

Learning slip stitch crochet is easier than you think. This stitch is the foundation of many crochet projects, and I’m here to walk you through it.
In this guide, I’ll show you exactly how to make a slip stitch, what supplies you need, and where to use it in your work. You’ll also learn common mistakes to avoid and tips that actually help.
I’ve been crocheting for years, and I still use this stitch daily. By the end, you’ll feel confident making slip stitches on your own.
Let’s get your hook moving.
What Is a Slip Stitch in Crochet?
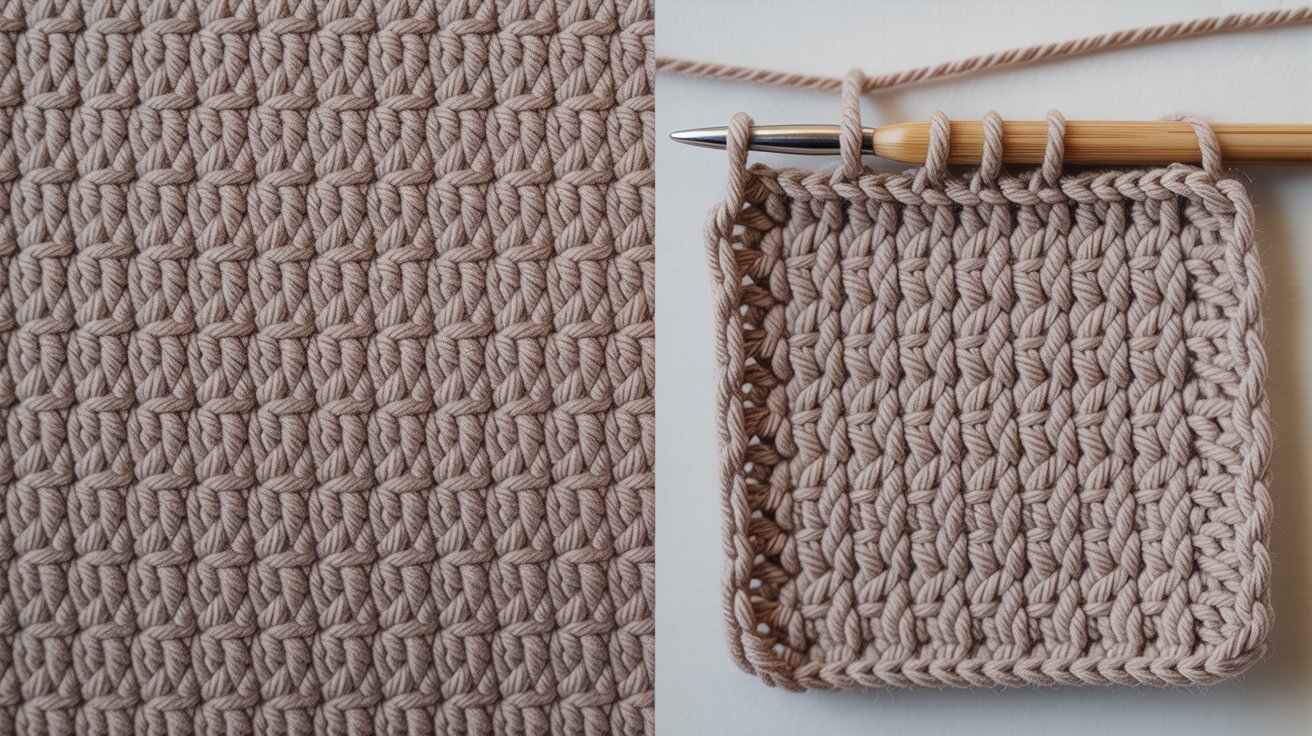
A slip stitch is the shortest stitch in crochet. It adds almost no height to your work. You make it by inserting your hook into a stitch, wrapping the yarn, and pulling through both loops at once. The slip stitch creates a tight, flat connection between stitches. It’s often abbreviated as “sl st” in patterns.
I use slip stitches to join rounds when working in circles. They’re perfect for connecting the end of a row to the beginning. This stitch also helps you move your yarn across your work without adding bulk.
You’ll find slip stitches in borders, seams, and decorative edges. They create invisible joins that look professional. When you need to finish a project cleanly, the slip stitch is your go-to move.
Slip Stitch Crochet: Easy Step-by-Step Tutorial
Here’s how to make a perfect slip stitch every single time.
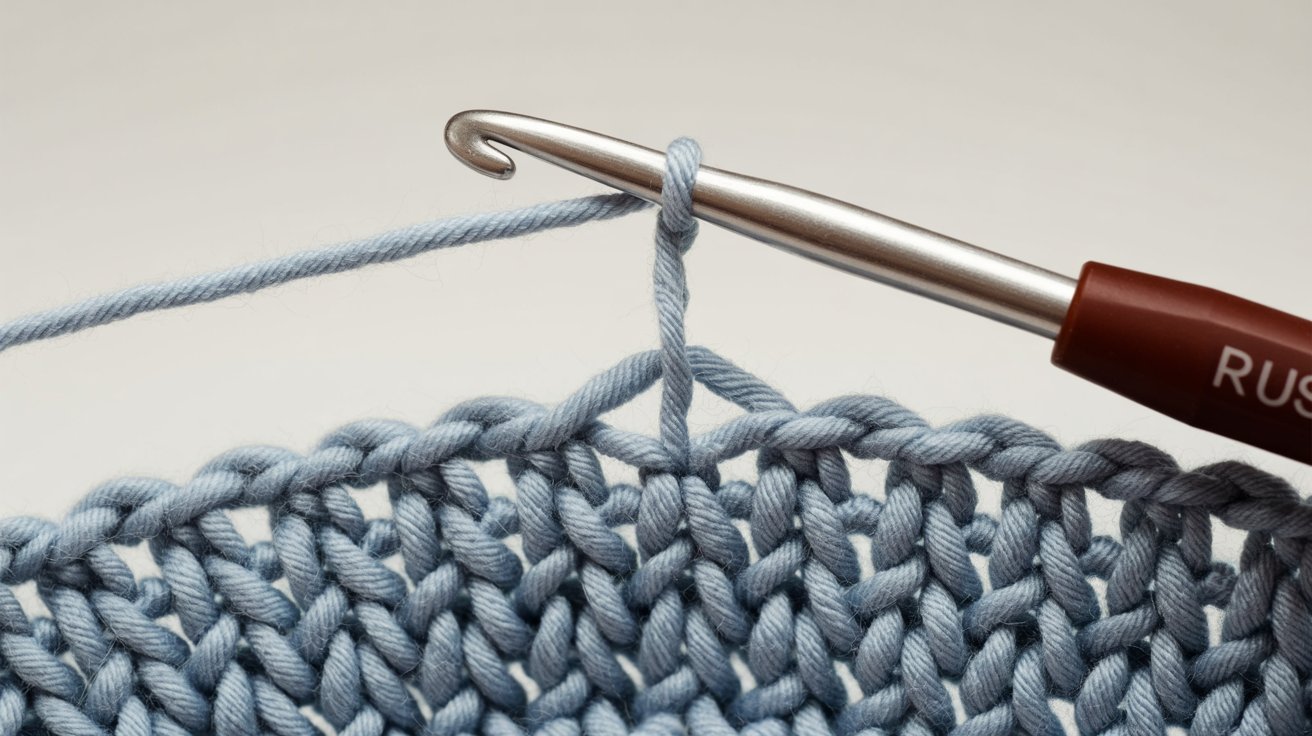
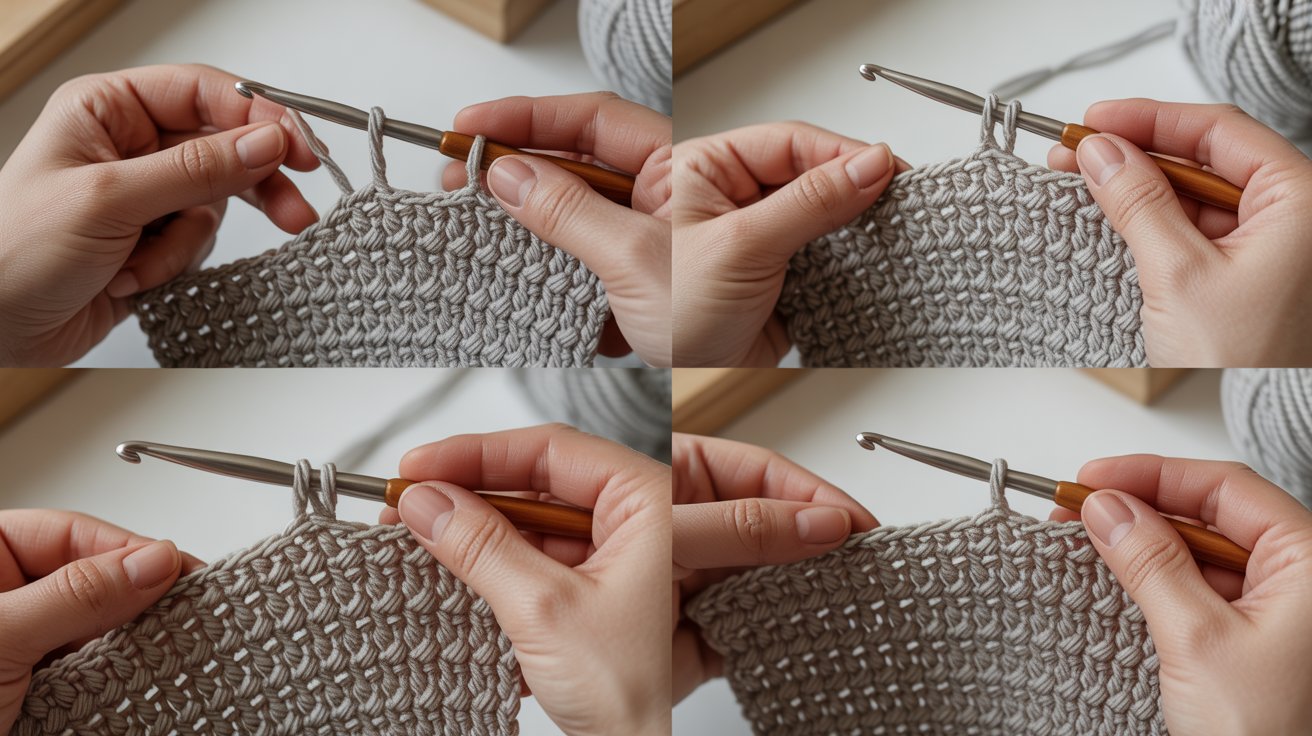
Step 1: Insert the Hook Into the Stitch
Start with a loop already on your hook. Look at your work and find the stitch you want to work into. Push your hook under both loops at the top of that stitch. Go from front to back.
Your hook should pass cleanly through. You’ll now have one loop on your hook and two loops around it.
Step 2: Yarn Over Correctly
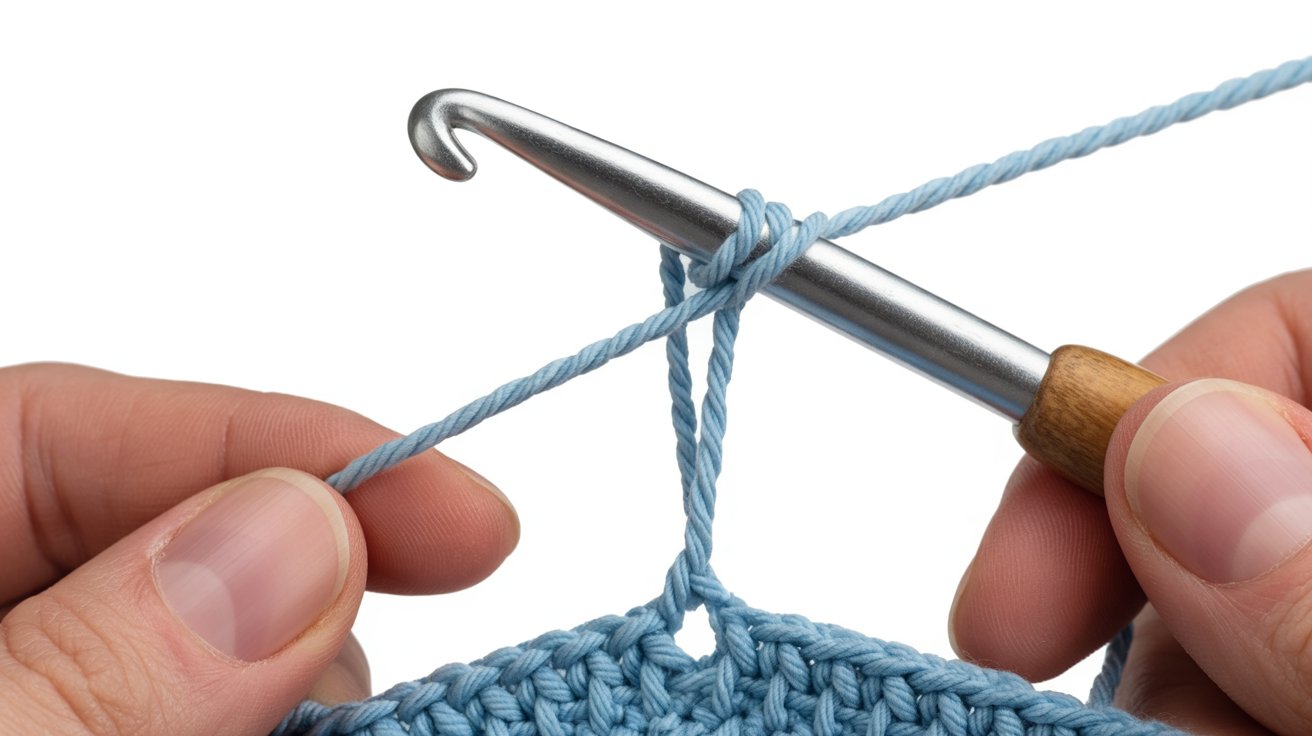
Wrap your working yarn over the hook from back to front. This is called a yarn over. Make sure the yarn catches in the throat of your hook.
Don’t wrap it too loosely or too tightly. The yarn should sit comfortably in place. You’re ready for the final step.
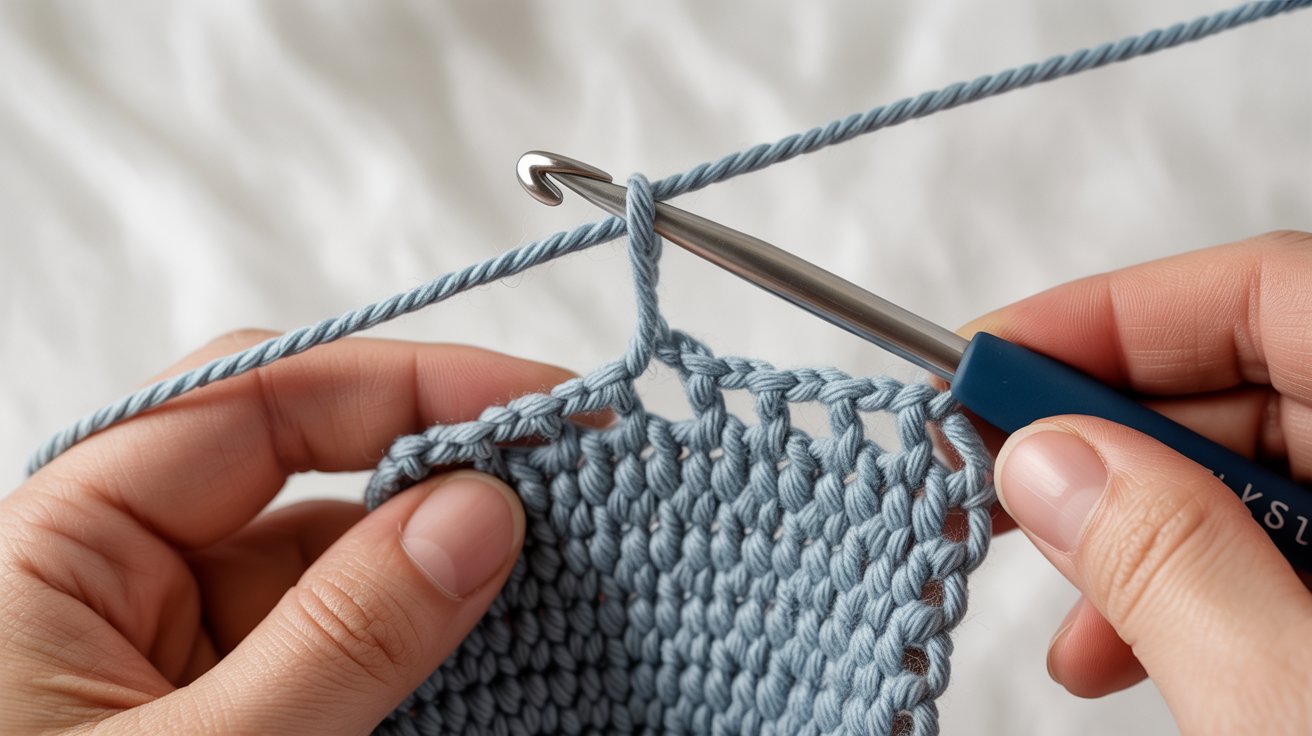
Step 3: Pull Through the Stitch and Loop on Hook
Now pull that wrapped yarn through everything at once. Draw it through the stitch and through the loop on your hook in one smooth motion.
You should end up with just one loop on your hook. That’s your slip stitch done. It should look flat and tight against your work.
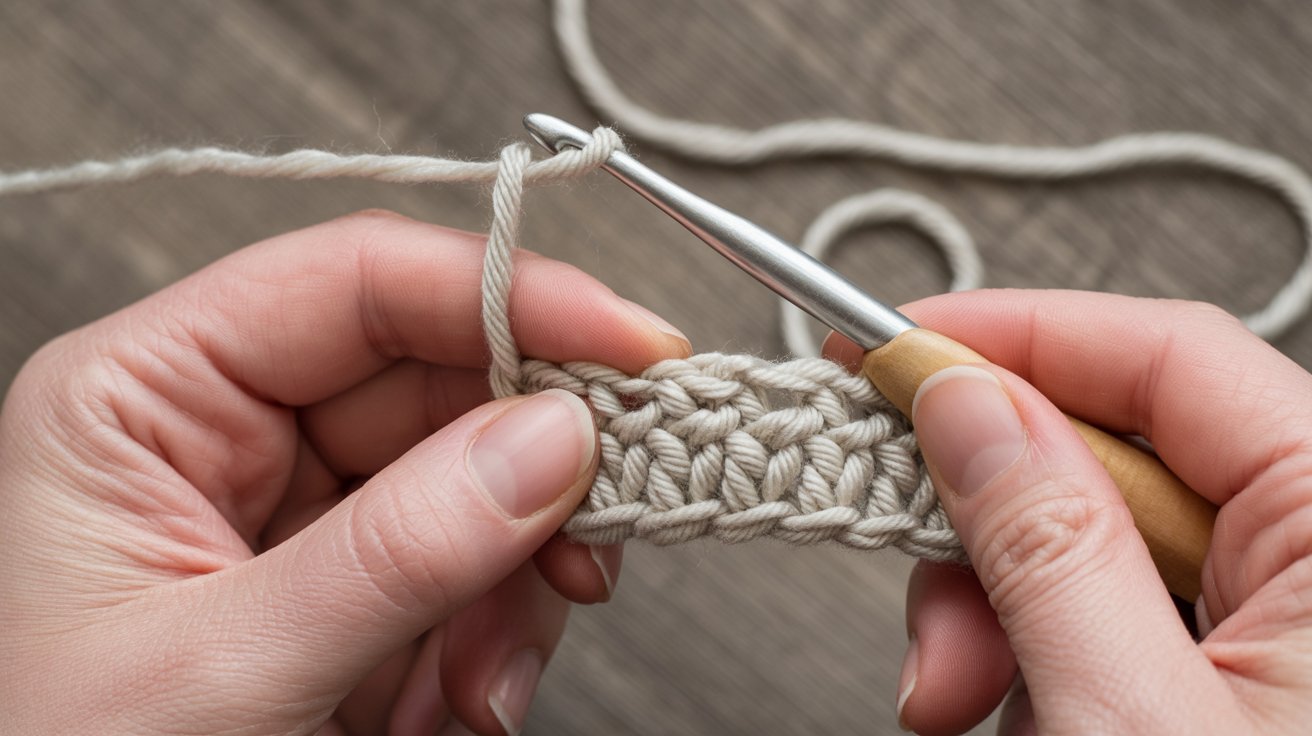
Supplies Needed for Slip Stitch Crochet
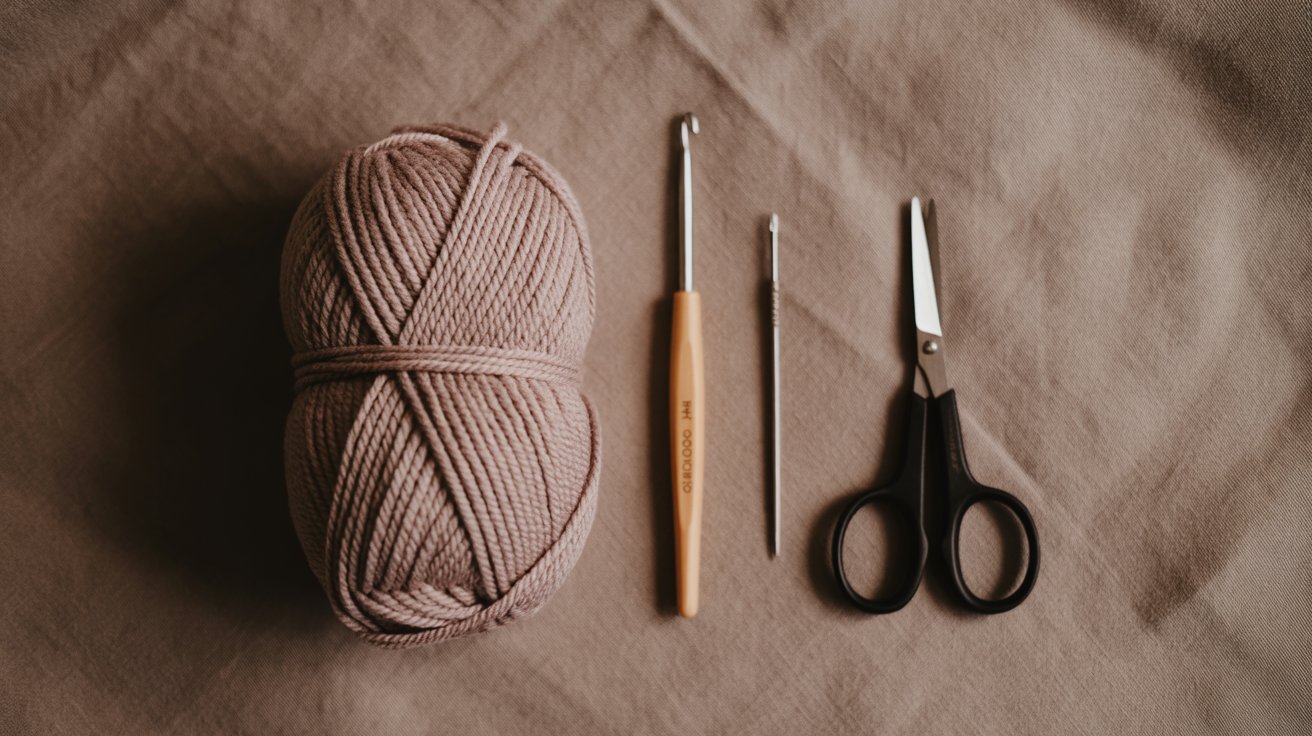
Start with medium-weight yarn in light colors like cream or light gray. Acrylic yarn works great for beginners because it’s affordable and easy to see your stitches.
Cotton is another good option with a nice grip. Avoid fuzzy or textured yarn until you’re comfortable with the basics.
Match your hook size to your yarn weight. For medium yarn, try a 5mm or 5.5mm hook. Aluminum hooks glide through stitches smoothly. The hook should feel comfortable in your hand. Check the yarn label for hook size recommendations.
Slip Stitch vs Other Basic Crochet Stitches
Understanding the differences helps you choose the right stitch for each project.
Slip Stitch vs Single Crochet
Single crochet stitches add height to your work. Slip stitches don’t. When you make a single crochet, you pull through one loop first, then through two. With a slip stitch, you pull through both loops at the same time.
A single crochet creates fabric. Slip stitch creates connections. I use slip stitches to move around my work. I use a single crochet to build rows.
How Slip Stitch Affects Fabric Height and Texture?
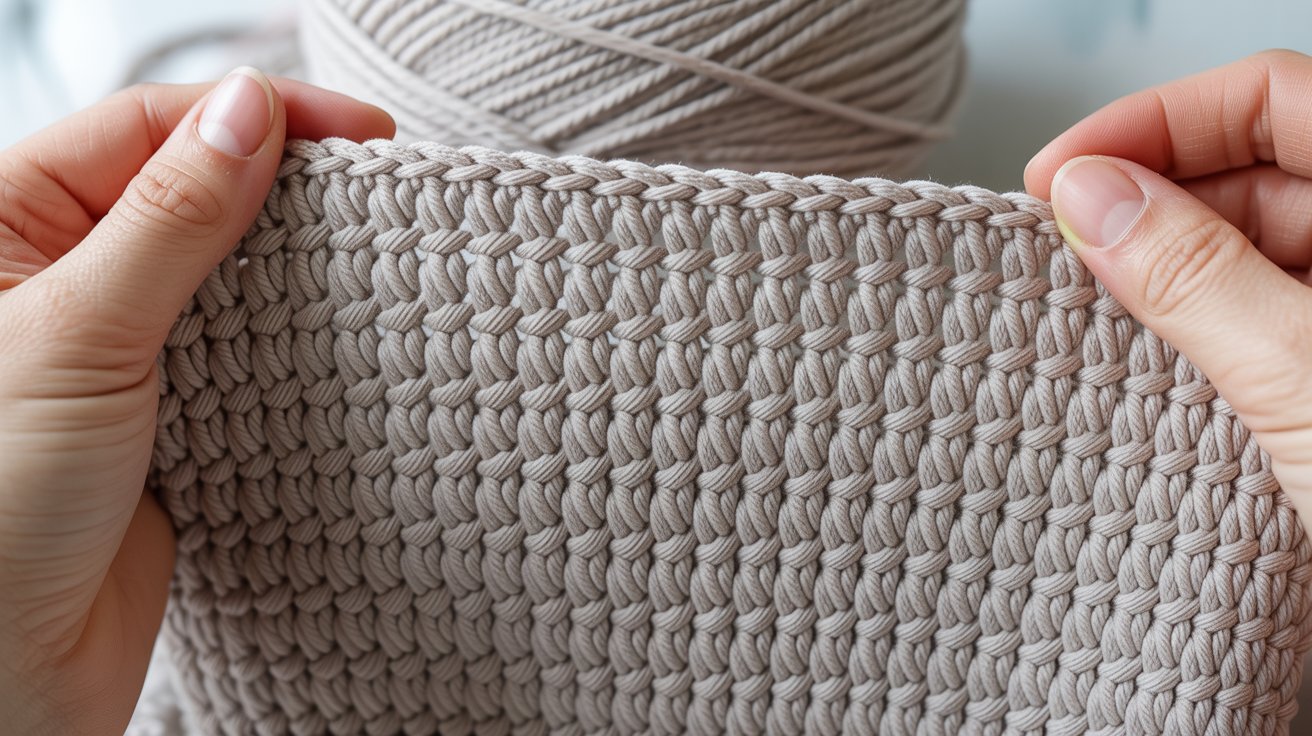
Slip stitches make your work nearly flat. They create a tight, firm texture when worked in rows. This density makes slip stitch fabric stiff. It’s not as flexible as other stitches.
When you use slip stitches in borders, they create a clean, finished look. The fabric won’t drape or flow much. This stitch is more functional than decorative.
Common Mistakes When Learning Slip Stitch Crochet
Watch out for these errors that can slow down your progress.
Making Stitches Too Tight
Tight stitches are the biggest problem I see. When you pull the yarn through, don’t yank it. Let it slide smoothly. Tight stitches make it hard to insert your hook for the next stitch.
Your hand will get tired faster. Keep a relaxed grip on both your hook and yarn. The stitches should slide along your hook easily.
Inserting the Hook in the Wrong Loop
Always check where your hook goes. Most patterns want you to work under both loops. Sometimes you’ll work under just the front loop or back loop. Read your pattern carefully.
I used to skip this step, and my work looked messy. Working in the wrong loop changes how your fabric looks and feels.
Skipping Stitches
Count your stitches at the end of each row. It’s easy to miss stitches when they’re small. Slip stitches can hide in your work. I mark my first and last stitch with a safety pin.
This helps me keep track. If you skip stitches, your work will get narrower. If you add extra, it will get wider.
Tips for Beginners to Improve Slip Stitch Crochet
These simple tricks will help you master the technique faster.
- Wrap the yarn around your pinky and over your index finger to control tension and keep stitches consistent.
- Practice making stitches at the same speed and don’t rush through the motions.
- Make a foundation chain of 20 stitches and practice slip stitching into each chain repeatedly.
- Work on your slip stitches while watching TV to build muscle memory through repetition.
- Try to work without looking at your hands after you get comfortable with the motion.
Where to Use Slip Stitch Crochet in Projects?
Slip stitches work great for joining rounds and creating seamless circles. I use them to attach granny squares and make invisible seams between pieces. The joins are strong and lie flat.
Slip stitch borders give projects a finished edge. Work a row around blankets, scarves, coasters, or placemats. The edge stays flat and won’t curl. You can use contrasting colors for a decorative line.
Sometimes you need to reposition your yarn across your work. Slip stitches let you do this invisibly without adding height. I use this technique when making flowers or working with complex patterns. It keeps the back of your work tidy too.
Conclusion
You now know how to make a slip stitch from start to finish. Practice this stitch until your hands remember the motion. It’s okay if your first attempts look messy. Mine did too. The more you practice, the smoother your stitches will become.
Try using slip stitches in a small project like a coaster or bookmark. Once you’re comfortable, learn single crochet next. That’s the natural progression.
Drop a comment below and tell me how your first slip stitches turned out. I’d love to hear about your progress.
Frequently Asked Questions
What is the main purpose of a slip stitch in crochet?
Slip stitch creates joins and connections without adding height. I use it to close rounds, move yarn position, and make clean borders on finished projects.
Can you make an entire project using only slip stitches?
Yes, but the fabric will be very dense and stiff. Slip stitch-only projects work well for pot holders, coasters, and other items that need firm structure.
How do I know if my slip stitches are too tight?
If you struggle to insert your hook into the next stitch, they’re too tight. Your stitches should slide along the hook easily without resistance.
What’s the difference between slip stitch and chain stitch?
Chain stitch creates a foundation row with no base to work into. Slip stitch works into existing stitches and creates a flat join.
Do I need to count slip stitches in my pattern?
Sometimes yes, sometimes no. When joining rounds, the slip stitch usually doesn’t count. When working slip stitch rows, count each one as instructed.