

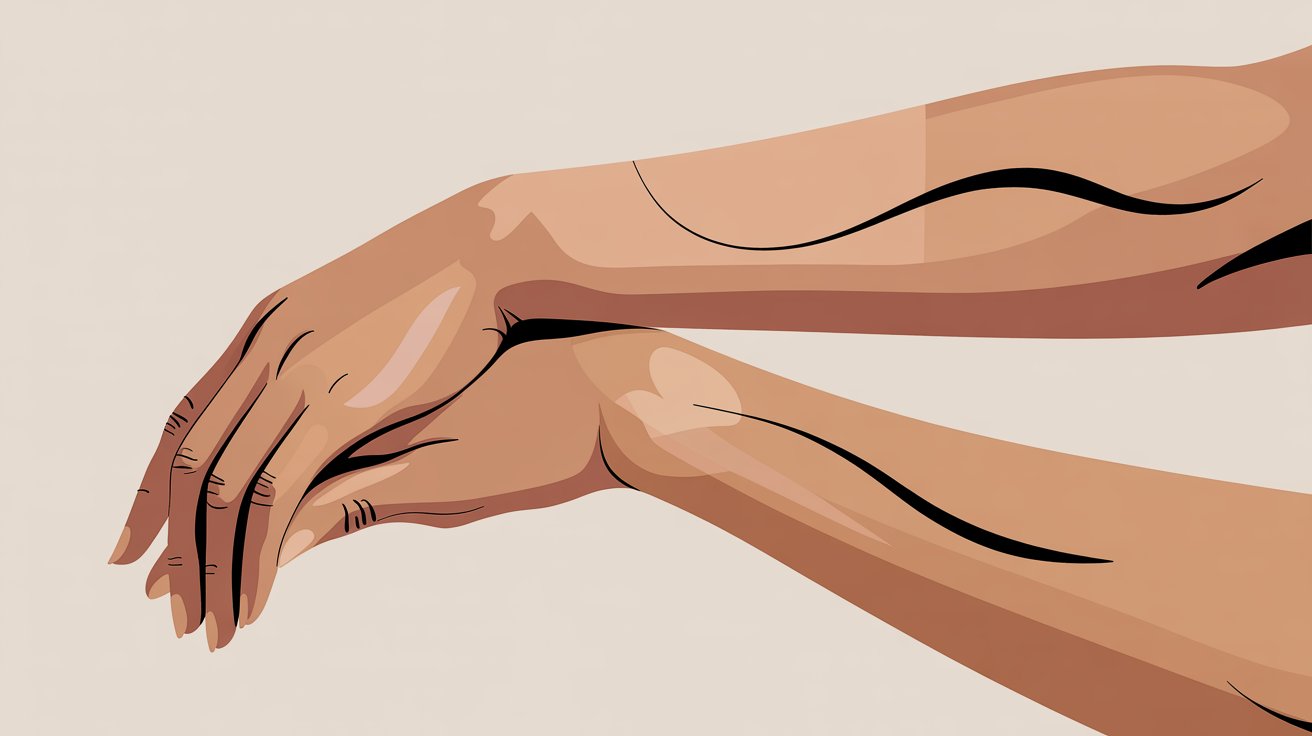
Arms are one of the hardest parts of the body to draw. Most artists, even experienced ones, struggle with the proportions, the curves, and the muscle flow.
I have been there too.
This guide breaks it all down in simple steps. You will learn the basics of arm structure, how muscles work, and how to add detail at any skill level.
It does not matter if you are just starting out or looking to improve.
By the end, your arm drawings will look natural and confident.
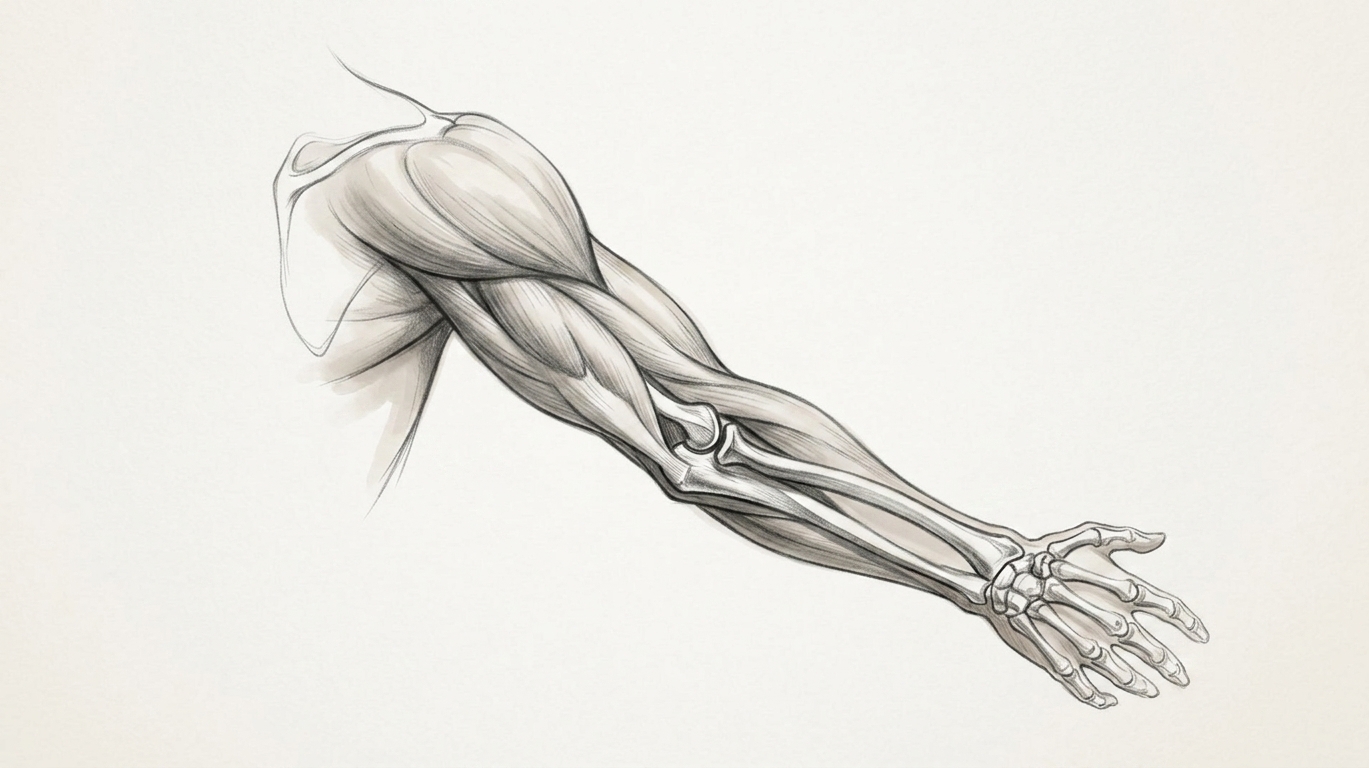
Basic Arm Anatomy Every Artist Should Understand
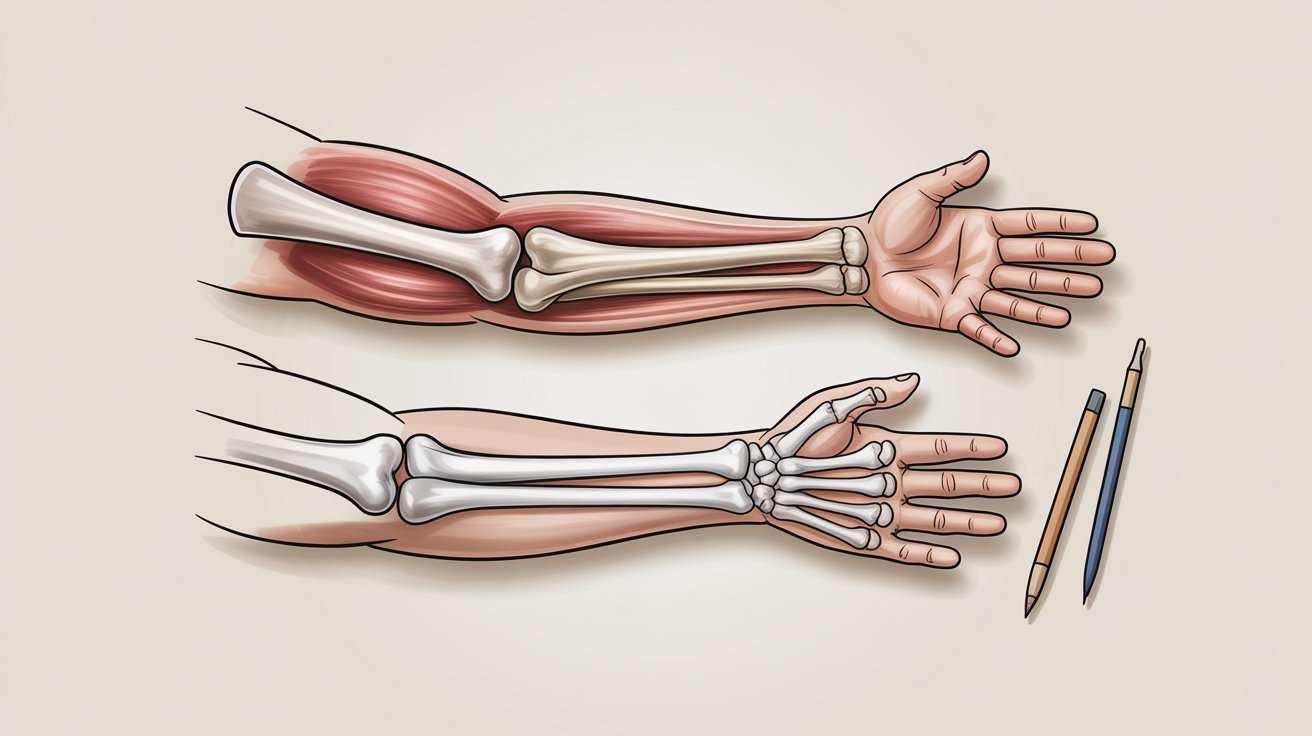
The arm has three main parts: the upper arm, forearm, and hand. Each section has its own length and shape.
The upper arm runs from the shoulder to the elbow. The forearm goes from the elbow to the wrist. Three key bones hold it all together: the humerus, radius, and ulna.
Proportions matter a lot here. The full arm is roughly three head-lengths long. Getting this right makes your figures look balanced and real.
1. Beginner Level – Drawing Arms Using Simple Shapes
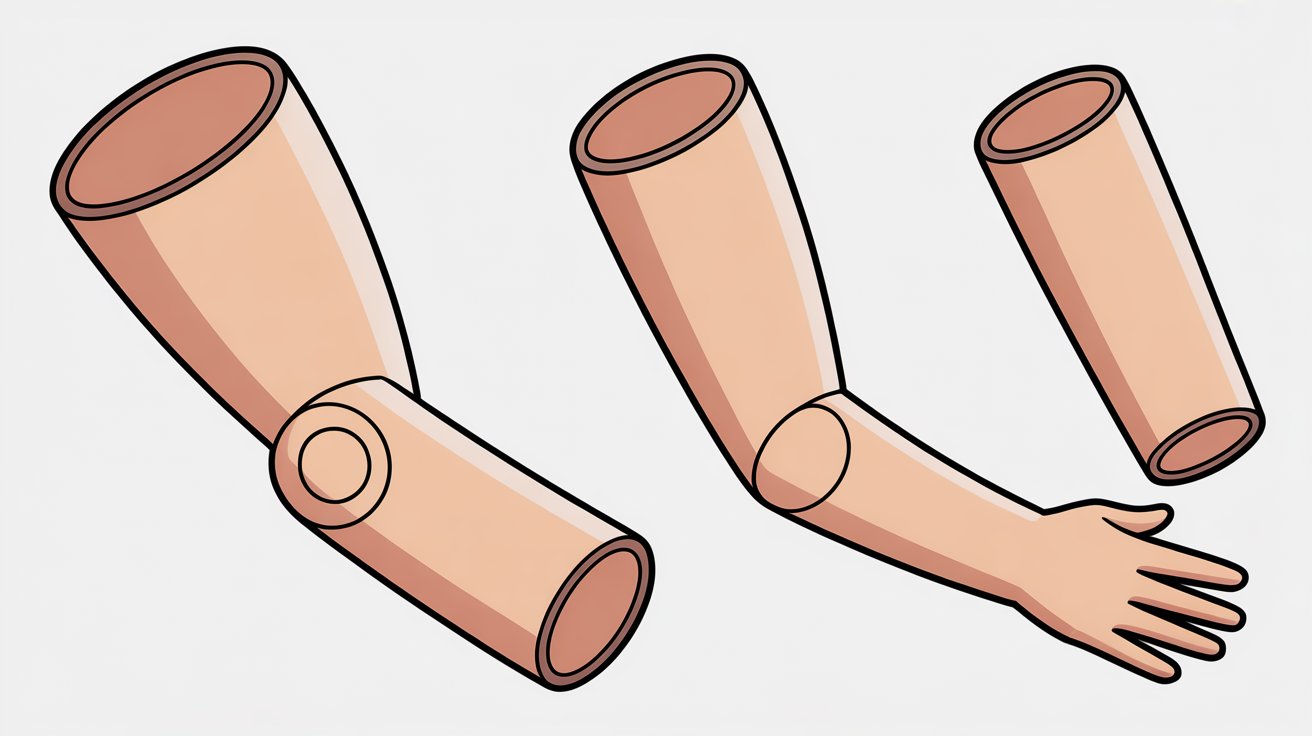
Start with cylinders. Think of the upper arm and forearm as two tapered tubes connected at the elbow. The upper arm is wider at the shoulder and narrows slightly toward the elbow.
The forearm tapers more sharply toward the wrist. Place your three key points first: shoulder, elbow, and wrist. Once those are in the right spots, connect them with curved lines.
Straight lines make arms look stiff. A gentle curve gives them life and makes the whole figure feel more natural.
2. Beginner to Intermediate – Adding Structure and Movement
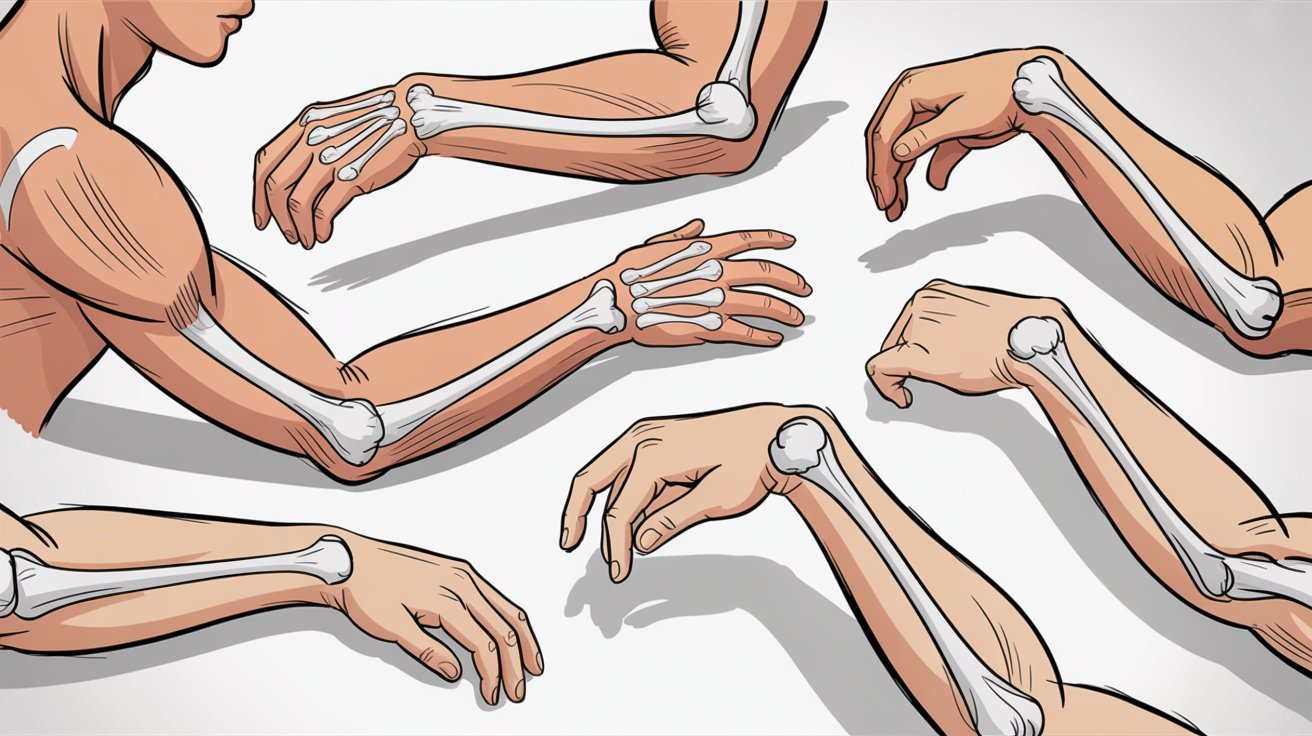
The shoulder, elbow, and wrist are not just connection points. They control how the arm moves and bends. The forearm can twist, which changes how the muscles and bones look from different angles.
This is called rotation. When drawing poses, think about the direction the arm is flowing, not just where it starts and ends.
A lot of beginners make the forearm too long or the upper arm too short. Check your proportions against the head size to keep everything balanced and natural looking.
3. Intermediate Level – Learning Arm Anatomy and Muscles
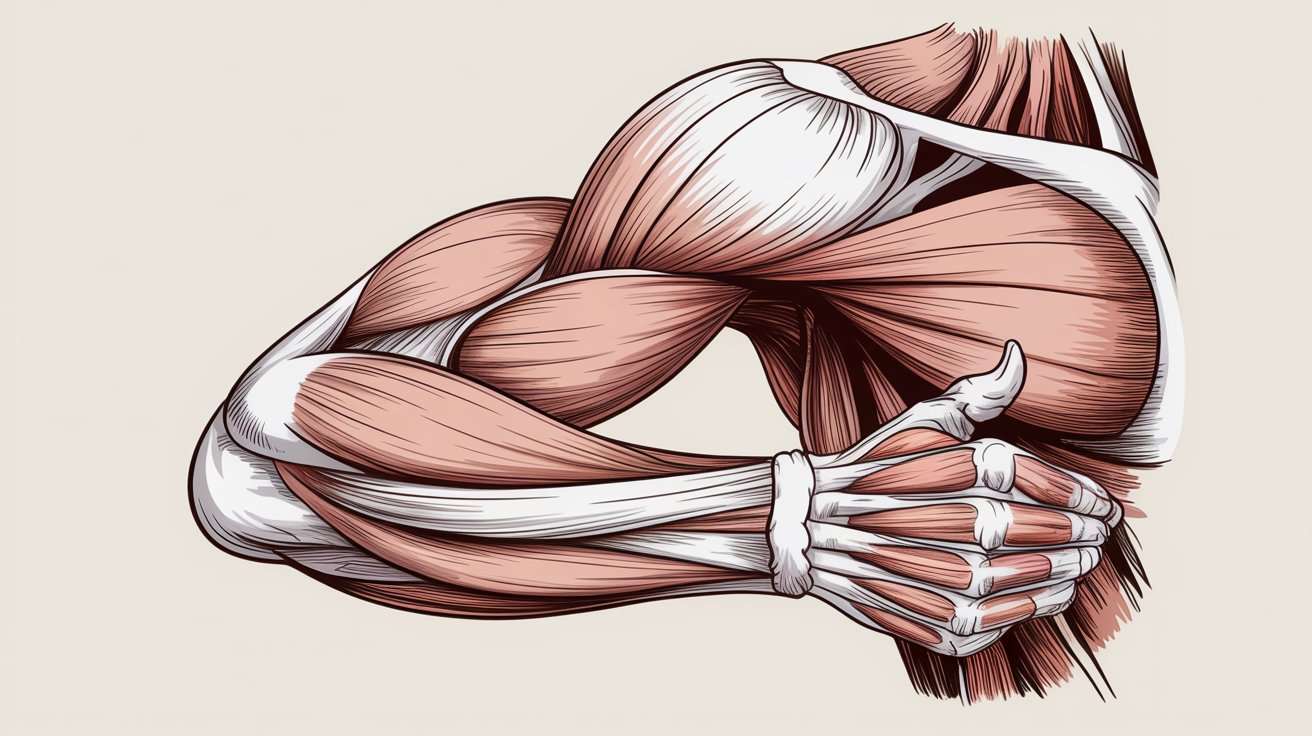
At this level, you start learning the actual muscles. The biceps sit on the front of the upper arm. The triceps run along the back.
The deltoid wraps around the shoulder and gives it that rounded shape. The forearm has two main muscle groups: flexors on the inside and extensors on the outside.
These create visible ridges, especially near the elbow. Muscles shift and change shape depending on how the arm is positioned. Knowing this helps your drawings look accurate and full of life.
4. Advanced Level – Dynamic Arm Movement and Realism

At this stage, you focus on how the whole arm moves as one connected system. The shoulder rotates, the elbow bends, and the forearm twists. All three work together.
When drawing action poses, think about where the force is coming from and where it is going. Arms in motion have stretch and compression. The side that bends gets compressed.
The opposite side stretches. You also need to connect the arm naturally to the torso. How the arm attaches at the shoulder affects the entire pose and figure flow.
5. Pro Level – Simplifying Anatomy for Artistic Style
Knowing anatomy is only half the work. The real skill is knowing when to use it and when to leave it out. In stylized art, you simplify shapes but keep the gesture strong.
The arm should still feel like it has weight and direction, even with fewer details. Use anatomy to support the story your drawing is telling. A tense arm looks different from a relaxed one.
Your lines, shapes, and muscle hints should all work together to show emotion, energy, and movement in every pose you draw.
Step-by-Step Process: How to Draw Arms
Every good arm drawing starts with structure and ends with detail. Follow these five steps to build arms that look natural, accurate, and full of movement.
Step 1 – Start with Basic Shape Construction
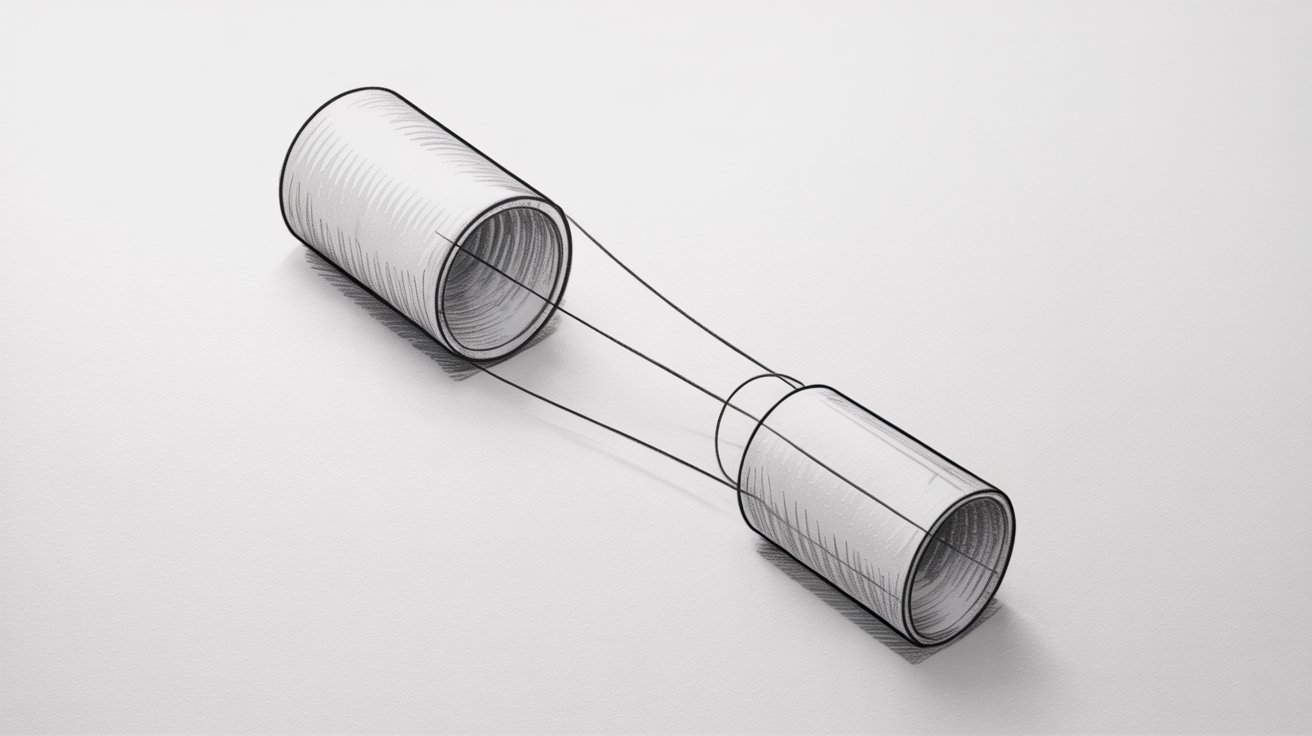
Draw two cylinders for the upper arm and forearm. Keep the upper arm wider and let it taper toward the elbow. These basic forms give your arm a solid foundation before any detail goes in.
Step 2 – Add Joint Placement (Shoulder, Elbow, Wrist)

Mark the shoulder, elbow, and wrist as simple dots or circles. These three points control the entire arm position. Getting them right early saves you from fixing proportion problems later in the drawing.
Step 3 – Build Muscle Structure Over Forms
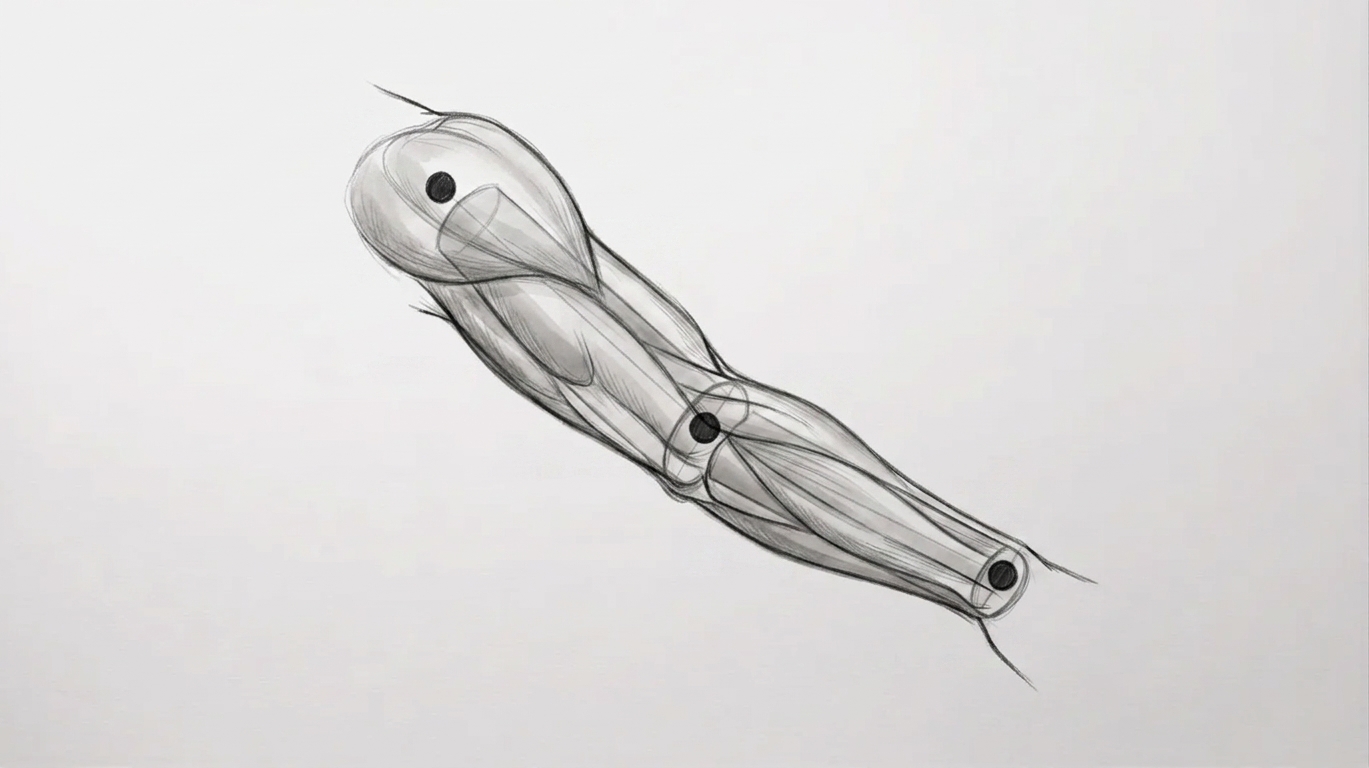
Layer the main muscles over your basic shapes. Add the biceps on the front, triceps on the back, and deltoid at the shoulder. Keep the shapes soft and follow the direction of each muscle group.
Step 4 – Add Movement and Rotation
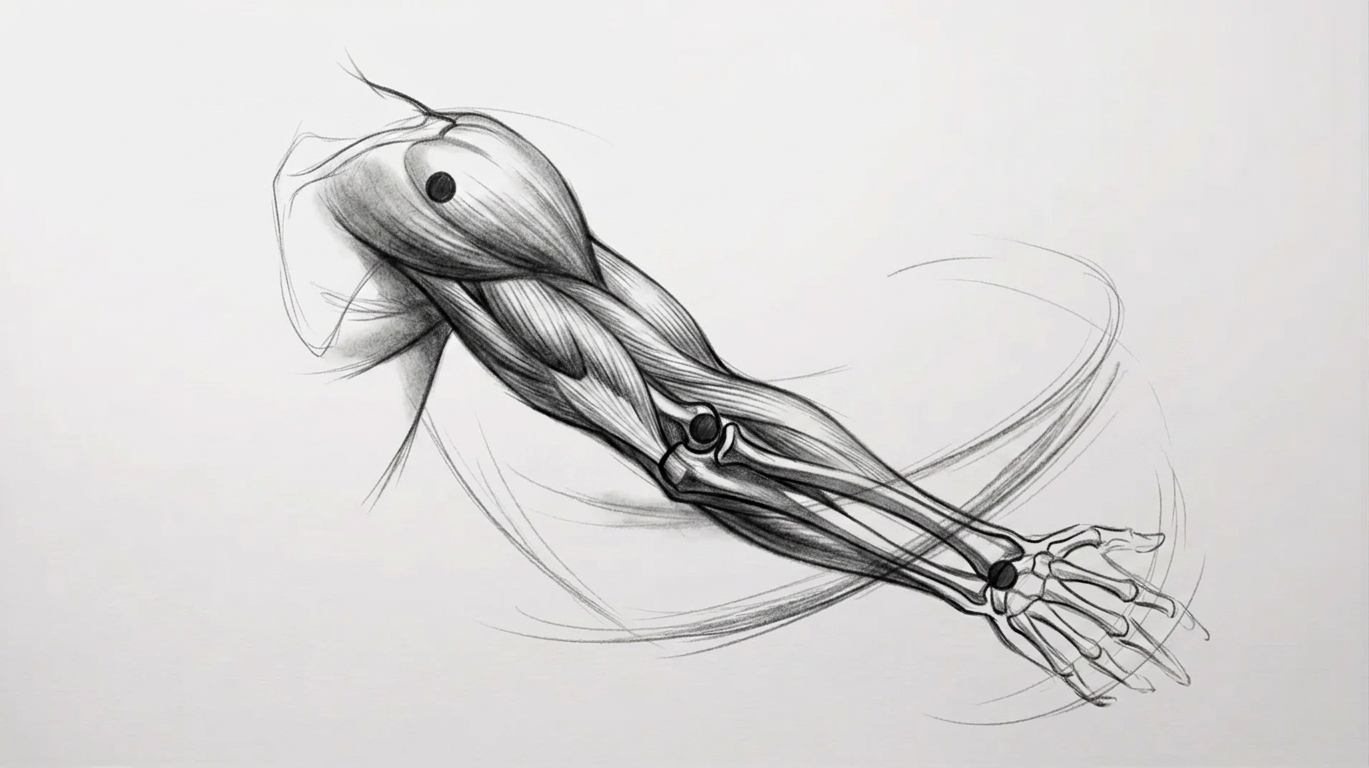
Show forearm twist by adjusting how the radius wraps around the ulna. Bent arms compress on one side and stretch on the other. Use flowing lines to show direction, force, and natural arm movement.
Step 5 – Refine Linework and Final Details
Clean up your sketch lines and add muscle definition where needed. Keep detail where the eye naturally goes, like the elbow and wrist. Less detail in calm areas makes the important parts stand out more.
Final Tips for Mastering How to Draw Arms
- Always build the structure first. Cylinders and joints before muscles and details keep your drawings grounded and proportionate.
- Use real references as much as you can. Photos, mirrors, and life drawing sessions train your eye faster than imagination alone.
- Start simple and move up slowly. Rushing into advanced anatomy before mastering basic shapes leads to frustrating results.
- Repeat the same poses over and over. Repetition builds muscle memory and makes arm drawing feel natural over time.
- Observe how real arms look in motion. The more you study movement and form in daily life, the better your drawings will get.
Conclusion
Drawing arms takes time, but it gets easier the more you practice. Start with simple shapes, learn the basic anatomy, and build up from there. Do not rush the process.
I still go back to basics whenever I feel stuck. It always helps.
Focus on structure first, use real references, and repeat what you learn. Small, steady progress adds up fast.
If this guide helped you, share it with a fellow artist. And drop a comment below telling me what you are working on next!
Frequently Asked Questions
What is the easiest way to start learning how to draw arms?
Start with basic cylinder shapes for the upper arm and forearm. Once you get the proportions right, adding detail becomes much easier.
How do I get arm proportions right in figure drawing?
The full arm is roughly three head-lengths long. Use this as a guide every time you draw to keep your figures looking balanced.
Why do my drawn arms always look stiff?
Stiff arms usually come from using straight lines instead of curved ones. A slight curve in the arm creates a natural, relaxed look instantly.
How long does it take to get good at drawing arms?
It depends on how often you practice. Most artists see real improvement within a few weeks of daily sketching with references.
Do I need to learn full anatomy to draw arms well?
You do not need to memorize every muscle. Learning the key ones like the biceps, triceps, and deltoid is more than enough to draw convincing arms.