
")
Oogie Boogie is one of the most iconic villains from A Nightmare Before Christmas.
That lumpy, burlap bag body and creepy grin make him a Halloween favorite and honestly, a really fun character to draw.
I remember the first time I tried drawing him. He looks simple, but there are a few tricks that make all the difference.
In this guide, I'll walk you through an easy step-by-step tutorial perfect for beginners. You'll also find video and illustrated guide options to follow along at your own pace.
Art Supplies Needed for Oogie Boogie Drawing

Gather your supplies before you start. Here is what you need.
Basic Drawing Materials
Everything you need to get started:
- Pencil for sketching the outline
- Eraser for fixing mistakes
- Plain drawing paper to work on
Optional Coloring Tools
Want to add color and detail? Grab these:
- Black marker or pen for clean outlines
- Green and brown colored pencils or markers for coloring
- Shading tools for adding texture effects
Step-by-Step Oogie Boogie Drawing Tutorial
This is where the real fun begins. Follow each step slowly and you will have Oogie Boogie on paper before you know it.
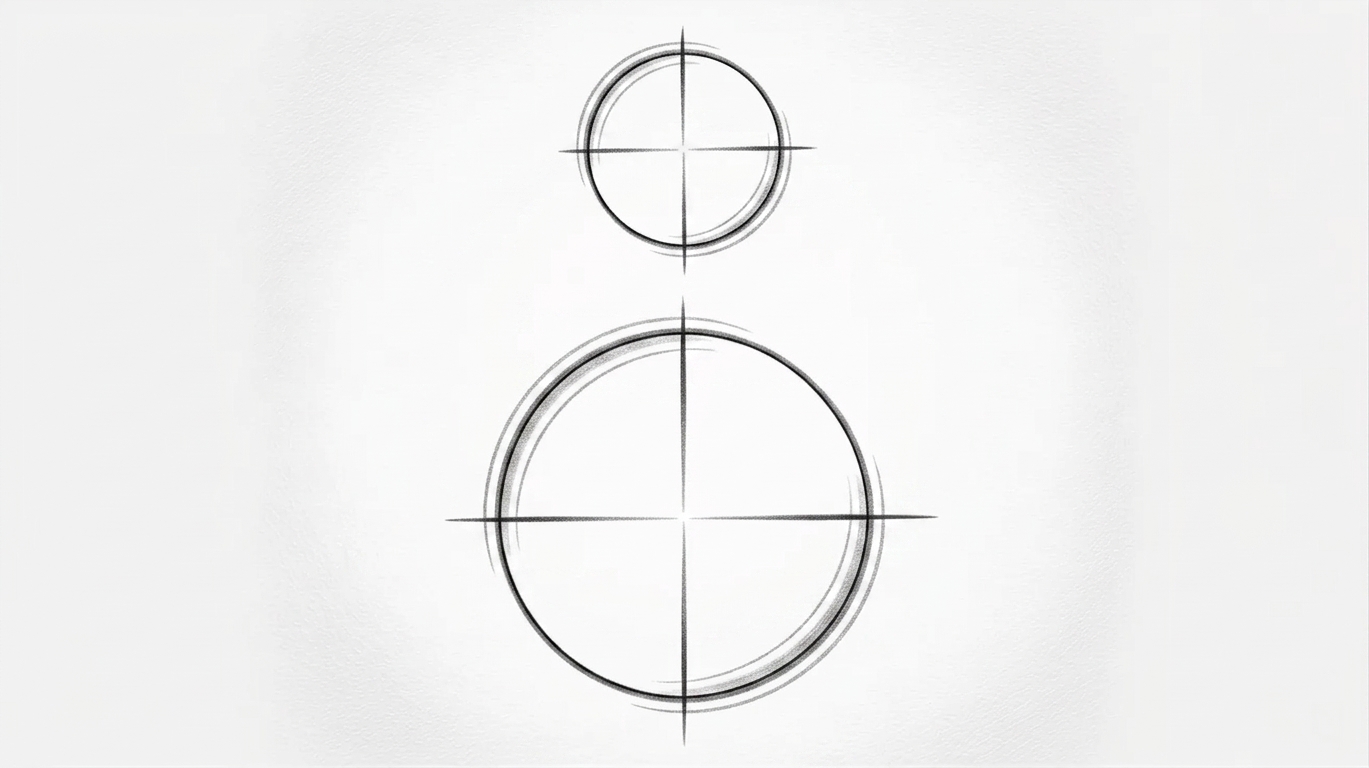
Step 1 – Draw the Head Shape

Start light and simple. This is just the base of your drawing.
Sketch a light circle near the top of your paper. Do not press too hard with your pencil. This is just a rough guide. Keep it loose and simple. The size of this circle will set the proportions for the rest of the drawing, so place it with a little space above.
Step 2 – Add Facial Guidelines

These lines make placing the face much easier. Do not skip this step.
Draw one vertical and one horizontal curved line inside the head circle. These crossed lines act as a map for where the eyes and mouth will go. They do not need to be perfect. Just make sure they curve slightly to follow the shape of the circle.
Step 3 – Draw the Body Shape
The body is bigger than the head. Keep that in mind as you sketch.
Draw a larger circle below the head. Leave a small gap between the two shapes for now. Oogie Boogie has a round, sack-like body, so this circle should feel wide and full. Keep your lines light at this stage.
Step 4 – Connect Head and Body
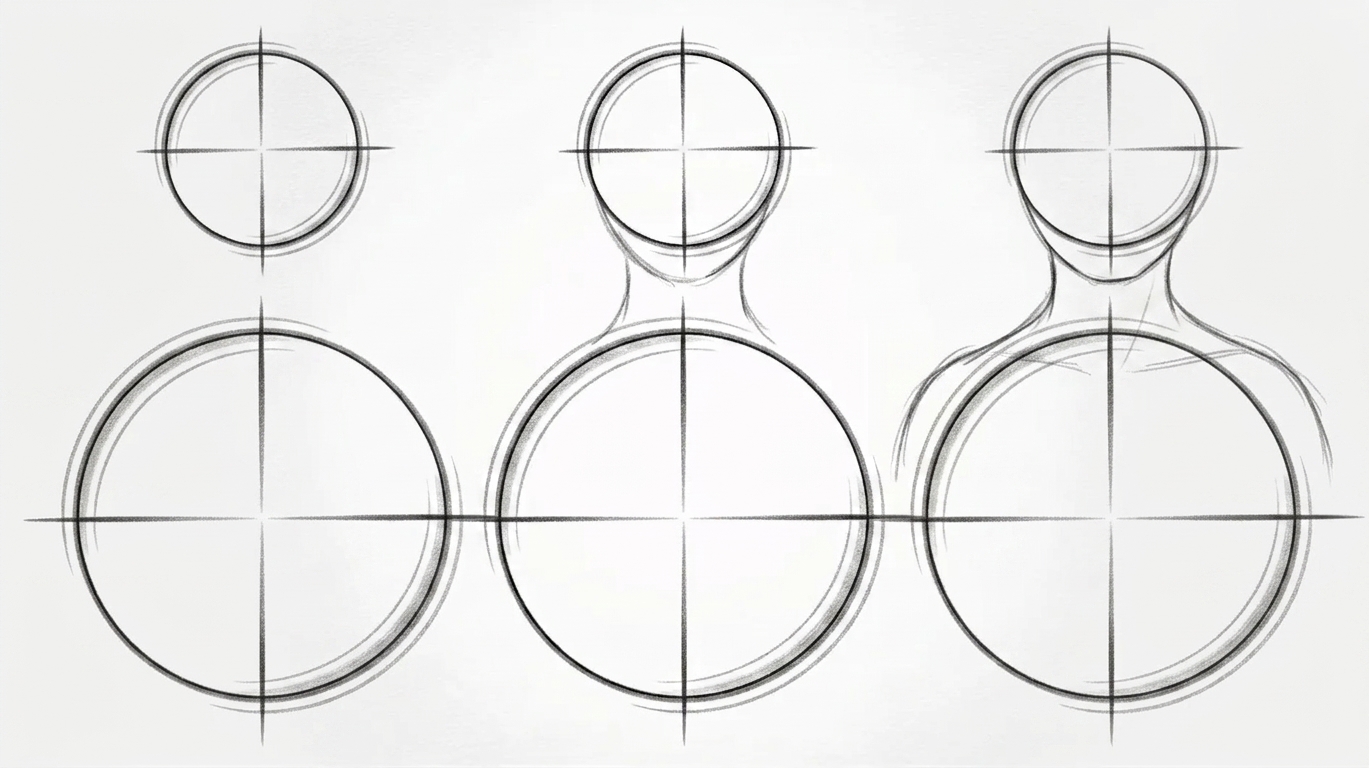
This step brings the two shapes together. Take your time with the curves.
Draw two curved lines connecting the head to the body. These form the neck and shoulder area. The lines should flare out slightly to give that sack-like, stuffed body feel. Keep the shape soft and rounded, not stiff or angular.
Step 5 – Add Arms and Basic Form
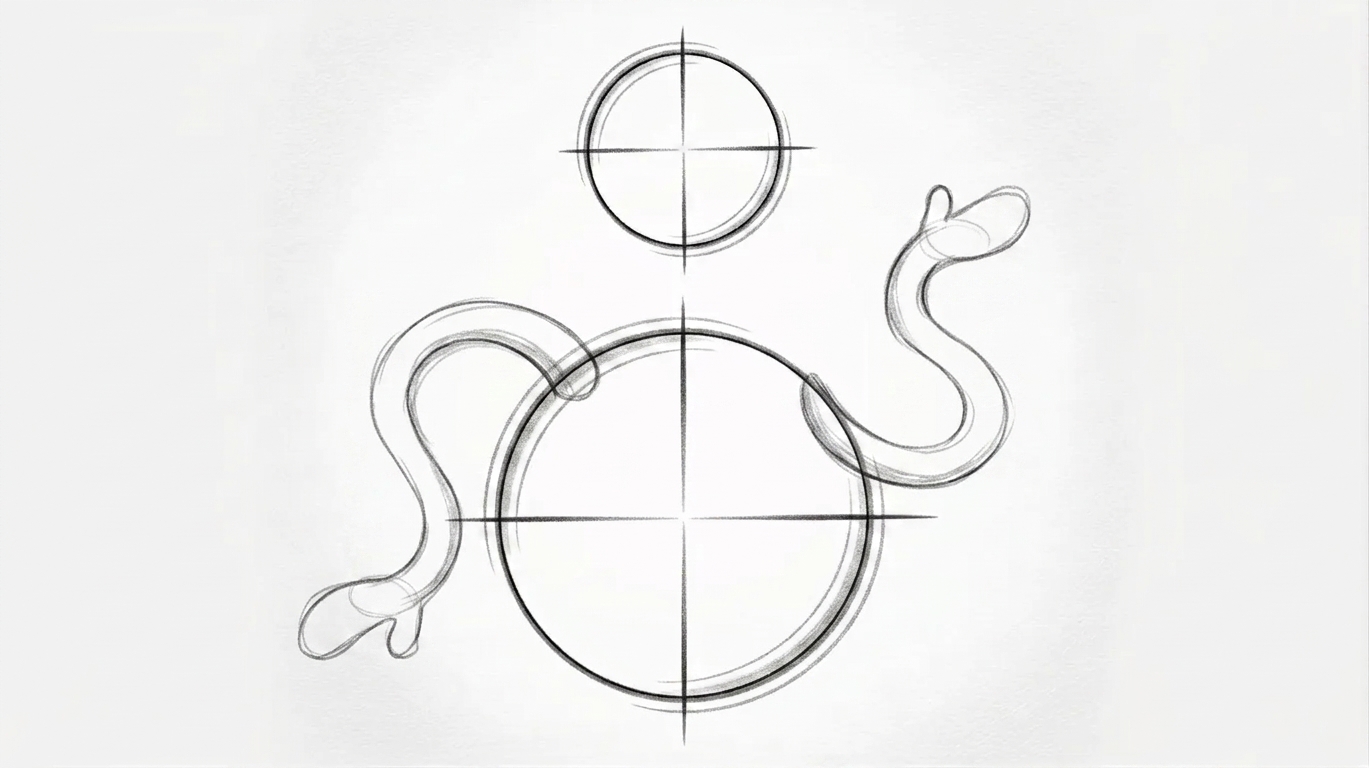
The arms give Oogie Boogie his fun, wobbly look. Keep them loose.
Sketch two curved "S" shaped arms on both sides of the body. Do not make them too rigid. Oogie Boogie is a cartoon character, so the lines should feel relaxed and slightly floppy. This loose style is what makes him look so natural.
Step 6 – Refine the Outline
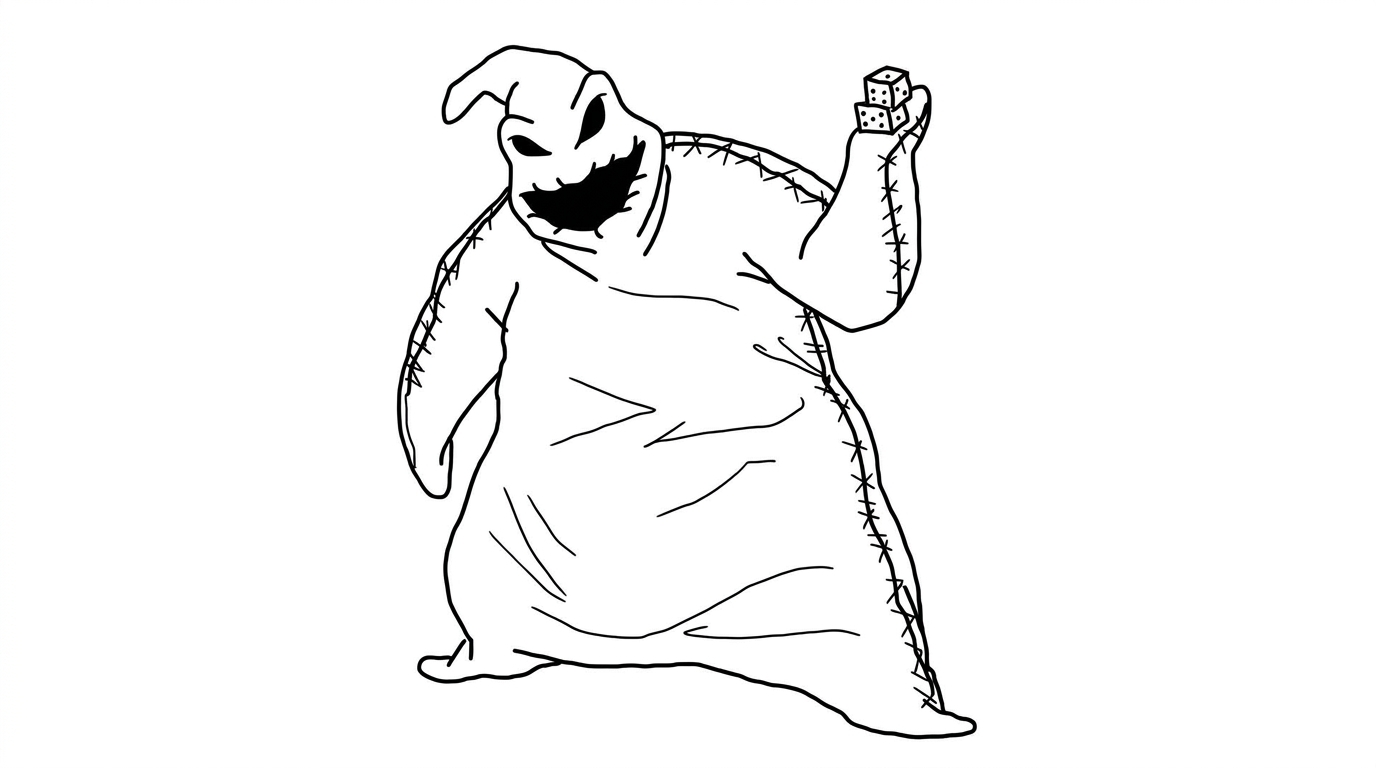
This is where your drawing really starts to come together. Clean it up carefully.
Go over your final lines with a darker pencil or pen. Once you are happy with the outline, erase all the light sketch guidelines underneath. Take your time here. Clean lines make a big difference in how polished the finished drawing looks.
Coloring Oogie Boogie Drawing
Coloring is where your drawing really comes to life. Keep it simple and have fun with it.
Use green tones as the base color for his body. A lighter green works well for the flat areas, while a darker shade adds depth along the edges and creases. This gives him that burlap texture feel.
Add shading in the folds and under the arms to make him look three-dimensional. For a fun finish, try adding a dark Halloween-style background behind him.
Beginner Tips for Better Drawing Results
Keep these tips in mind before you start drawing.
- Always start with light pencil strokes. This makes it easy to fix mistakes without leaving marks on the paper.
- Focus on getting the basic shapes right first. Details come later once the overall form looks correct.
- Keep a reference image of Oogie Boogie nearby. It helps you stay accurate with the proportions and details.
- Practice the proportions slowly, one step at a time. Rushing through the early stages leads to uneven shapes.
- Do not worry about making it perfect on the first try. Every attempt helps you improve and get more comfortable with the character.
Conclusion
Drawing Oogie Boogie is much easier than it looks. Start with basic shapes, take it one step at a time, and the character comes together really naturally.
I always say practice is the only thing that makes drawing feel less intimidating. The more you try, the better your lines get.
Once you feel confident with Oogie Boogie, try drawing Jack Skellington or Sally next. Drop your drawing in the comments. I would love to see how it turns out!
Frequently Asked Questions
Is Oogie Boogie easy to draw for beginners?
Yes, he is one of the more beginner-friendly characters to draw. His body is made up of simple round shapes that are easy to sketch.
What pencil should I use to draw Oogie Boogie?
A regular HB pencil works perfectly for sketching. It gives you light, easy-to-erase lines while you build the shape step by step.
Do I need special paper to draw Oogie Boogie?
No, plain drawing paper works just fine. Any smooth, white paper you have at home is good enough to get started.
How do I color Oogie Boogie correctly?
Use green tones as the base and add darker shades for depth. Brown accents can help bring out the burlap texture on his body.
Which Nightmare Before Christmas character should I draw next?
Jack Skellington is a great next step after Oogie Boogie. His tall, thin shape and simple face make him a fun and manageable character to try.