

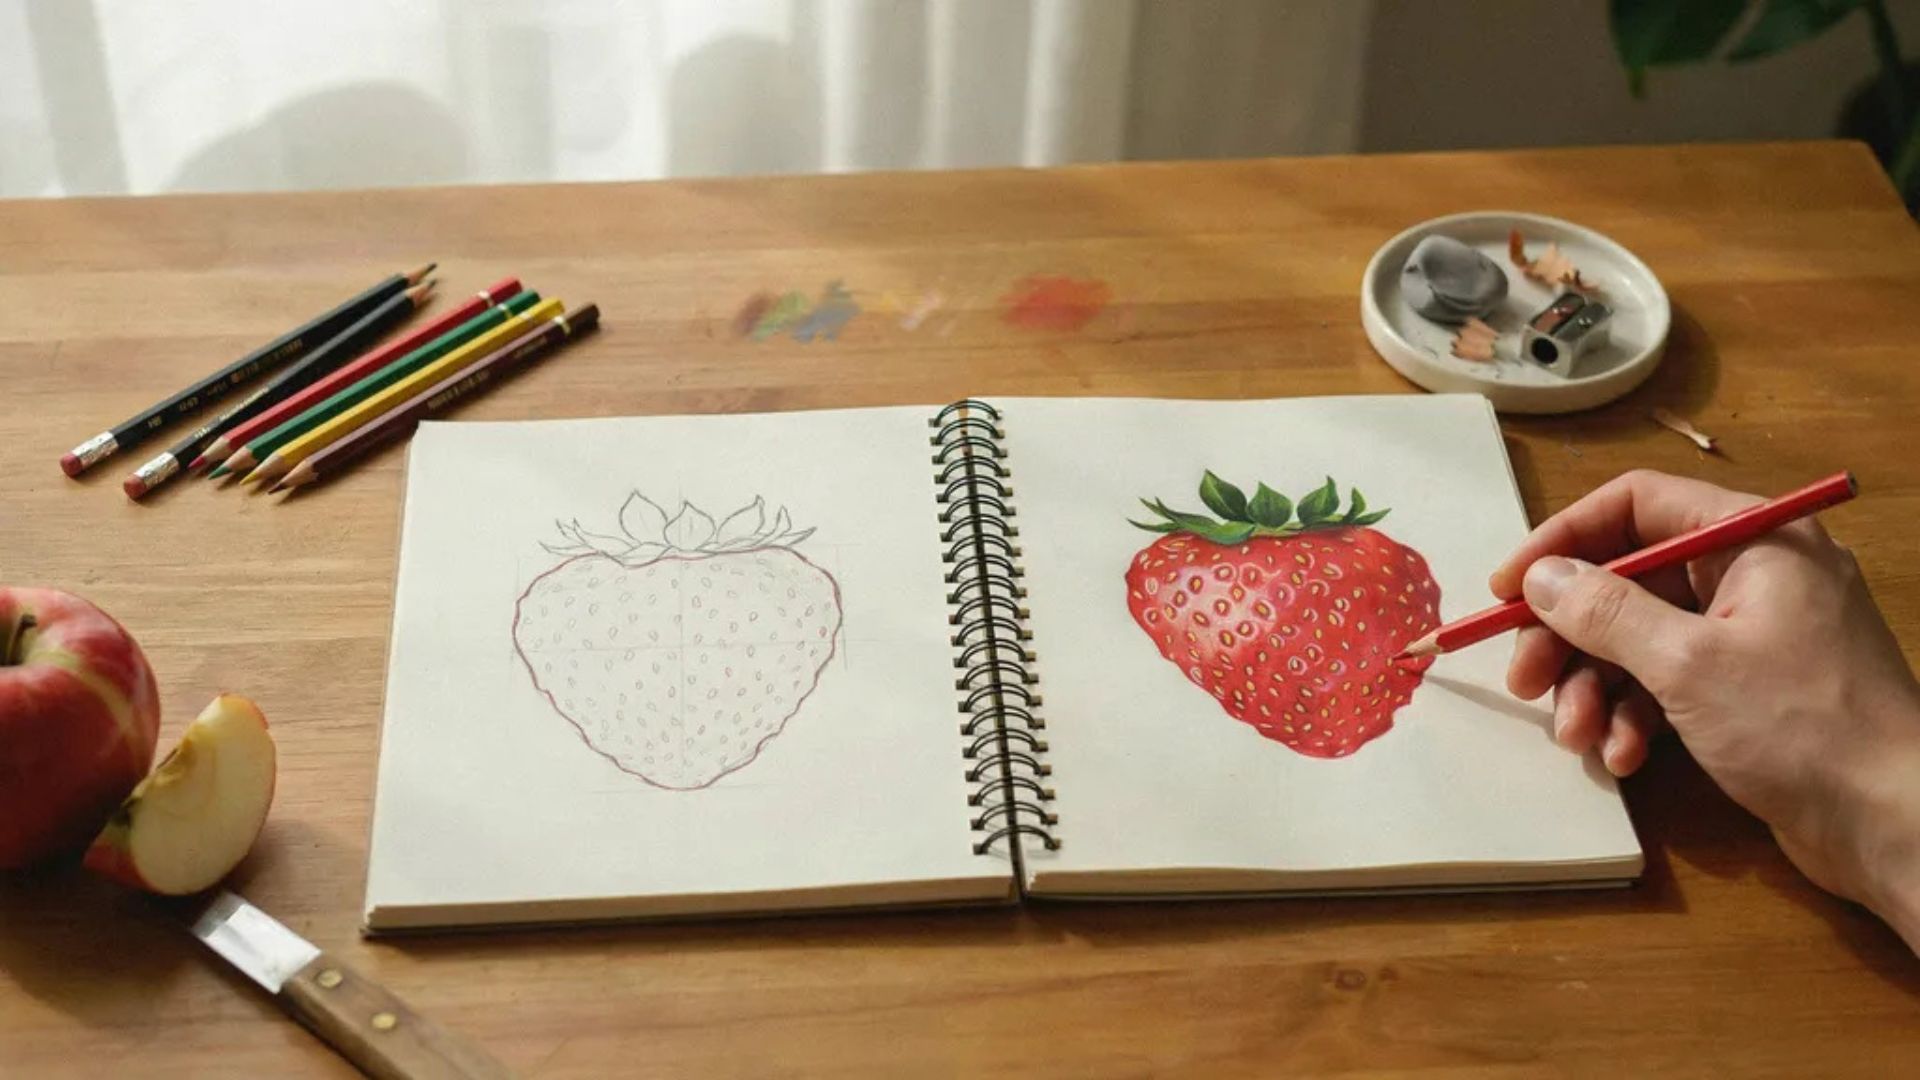
Drawing a strawberry is one of the best ways to start your art practice because it is simple, fun, and helps build important drawing skills quickly.
In this guide, you'll learn exactly how to create a strawberry drawing easy, from sketching the basic shape to adding details, shading, and color.
Whether you're a complete beginner or looking to improve your sketching skills, these easy-to-follow steps will help you create a strawberry drawing with confidence.
You'll also find useful shading techniques, common mistakes to avoid, and creative strawberry drawing ideas to influence your next artwork.
Why Strawberry Drawing Is Great for Beginners
Strawberries are easy to draw because they have a simple shape, clear details, and plenty of room to practice shading, texture, and coloring techniques without feeling overwhelming.
The basic outline is easy to sketch, while the seeds, leaves, and shading provide opportunities to practice important drawing techniques.
Unlike more complex subjects, strawberries are forgiving and still look recognizable even if the proportions aren't perfect.
They also help artists develop observation skills, understand light and shadow, and gain confidence with coloring.
Whether you're drawing with pencils, markers, or colored pencils, a strawberry is a fun and approachable way to improve your artistic abilities.
Materials Needed for Strawberry Drawing Easy

Gather a few basic art supplies before you start to make the drawing process smoother and more enjoyable.
Basic Drawing Supplies
You don't need much to get started:
- Pencil a regular HB pencil works well
- Eraser for cleaning up lines
- Drawing paper any plain white paper is fine
Optional Coloring Tools
Once your sketch is ready, you can add color using:
- Colored pencils
- Markers
- Crayons
Start with what you already have at home.
How to Draw a Strawberry Easy Step by Step
Follow these simple steps to create a strawberry drawing from a basic outline to a fully detailed and colored illustration.
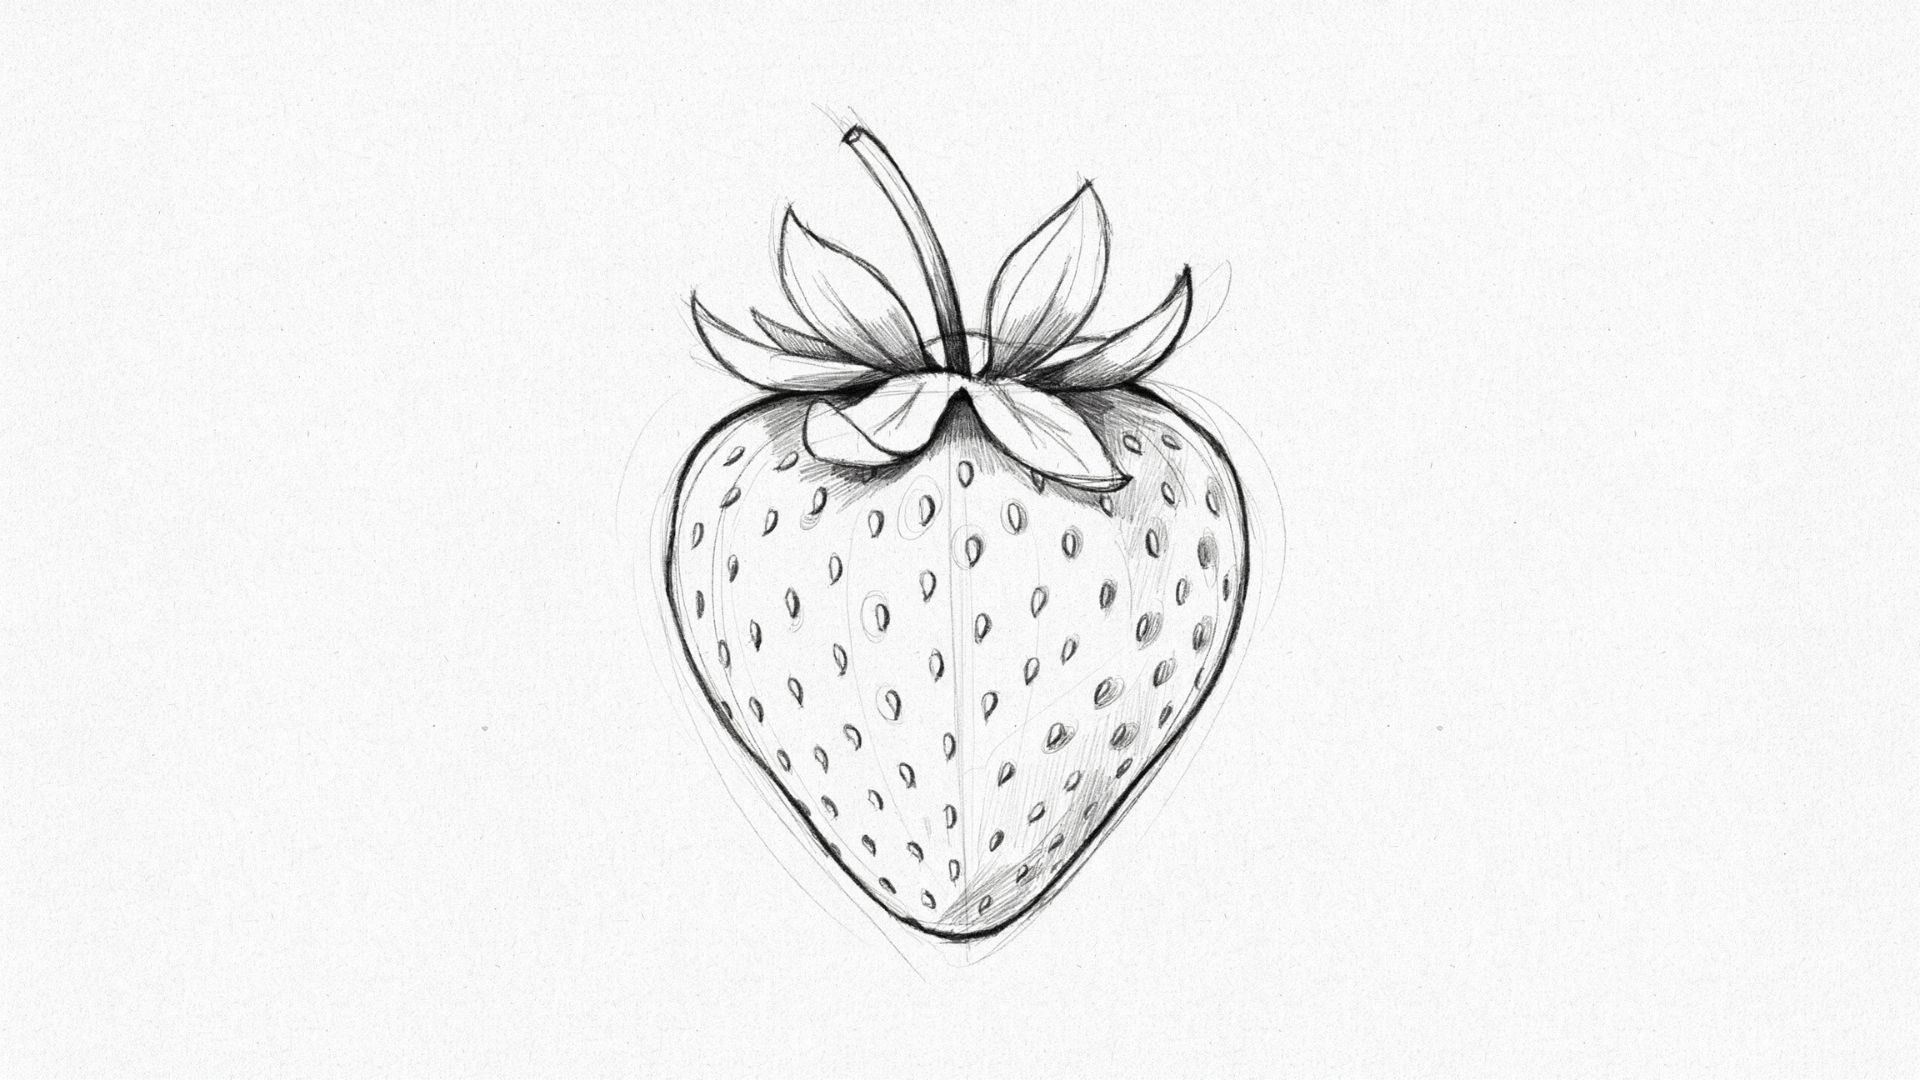
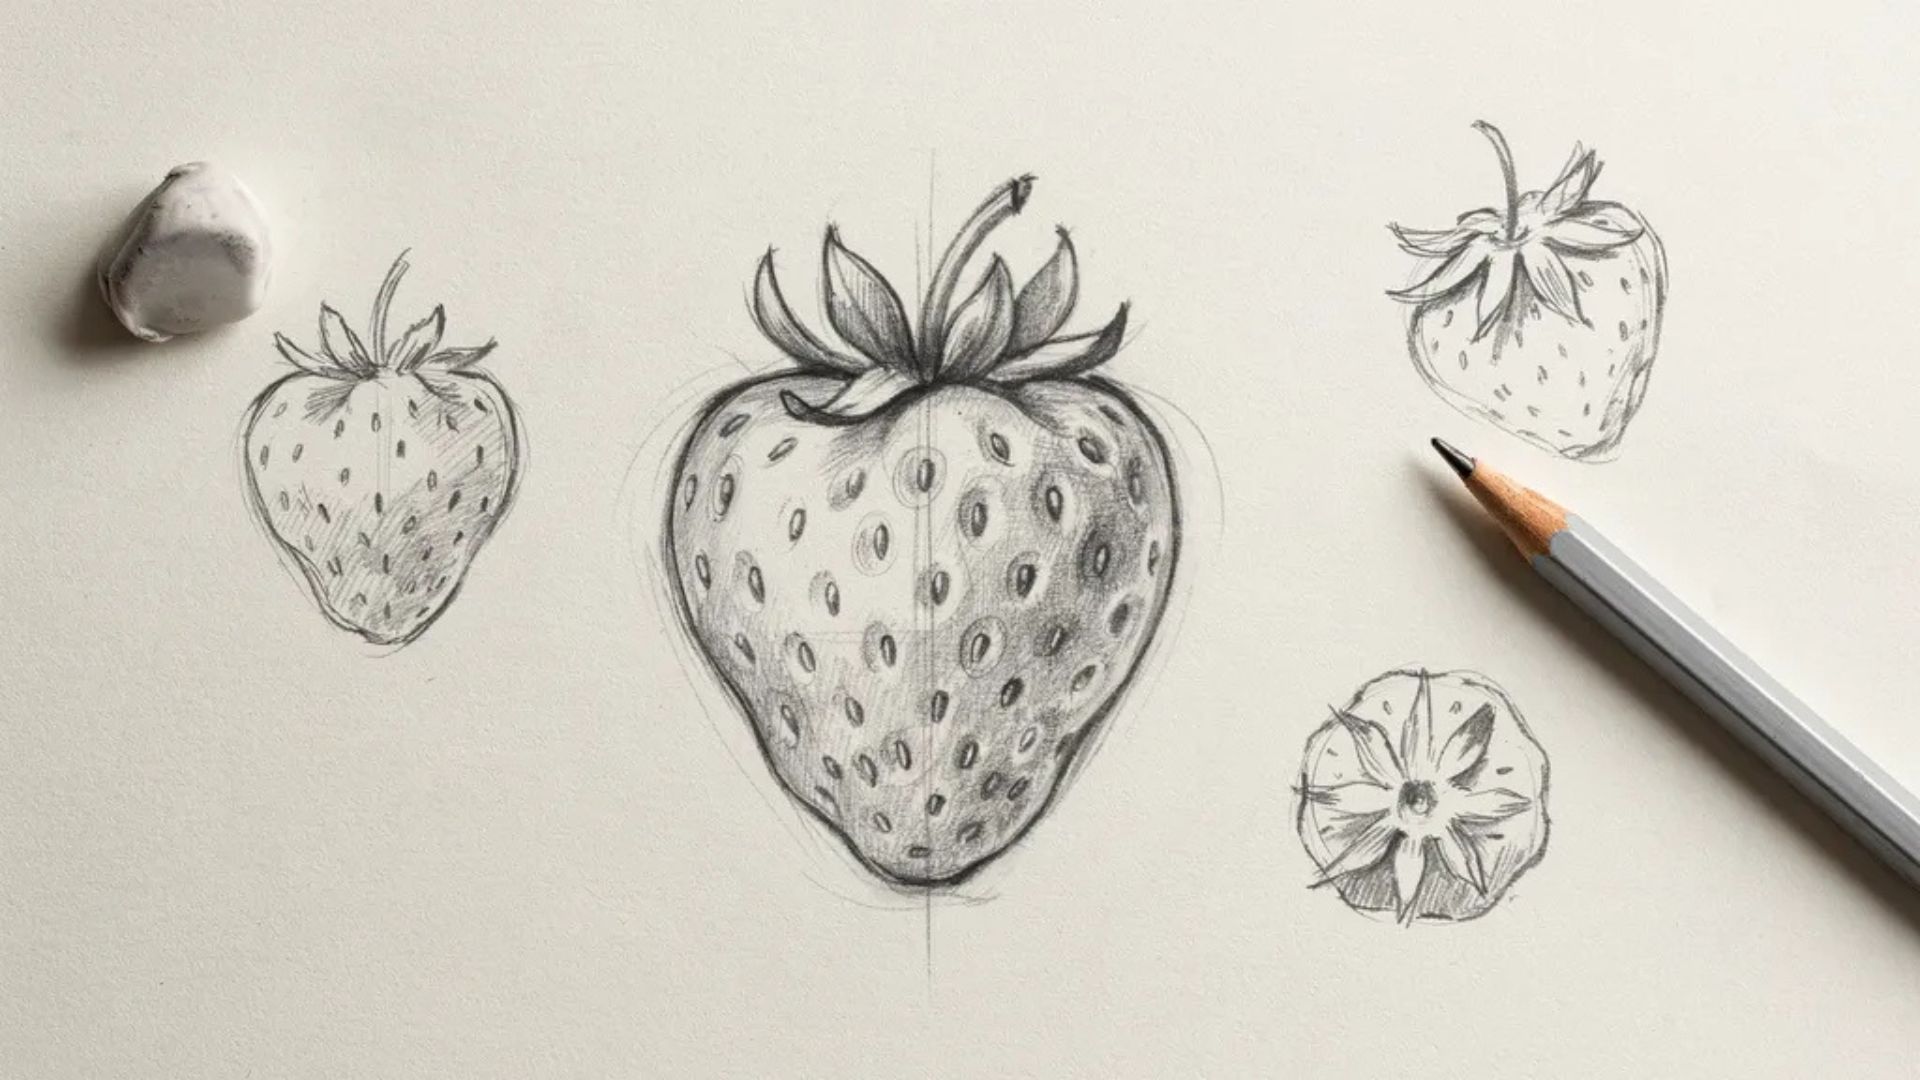
Step 1: Sketch the Basic Strawberry Shape
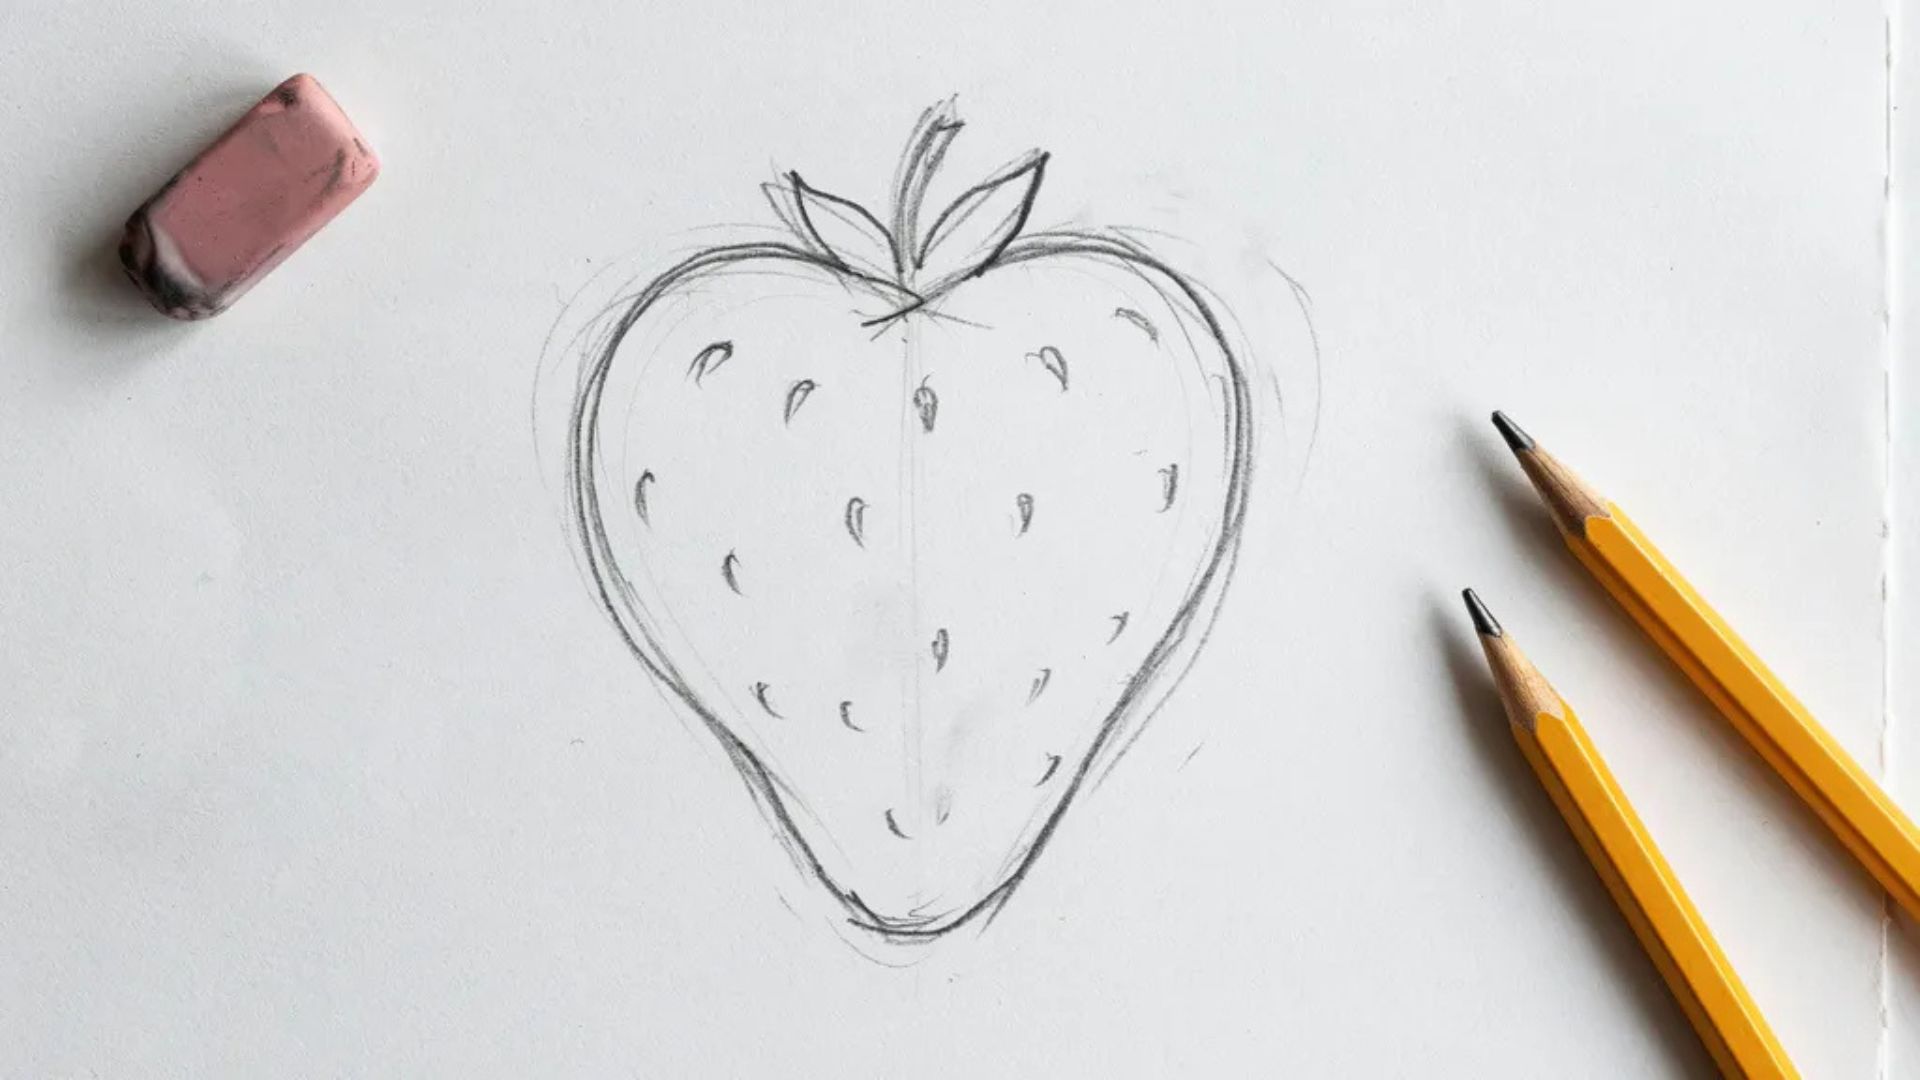
Start with a simple heart-like outline. Draw a rounded top that dips slightly in the middle. Then bring both sides down to meet at a soft point at the bottom.
Keep it loose, don't press too hard with your pencil.
Step 2: Refine the Outline
Now look at your shape and adjust the curves. Real strawberries aren't perfectly even. Make one side slightly fuller. Soften any sharp angles. This gives your drawing a natural look.
Step 3: Draw the Strawberry Leaves
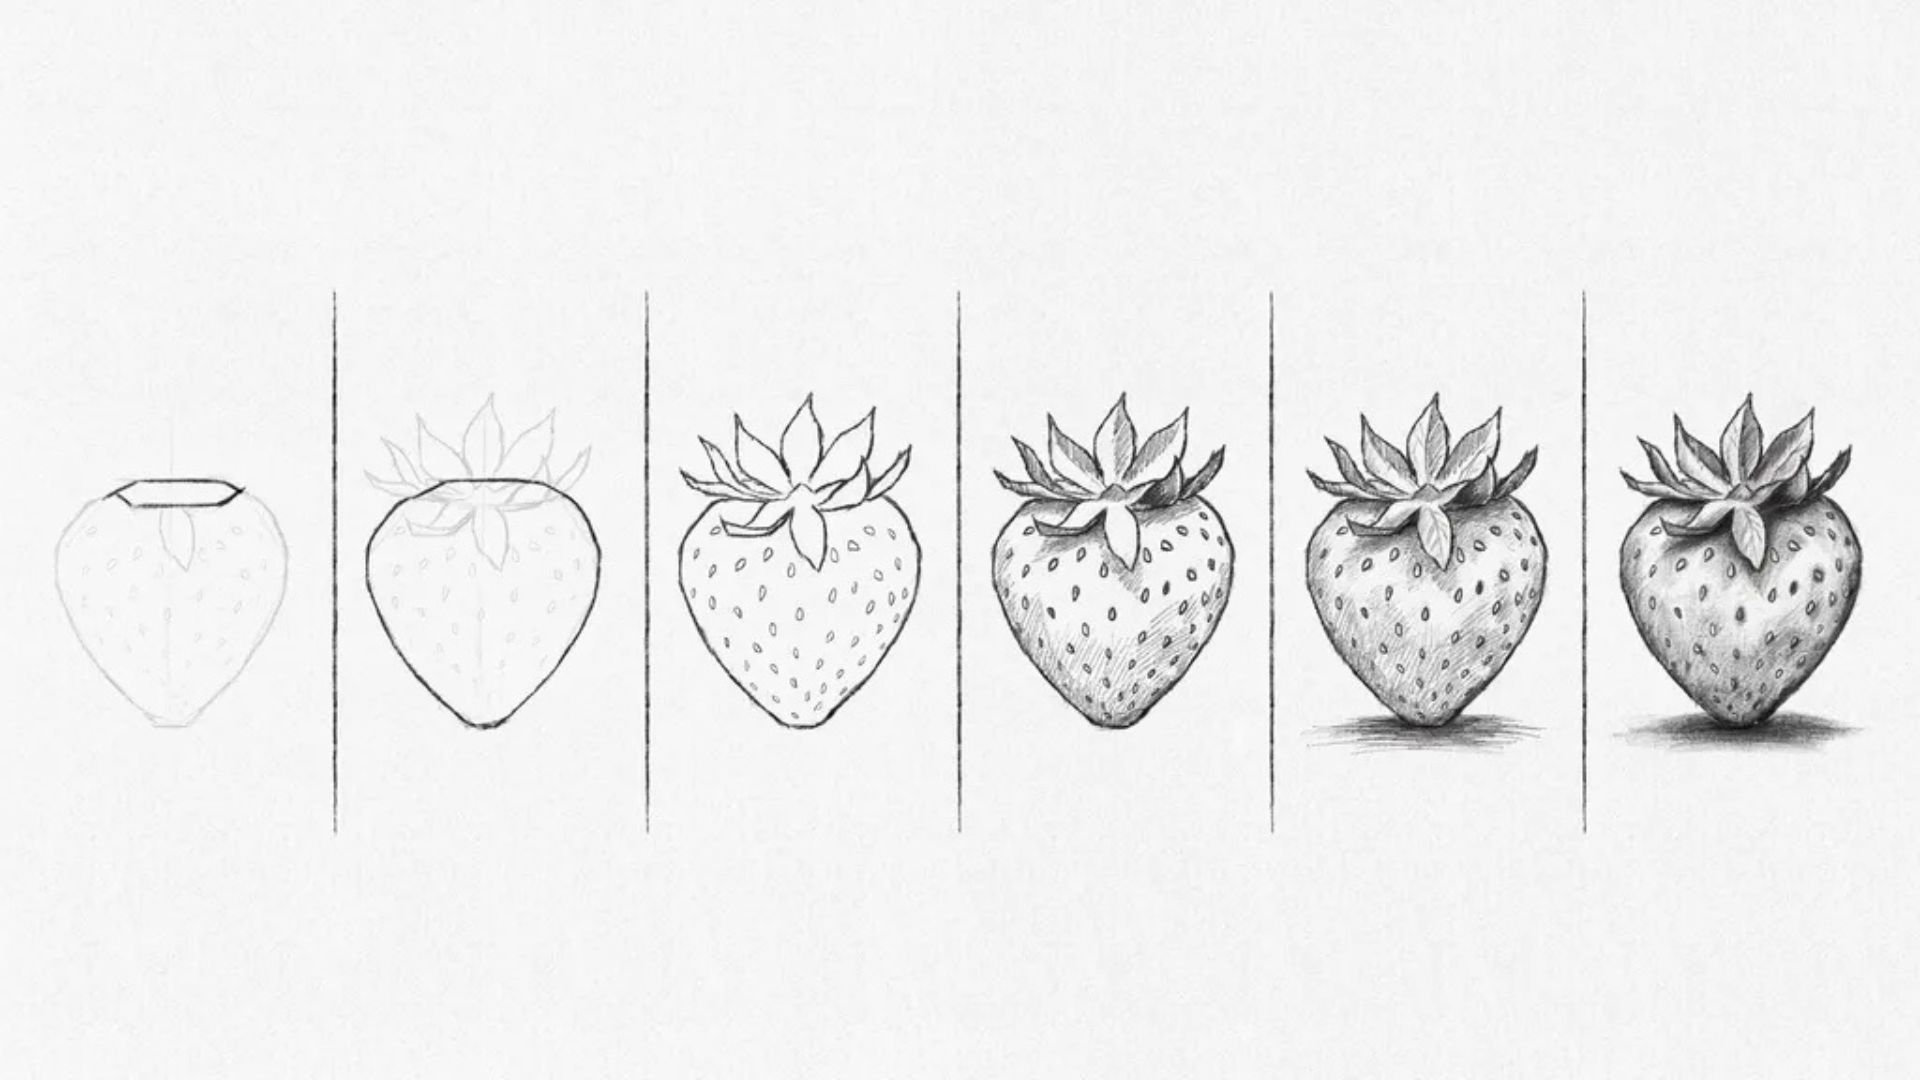
At the top of the fruit, add 4–5 small pointed leaves spreading outward. These are called the calyx. Draw them like little star points. Vary their angles so they don't all look the same.
Step 4: Add the Stem
Above the leaves, sketch a short, thin stem. It doesn't need to be long, just enough to show where the strawberry was attached to the plant.
Step 5: Draw the Seeds
Place small oval or teardrop-shaped seeds across the surface of the fruit.
Space them out evenly but not perfectly: slight variation looks more realistic. Seeds near the edges should tilt slightly to follow the curve of the fruit.
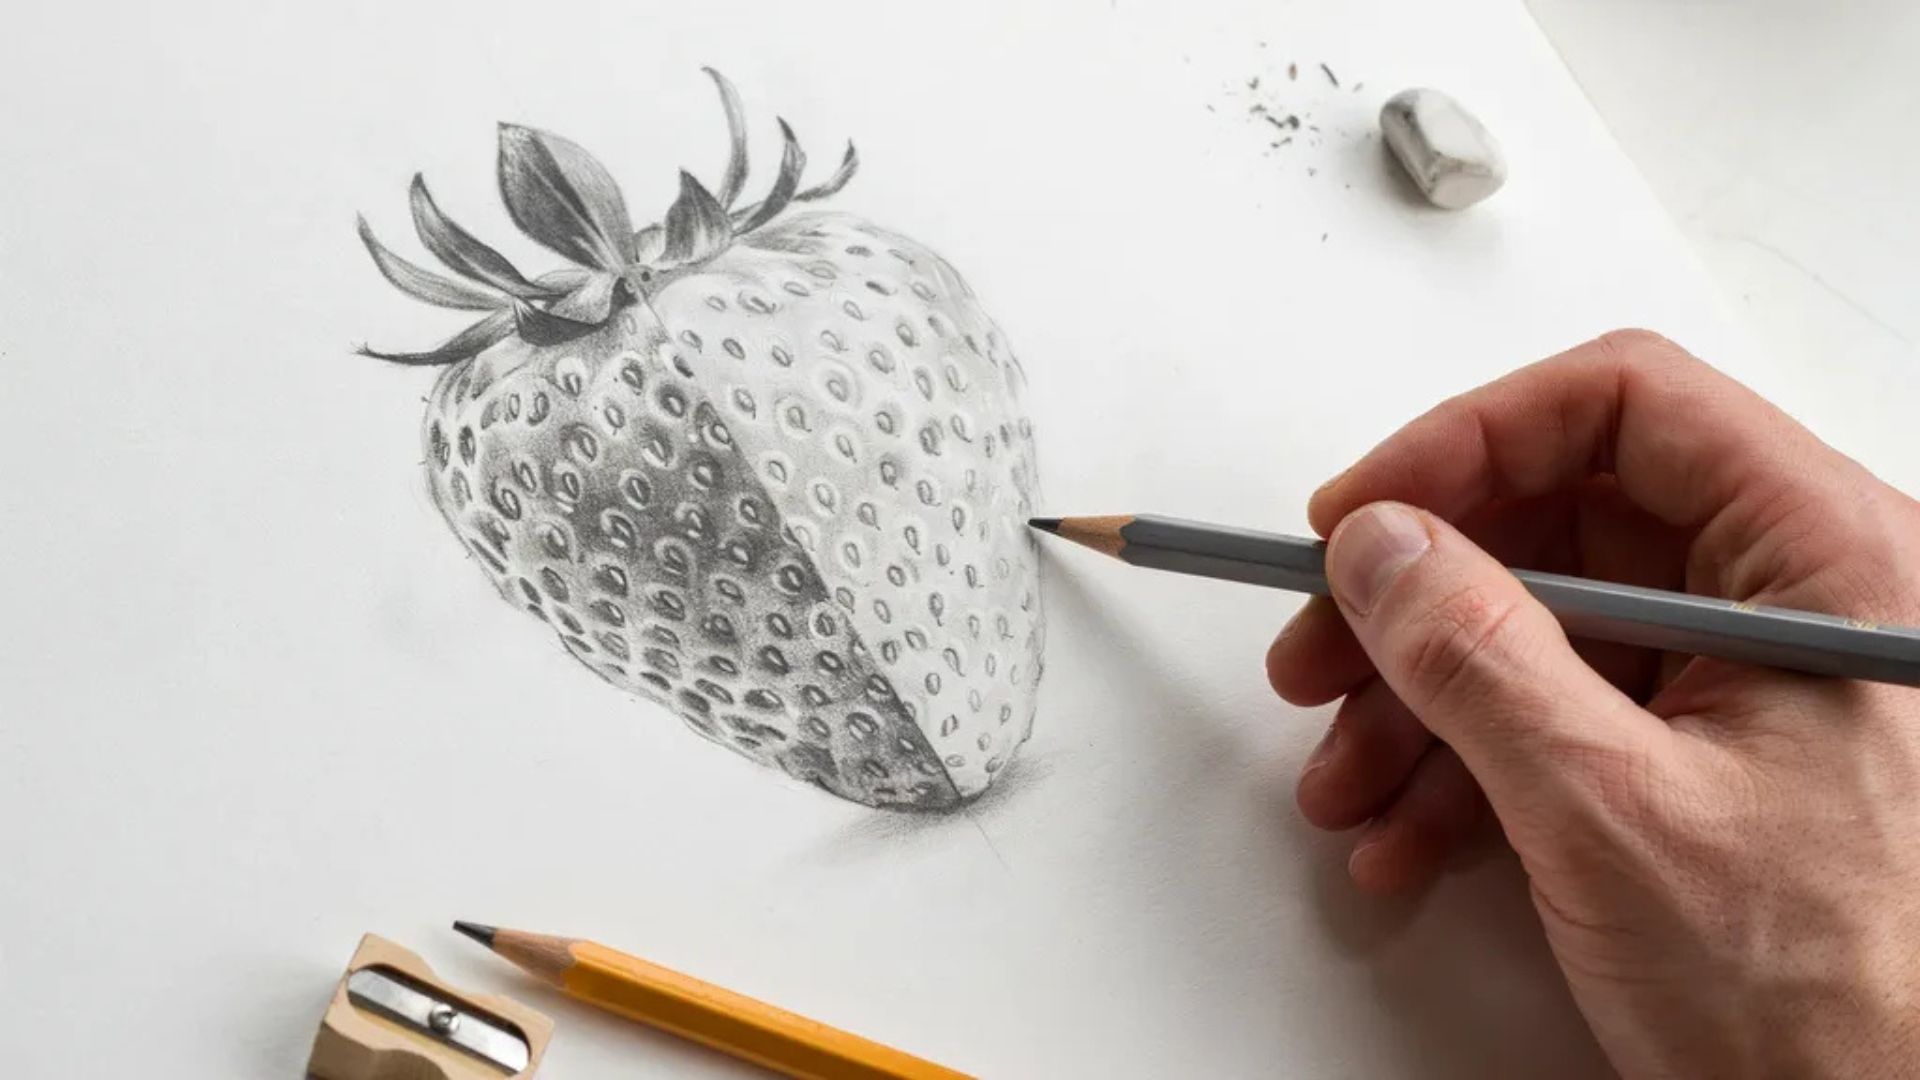
Step 6: Clean Up the Sketch
Use your eraser to remove any rough guide lines. Sharpen the outline where needed. This step makes a big difference in how polished your final drawing looks.
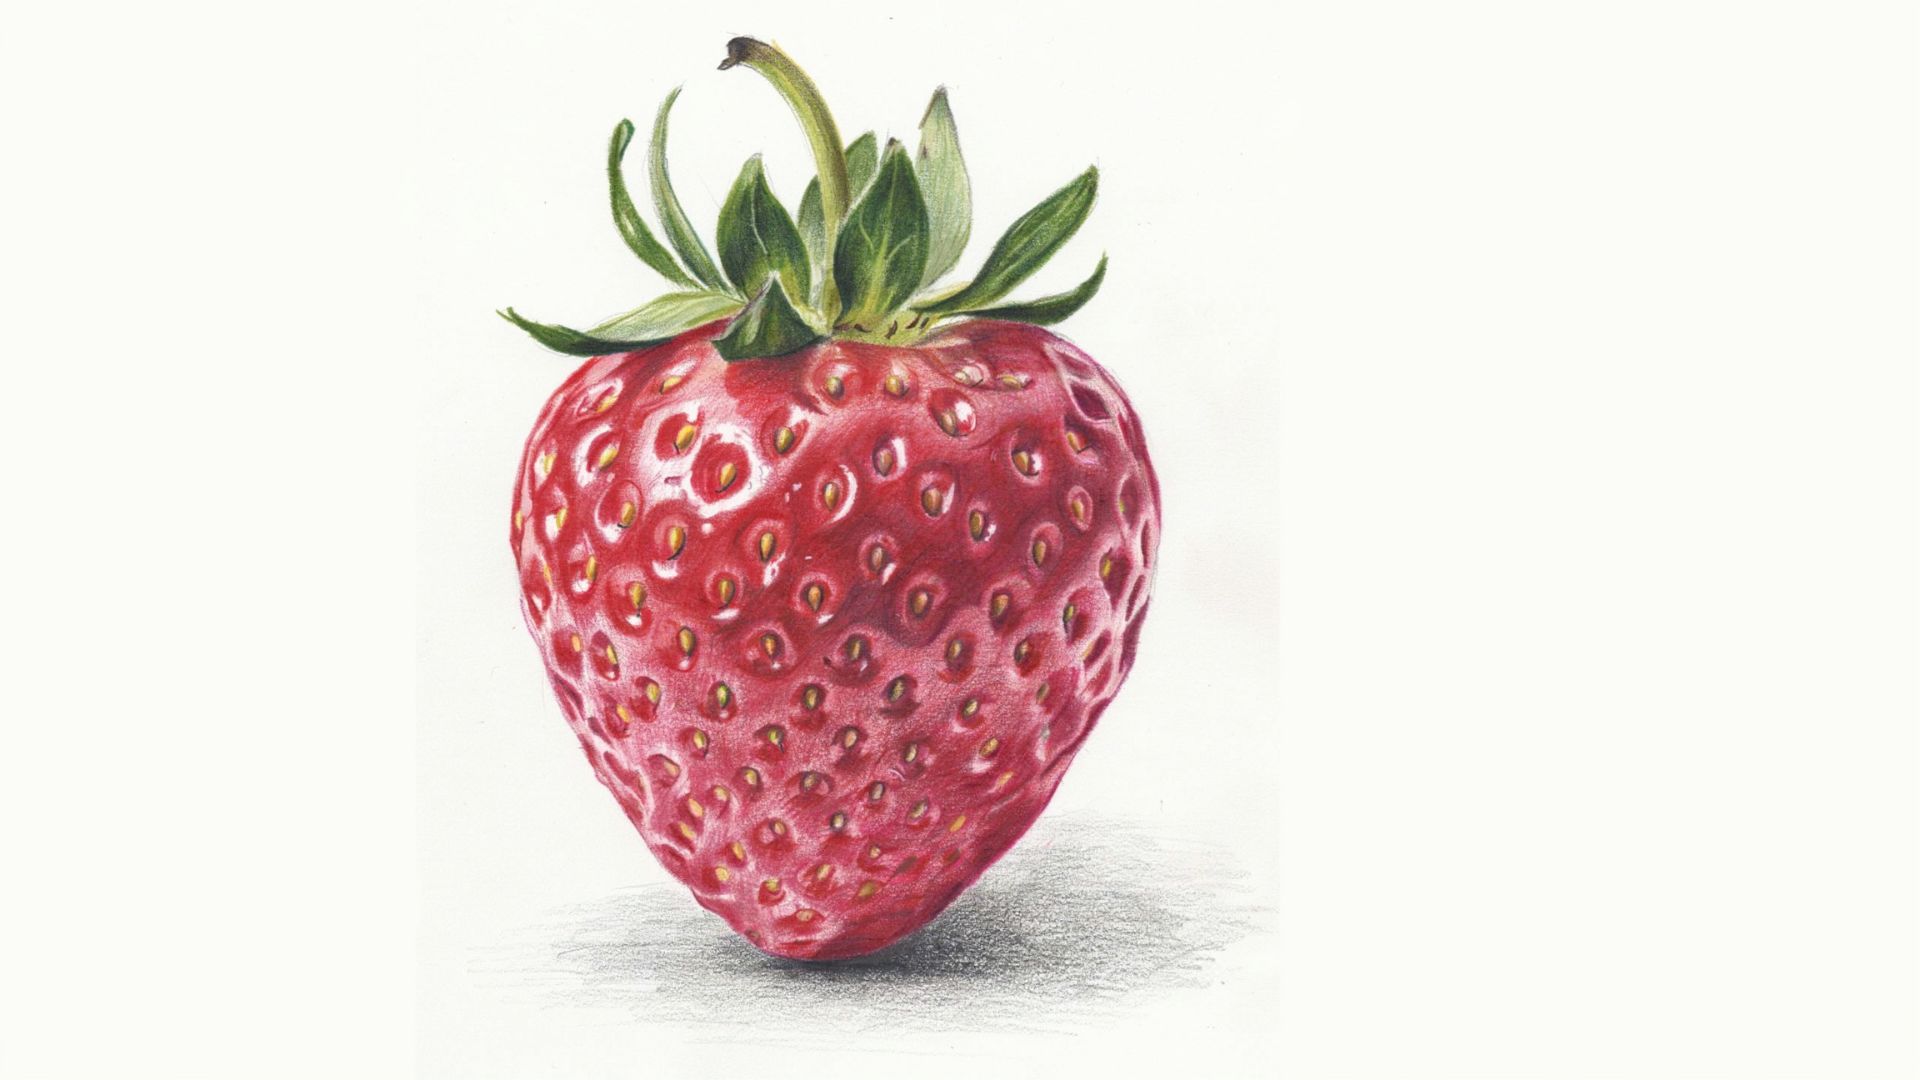
Step 7: Color Your Strawberry
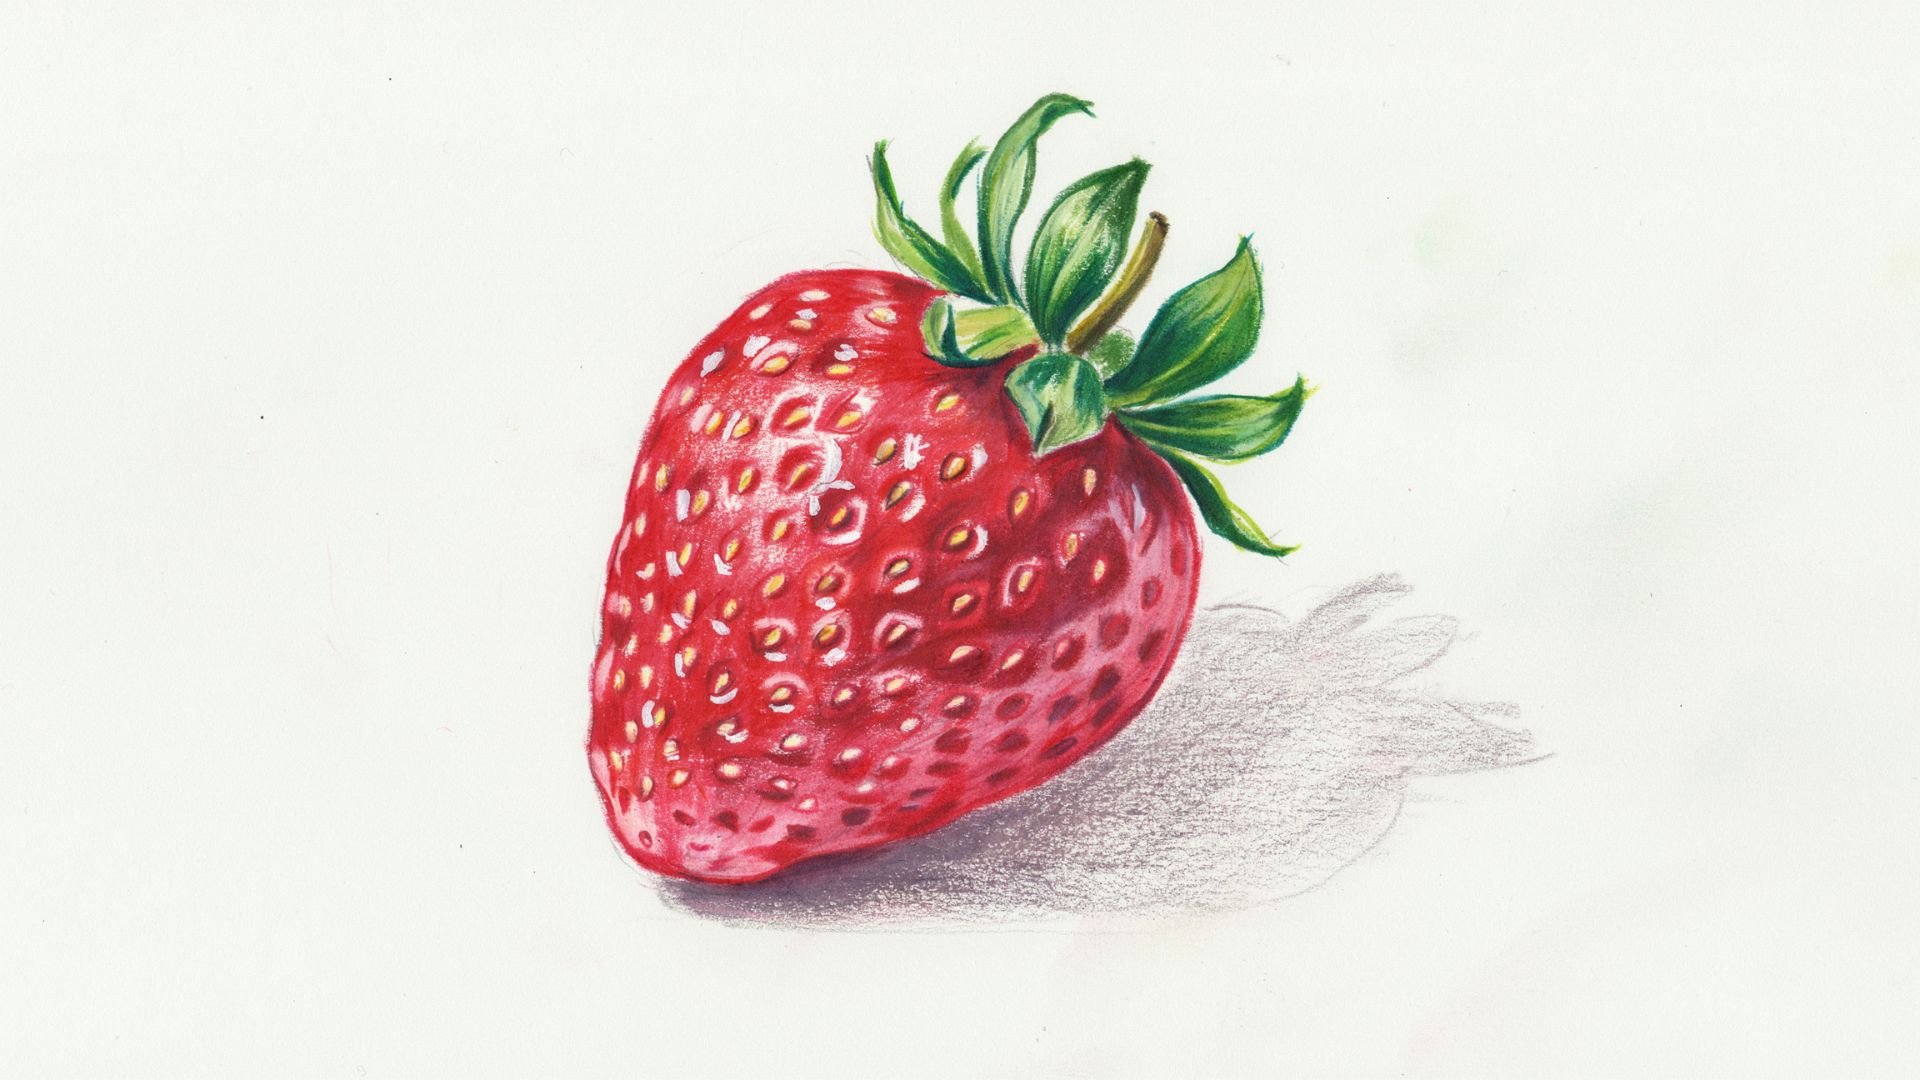
Use a bright red for the main body. Add a slightly darker red on the shadowed side. Color the leaves and stem green, and use a pale yellow or white around each seed.
These small color differences bring the drawing to life.
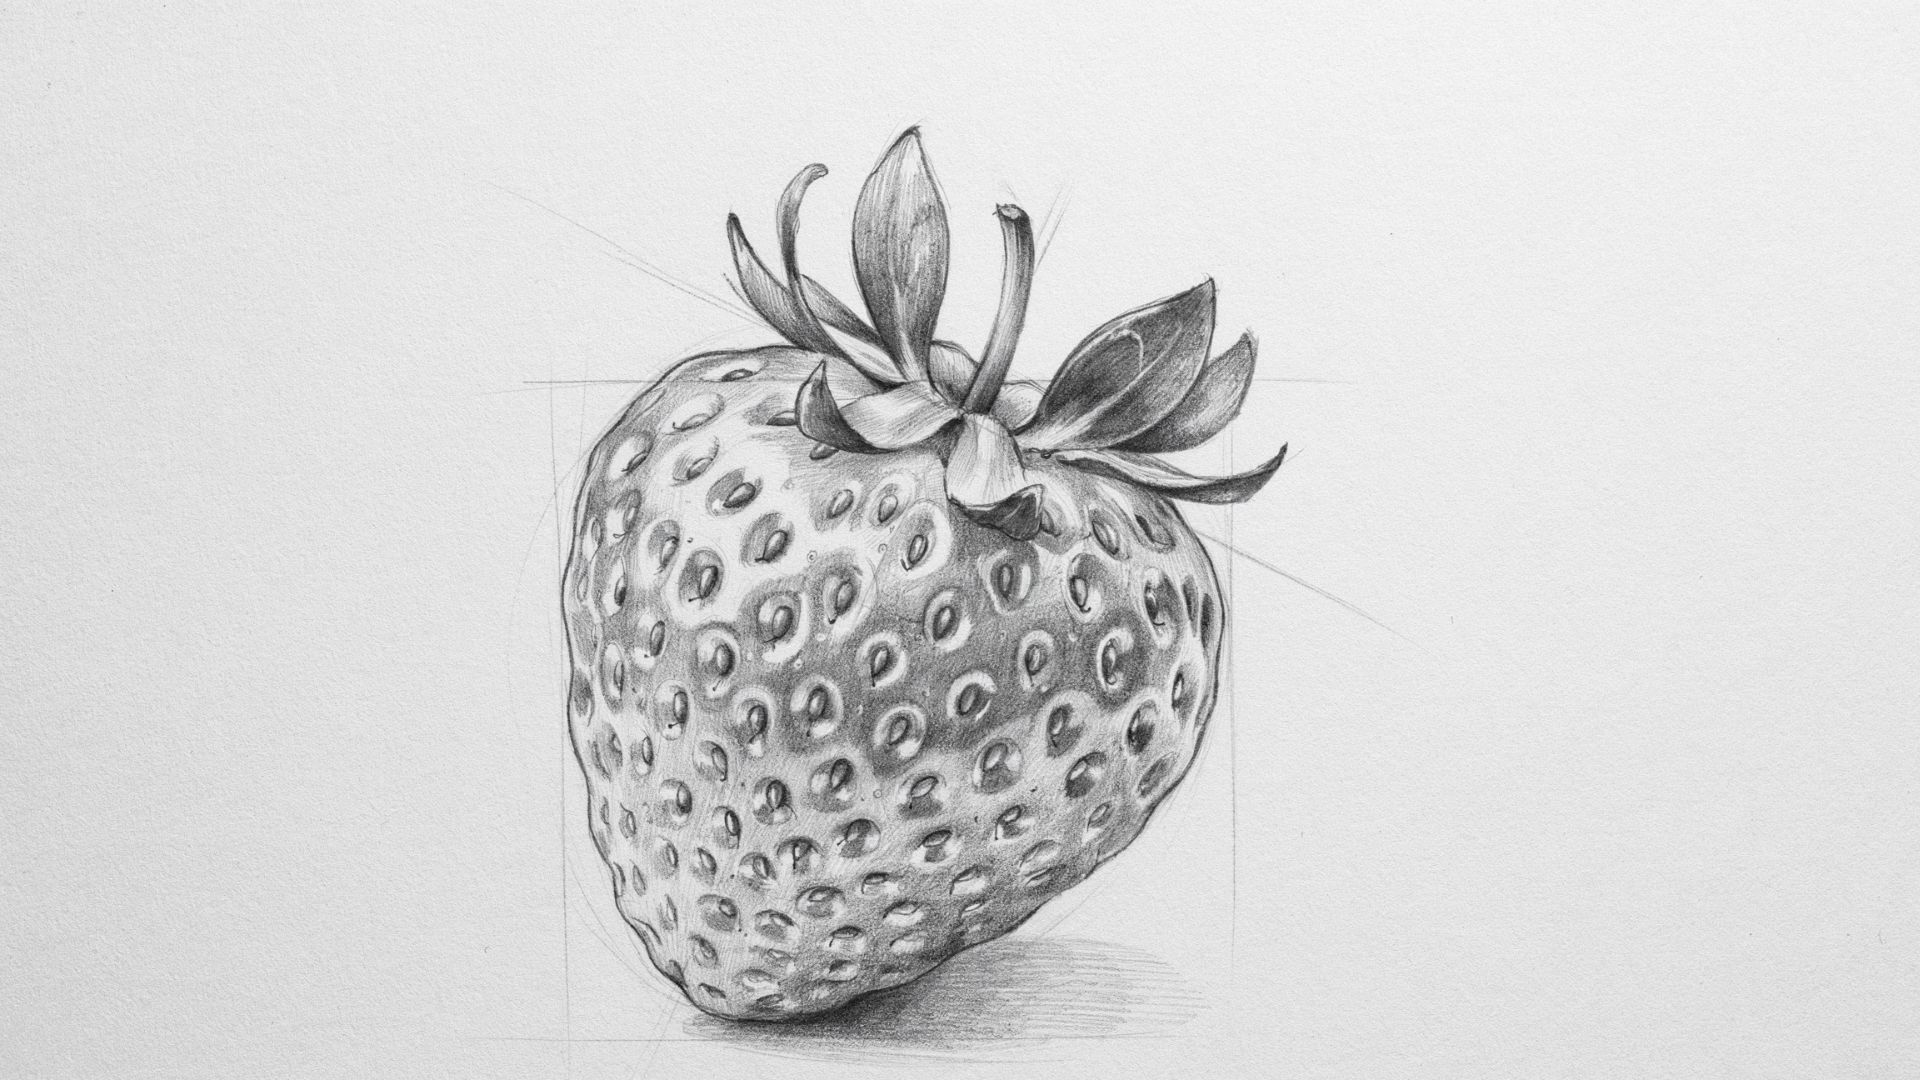
Adding Details to Your Strawberry Drawing
Small details like seed texture, leaf veins, and natural curves can make your strawberry drawing look more realistic and visually appealing.
Create Realistic Seed Texture

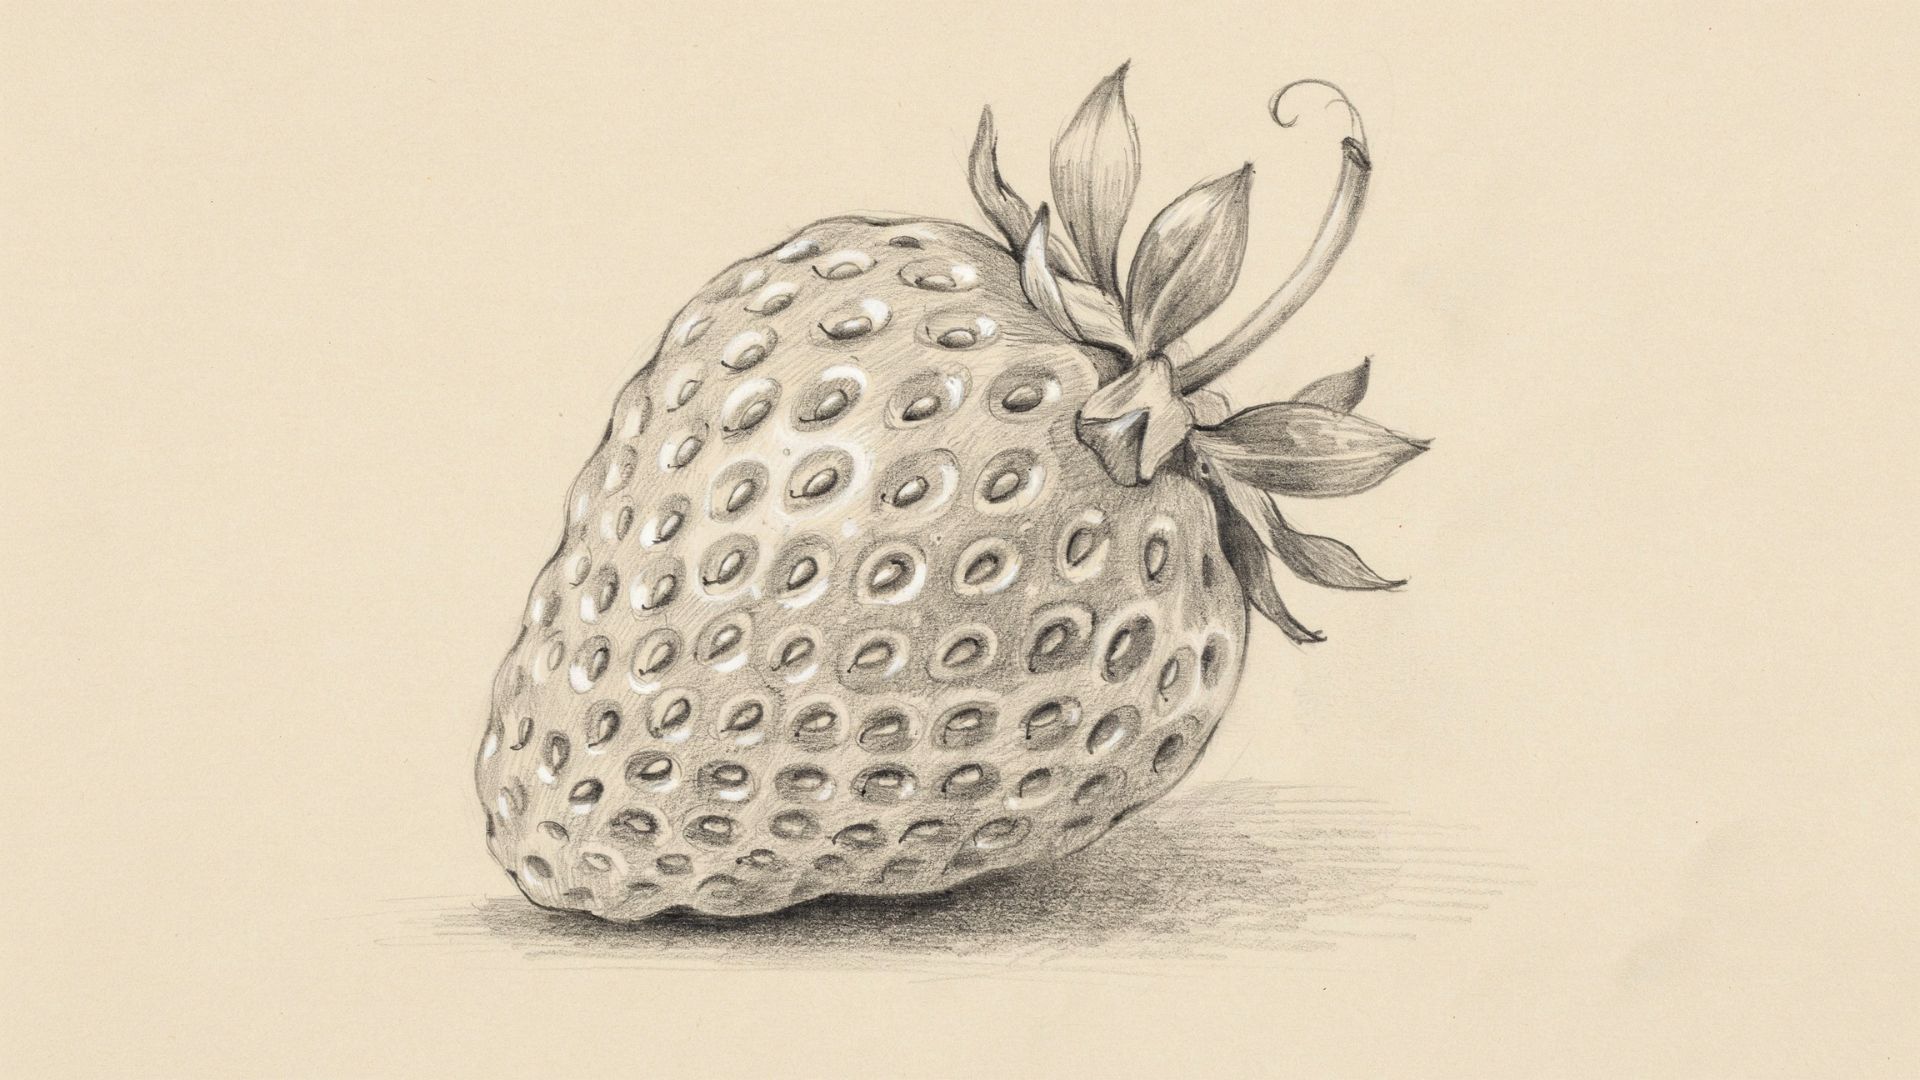
Don't make every seed the same size. Seeds near the center can be slightly larger. Seeds near the edges should be smaller and angled. This gives the fruit a rounded, three-dimensional feel.
Improve the Leaf Details
Add thin lines through each leaf to show veins. Curve the leaves slightly and some pointing up, some bending down. This small step makes the leaves look alive instead of flat.
Improve the Fruit Shape
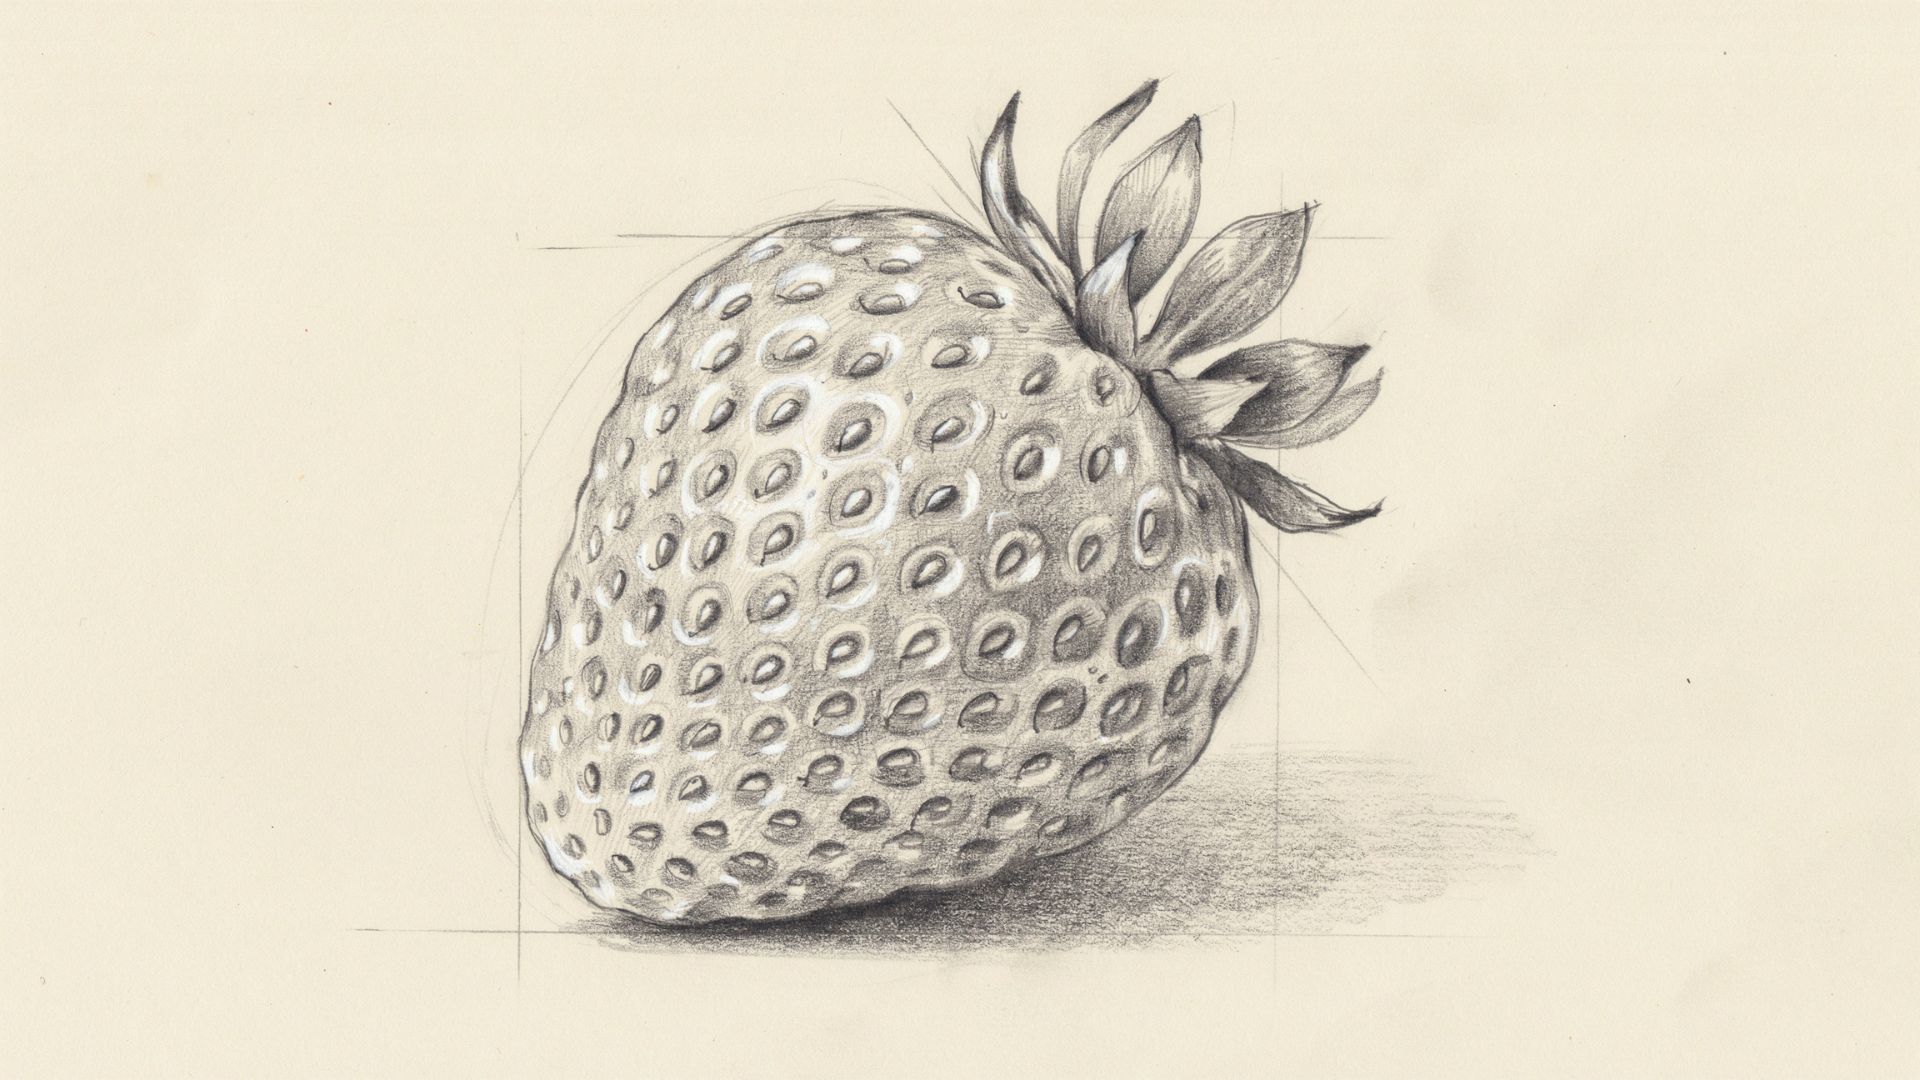
Look at a real strawberry or a photo. Most are wider in the middle and taper at the bottom. If your drawing looks too skinny or too round, adjust the outline now. A fuller shape reads as more natural.
How to Shade a Strawberry Drawing Easy
Learning a few basic shading techniques can add depth, dimension, and a more realistic look to your strawberry drawing.
Identify the Light Source
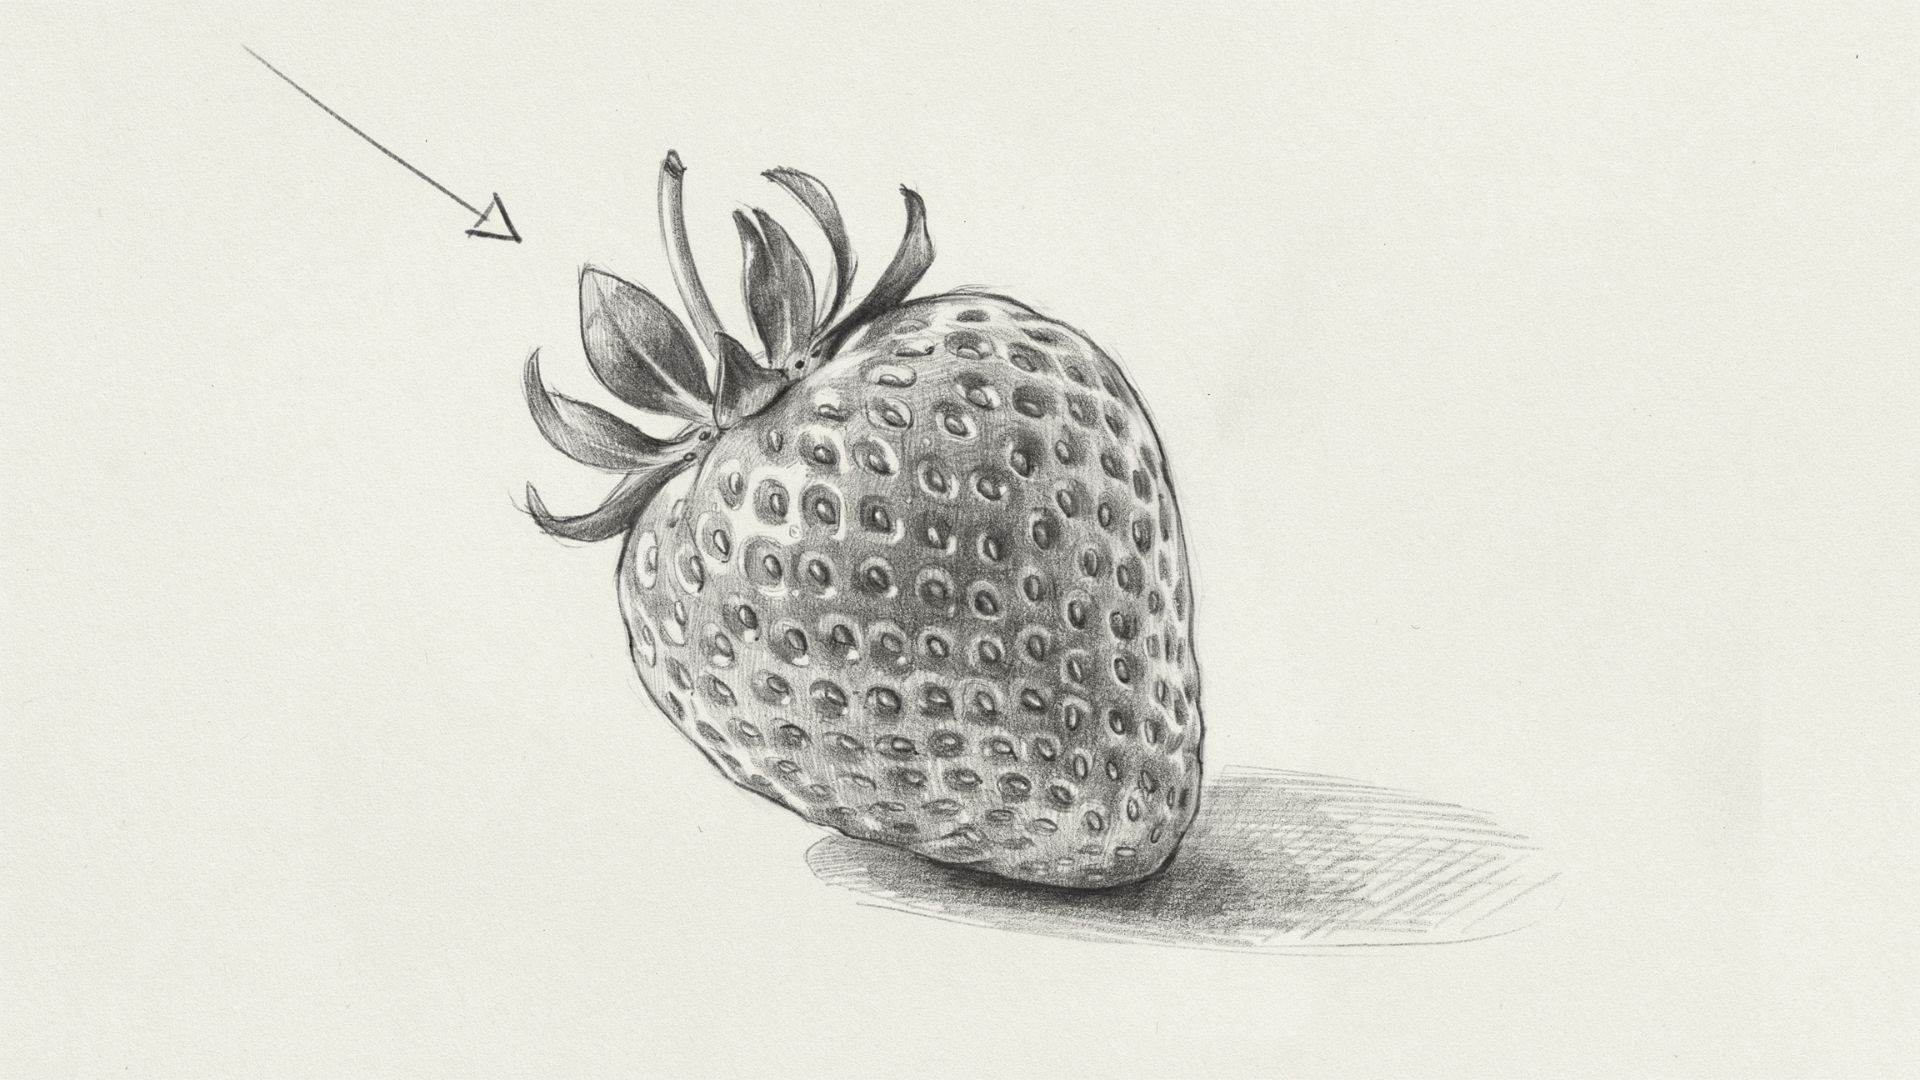
Before you shade anything, decide where your light is coming from. Top-left is the most common choice. This decision controls where your highlights and shadows go.
Add Basic Shadows
Shade the side opposite to your light source. For a top-left light, the bottom-right of the strawberry gets darker. Use light pencil strokes and build up the tone gradually.
Don't press hard right away.
Blend for a Smooth Finish
Use the side of your pencil tip for soft shading. Blend in small circular motions. Avoid harsh lines in the shaded area.
The goal is a gradual shift from light to dark, this is what makes the fruit look round and full.
Easy Strawberry Drawing Ideas to Try
Find these creative strawberry drawing ideas to practice different styles and add variety to your artwork.
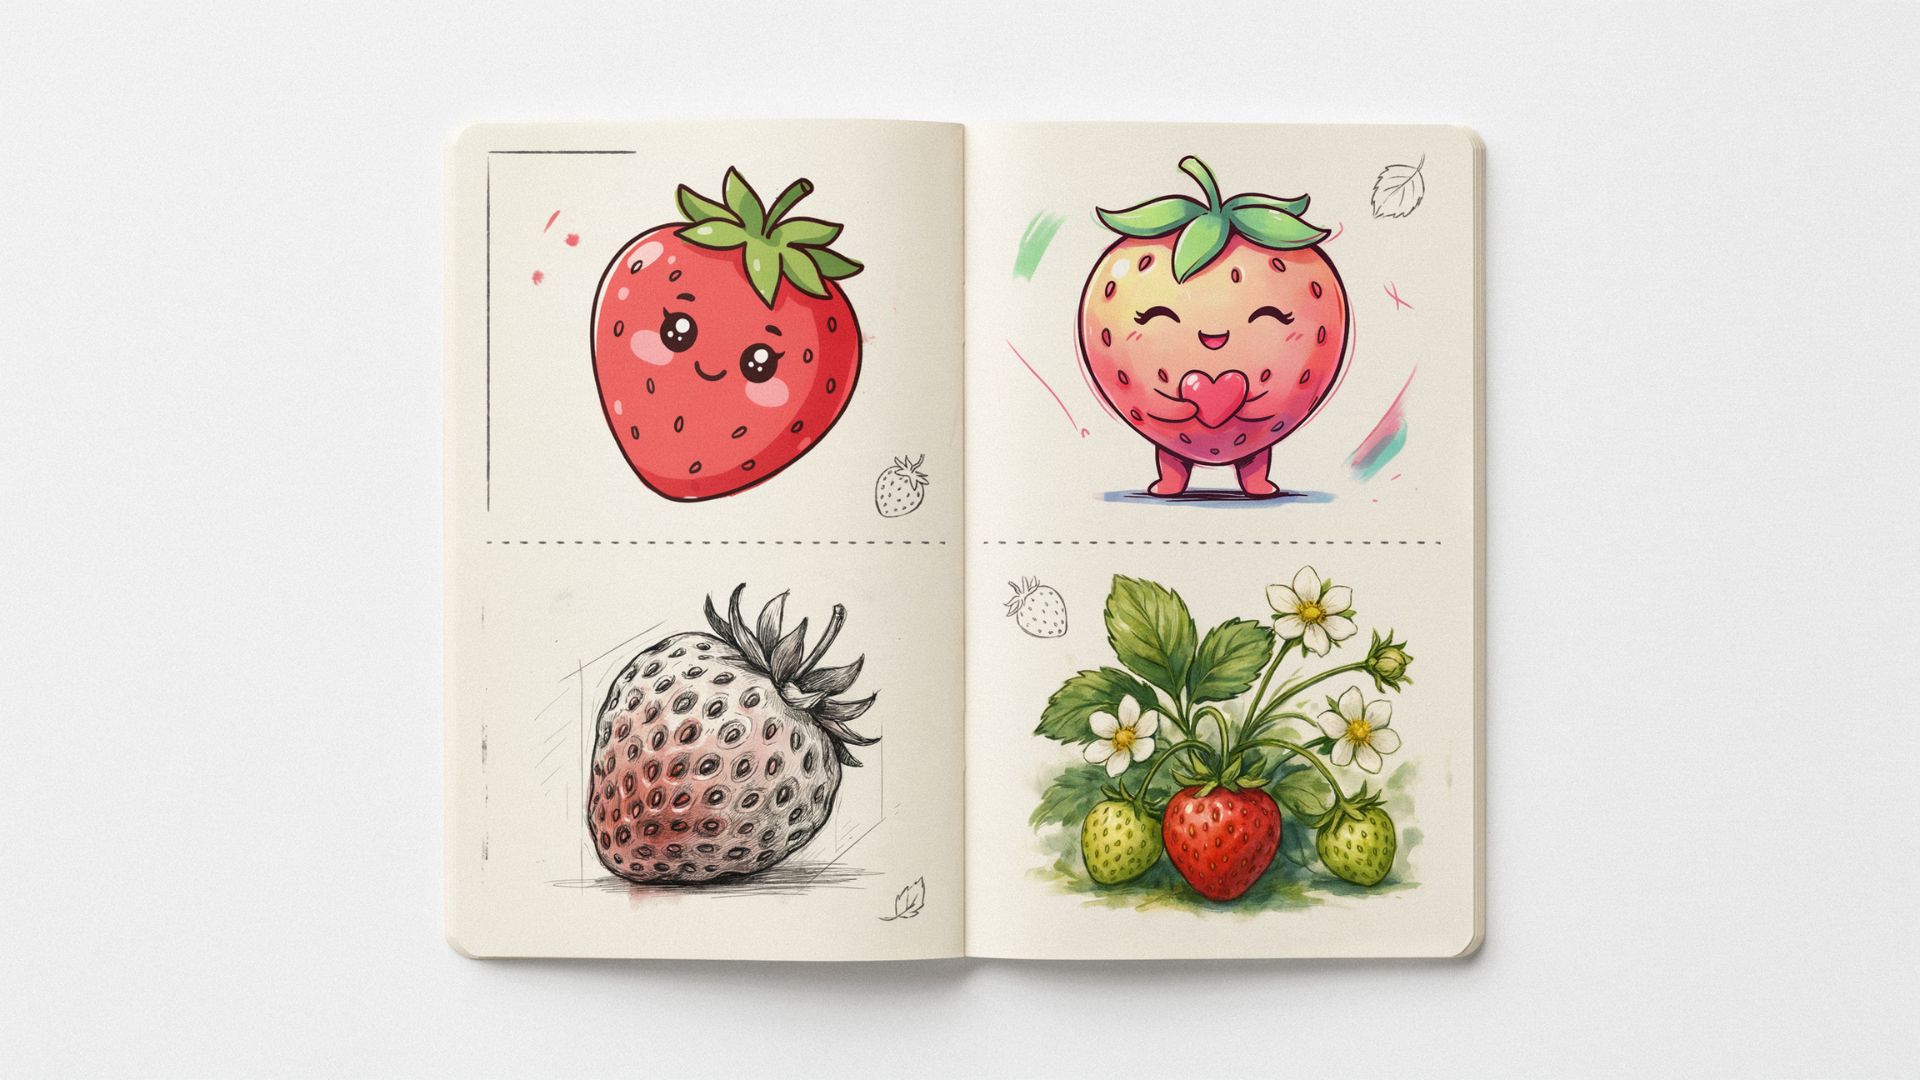
Cute Cartoon Strawberry Drawing
Add two small oval eyes and a curved smile to the front of the fruit. This turns your strawberry into a fun character. Great for kids or casual sketchbooks.
Kawaii Strawberry Character
Go further with the cartoon style. Add rosy cheeks, tiny hands, and big sparkling eyes. Kawaii strawberries are popular in doodle art and sticker designs.
Realistic Strawberry Sketch
Focus on getting the texture right. Study a real strawberry and pay close attention to seed placement, surface bumps, and light reflection. Use cross-hatching for shading instead of flat color.
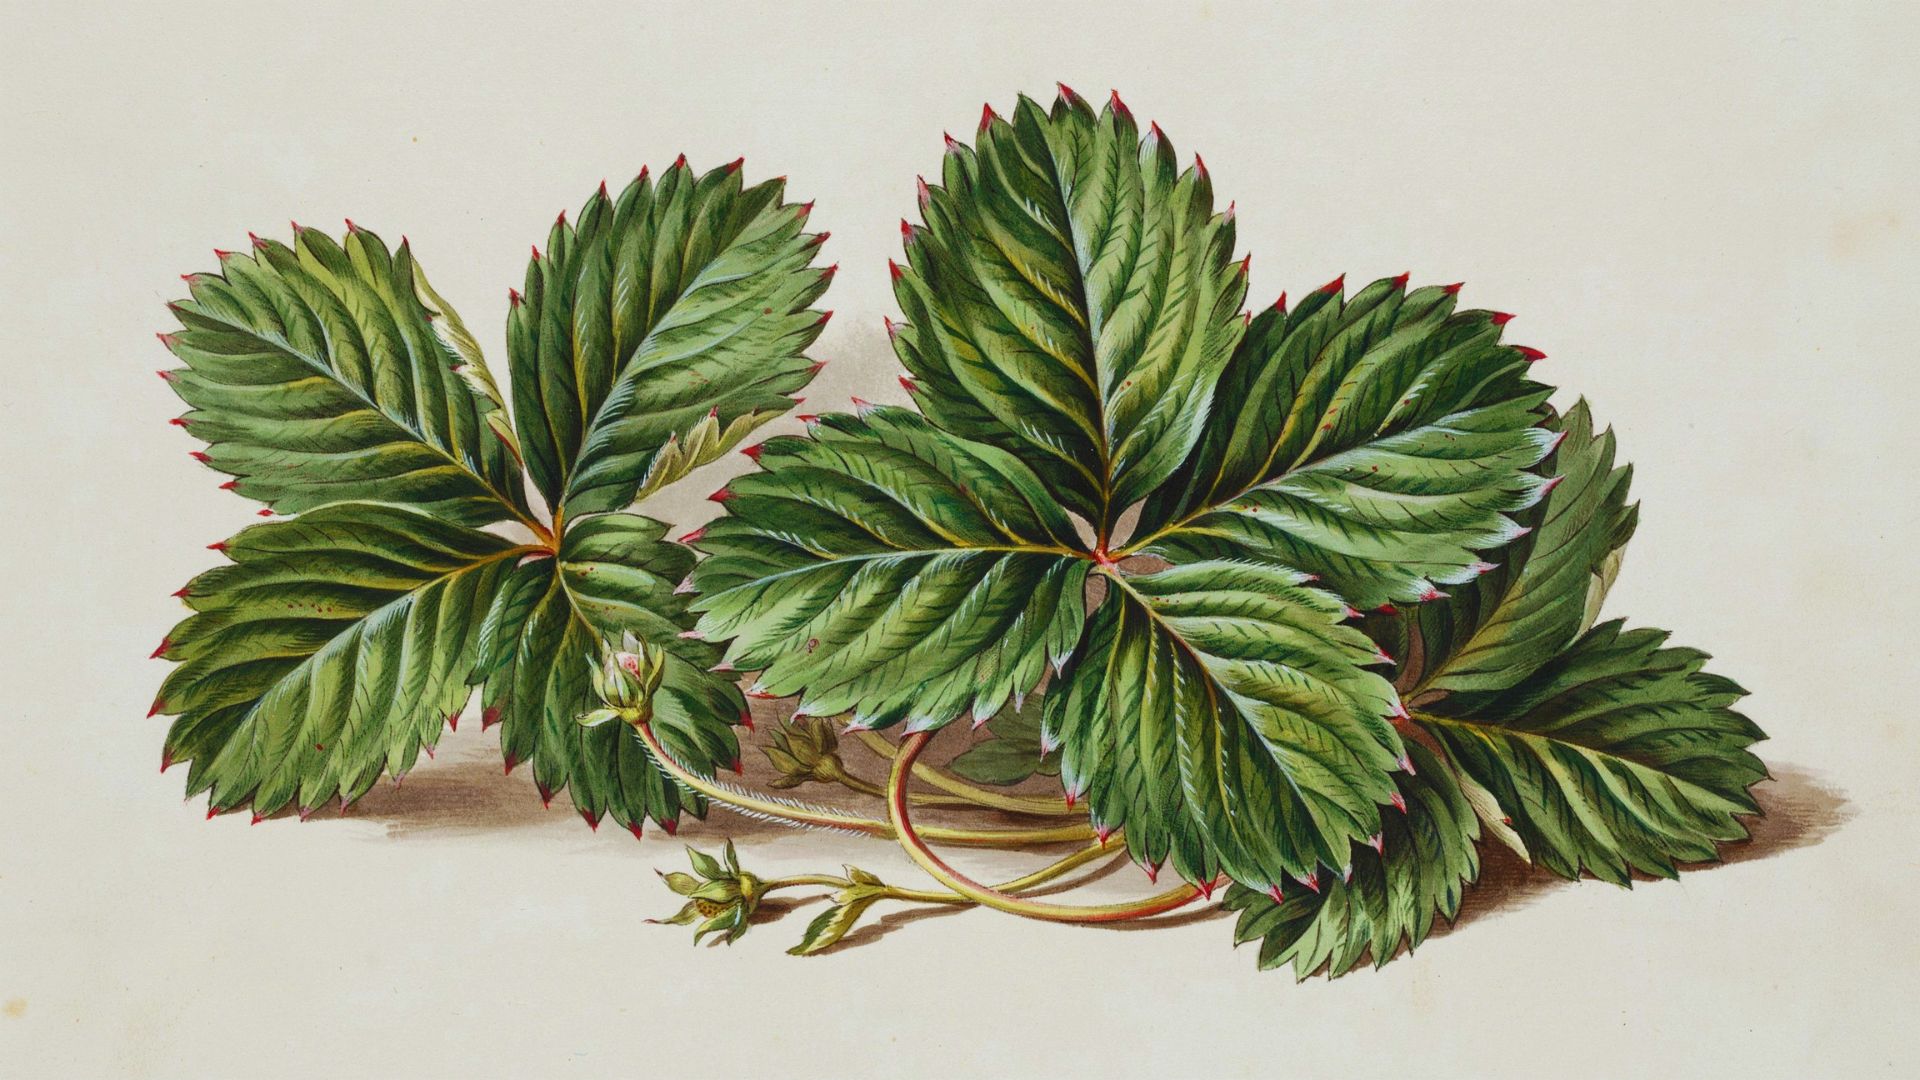
Strawberry with Leaves and Flowers
Draw the full strawberry plant.
Add a few small white flowers with yellow centers, some leaves on stems, and a couple of berries at different stages: green, half-ripe, and fully red. This makes a great nature illustration.
Common Mistakes to Avoid
Avoiding a few common drawing errors can help your strawberry sketch look cleaner, more balanced, and more realistic.
Making the Shape Too Symmetrical
Real strawberries are slightly lopsided. If your drawing looks too perfect, it ends up looking fake. Add a small bump here or a slight curve there to keep it natural.
Overcrowding the Seeds
Beginners often pack too many seeds in. Leave breathing room between each one. A sparse, well-spaced seed pattern looks far more realistic than a crowded mess.
Ignoring Leaf Proportions
The leaves should be roughly the same width as the top of the fruit. Too small and they look out of place. Too large and they overpower the drawing. Check the balance before you finalize.
Benefits of Learning Strawberry Drawing
Practicing strawberry drawing helps develop fundamental art skills while building confidence and creativity for future drawing projects.
Improves Observation Skills
Drawing from life trains your eye. You start noticing shapes, shadows, and proportions in everyday objects, not just in art.
Builds Confidence for Beginner Artists
Completing a recognizable drawing, even a simple one, gives you a real confidence boost. Strawberries are forgiving subjects that look good even when imperfect.
Helps Develop Shading Techniques
The rounded surface of a strawberry is perfect for practicing light and shadow. The skills you build here apply directly to portraits, still life, and other subjects.
Tips to Make Your Strawberry Drawing Look Better
A few simple techniques and consistent practice can help make your strawberry drawings look more polished, realistic, and visually appealing.
- Use light pencil strokes first, you can always darken later, but over-pressing is hard to fix
- Study real strawberry references, even a quick phone photo helps a lot
- Practice different strawberry shapes, try tall, wide, small, and large versions
- Add highlights for realism, leave a small white spot near the top of the fruit where light hits
- Experiment with colors and shading, try colored pencils, then markers, and see which you prefer
Conclusion
I've taught many beginners how to draw fruit, and strawberry drawing easy is often the quickest to learn.
Start with the basic shape, add details gradually, and take your time with shading. Every drawing helps improve your skills and confidence.
Ready to get started? Grab your pencil and draw your first strawberry today. Then try other fruits to build your creativity and practice.
Keep sketching regularly, experiment with new techniques, and watch your artwork improve with every drawing.
Frequently Asked Questions
How do you draw strawberries easy for beginners?
Start with a heart-like shape, add leaves and a short stem, place small seeds across the surface, then color with red and green. Follow the steps above and you'll have a clean result in under 15 minutes.
What is the easiest way to draw a strawberry?
Sketch a rounded triangle or heart shape first. That gives you the basic outline. Everything else leaves, seeds, shading, gets added on top of that foundation.
How can I make my strawberry drawing look realistic?
Use a reference photo, vary your seed sizes, shade one side darker, and add a small highlight near the top. These four steps make the biggest difference.
What colors should I use for a strawberry drawing?
Use bright red for the main body, dark red for shadows, light red or pink for highlights, green for the leaves and stem, and pale yellow around the seeds.
Can kids learn strawberry drawing easy?
Yes. The basic shape is simple enough for young children. Start with just the outline and seeds, then introduce color. Shading can come later as their skills grow.