

I’ve been working with air-dry clay for years now. And let me tell you, cracking is the most frustrating thing you’ll deal with.
Air-dry clay is amazing because it cures at room temperature. No kiln, no oven, just patience. That’s why crafters and artists love it for sculptures, decorative items, and pottery projects.
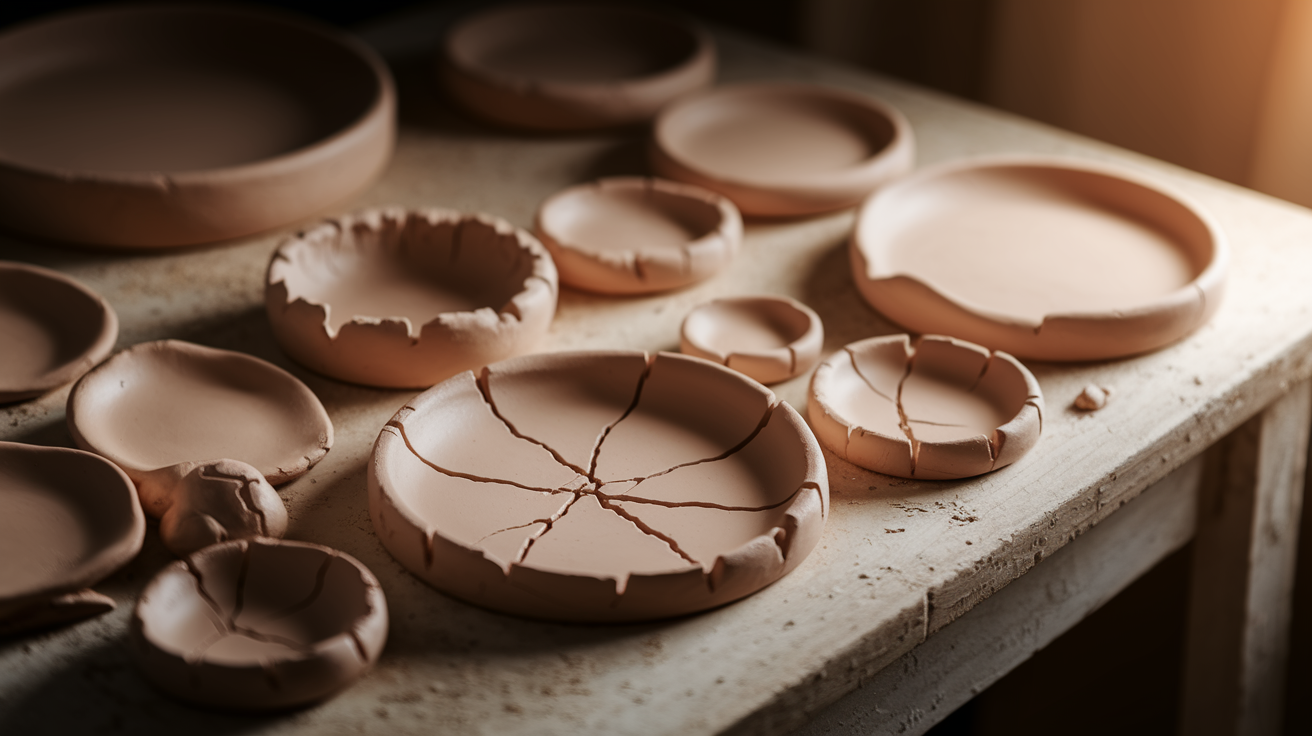
But here’s the problem. Cracks can ruin hours of careful work in minutes. They weaken your piece and make it look messy.
I learned the hard way through ruined projects and wasted clay. Now I’m sharing everything I wish someone told me from the start. When you master these techniques, your projects will stay strong and beautiful through the entire drying process.
Understanding Why Air Dry Clay Cracks
Identifying the root causes of cracking helps you take preventive measures to protect your clay projects from damage.
Causes of Cracking
To effectively prevent cracks, it’s crucial to understand what causes them in the first place.
Several factors contribute to this common problem, and recognizing these triggers will help you avoid them in your future projects.
Drying too fast: is one of the primary culprits. When air dry clay loses moisture rapidly, the surface contracts faster than the interior, creating tension that results in splits and fissures. This often occurs when pieces are placed in direct sunlight, near heat sources, or in areas with strong air circulation.
Uneven thickness: creates stress points within your clay piece. Thick sections retain moisture longer than thin areas, causing different parts to dry at varying rates. This inconsistent drying process leads to warping and cracking as the clay attempts to adjust to these competing forces.
Improper mixing or kneading: can leave air bubbles trapped within the clay or create inconsistent texture. These weak spots become vulnerable areas where cracks are likely to form during the drying process.
Using clay that is too old or dry: presents challenges from the start. Aged clay may have already begun losing its plasticity and binding properties, making it more prone to splitting even with careful handling.
Environmental factors: such as low humidity and fluctuating temperatures can accelerate moisture loss and create unstable drying conditions that promote crack formation.
Preparing the Clay Properly
Proper preparation forms the foundation of crack-free air dry clay projects and significantly impacts your final results.
Choosing the Right Clay
Freshness and quality considerations play a vital role in your project’s success. Fresh clay maintains optimal moisture content and plasticity, making it easier to work with and less prone to cracking.
When selecting clay, check the packaging date and choose the newest available option. Quality clay should feel smooth and pliable when squeezed gently through the packaging.
Avoid clay that feels hard or lumpy, as these characteristics indicate aging or poor storage conditions.
Store unopened clay in a cool, dry place away from direct sunlight. Once opened, keep clay in airtight containers or plastic bags to maintain moisture levels.
If your clay feels slightly dry, you can restore it by adding small amounts of water and allowing it to absorb gradually.
Kneading and Conditioning the Clay
The importance of kneading to avoid air bubbles cannot be overstated. Air pockets trapped within clay create weak points that often become crack initiation sites during drying.
Thorough kneading eliminates these bubbles while creating a uniform texture throughout your material.
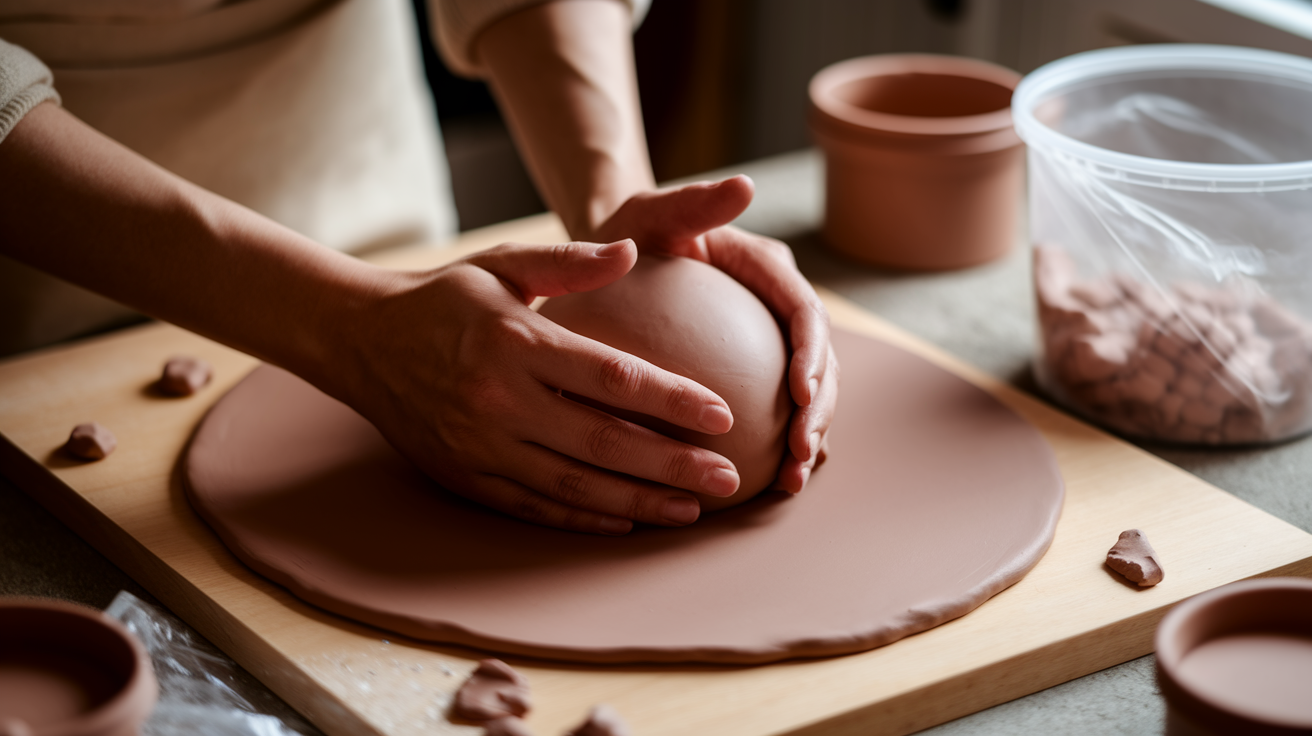
Tips for conditioning the clay before use include working the clay slowly and methodically. Start by rolling it into a ball, then press it flat with your palms.
Fold the clay over itself and repeat this process several times. Continue kneading until the clay feels smooth and consistent, typically requiring 5-10 minutes of work. Well-conditioned clay should stretch without tearing and maintain its shape when formed.
Techniques to Prevent Cracking During Creation
Implementing proper techniques during the creation process significantly reduces the likelihood of cracks forming in your finished piece.
Working with Even Thickness
Avoiding very thick or thin areas is essential for preventing stress-related cracking. Dramatic variations in thickness create uneven drying patterns that lead to structural problems.
Thick sections retain moisture much longer than thin areas, causing different parts of your piece to contract at different rates.
This creates internal tension that manifests as cracks along the boundaries between thick and thin sections.
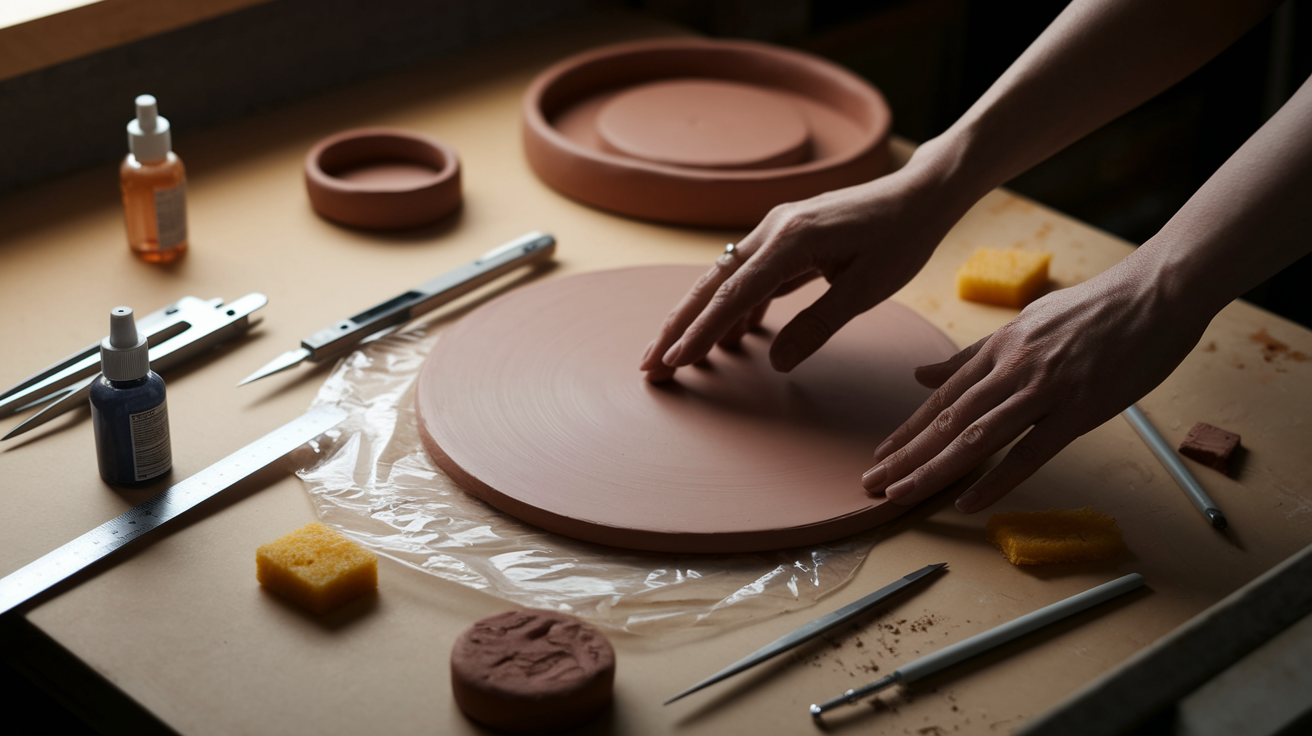
How to check for uniform thickness requires systematic inspection throughout your work process.
Use calipers or a ruler to measure various sections of your piece, ensuring consistency within a reasonable range.
For most projects, maintaining thickness variations within a quarter-inch helps promote even drying.
Run your hands over the surface to feel for irregularities, and use gentle pressure to smooth out any dramatic differences you detect.
Adding Moisture Gradually
Using water sparingly but effectively prevents oversaturation while maintaining workability. Too much water weakens the clay structure and can actually increase cracking risks.
Apply moisture using a damp sponge or spray bottle, adding small amounts at regular intervals rather than soaking the clay all at once.
How to keep the clay moist while working involves covering unused portions with damp cloths or plastic wrap.
Work in sections when creating larger pieces, keeping completed areas covered while you focus on new sections.
This prevents premature drying and maintains consistent moisture levels throughout your creation process.
Drying Process: How to Avoid Cracks
The drying phase is critical for maintaining the integrity of your air dry clay projects and requires careful attention to environmental conditions.
Drying Slowly and Evenly
Ideal drying environments should maintain room temperature between 65-75°F with humidity levels around 40-60%.
Avoid placing pieces near heating vents, air conditioners, or windows with direct sunlight, as these create uneven temperature zones that cause irregular drying patterns.
Consistent air circulation helps, but avoid strong drafts or fans that accelerate the process too quickly.
To cover or wrap pieces and slow drying, loosely drape damp cloths over your work without letting the fabric touch the clay directly.
Plastic wrap can create a controlled environment, but leave small openings to prevent complete moisture retention.
For thick pieces, cover only portions at a time, allowing gradual exposure to air as outer layers firm up.
Supporting Large or Complex Pieces
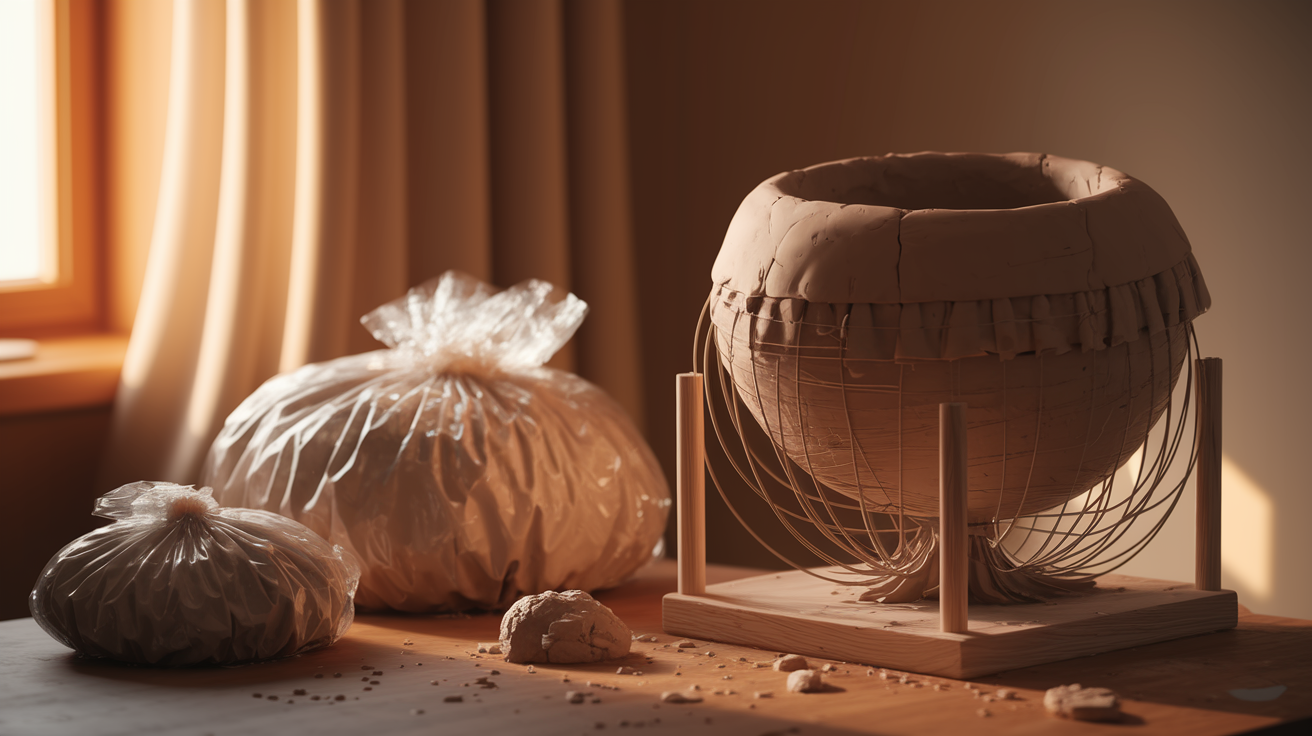
Use armatures or supports for substantial projects that might sag during drying.
Wire frames, foam cores, or wooden structures provide internal stability while the clay maintains its shape.
Position supports strategically to distribute weight evenly and prevent stress concentration in vulnerable areas.
To reinforce weak spots, identify potential problem areas early.
Add extra clay to thin sections, smooth joints carefully, and consider temporary external supports for overhanging elements until the clay reaches sufficient strength.
Repairing Cracks Before and After Drying
Even with careful prep, cracks can still happen. But you can fix them.
While clay is still workable: Mix small amounts of clay with water to make a paste called slip. Apply it directly into the crack with a brush or finger, working it deep. Smooth the area gently with a damp sponge. For deeper cracks, apply slip in thin layers.
After your piece dries: Sand the cracked area with fine-grit sandpaper first. Fill larger cracks with wood filler or modeling paste slightly above the surface. Once dry, sand smooth and repaint with acrylics to match your original finish.
Tips and Tricks from Experts
Storing clay properly to maintain moisture
- Keep unopened packages in cool, dry locations away from direct sunlight and extreme temperatures
- Transfer opened clay to airtight containers or heavy-duty plastic bags, removing excess air before sealing
- Add a slightly damp paper towel to containers if clay feels dry, but avoid oversaturating the material
- Check stored clay regularly and replace damp towels as needed to maintain consistent moisture levels
Using sealers or varnishes after drying
- Apply thin, even coats of acrylic sealer or polyurethane varnish once your piece has completely dried
- Allow each coat to cure fully before adding additional layers for maximum protection
- This finishing step protects your work and enhances appearance and durability over time
Avoiding sudden temperature changes
- Keep your workspace at a consistent temperature throughout the entire creative process
- Avoid moving pieces between dramatically different environments during creation and drying
- Allow finished pieces to acclimate slowly to new environments rather than exposing them to immediate temperature variations
- Gradual transitions help prevent thermal shock that can cause cracking even in well-prepared clay
Conclusion
Preventing cracks in air dry clay comes down to a few key habits. Start with fresh clay and keep your thickness even while working.
Control the drying environment by avoiding rapid temperature changes. Consistent humidity makes a huge difference.
When cracks appear, fix them right away using the right repair techniques.
Success comes through practice. Each project teaches you something new. Don’t get discouraged by setbacks. Even experienced artists deal with cracking.
With these prevention methods, you can focus on the creative fun instead of worrying about problems.
Frequently Asked Questions
What causes air-dry clay to crack during drying?
Air dry clay cracks when it loses moisture too quickly or unevenly, creating internal stress. Factors like direct sunlight, heat sources, uneven thickness, and low humidity accelerate this process and increase cracking risk.
How long should I let air-dry clay dry completely?
Most air dry clay pieces need 24-48 hours to dry completely, depending on thickness and environmental conditions. Thicker pieces may require several days, so be patient and allow adequate time for thorough drying.
Can I repair cracks that appear in my finished piece?
Yes, small cracks can be repaired using slip (clay mixed with water) while the piece is still soft. For dried pieces, use wood filler or modeling paste, then sand smooth and repaint the area.
What’s the best environment for drying air dry clay?
Room temperature between 65-75°F with moderate humidity (40-60%) provides ideal drying conditions. Avoid direct sunlight, heating vents, and areas with strong air currents that cause rapid moisture loss.
How do I keep clay from drying out while I’m working on it?
Cover unused portions with damp cloths or plastic wrap while working on other sections. Keep a spray bottle nearby to lightly mist the clay if it starts feeling dry during extended work sessions.