

Want to add character to your home while saving space? Building a barn door is easier than you think.
This guide shows you how to build a barn door from scratch. You’ll learn which wood works best, what tools you need, how to assemble the door, and how to hang it properly.
I’ll help you avoid the mistakes that waste time and money. No more doors that don’t slide smoothly or hardware that doesn’t fit.
I’ve built barn doors for different rooms, learning what works through real experience.
You don’t need fancy skills or expensive tools. Just follow the steps and you’ll create something you’re proud to show off.
Your new barn door will look professional and work perfectly.
What Is a Barn Door?
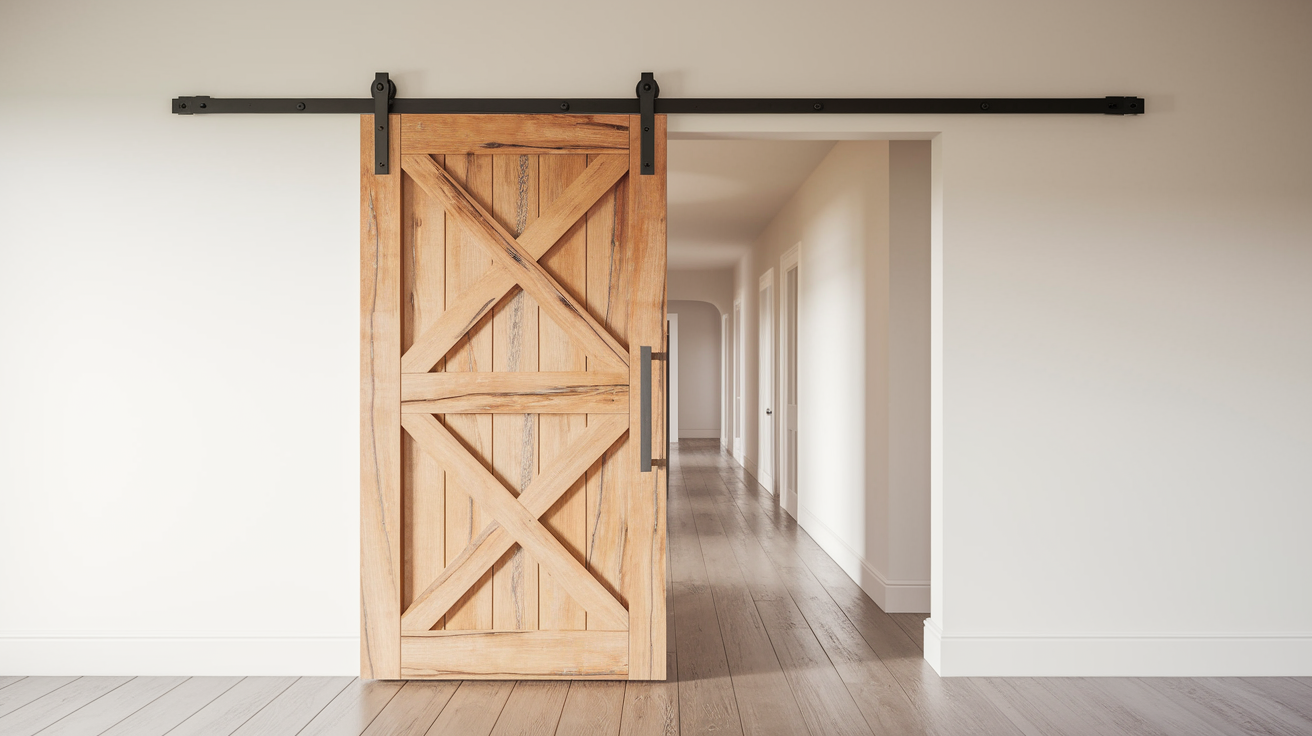
A barn door is a sliding door that moves horizontally along a track instead of swinging open like regular doors.
Originally used on farms, these doors are now popular in homes for their space-saving design and rustic style.
Key Features:
- Slides on a mounted track system
- Saves space – no swing clearance needed
- Made from wood, metal, or composite materials
- Adds decorative charm to any room
Common Uses:
- Bedroom and bathroom doors
- Closet entrances
- Room dividers
- Pantry access
Barn doors combine practical function with stylish design, making them perfect for small spaces or anyone wanting to add character to their home.
Materials and Tools Needed to Build a Barn Door
Having the right materials and tools is essential for building a sturdy, beautiful barn door. Let’s review what you’ll need to get started confidently.
Materials:
- Plywood (cut to door size)
- Reclaimed wood planks
- Wood glue
- Nails
- Barn door hardware kit
- Wall anchors and bolts
Tools:
- Table saw
- Chop saw
- Nail gun
- Drill with bits
- Tape measure
- Sanding block
- Safety goggles
Step-by-Step Guide to Build a Barn Door
I built my first barn door with basic tools and a lot of measuring twice.
I’ll walk you through exactly how I did it so you can avoid mistakes and feel confident at every step.
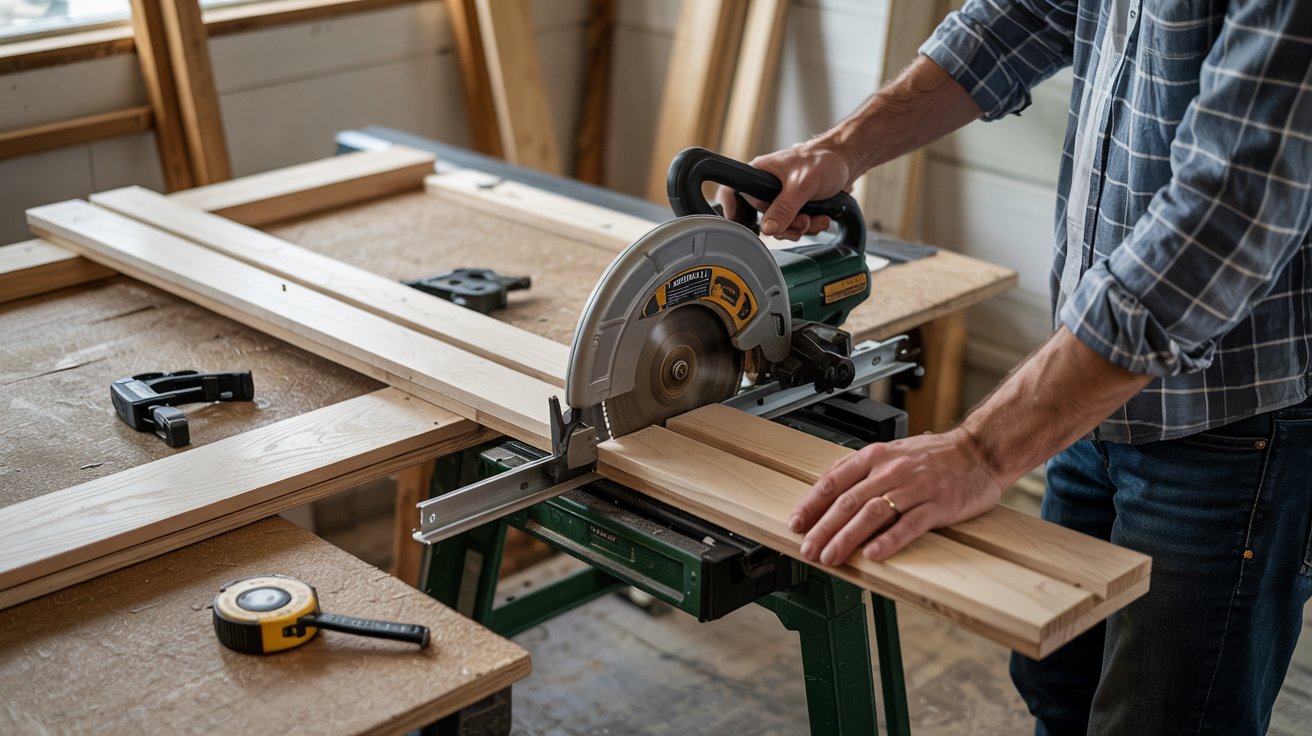
Step 1: Measure and Cut the Wood
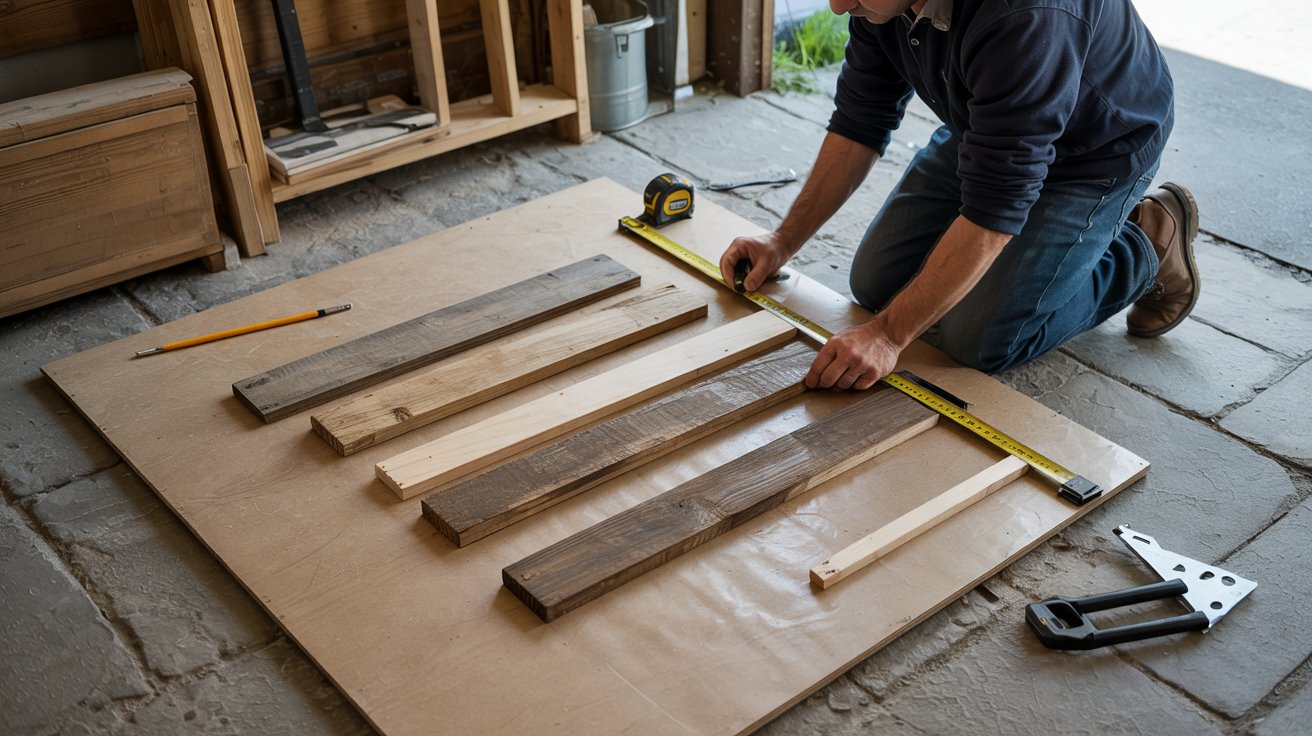
I start by measuring the door opening. I add about one to two inches on all sides so the door fully covers the space.
Next, I cut the plywood to the final door size. This plywood acts as the base.
Then I cut my reclaimed wood planks to 36 inches. I lay them out on the plywood first. I do not glue anything yet.
This is the moment to pause. I rearrange the boards until the pattern feels right to me. Once I like how it looks, I move on.
Step 2: Attach the Wood Planks
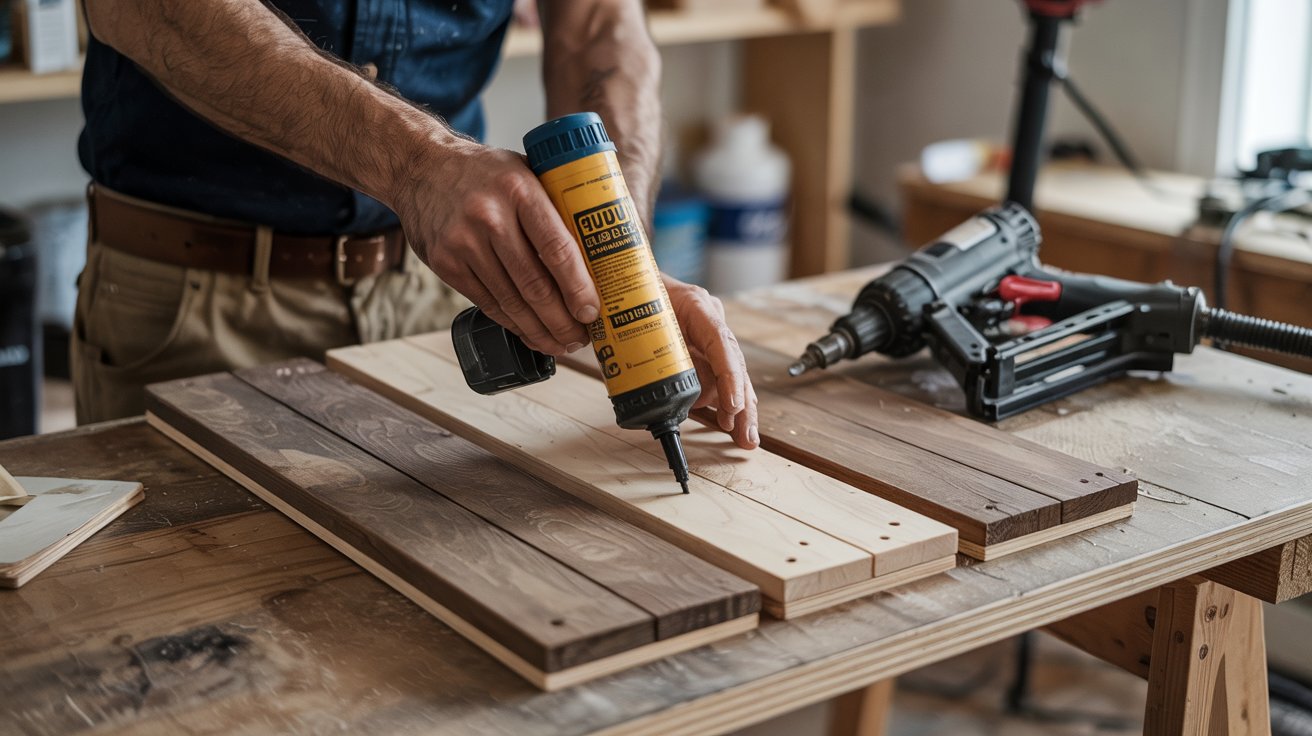
I apply wood glue to the back of each plank. I press it firmly onto the plywood.
Then I use a nail gun to secure each plank in place. I work from one side to the other. I check often to make sure the boards stay straight.
If something looks off, I fix it right away. Small errors grow fast if ignored.
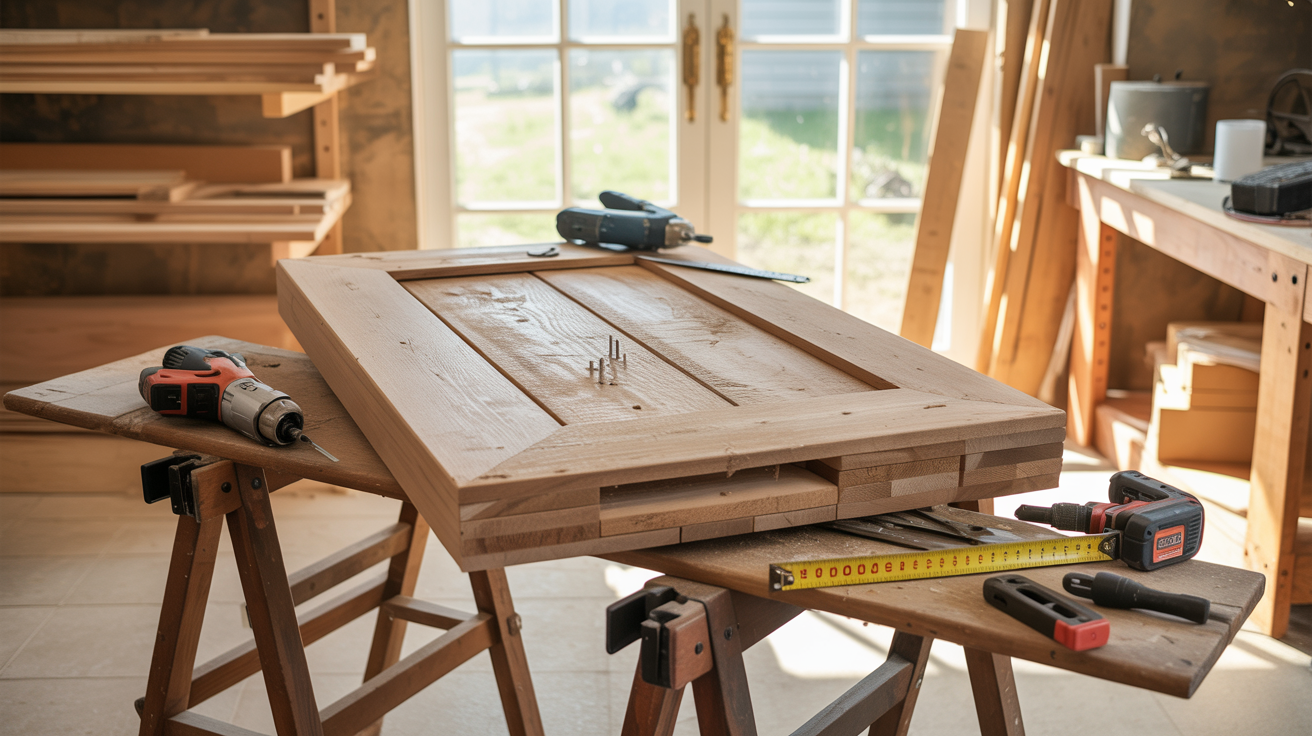
Step 3: Cut and Add Trim
Now I cut trim pieces that are about two inches wide. I use a table saw for this.
I measure the full height and width of the door. Then I cut the trim with a chop saw. I dry-fit the trim first. This step matters more than it sounds.
Once it fits well, I glue and nail the trim around the edges. This frames the door and hides rough ends.
Step 4: Make and Attach the Handle

I like making my own handle from scrap wood. It keeps things simple and low cost.
I cut the handle shape and added small braces behind it for strength. Then I glue and nail it onto the door.
Before moving on, I grab the handle and give it a firm pull. If it moves, I add more support.
Step 5: Install the hardware on the door
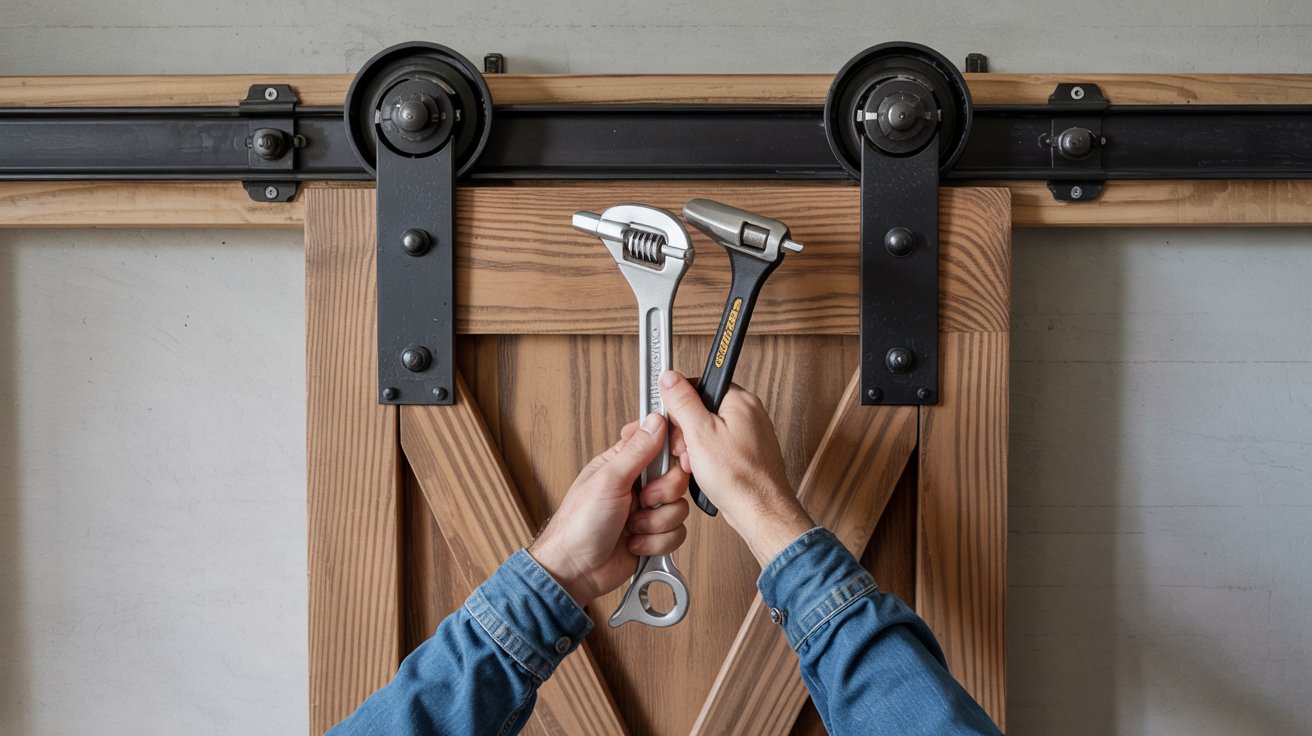
I choose hardware that can handle the weight of my door. This part is not worth guessing.
I follow the instructions that come with the kit. I take my time here. I double-check spacing and make sure everything is tight.
If the hardware sits crooked, the door will not slide right later.
Step 6: Mount the track on the wall
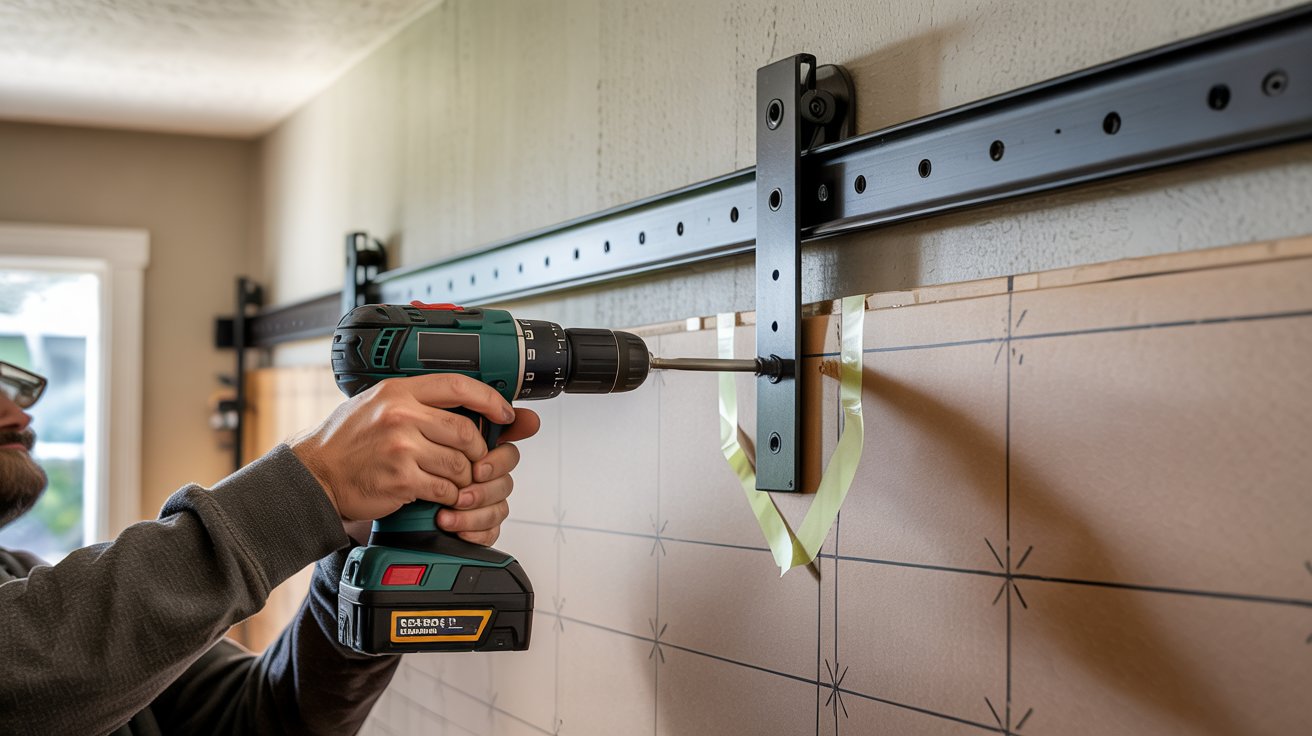
I mark where the track will go. I place it high enough so the door will not drag.
I use painter’s tape on my drill bit so I do not drill too deep. I make sure every bolt goes into a wall stud.
Drywall alone will not hold the weight. This step is critical.
Step 7: Hang the door and test it
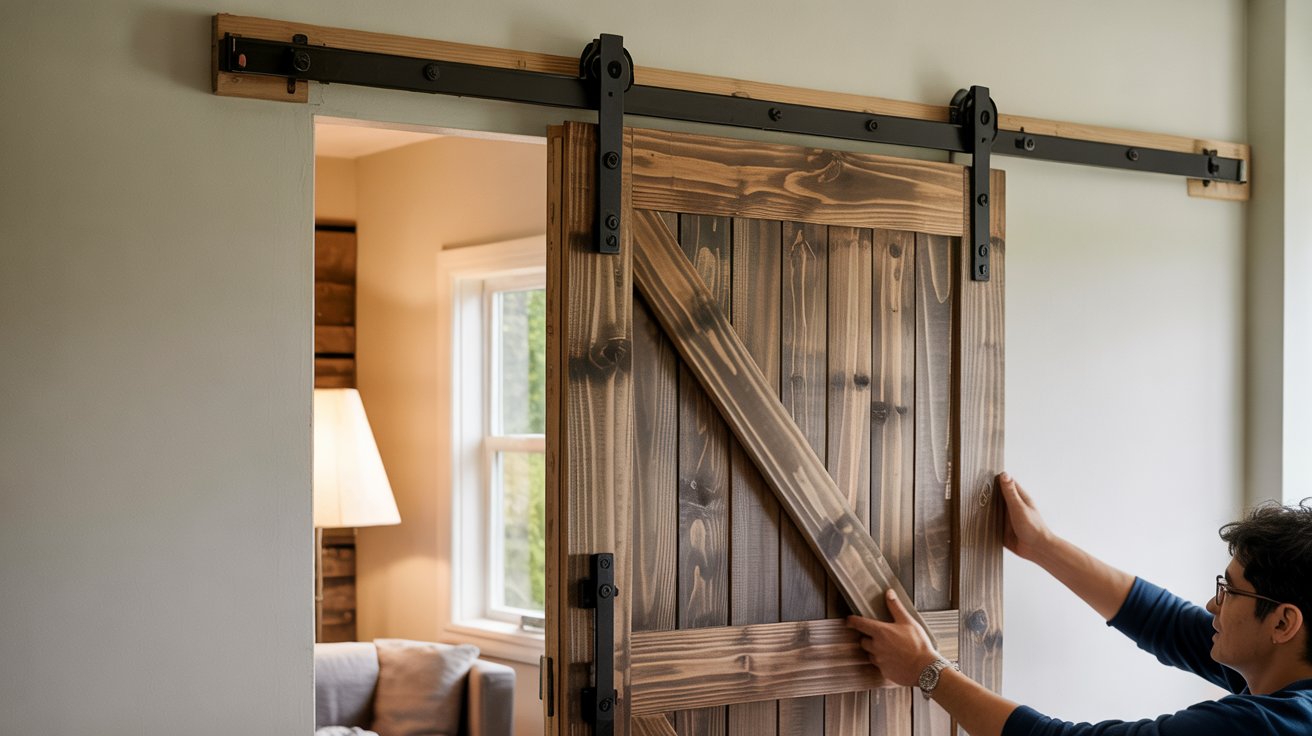
Now comes the fun part.
I lift the door onto the track and secure it in place. Then I slide it back and forth slowly. I listen for noise. I watch for sticking. If something feels wrong, I adjust it right away.
Once it moves smoothly, I install the floor guide. The door is done.
If you want to see the full process in action, I’ve shared a helpful video walkthrough here:
Bonus Tips and Troubleshooting
Building a barn door comes with learning curves.
Here are solutions to common problems and expert tricks that make the process smoother and your final result better.
| Issue/Tip | Solution |
|---|---|
| Door dragging on floor | Adjust track height or trim bottom of door |
| Uneven sliding | Check track level and tighten all bolts |
| Door won’t stay closed | Add a floor guide or door stop |
| Gaps around door | Measure twice before cutting; add weather stripping if needed |
| Hardware squeaking | Apply lubricant to rollers and track |
| Door too heavy | Use heavier-duty hardware rated for door weight |
| Wood splitting | Pre-drill holes before nailing |
| Uneven wood grain | Arrange planks before gluing for best look |
| Track sagging | Ensure bolts hit wall studs, not just drywall |
| Handle feels loose | Add extra braces and more nails for support |
Pro Tips:
- Always wear safety goggles
- Test fit everything before final assembly
- Sand rough edges for smooth finish
- Consider adding a soft-close mechanism for quiet operation
Conclusion
Building a barn door yourself is totally doable. You now have all the steps to make it happen.
This guide walked you through choosing materials, cutting wood, assembling pieces, and hanging your finished door. You learned how to avoid common problems that trip up beginners.
Your homemade barn door will save space and add character. It costs less than store-bought versions, and you get the pride of making something yourself.
I’ve found that the hardest part is just getting started. Once you begin, the process flows naturally.
Whether you’re fixing up a bedroom, bathroom, or closet, this door will work beautifully.
Ready to start building? Pick your wood, gather your tools, and create something amazing for your home today.
Frequently Asked Questions
How Much Does It Cost to Build a Barn Door?
Building a barn door typically costs $100-300, depending on wood choice and hardware quality. DIY saves significantly compared to buying pre-made doors.
What Size Should My Barn Door Be?
Your barn door should be 1-2 inches wider and taller than the door opening to ensure complete coverage and privacy when closed.
Can I Install a Barn Door Without Professional Help?
Yes! With basic tools and our step-by-step guide, most DIYers can successfully build and install a barn door in one weekend project.
What Type of Wood Works Best for Barn Doors?
Reclaimed wood, pine, and cedar work great for barn doors. Choose wood that matches your style and budget while being sturdy enough.
Do Barn Doors Provide Good Privacy and Sound Blocking?
Barn doors offer decent privacy but less sound blocking than traditional doors since they don’t seal completely around the frame like hinged doors.
How Much Space Do I Need For a Sliding Barn Door?
You need wall space equal to your door width plus 6 inches on one side for the door to slide completely open.