

I still remember the first time I tried drawing a dragon eye. It looked like a potato. But with a little practice, it started coming together, and that feeling was worth it.
This guide walks you through dragon eye drawing step by step. You will learn what materials to use, how to shade, and how to add scales and texture.
I have broken it down so anyone can follow along, even if you have never drawn before. No fluff. Just clear, practical steps that actually work.
Why Dragon Eye Drawing is Great for Beginners
Dragon eye drawing is one of the best starting points in fantasy art. It is small enough to finish in one sitting but detailed enough to teach you something real.
You practice shading, color blending, and texture work all at once. These are skills every artist needs. Because a dragon eye is just one focused subject, you do not feel overwhelmed.
You can go slow, layer by layer, and actually see your progress. It also sparks creativity. There are no strict rules on color or style.
You are learning while having fun, and that is what makes it so worth trying.
Materials Needed for Dragon Eye Drawing
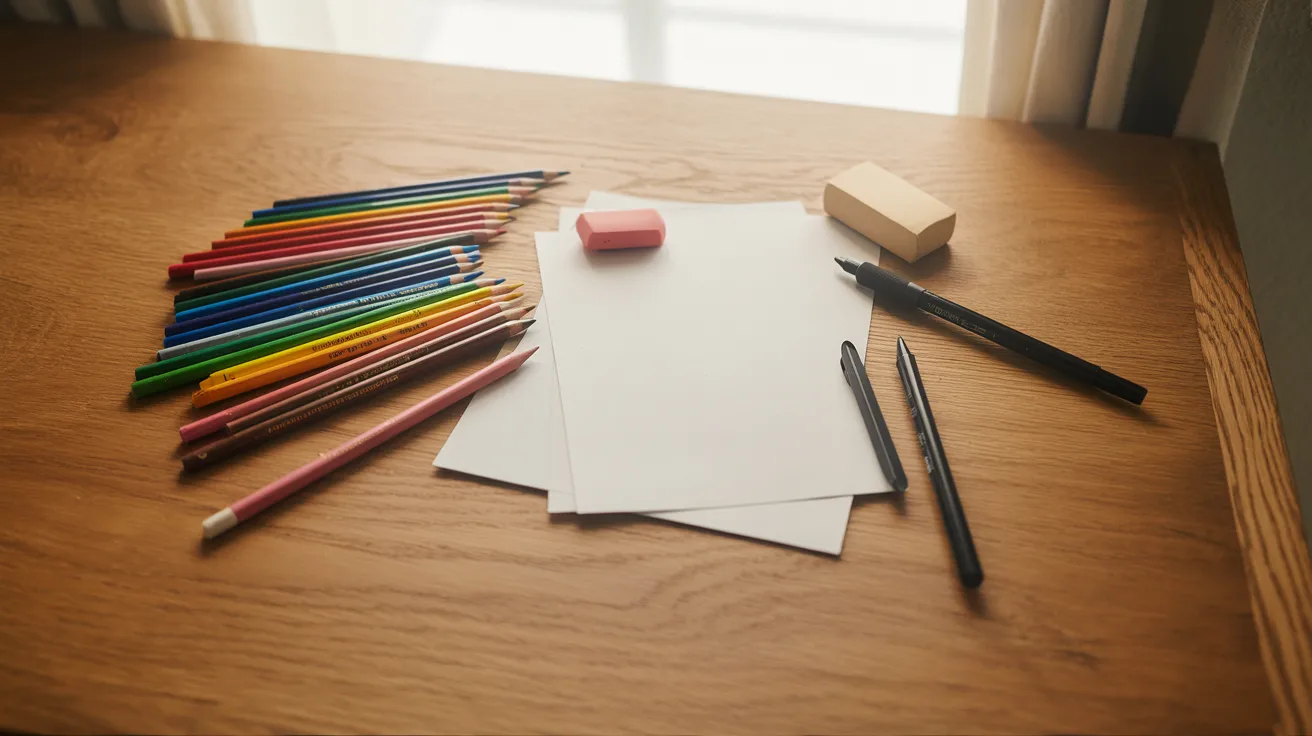
You do not need much to get started, just a few basic tools.
Basic Supplies
You do not need expensive tools. Start simple
- Drawing paper or sketch paper
- Pencil and eraser
- Colored pencils
- Black pen or fineliner (optional, for outlines)
Optional Tools
These are not required, but they help
- Blending stump or tissue for smoother color transitions
- Reference images of animal or dragon eyes (a quick search gives great results)
Using a reference image makes a big difference, especially for beginners. It gives your eye a sense of direction before you even start sketching.
Step-by-Step Dragon Eye Drawing for Beginners
Follow these simple steps to draw a dragon eye that actually looks good.
Step 1: Sketch the Basic Shape

Start light. Use a pencil and draw a large oval for the eye. Do not press hard. You will erase parts of this later.
Then add curved lines above and below the oval to form the upper and lower eyelids. Keep the lines smooth. The eyelids give the eye its expression.
Step 2: Add Inner Eye Structure
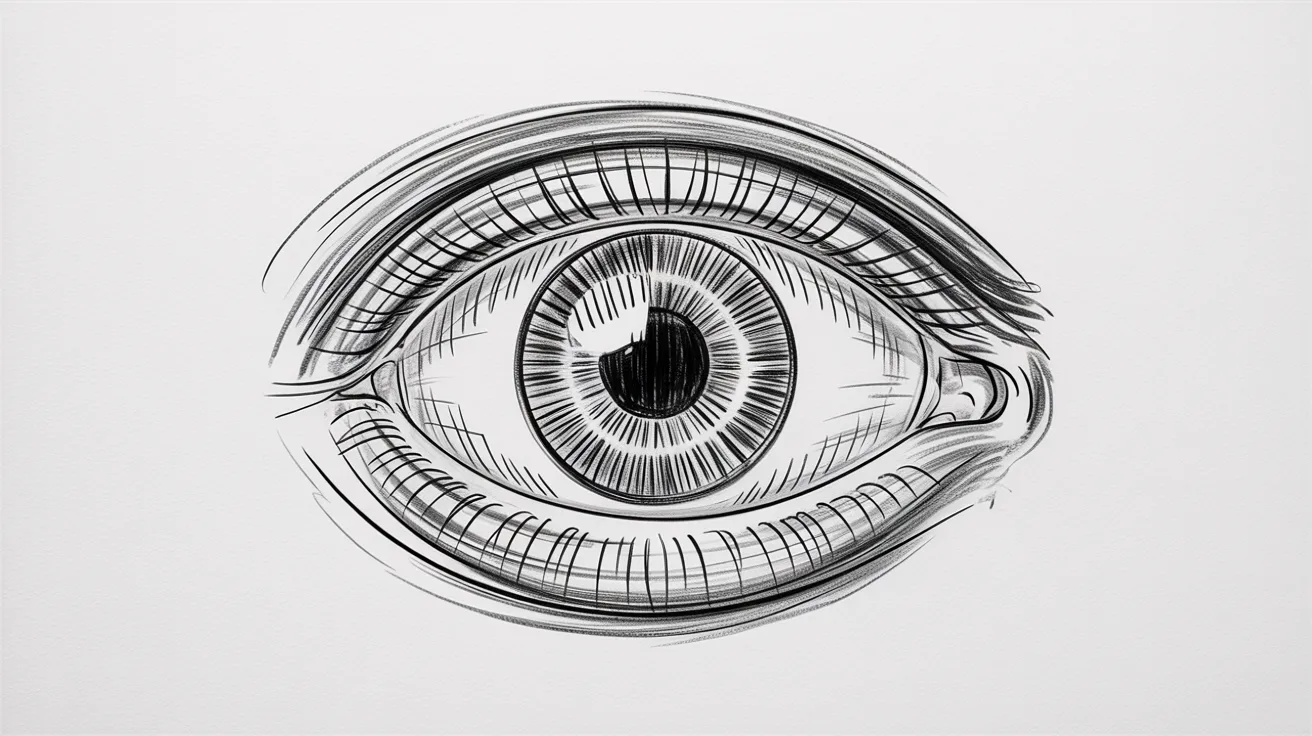
Inside the oval, draw the iris. This is the colored ring around the pupil.
For the pupil, go with a vertical slit. This looks more dragon-like than a round pupil. You can also try a diamond or star shape for a more fantasy feel.
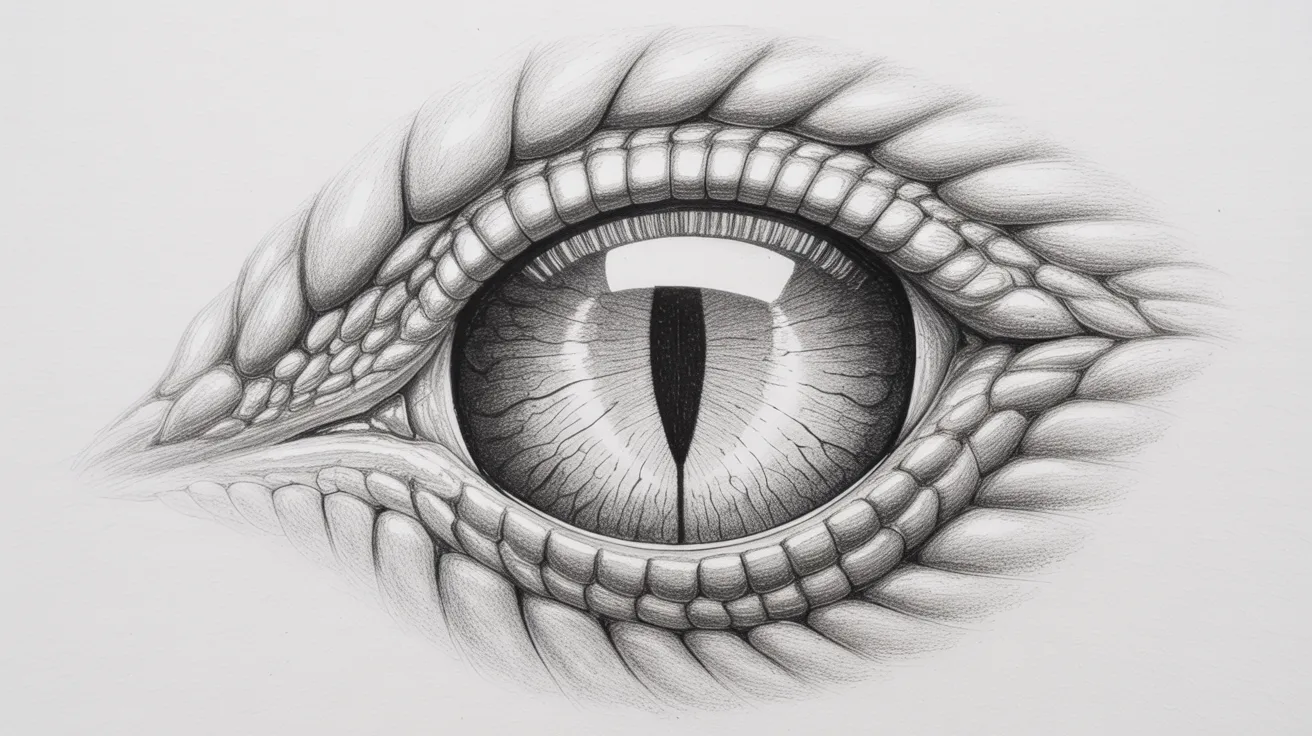
Step 3: Build Shading and Depth
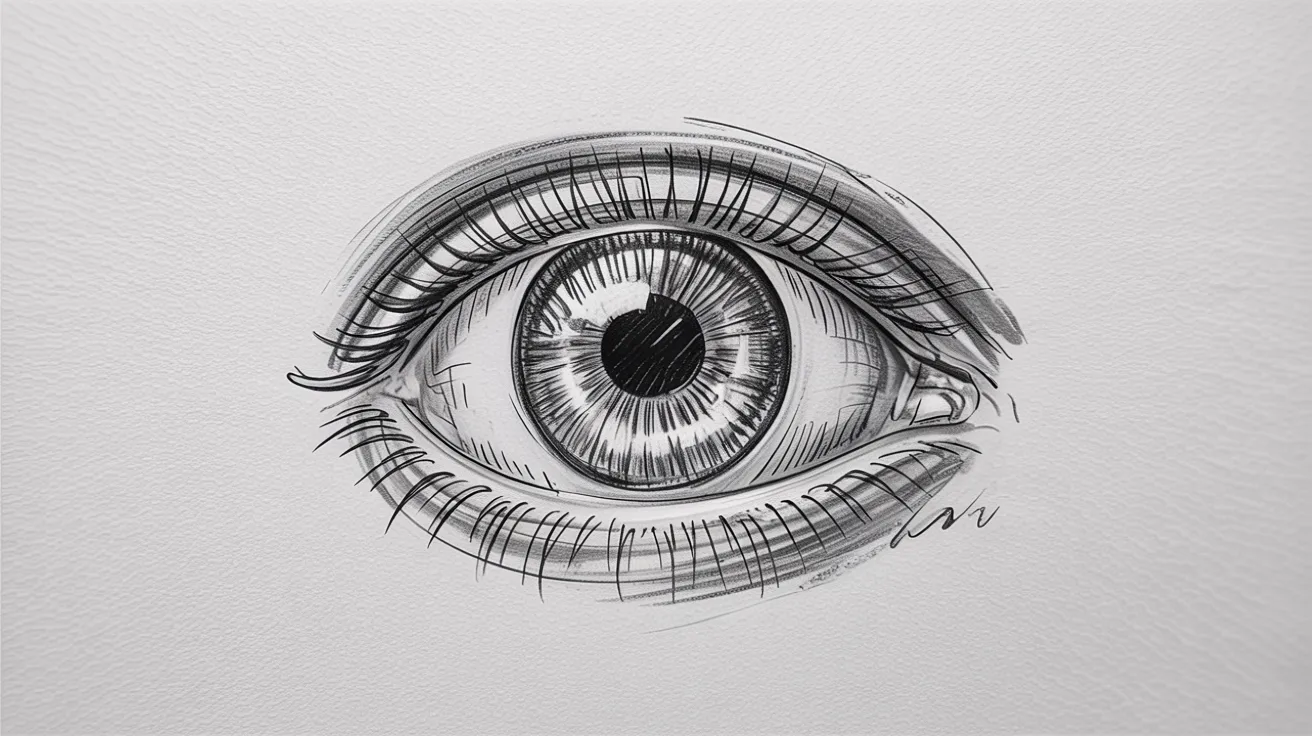
This is where the eye starts to come alive.
Start with a light base color across the iris. Then slowly layer medium tones on top. Add darker shades near the edges and around the eyelids.
Go slow here. Build color in thin layers rather than pressing hard right away. This gives you more control and a smoother result.
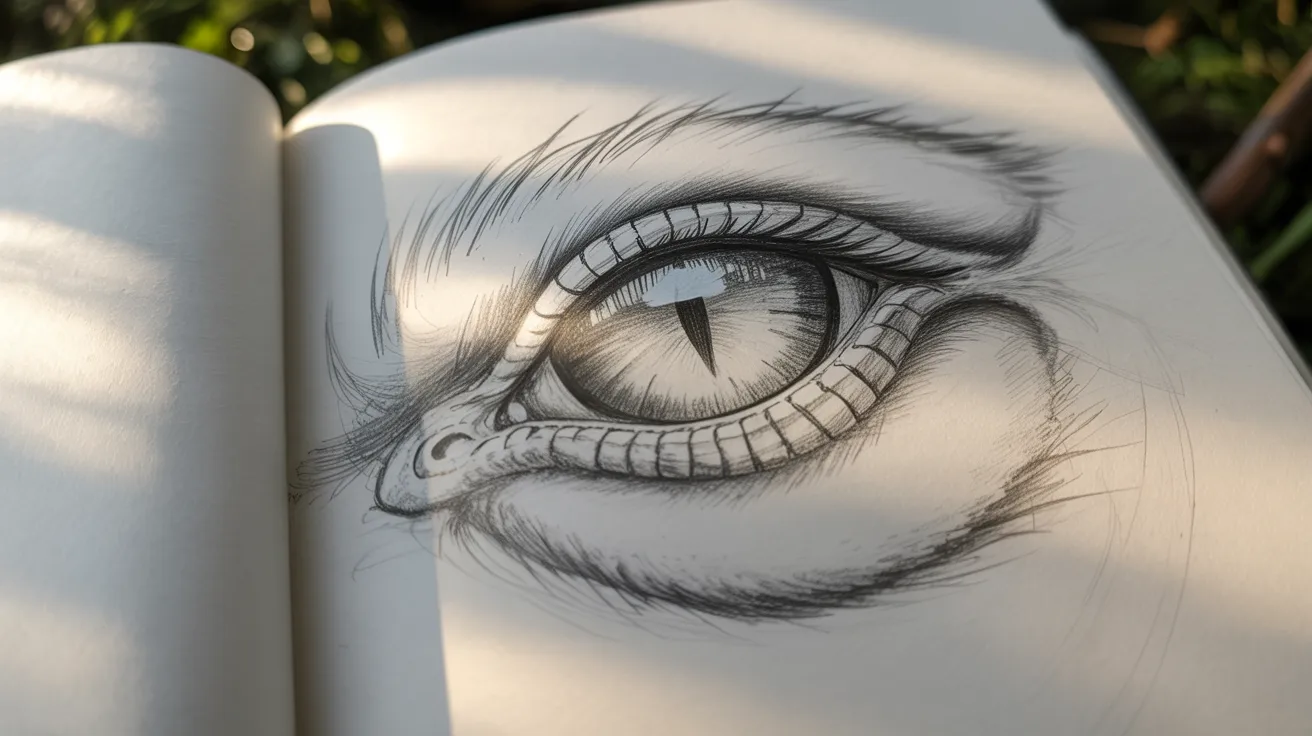
Step 4: Create Scales and Texture
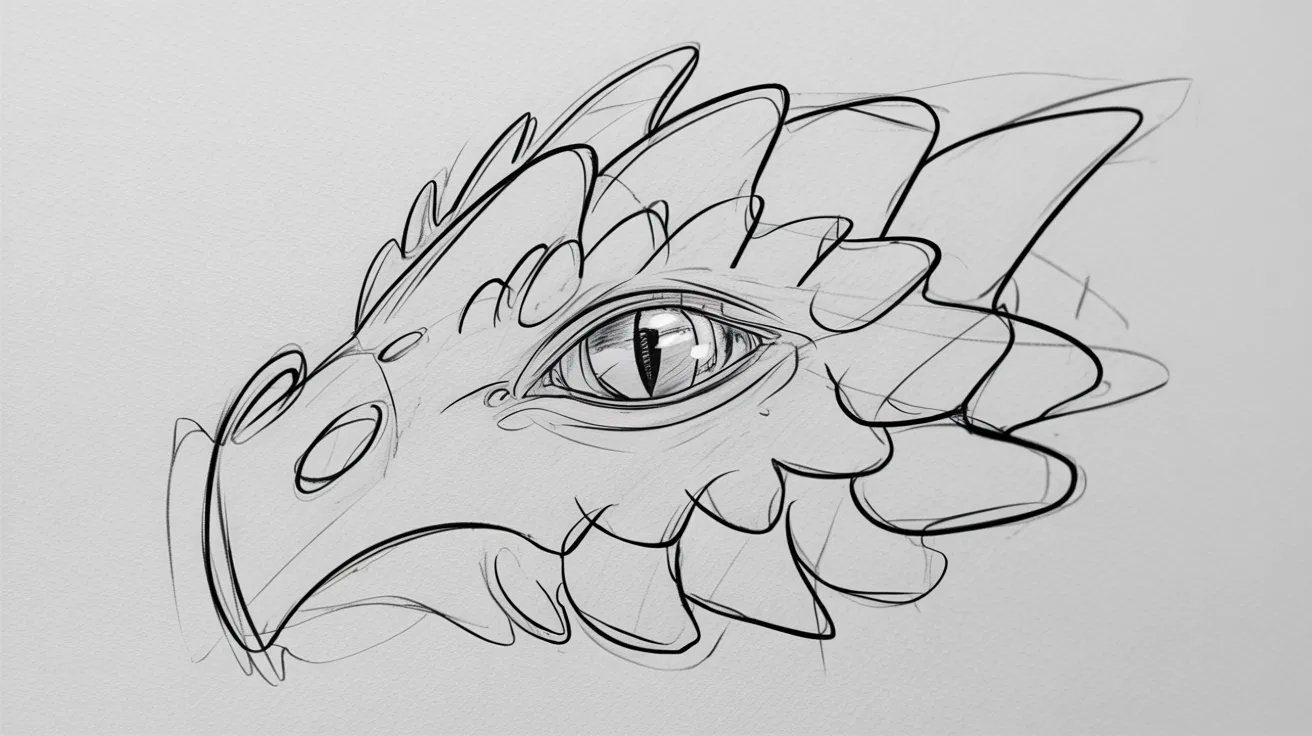
Around the eye, draw overlapping scale patterns. Think of fish scales but slightly sharper.
Vary the size of your scales. Larger ones sit further from the eye, smaller ones closer in. This layered look adds depth and makes the eye feel part of a living creature.
Step 5: Apply Blending Techniques
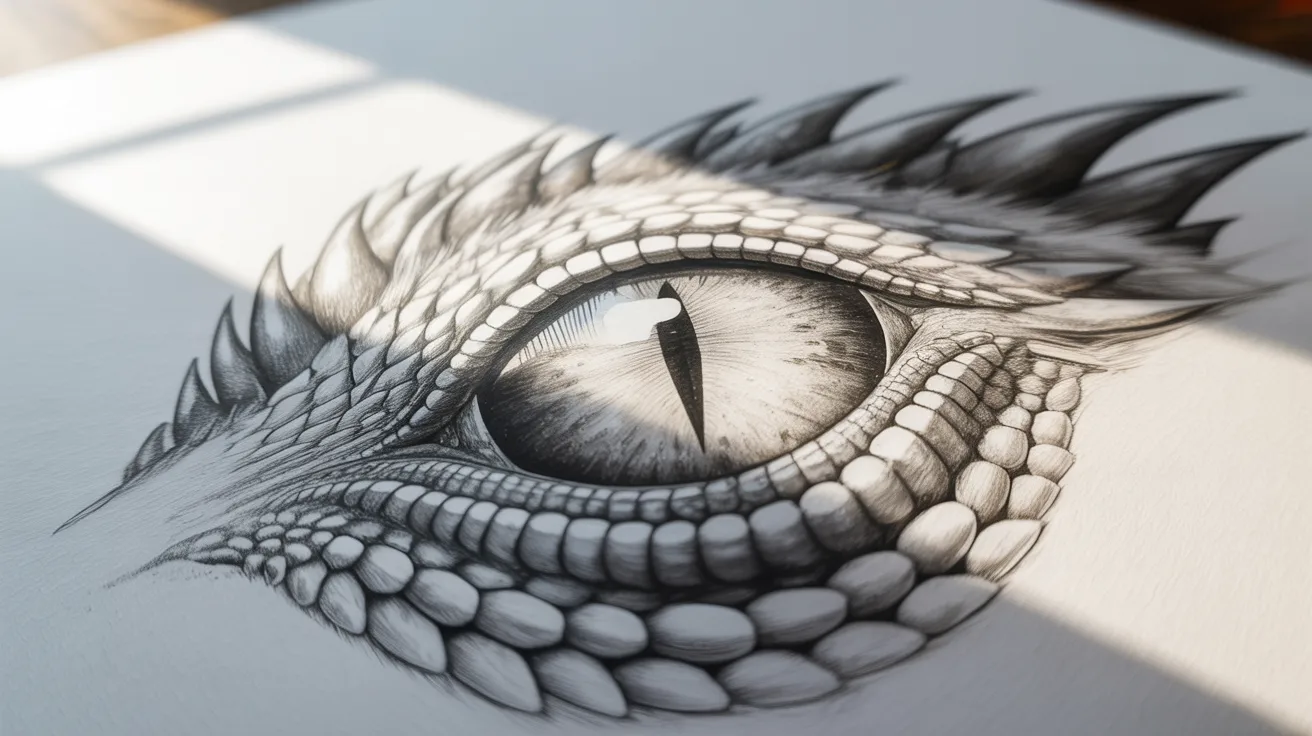
Use a blending stump or the tip of your finger to gently smooth out your colored pencil strokes. Work from light to dark.
Where two colors meet, blend them slowly so there is no harsh line. This is what separates a flat drawing from one that looks three-dimensional.
Step 6: Add Highlights and Finishing Details
Leave a small white spot near the top of the eye. This reflection is what makes the eye look glossy and real.
Once you are happy with the coloring, go over the outlines with a black pen or a sharp dark pencil. This brings the whole drawing together and makes the details pop.
Benefits of Learning Dragon Eye Drawing
Real skills that grow with you, far beyond this one drawing.
Shading and Color Blending
Drawing a dragon eye teaches you how light and shadow work together. Layering colored pencils trains your eye to mix tones and create smooth transitions without a palette.
Understanding Light and Depth
Every shadow you add and every highlight you place builds your sense of depth. You start to see how light hits a surface, and that changes how you approach every future drawing.
Patience and Layering Technique
Good art is built slowly. This project pushes you to work in layers, one step at a time. That habit of slowing down and building carefully carries into all your artwork.
Creativity and Confidence
There is no single right way to color a dragon eye. You make the choices. And when you finish a detailed piece like this, that sense of accomplishment pushes you to keep going and try something harder next time.
Tips for Better Dragon Eye Artwork
Small habits that make a big difference in your final result.
- Start light. Always sketch with a soft pencil first. Heavy lines early on are hard to fix.
- Layer your colors. Do not try to get full color in one stroke. Build it up slowly.
- Use references. Look at real animal eyes, like cats or reptiles. They help a lot with iris detail and scale placement.
- Try bold color choices. Red, teal, orange, silver. Dragon eyes do not need to look realistic, so have fun with it.
- Blend often. Every few layers, blend your strokes. It keeps the color looking smooth and consistent.
- Do not rush the highlights. That small white reflection at the end does more work than you think. Do not skip it.
Conclusion
Dragon eye drawing is one of those projects that surprises you. You start thinking it will be too hard, and then something clicks. I felt that too, and it is a great feeling.
If you give this a try, I would love to know how it goes. Drop a comment below and share your experience. Did you go realistic or full fantasy with your colors? Either way, you did something creative today, and that counts.
Share this post with a friend who loves art. You might just influence them to pick up a pencil too.
Frequently Asked Questions
What pencils work best for dragon eye drawing?
Colored pencils with soft cores blend more smoothly. Brands like Prismacolor or Faber-Castell work well, but any decent set will do for beginners.
How long does it take to draw a dragon eye?
Most beginners finish in one to two hours. The more time you spend on blending and layering, the better the result looks.
Can I draw a dragon eye without colored pencils?
Yes. You can use graphite pencils for a black-and-white version. Focus on shading with light, medium, and dark tones to create depth.
Do I need drawing experience to try this?
No experience needed. This project is built for beginners. Starting with basic shapes and building up slowly makes it manageable for anyone.
What is the most important step in dragon eye drawing?
Shading and blending matter the most. Getting the light and dark tones right is what makes the eye look real and three-dimensional.