

I remember sitting with a blank page, not knowing where to start. A simple candle drawing felt too basic, but that's exactly why it's perfect for beginners.
In this guide, I'll walk you through every step, from the basic shape to the flame. You don't need fancy tools or art school skills.
Just a pencil and some patience. We'll cover materials, step-by-step instructions, coloring tips, and common mistakes to avoid.
I've helped many beginners start their art practice, and candles are always my first recommendation.
Understanding the Basics of Candle Shapes
Before picking up your pencil, understanding the simple structure of a candle makes the whole process easier.
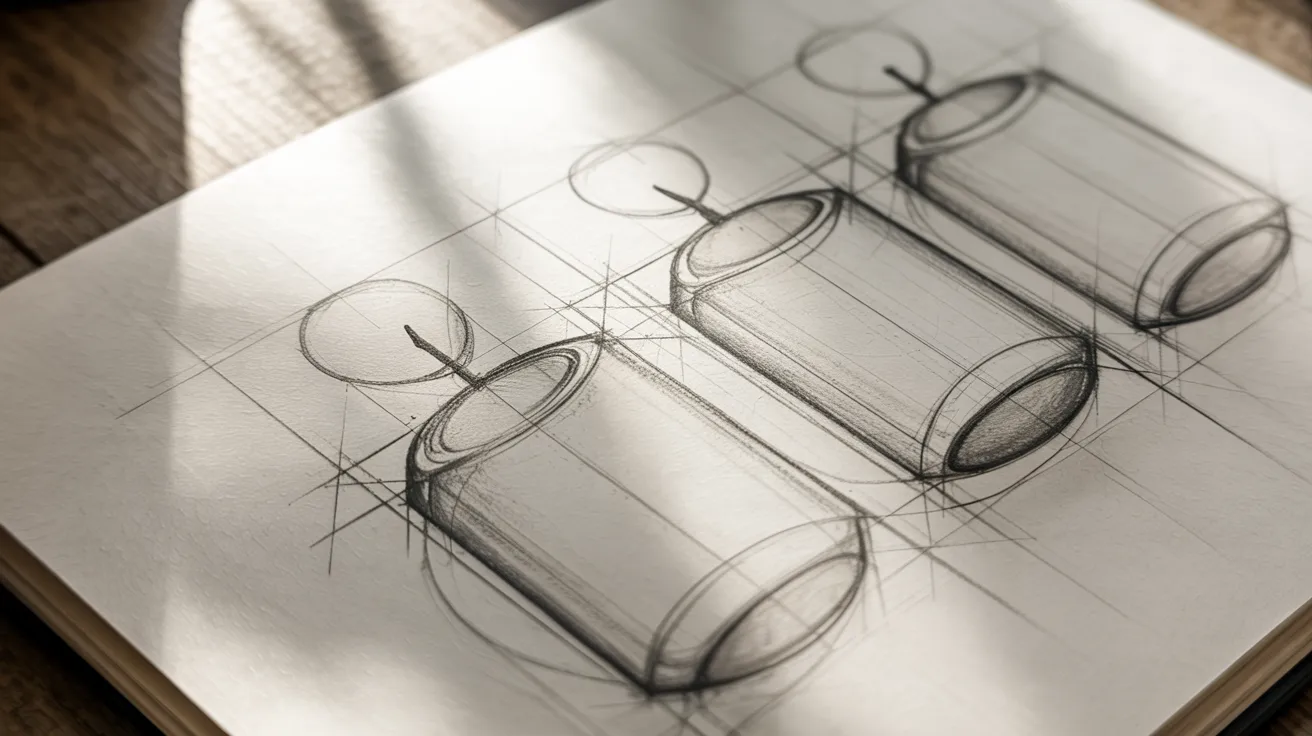
A candle is mostly a rectangle or cylinder. That's it. No complex curves or hard angles. This makes it one of the best shapes for beginners.
Proportions matter. A candle that's too wide looks like a block. Too thin, and it looks like a stick. A good ratio is roughly 1:3 in width to height.
The flame sits on top. It can be realistic or cartoon-style. Wax drips on the sides add character.
Get comfortable drawing simple ovals and rectangles first. Once those feel easy, the rest follows naturally.
Materials Needed for Candle Drawing
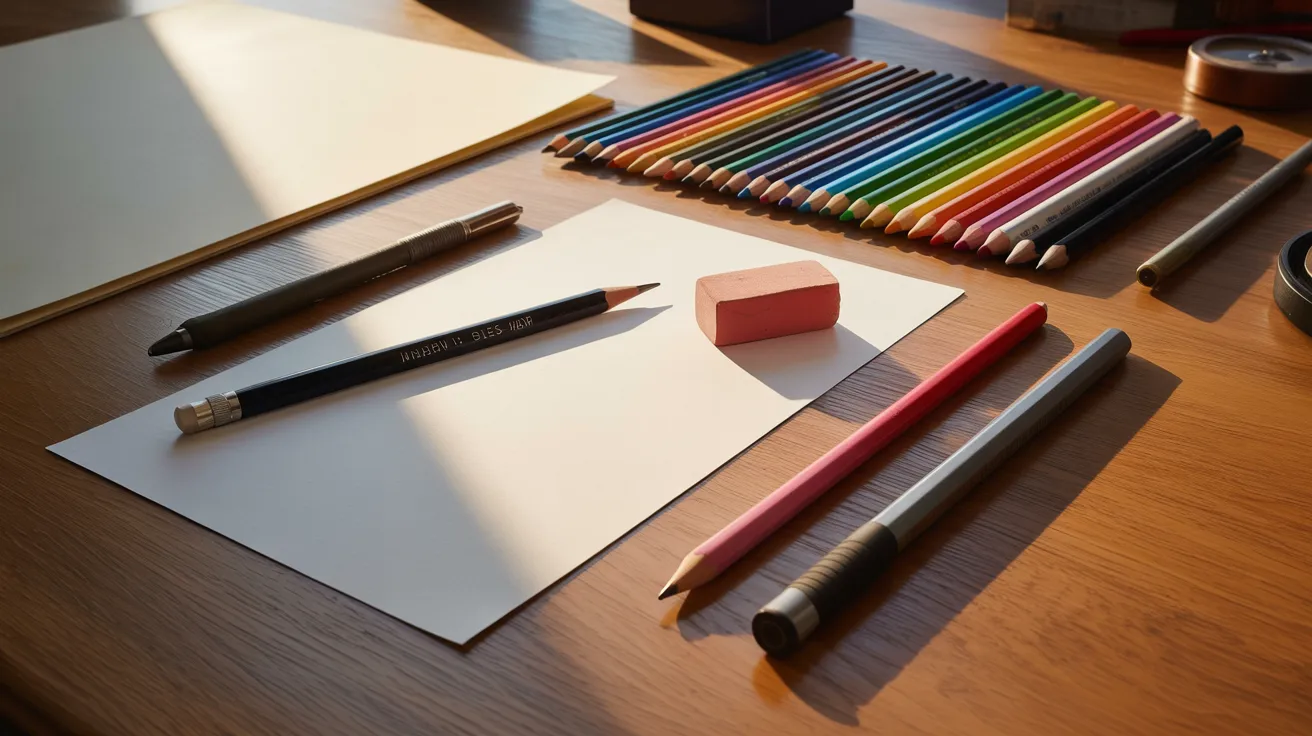
You don't need much. A few basic tools are all it takes to get started.
Basic tools:
- Pencil (HB or 2B works best for sketching)
- Eraser (a kneaded eraser is gentle on paper)
- Black pen or fine liner for outlining
- Crayons or colored pencils for adding color
Optional tools:
- Blending stump for smooth shading
- White gel pen for highlights on the flame
- Ruler for straight candle edges
Start simple. You can always add more tools later as you improve.
Step-by-Step Guide to Drawing a Candle
Follow these six simple steps to draw a clean, complete candle from scratch.
Step 1 – Draw the Basic Candle Shape

Start with a light pencil sketch. Draw a tall rectangle. Make the sides straight and the top flat. This is the body of your candle. Don't press too hard.
You'll erase some of these lines later. Keep the width moderate. Not too wide, not too narrow. A simple rectangle is all you need to begin.
Step 2 – Add the Candle Base or Holder
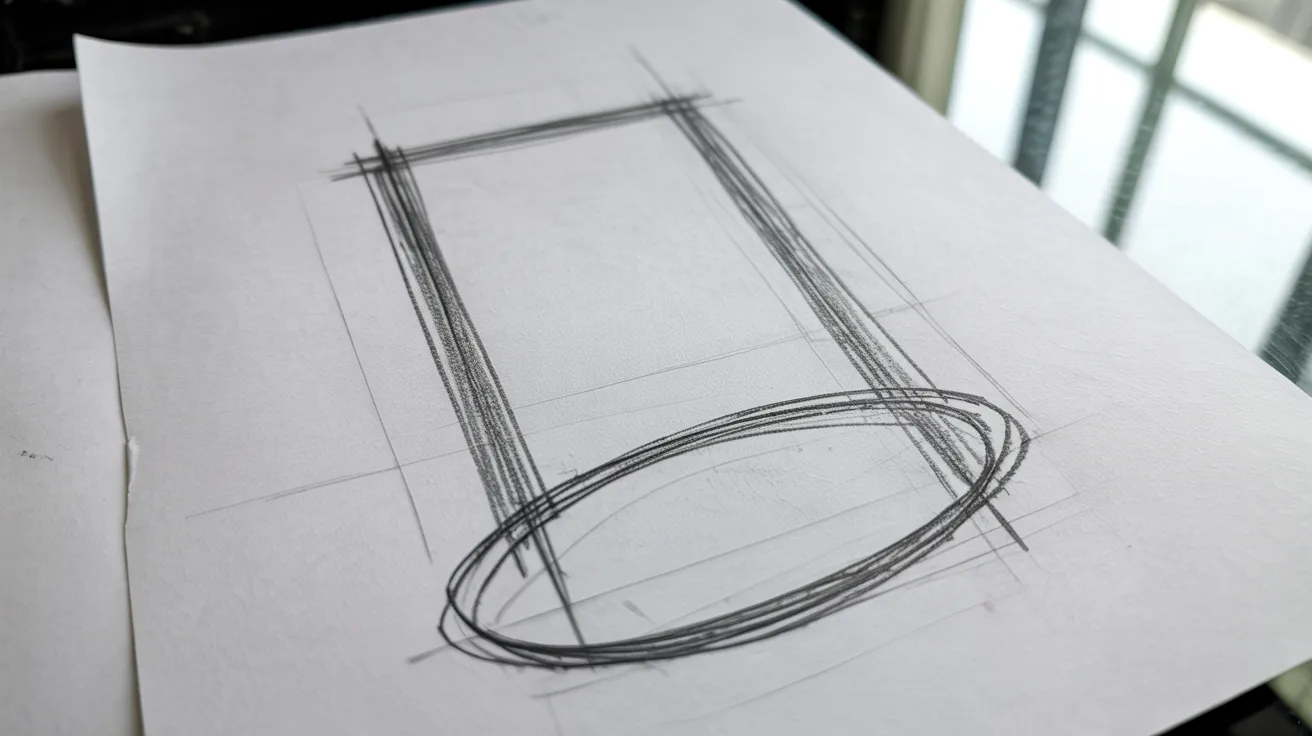
At the bottom of the rectangle, draw a wider, shorter shape. This acts as the candle holder or base. It can be a simple rounded dish or a flat oval.
A small platform under the candle makes it look more grounded and finished. This step only takes a few seconds but adds a lot to the overall look.
Step 3 – Draw the Wick
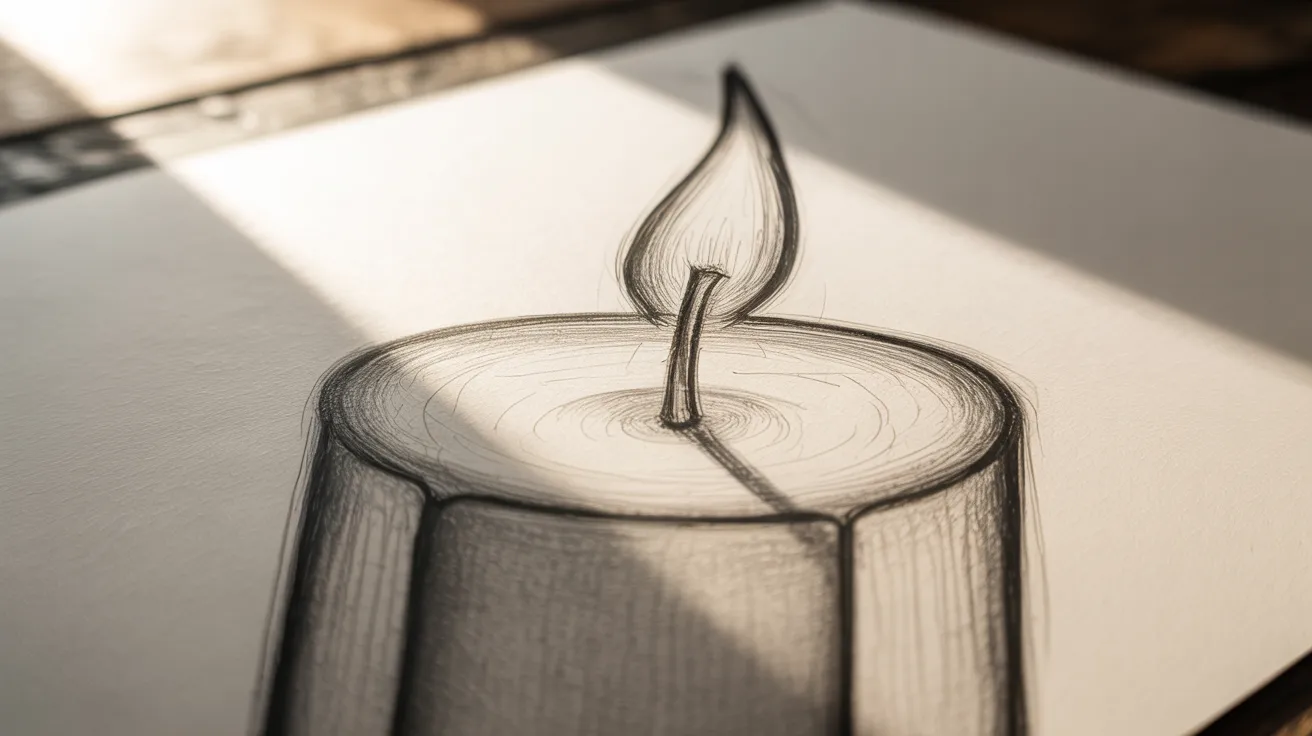
At the top center of the candle body, draw a short vertical line. This is the wick. Keep it thin and short. It should sit right at the middle of the top edge.
You can add a tiny curve at the tip to make it look like it has already been lit before. Small details like this matter.
Step 4 – Create the Flame
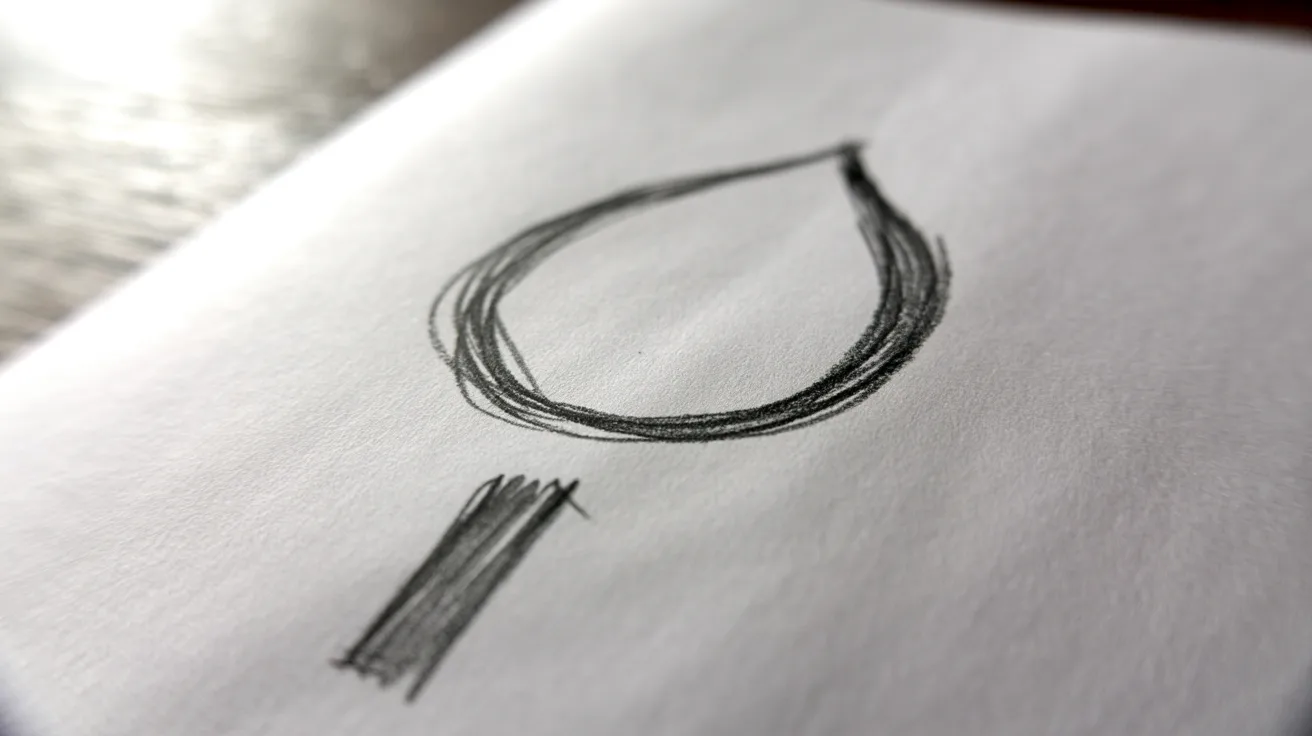
Above the wick, draw the flame. Start with a small teardrop shape. The bottom is slightly wider and the top comes to a soft point. For a cartoon look, make the flame rounder and bigger.
For a realistic look, make it taller and slightly bent to one side. Add a small inner flame shape inside using a different color later.
Step 5 – Add Wax Details and Drips
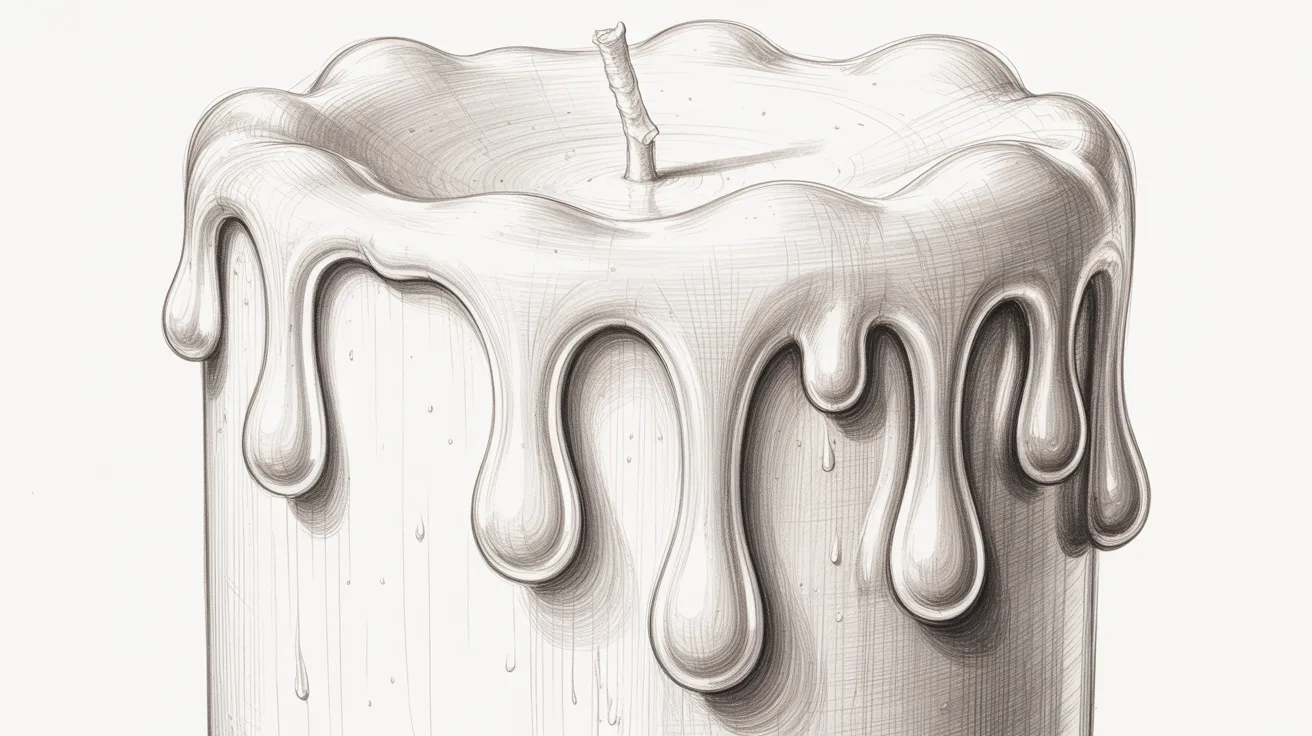
On the sides of the candle, draw a few curved lines coming down. These are wax drips. Make them uneven. Real wax drips are never perfectly straight.
A small pool at the top of the candle around the wick also adds a nice touch. You can also add a few horizontal curved lines across the body to show wax texture.
Step 6 – Final Outline and Cleanup
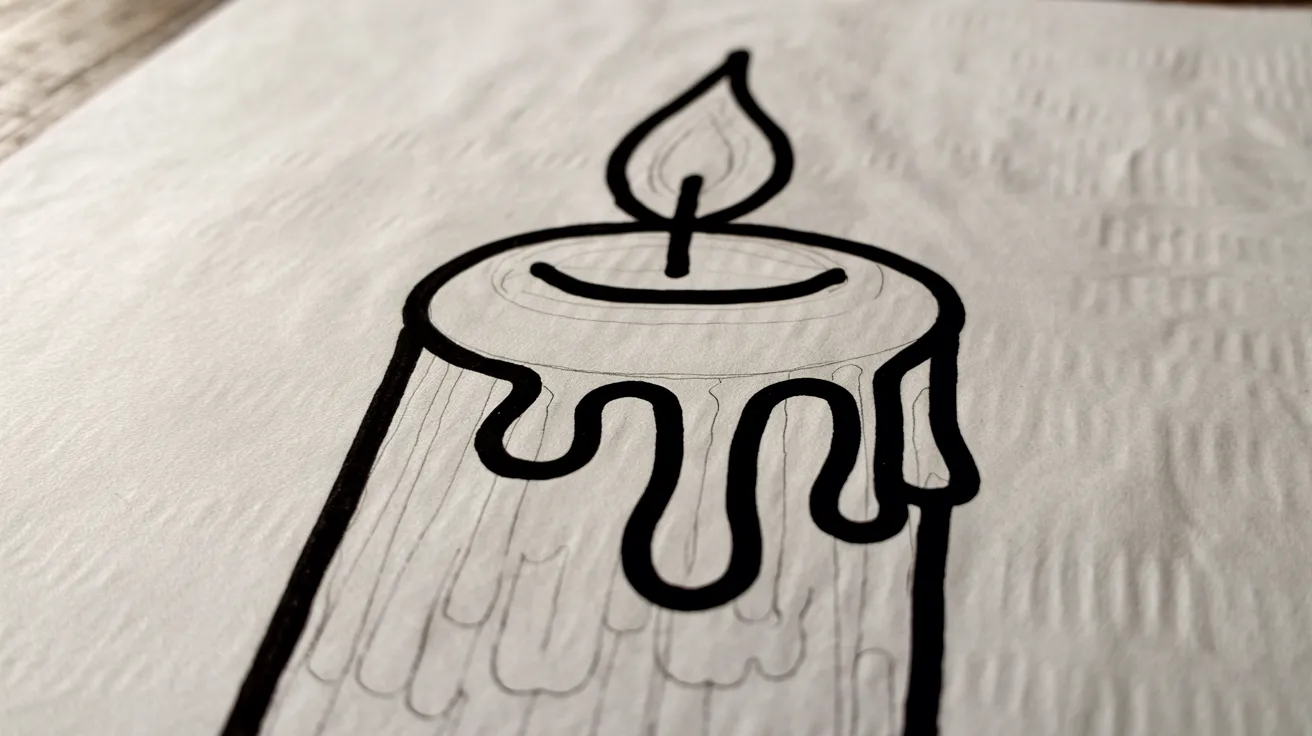
Go over your drawing with a black pen or fine liner. Trace only the lines you want to keep. Let it dry, then erase all the pencil marks underneath. Check the shape one more time.
Fix any uneven lines. Your candle outline is now ready for color. This step makes the whole drawing look neat and finished.
Coloring and Shading Your Candle Drawing
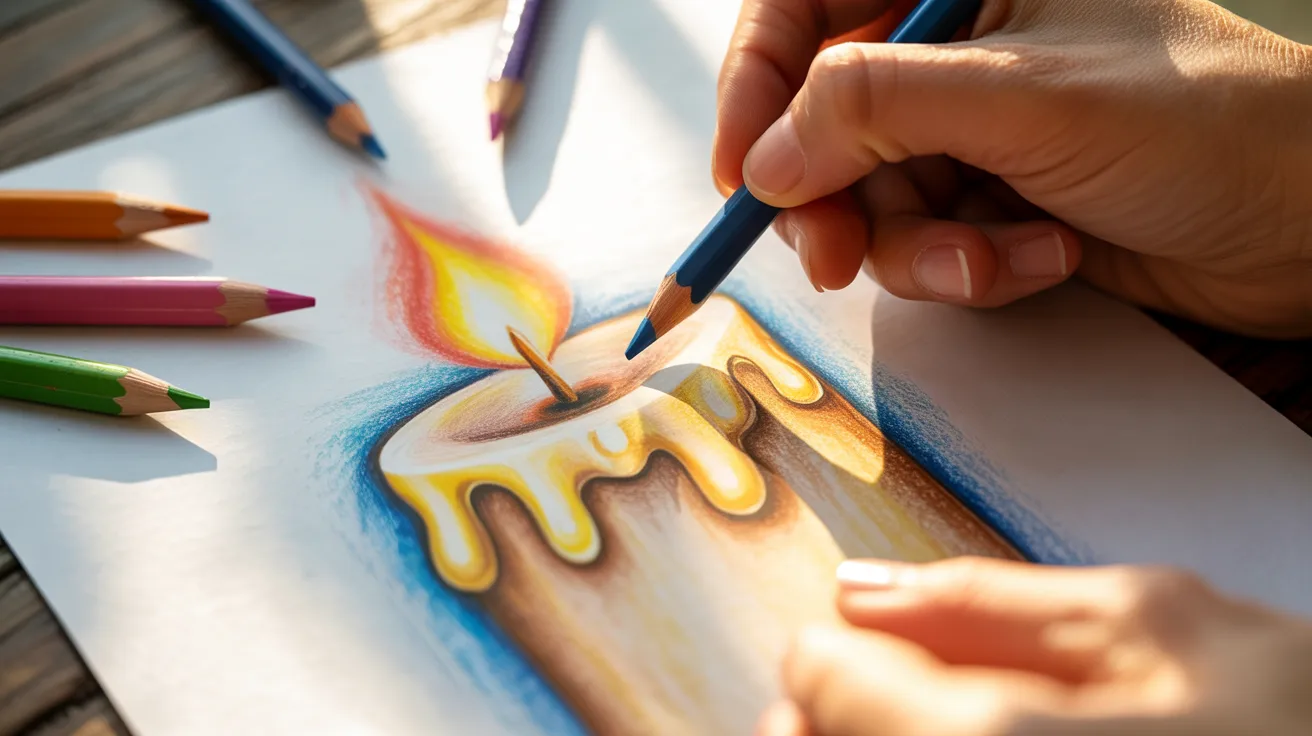
Color brings your candle to life. A few simple choices make a big difference.
Coloring the Flame
Use yellow at the base of the flame. Move to orange in the middle, then add a tiny bit of red at the tip. If you have a white gel pen, dot the center of the flame.
This creates a natural glow that looks warm and bright.
Coloring the Candle Body
Pick any color you like for the body. White, red, blue, and pastel shades all work well. Add a slightly darker version of the same color on one side.
This small step creates depth and makes the candle look three-dimensional.
Adding the Glow Effect and Shading
Around the flame, softly apply light yellow or warm orange on the paper. This gives the feeling of light spreading outward. Keep shading simple.
Pick one light source, leave the opposite side slightly darker. That contrast is all you need for a clean, finished look.
Tips for Better Candle Drawing
Small habits lead to much cleaner and more confident drawings over time.
- Start light. Always sketch with a light hand. It's easier to darken lines than to erase heavy ones.
- Keep shapes simple. A candle doesn't need extra detail to look good. Clean shapes work better than overcrowded ones.
- Practice flame styles. Try drawing five different flames on a spare sheet. Some tall, some short, some bent. This builds confidence fast.
- Focus on clean outlines. A messy outline makes the whole drawing look rough. Take your time when inking.
- Step back and look. After every step, hold your paper at arm's length. This helps you spot issues that are hard to see up close.
Conclusion
You did it. Drawing a simple candle drawing is one of those small wins that builds real confidence. I still remember my first one. It was crooked and the flame looked like a blob, but I was proud of it. That's how it starts.
Keep practicing. Try different sizes, colors, and flame shapes. Each one will look better than the last.
If this guide helped you, leave a comment below and share your drawing. Check out more beginner tutorials on the blog. I'd love to see what you create.
Frequently Asked Questions
What is the easiest way to start a simple candle drawing?
Start with a basic rectangle for the candle body. Add a wick and a simple teardrop flame on top. Keep lines light at first.
Do I need special art supplies to draw a candle?
No. A regular pencil, eraser, and black pen are enough. Crayons or colored pencils work well for adding color afterward.
How do I make the flame look realistic?
Draw the flame taller and slightly tilted. Add an inner shape in a lighter color and use a white highlight in the center for a glowing effect.
How do I add wax drips to my candle drawing?
Draw uneven curved lines flowing down the sides of the candle. Make them irregular in size. Add a small melted pool around the top of the wick.
How long does it take to learn candle drawing?
Most beginners get a clean result within one or two tries. With a few practice sessions, the shapes feel natural and easy to repeat.