

I’ve seen beginners pick up a pencil for the first time and walk away with something they were genuinely proud of. Symmetrical drawing made that happen.
It’s trending on Pinterest right now, and I get why. Symmetrical drawing easy projects remove the guesswork. You draw one side, mirror the other. That’s it.
Works for kids, adults, total beginners. No prior experience needed.
I put together 7 ideas that actually look impressive without being complicated. Most symmetrical drawings are easy with pencil, so you can start right now.
Curious? Good. Let’s go.
What Is Symmetrical Drawing? (And Why It’s So Satisfying)
Symmetry in art means both sides of a drawing mirror each other. Draw something on the left, repeat it on the right. That’s the core idea.
Mirror symmetry is the most beginner-friendly type. You split your page down the middle and make both halves match. It sounds simple because it is.
There’s something deeply satisfying about symmetrical work. The structure gives you a clear process to follow, which takes away a lot of the “I don’t know what to draw” anxiety.
For beginner symmetrical drawing easy practice, it’s one of the best ways to build confidence fast. You’re not guessing. You’re observing, measuring, and repeating.
Symmetrical drawing easy for kids also has a real benefit beyond art. It sharpens focus, trains hand-eye coordination, and teaches kids to slow down and look carefully.
7 Symmetrical Drawing Easy Ideas to Try Today
These seven ideas range from a five-minute sketch to a detailed hour-long project. All of them work with basic pencil and paper, and all of them look far more impressive than the effort they take.
1. Butterfly Mirror Drawing

The butterfly is the classic starting point for symmetrical drawing easy with pencil. The whole concept of a butterfly is already built on mirror symmetry, so the subject does half the work for you.
Fold your paper in half vertically, then unfold it. That fold line is your center guide. Draw one wing on the left side only, including any patterns or shapes inside it.
Now mirror exactly what you drew onto the right side. Take your time here. Match each curve, each line, each detail.
For a Pinterest-worthy result, fill the wings with repeating patterns like dots, chevrons, or teardrop shapes. The more consistent the pattern, the more polished the final piece looks.
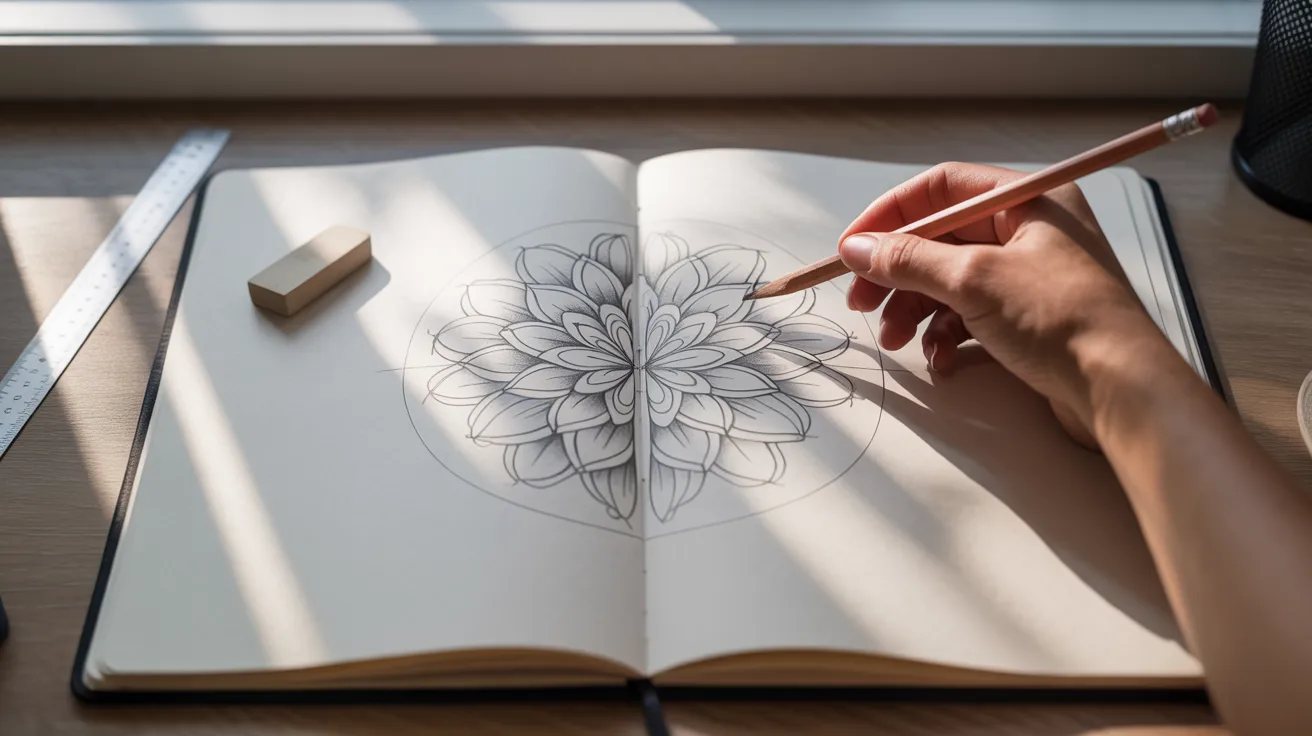
2. Mandala Flower Design
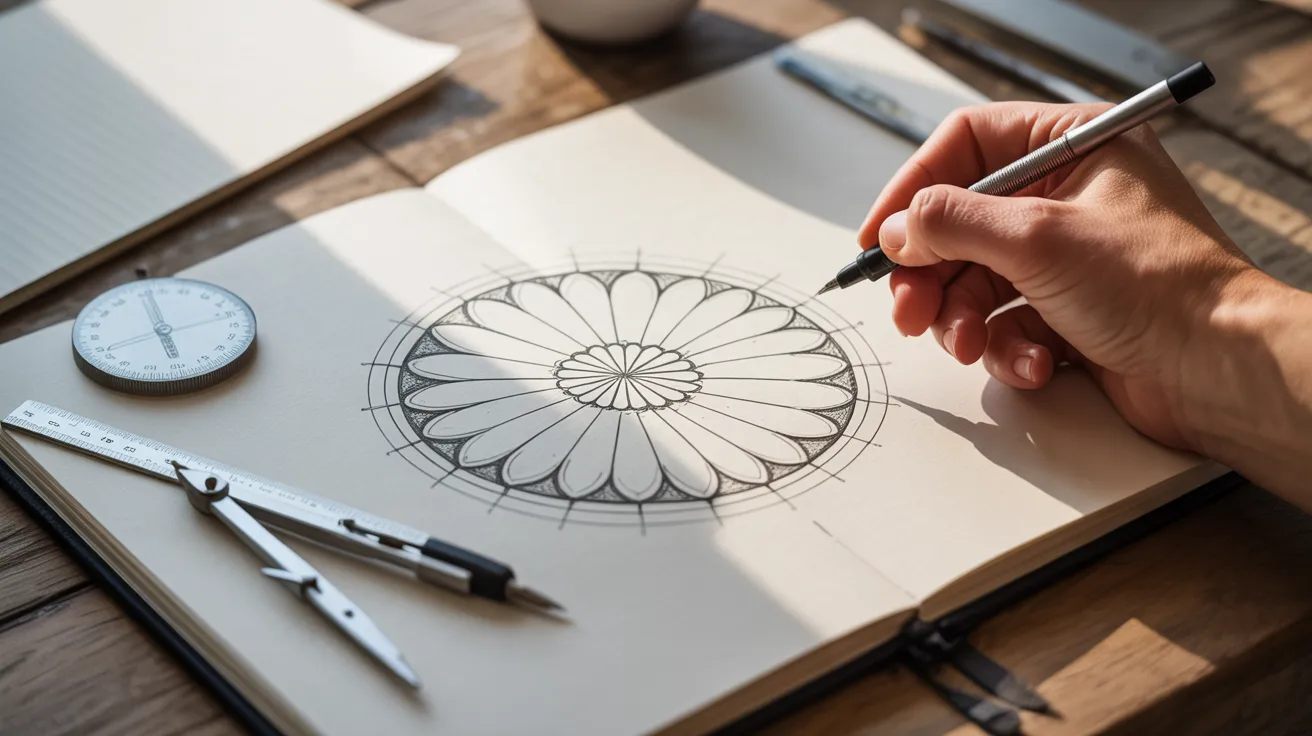
A mandala is one of the most satisfying beginner symmetrical drawing easy projects because the repetition itself creates the design. You’re not inventing anything complex. You’re just repeating simple shapes around a center point.
Start by drawing a small circle in the middle of your page. Use a ruler or compass to divide it into equal sections like slices of a pie. Eight sections is a good starting number.
In each section, draw the same simple shape. A petal, a teardrop, a triangle. Whatever you choose, keep it identical in every section.
This works beautifully in black fine-line pen or with pencil shading. Building outward ring by ring turns a basic shape into something that looks genuinely intricate.
3. Heart Pattern Art
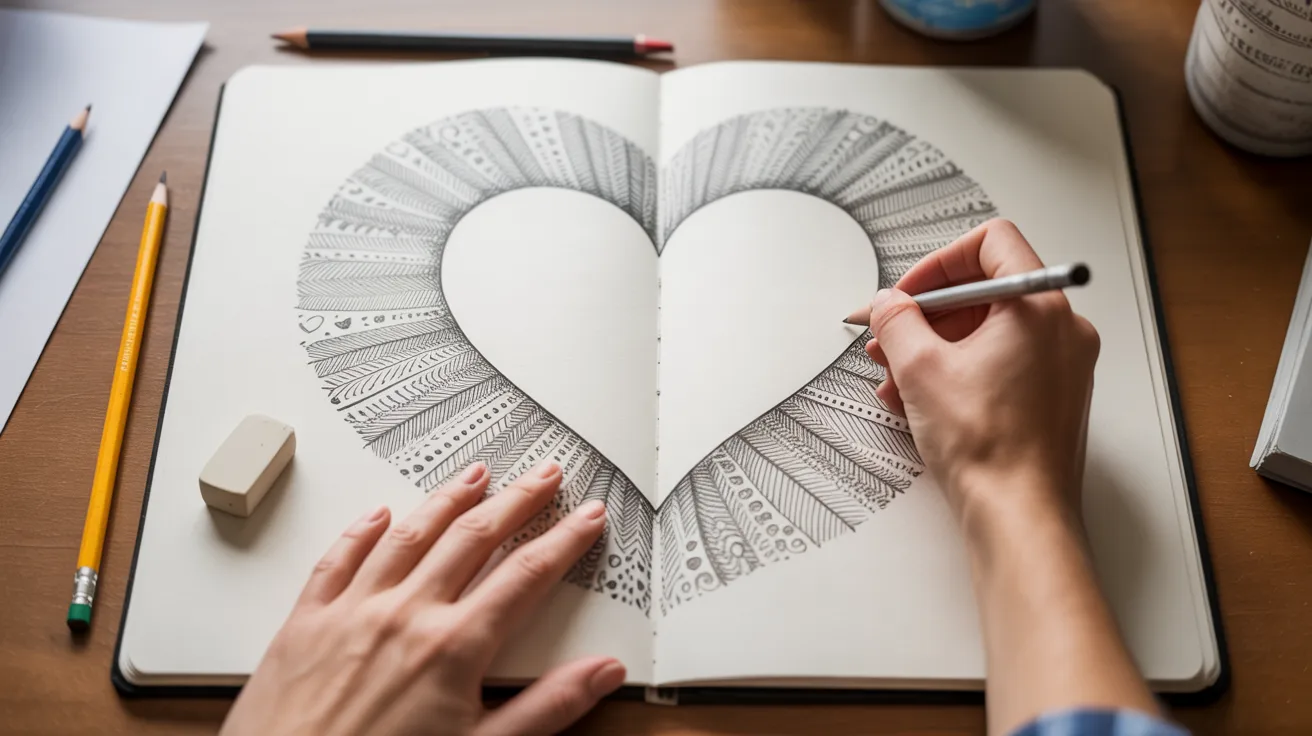
Hearts are a popular symmetrical drawing easy for kids activity because the shape is familiar, forgiving, and fun to decorate.
Start with a light vertical line down the center of your page. This is your guide. Draw one side of the heart curving outward from the top of the line, then mirror it on the other side.
Once your basic heart outline is solid, fill it with doodle-style patterns. Smaller hearts, stripes, dots, swirls. Each pattern section should be mirrored on both halves to keep the symmetry intact.
The result looks like detailed doodle art, but because you’re working symmetrically, the balance comes naturally.
4. Simple Geometric Shapes

If butterflies and hearts feel too decorative, geometric shapes are the cleanest way to practice symmetrical drawing easy with pencil. No curves, no organic lines. Just angles and edges.
Triangles, diamonds, squares, and hexagons all work well. Draw a center line, place one shape on the left, then mirror its position, size, and angle exactly on the right.
A grid underneath your paper makes this much easier. You can count squares to place each point precisely instead of eyeballing the distance.
Once you’re comfortable with single shapes, try nesting them or connecting them into larger patterns. Geometric symmetry scales up quickly into complex-looking compositions.
5. Cute Animal Face (Owl or Cat)

Animal faces are a great beginner symmetrical drawing easy idea for sketchbook practice because they combine recognizable shapes with natural symmetry.
Start with a vertical center line. Every feature you draw, the eyes, ears, nose, whiskers, needs to be the same distance from that line on both sides.
Owls work especially well because their features are bold and simple. Large round eyes, triangular ears, a small beak in the center. Cats are equally forgiving with their almond eyes and pointed ears.
For shading, keep it consistent on both sides. If you add a darker tone around the left eye, mirror that same tone on the right. Even shading is what makes symmetrical animal faces look polished.
6. Leaf or Nature Symmetry Drawing

Leaves are one of the most calming and natural options for symmetrical drawing. Real leaves are already symmetrical, so you have a built-in reference if you want one.
Start with a single vertical line down the center. This is the main vein of the leaf. From there, draw smaller veins branching off at matching angles on both sides.
Then add the outer edge of the leaf, curving outward symmetrically from the tip to the base.
This style of symmetrical drawing works beautifully for realistic pencil detailing. Shading along the veins and adding soft texture to the surface gives it a botanical illustration feel that photographs well and looks great on Pinterest.
7. Abstract Pattern Split Drawing
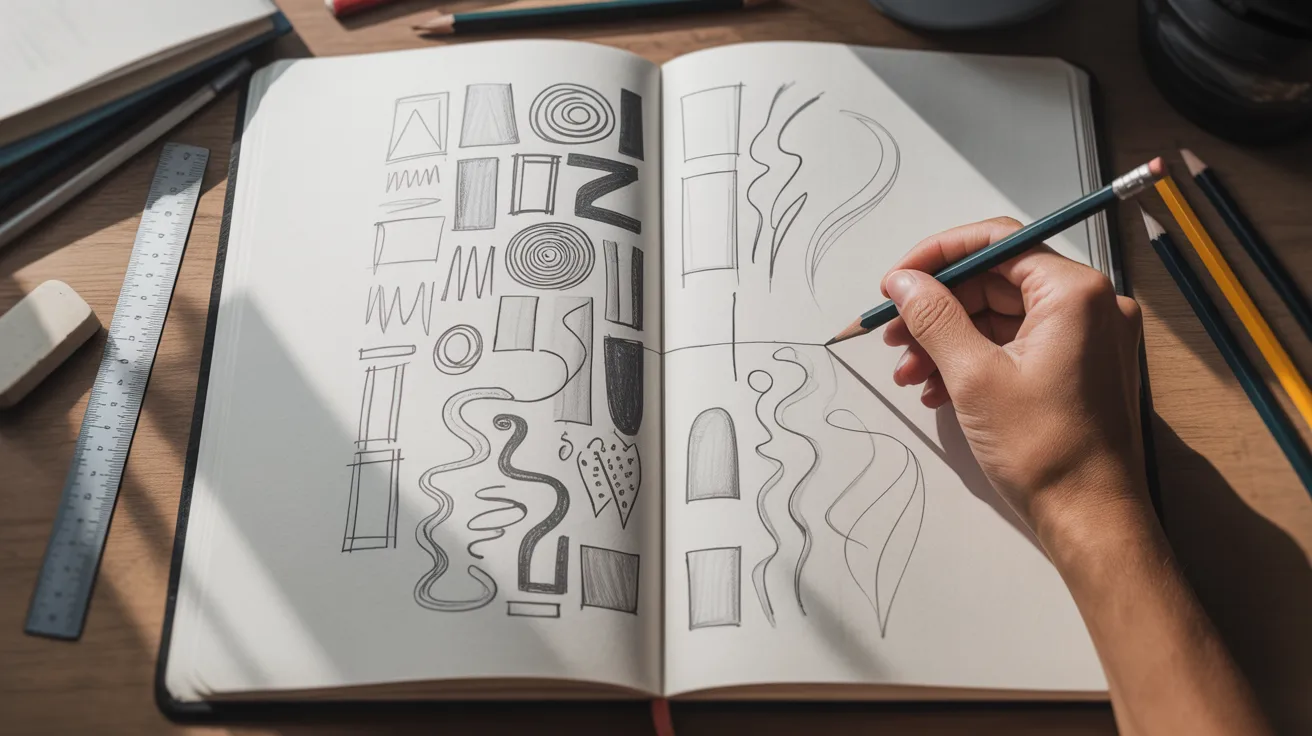
This is the most open-ended idea on the list, and it produces some of the most visually interesting results.
Draw a bold vertical line down the center of your page. On the left side, start creating shapes freely. Rectangles, curves, zigzags, spirals. Don’t overthink it. Just fill the space with varied shapes and lines.
Now mirror everything you drew onto the right side. Match the position, the size, and the angle of every element.
The result looks intentional and complex, but the process is still symmetrical drawing easy to follow step by step. It’s a great project for students who want more creative freedom without losing the structure that symmetry provides.
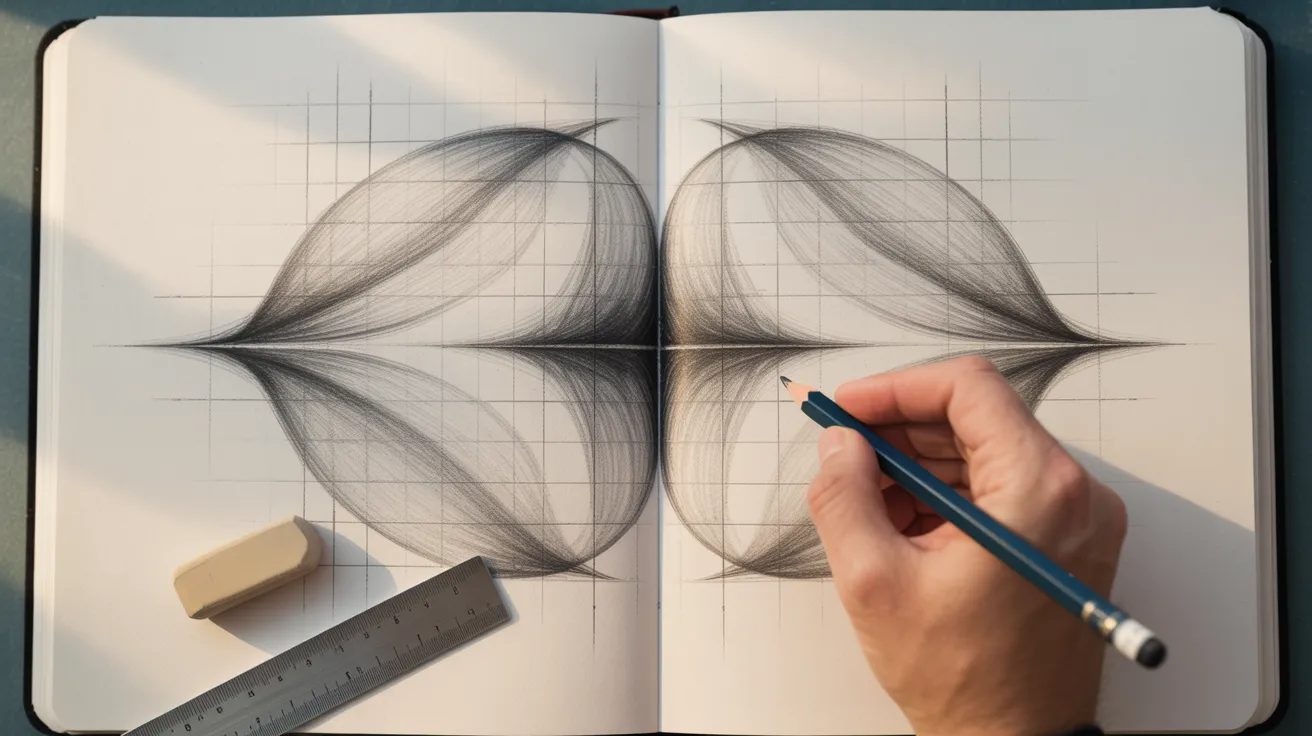
Step-by-Step Method to Make Any Drawing Symmetrical

Once you have a project in mind, the method is the same every time. Following these steps consistently is what separates clean, balanced symmetrical work from drawings that feel slightly off.
- Draw a light center guideline first: Use a ruler and press lightly. This line guides everything and gets erased later.
- Sketch one half only: Focus all your attention on getting one side right before touching the other.
- Measure key points: Use small tick marks along the center line to note the height and depth of important features.
- Mirror carefully using your measurements: Match each tick mark on the opposite side before connecting the lines.
- Refine both sides together: Once the mirror is in place, look at the whole drawing and adjust any lines that feel uneven.
- Erase your guidelines last: Only remove the center line once you’re fully happy with both sides.
For symmetrical drawing easy with pencil projects, always keep your initial lines light. Heavy early marks are hard to erase and make the mirroring step much harder. The most common beginner mistake is pressing too hard too soon. Build up pressure gradually once the structure is confirmed.
Tools You Need for Symmetrical Drawing Easy Projects

You don’t need much. That’s one of the best things about symmetrical drawing easy projects. The basics cover everything.
- HB pencil: For light guidelines and initial sketching.
- 2B pencil: For darker lines, shading, and final details.
- Eraser: A kneaded eraser is ideal for lifting guidelines without smudging.
- Ruler: For drawing straight center lines and measuring distances.
- Compass: Optional, but helpful for mandalas and circular designs.
Pencil is genuinely the best starting point for beginners. It’s forgiving, adjustable, and gives you full control over line weight as your confidence grows. You can always move to pen or digital tools later, but pencil teaches you the fundamentals in a way nothing else does.
Tips to Make Your Symmetrical Drawings Look Professional
The difference between a beginner drawing and a polished one usually comes down to a few small habits. These tips help beginner symmetrical drawing easy artists improve faster than most people expect.
- Keep all lines light at the start: You will need to adjust. Light lines make that easy.
- Use a grid for geometric work: Counting squares removes the guesswork from mirroring.
- Focus on spacing, not just shape: Even spacing between repeated elements is what gives symmetrical work its satisfying rhythm.
- Add shading in balanced passes: Shade both sides at the same time rather than finishing one side completely before moving to the other.
- Use contrast to define the symmetry: A darker center or a stronger outline on the edges makes the mirrored structure visible and intentional.
Small, consistent habits compound quickly. After a few projects, you’ll start to see balance and proportion more naturally, and your drawings will reflect that without extra effort.
Conclusion
You now have 7 ideas, a step-by-step method, and every tool tip you need. The only thing left is to actually draw something.
Pick the one that caught your eye. Grab a pencil. Start today.
Symmetrical drawing easy projects have a way of pulling you in. You finish one and immediately want to try the next.
If you create something, share it on Pinterest and tag it. I’d love to see what you make. Save this page. You’ll want to come back to it.
Frequently Asked Questions
What is the easiest symmetrical drawing for beginners?
Butterflies and simple geometric shapes are the easiest symmetrical drawing easy options for first-time artists. Both use clear center lines and forgiving shapes that are easy to mirror.
Can kids learn symmetrical drawing easily?
Yes, symmetrical drawing easy for kids improves focus, hand control, and creativity. Heart patterns and animal faces are especially popular with younger students.
Do I need special tools for symmetrical drawing?
No. Most symmetrical drawing easy with pencil projects only require a basic pencil, eraser, and ruler. A compass helps for mandalas but is completely optional.
How do I make my symmetrical drawing look perfect?
Use a light center guideline, measure key points on both sides, and mirror carefully before committing to darker lines. Taking your time in the sketching phase makes the biggest difference.
Is symmetrical drawing good for improving art skills?
Yes. Beginner symmetrical drawing easy practice improves observation, proportion, and shading control over time. It also builds the habit of measuring before drawing, which carries over into every other art project.