

I remember the first time I sat in front of a loom. I had no idea what I was doing.
The threads, the frame, the strange up-and-down motion, it all looked confusing. But rigid heddle weaving turned out to be far simpler than I expected.
If you’re new to weaving, this guide is for you. I’ll walk you through how it works, what the parts are, and why this style of weaving is one of the best ways to start.
No experience needed.
I’ve been weaving for years now, and I still come back to the rigid heddle loom when it’s time for something quick and satisfying.
Let’s get started.
What Is Rigid Heddle Weaving?
Rigid heddle weaving is a simple hand weaving method where a flat frame called a rigid heddle separates and controls threads to create fabric.
The heddle moves up and down, making gaps for yarn to pass through. It’s one of the most direct ways to turn raw yarn into a finished piece of cloth.
Unlike large floor looms, a rigid heddle loom is compact, affordable, and easy to set up. It’s ideal for scarves, table runners, and small fabric panels.
How a Rigid Heddle Loom Works
The loom controls threads in a smart, simple way. Here’s how the three main actions come together to create fabric.
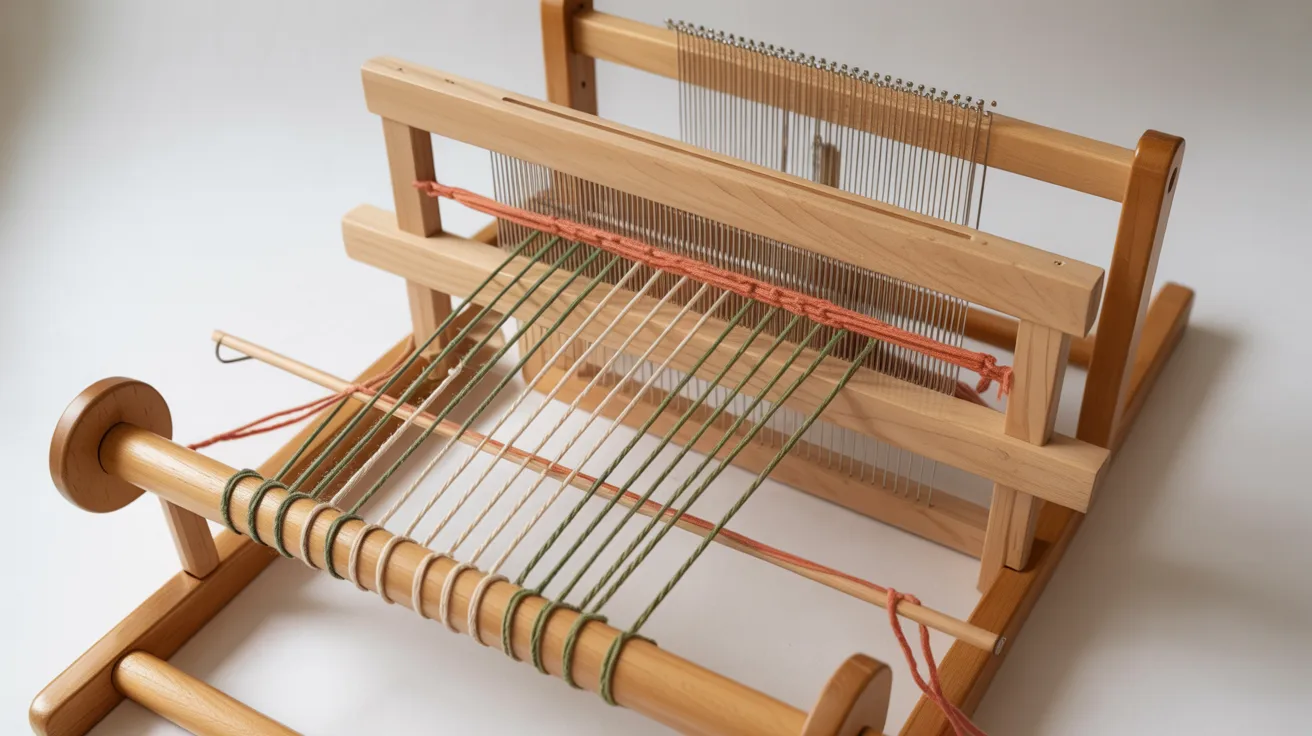
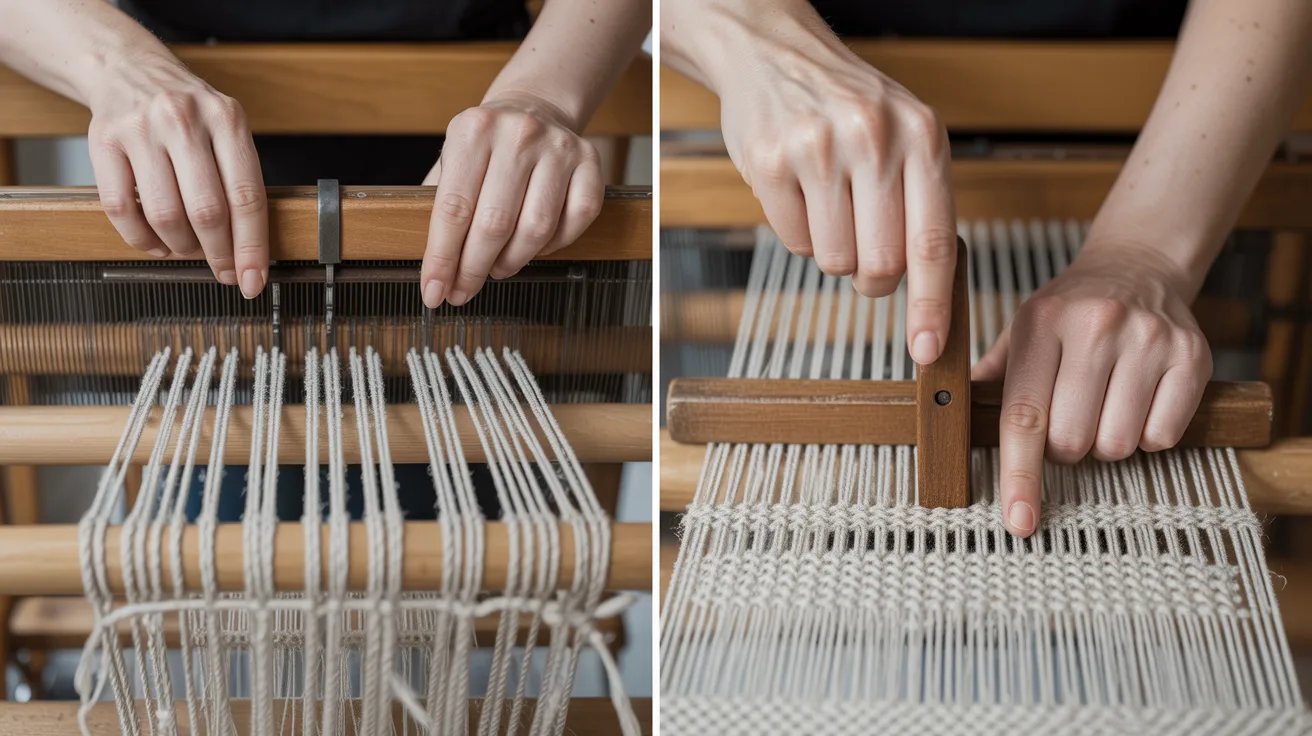
The Basic Structure of the Loom
A rigid heddle loom has a frame that holds everything in place. Threads run from one end to the other. The heddle sits in the middle and controls those threads.
The whole setup is compact and stable. Once you understand the structure, everything else makes sense quickly.
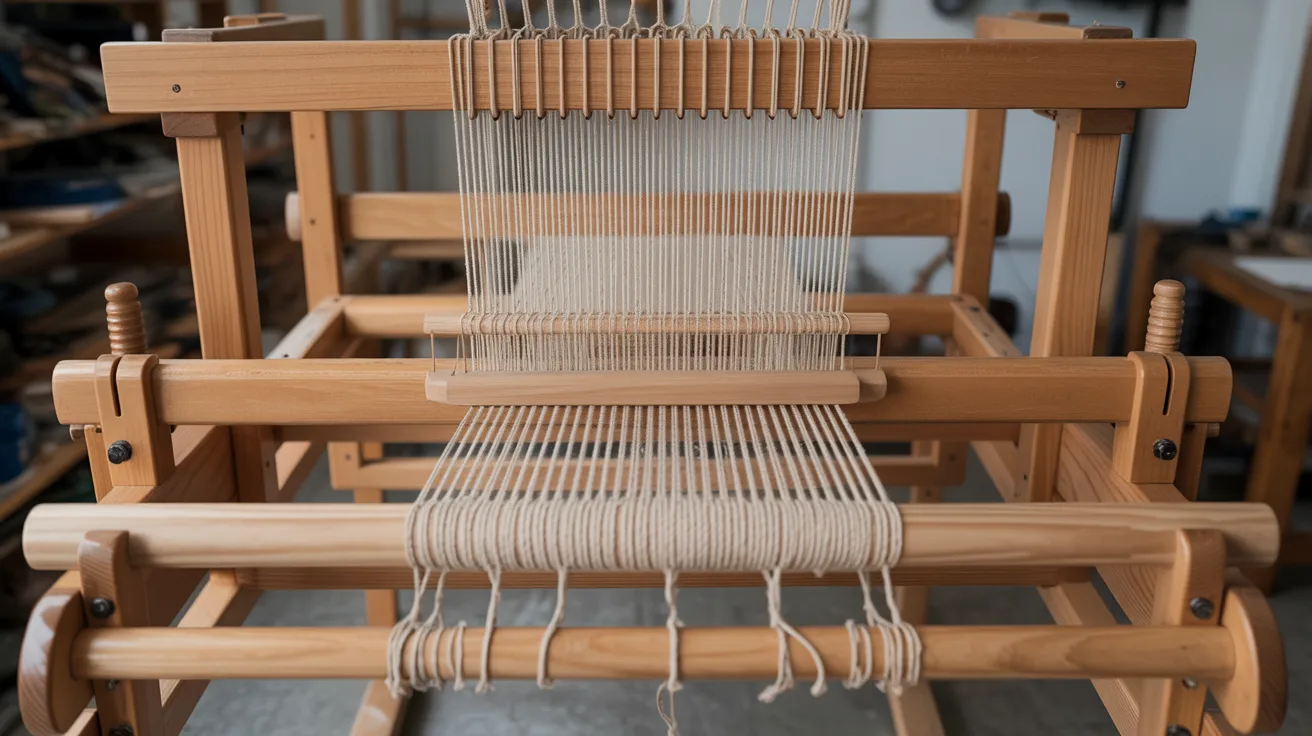
How the Heddle Controls Warp Threads

The heddle has two types of openings: slots and holes. Threads in the holes move up or down with the heddle. Threads in the slots stay in the middle.
This difference is what creates two distinct positions for the threads during weaving.
Creating the Shed for Weaving
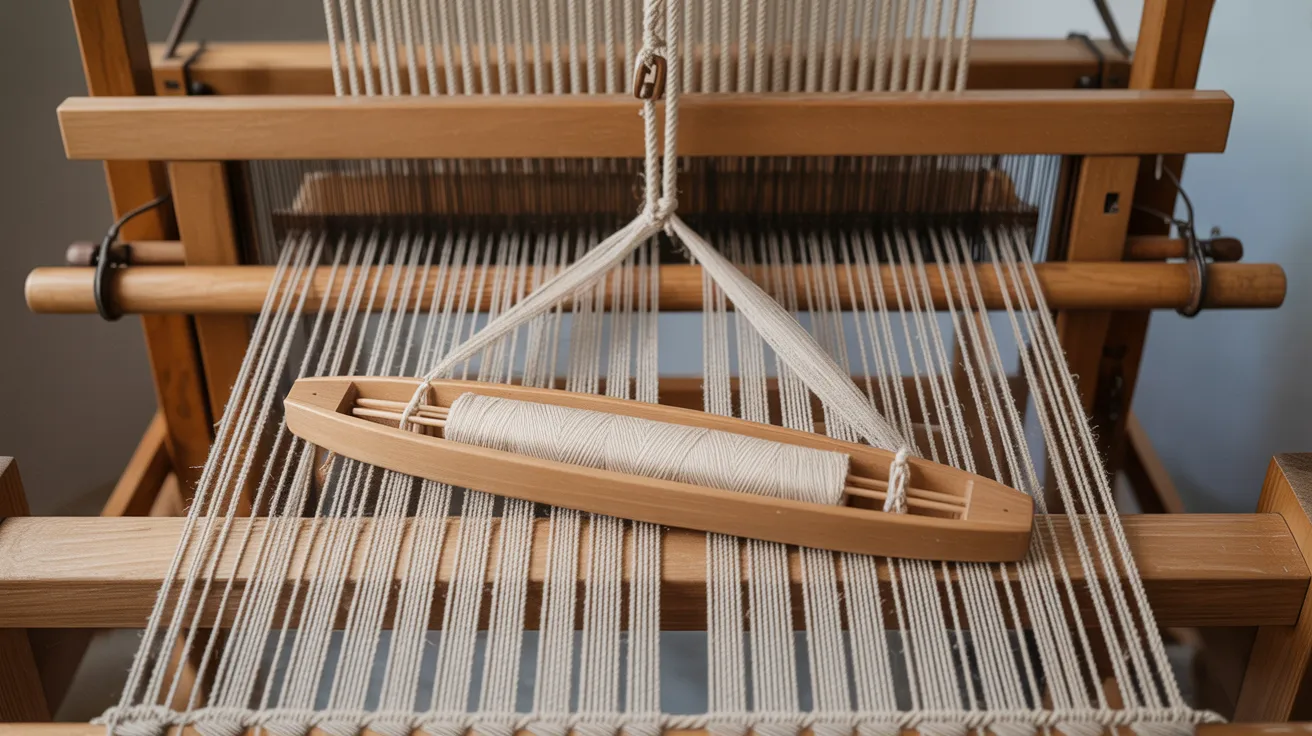
When you lift or lower the heddle, the threads split into two groups. This gap between them is called the shed.
You pass your shuttle through the shed to lay in the weft yarn. That’s the core action of weaving, repeated over and over again.
Key Weaving Terms Beginners Should Know
A few simple terms make it easier to follow weaving guides and talk about your work with confidence.
Warp Threads
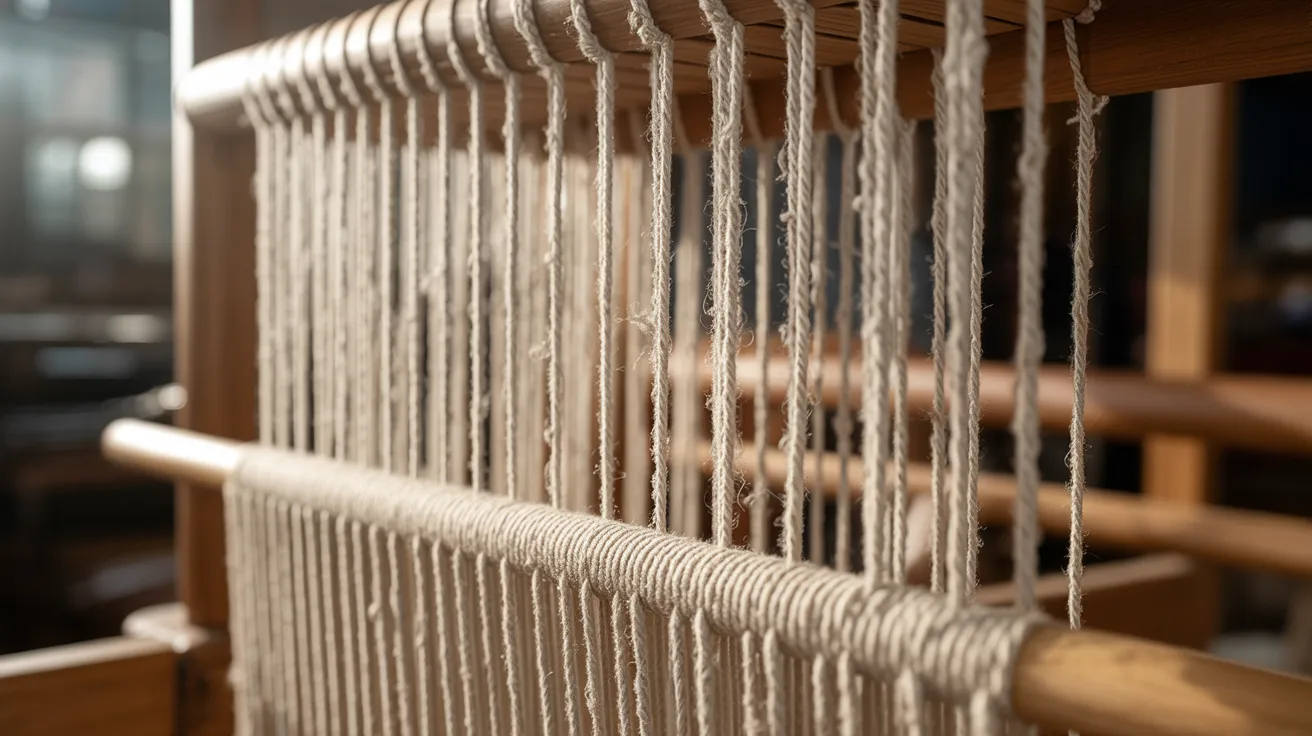
Warp threads are the vertical threads you set up on the loom before weaving starts. They run from one end of the loom to the other.
They act as the base structure. Everything else is built on top of them as you weave.
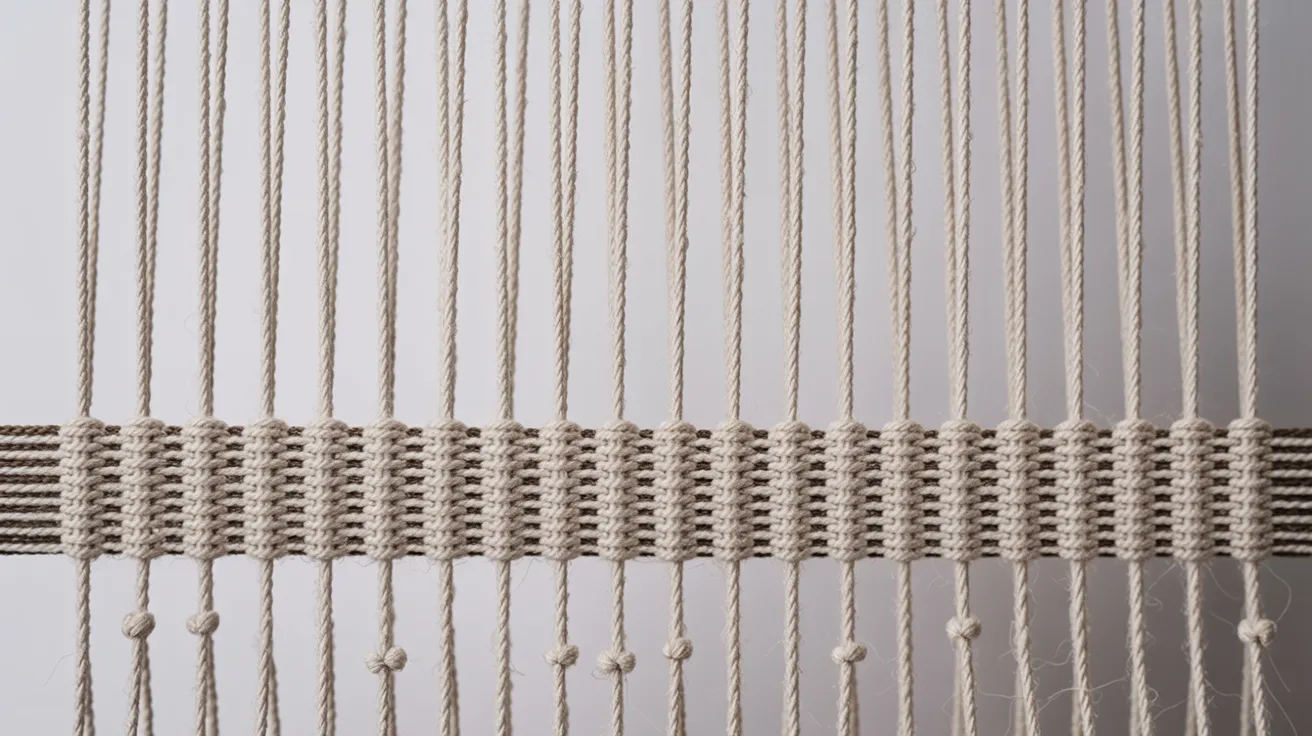
Weft Threads

Weft threads are the horizontal threads you pass through the warp during weaving. They go back and forth across the loom with each pass.
Weft threads are what you see building up row by row as your fabric grows steadily.
Shed and Beat
The shed is the gap that opens between warp threads when you move the heddle. After each weft pass, you press the weft down firmly with the heddle or a comb.
This pressing action is called the beat. It tightens the weave row by row.
Sett (Thread Spacing)
Sett refers to how many warp threads fit across one inch of the loom. It’s determined by the heddle’s slot and hole count.
The right set depends on your yarn thickness. Getting it right affects how tight or open your finished fabric looks.
Basic Principle Behind Rigid Heddle Weaving
Weaving is about crossing threads in a simple, repeating pattern. These three actions are at the heart of how it all works.
Interlacing Warp and Weft
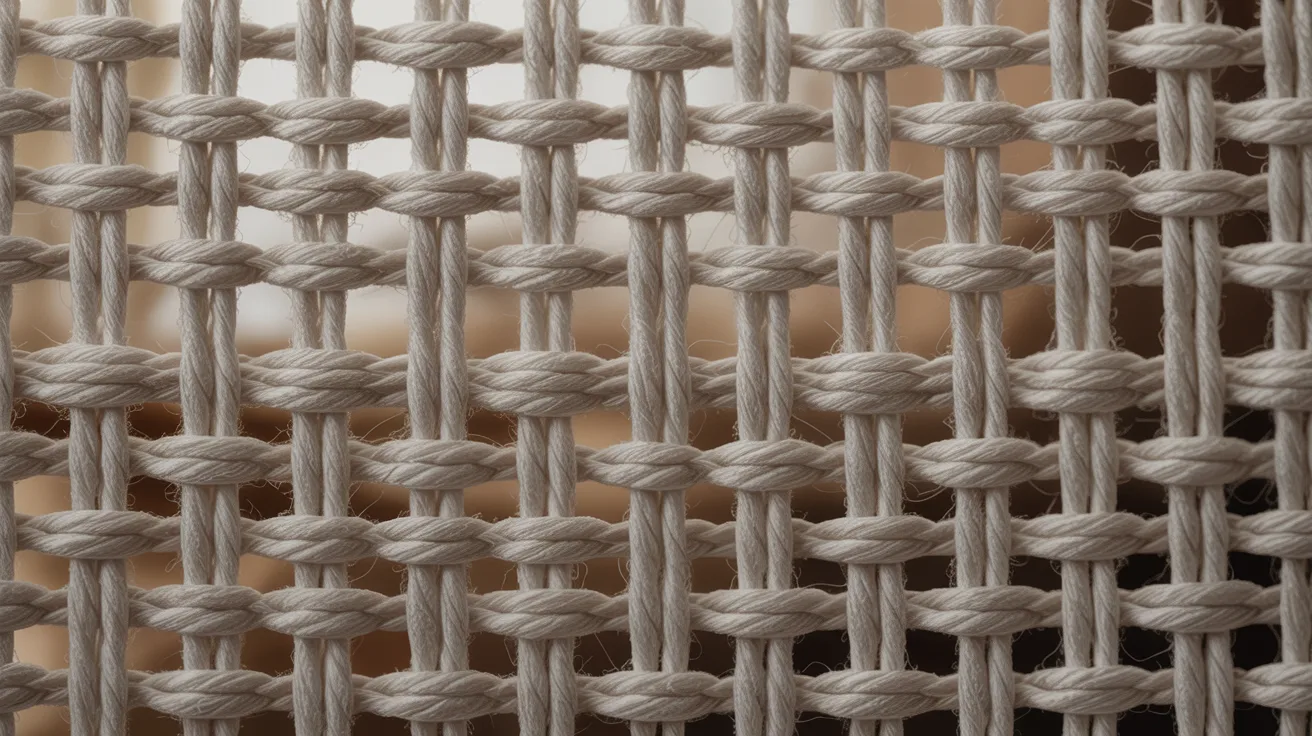
Weaving works by crossing two sets of threads at right angles. The warp runs vertically. The weft runs horizontally.
Each time the weft passes through the warp, it locks in place. This interlacing is what holds the fabric together without any glue or stitching needed.
The Up-and-Down Heddle Movement

The heddle moves in two directions: up and down. Each position opens a different shed. Up lifts the hole threads above the slot threads.
Down does the opposite. Alternating between the two positions keeps the weave structure balanced and even throughout.
How Fabric Structure Is Formed
Each pass of the weft locks into the previous one. The alternating sheds make sure weft threads go over and under different warp threads each time.
Over many rows, this builds a sturdy, interlocked fabric with a clear over-under grid pattern running all the way through.
Main Parts of a Rigid Heddle Loom
Knowing what each part does helps you set up faster and fix problems when they come up.
The Loom Frame
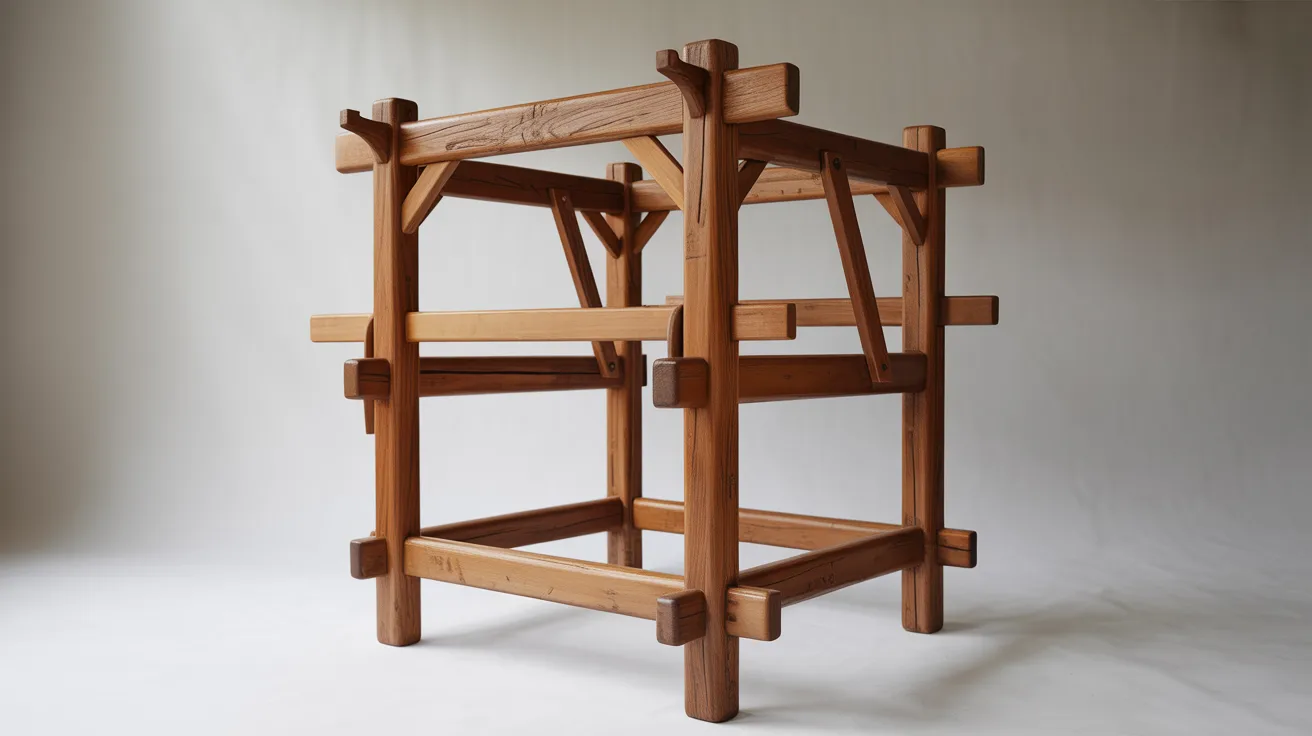
The frame holds all other loom parts together. It keeps the warp threads under the right tension as you weave. A good frame is sturdy and stable.
Without it, threads would go slack and weaving would become uneven. Most rigid heddle loom frames are made of wood.
The Rigid Heddle
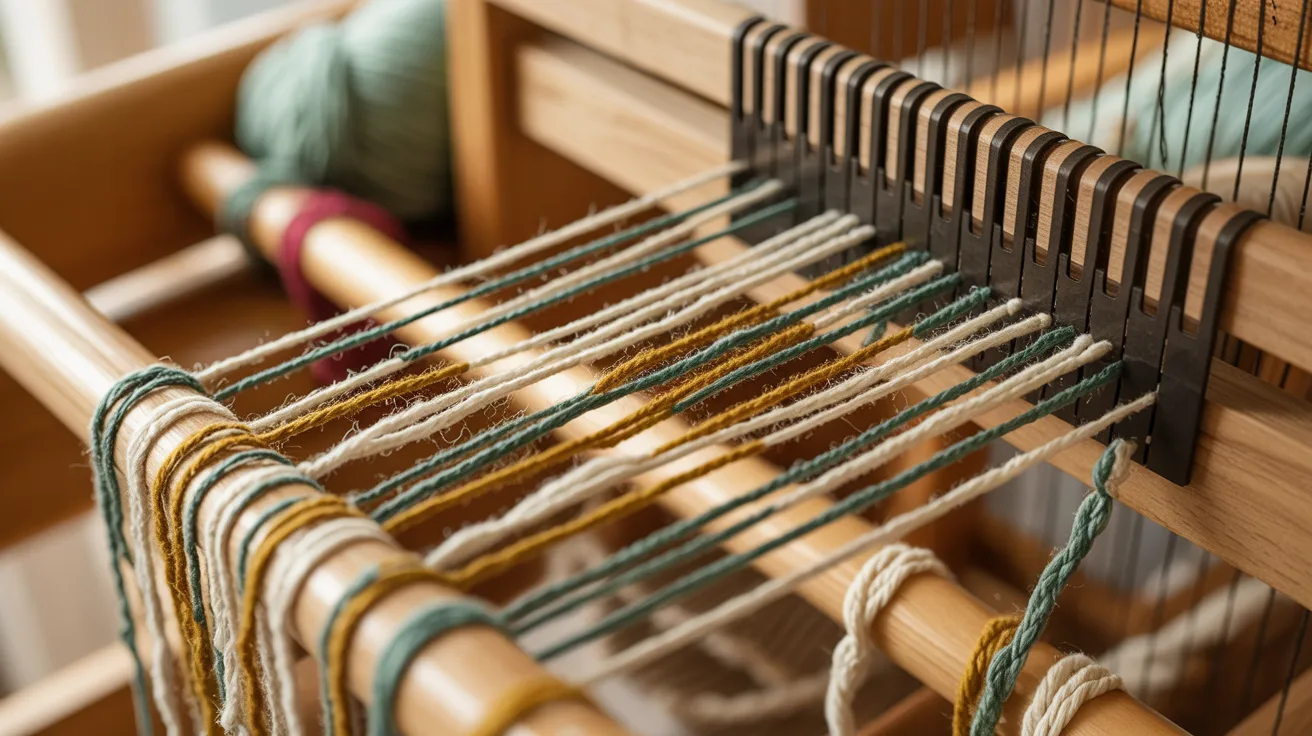
This is the flat slotted piece that sits in the middle of the loom. It has alternating slots and holes for threading yarn.
It moves up and down to open the shed. It also acts as a beater to press weft threads firmly into place after each pass.
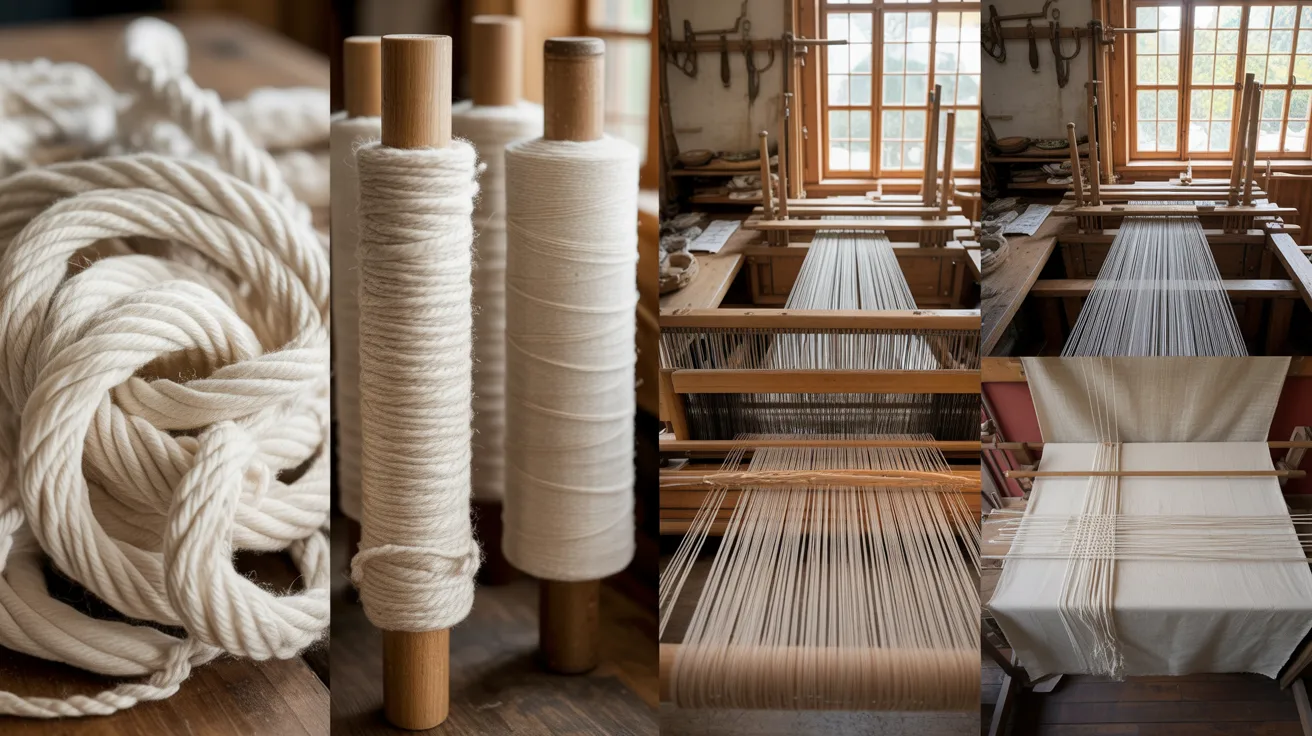
Warp Beam and Cloth Beam
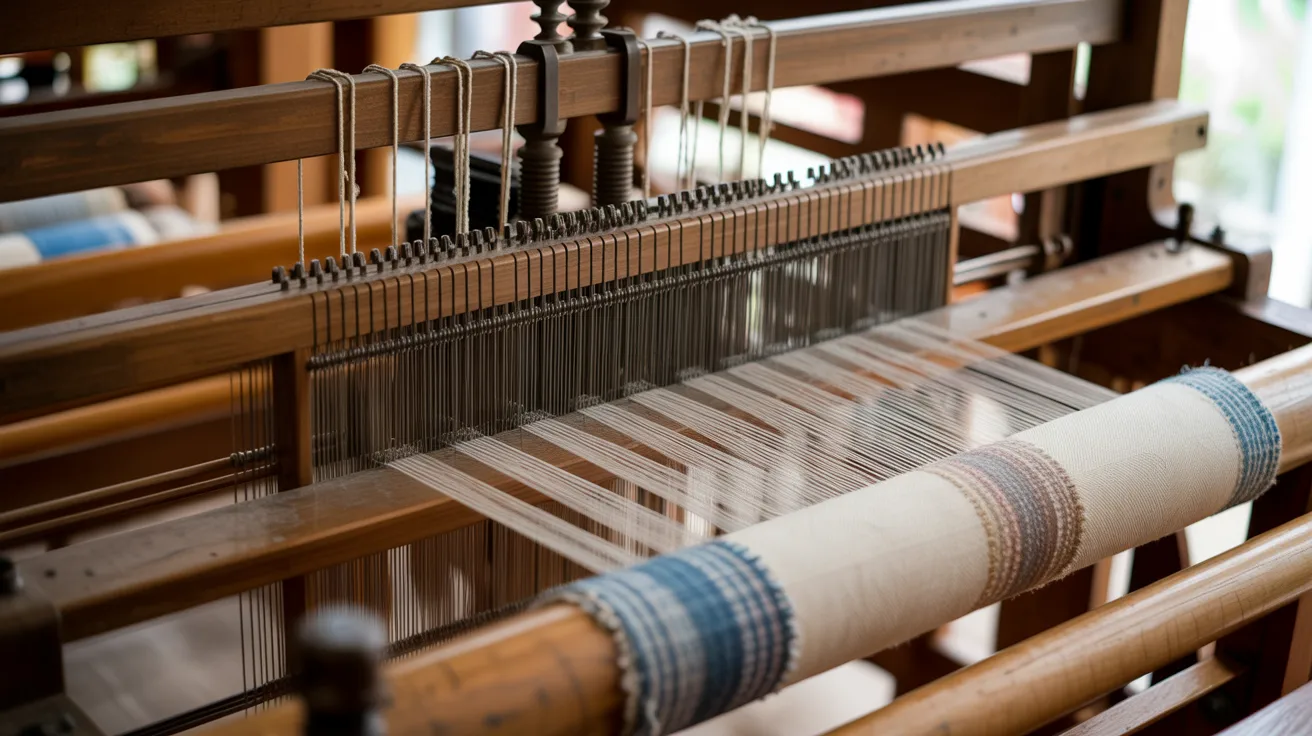
The warp beam holds your unworked warp threads at the back of the loom. As you weave, finished fabric winds onto the cloth beam at the front.
Both beams have a ratchet system to keep tension steady and let you advance the work smoothly.
Shuttle and Yarn
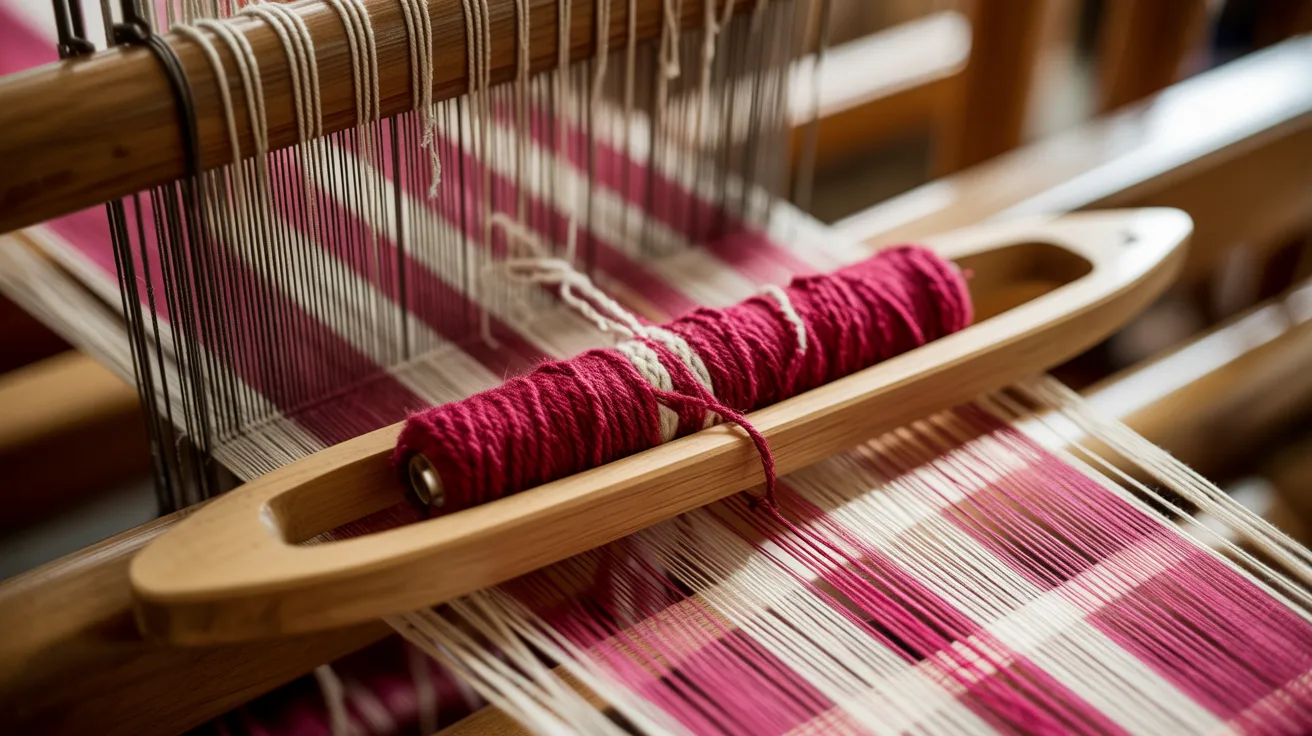
The shuttle is a flat tool that holds your weft yarn. You pass it through the shed from one side to the other. It keeps the yarn from tangling as it moves.
The yarn you pick for weft affects how soft, thick, or textured your finished fabric feels.
Why Rigid Heddle Weaving Is Beginner-Friendly
Rigid heddle weaving is one of the easiest ways to start making your own fabric. The loom is compact, affordable, and simple to set up at home.
You only need two heddle positions to create a basic weave, so the learning curve is gentle. Most beginners finish their first project within a few hours.
The technique also works with many yarn types, giving you room to experiment without a big investment upfront.
Tips to Improve Your Rigid Heddle Weaving Skills
Small habits make a big difference. These five tips will help you weave more smoothly and get better results.
- Keep your tension even. Pull the weft through at a slight angle before beating. This stops the edges from pulling in tight.
- Use smooth yarn to start. Fuzzy yarn sticks in the heddle. A smooth, medium-weight yarn lets you see your weave structure clearly as you go.
- Beat consistently. Same force, every row. A steady rhythm builds even fabric faster than you’d think.
- Advance your warp often. Roll the fabric forward every few inches. Working too close to the heddle ruins your tension and shed.
- Practice with short samples first. Test your set, yarn, and tension on a small sample before committing to a full project.
Conclusion
Rigid heddle weaving gave me a creative outlet I didn’t know I needed.
My first scarf wasn’t perfect, the edges were a little wobbly, but I was completely hooked from that first project.
There’s something really satisfying about making fabric with your own hands.
If you’ve been curious about weaving, this is a great place to start. Pick up a loom, grab some yarn, and just try it. You’ll figure it out faster than you think.
Got questions or made your first piece? Drop a comment below, I’d love to hear how it went.
And if this helped you, share it with someone who might want to give weaving a go too!
Frequently Asked Questions
What yarn is best for rigid heddle weaving?
Start with smooth, medium-weight wool or cotton. It’s easy to handle and works with most heddle sizes. Avoid fuzzy yarn as a beginner.
How long does it take to set up a rigid heddle loom?
About 30 to 60 minutes once you know the steps. It gets faster after two or three projects.
Can I make more than just scarves on a rigid heddle loom?
Yes! Table runners, dish towels, placemats, and small bags all work. Plenty of variety once you get going.
Do I need any special tools to start rigid heddle weaving?
Just a loom, a shuttle, and yarn. Most starter kits cover everything. Scissors and a tape measure help too.
How is rigid heddle weaving different from other types of weaving?
Floor looms use multiple shafts for complex patterns. Rigid heddle weaving uses one heddle, two positions. Much simpler and faster to learn.