

Looking for pot painting ideas to brighten up your space? You’re in the right place.
I’ve gathered 39 creative ways to paint pots that work for any skill level. From simple color dips to fancy patterns, this guide covers it all.
You’ll find easy options for beginners, cute designs for your desk, and classic terracotta styles. I’ve been painting pots for years, and these methods actually work.
No complicated steps or expensive supplies needed. Just grab some paint and a brush.
Let’s make your plants look great without spending a fortune.
Why Pot Painting Ideas Are an Easy & Affordable DIY Decor

Painting pots costs way less than buying new ones. A plain terracotta pot runs about $2. Add $10 worth of paint, and you can make over ten pots easily. Compare that to $15-30 for store-bought decorated pots.
The process is simple. Clean your pot. Apply paint. Let it dry. Done. Most projects take 30 minutes or less. You don’t need art classes or special skills.
Paint covers flaws in old pots and matches any color scheme. Personalized pots make great gifts. Seasonal designs let you switch up your decor. Materials are easy to find at craft stores and online shops.
You control the style. Want minimalist black and white? Go for it. Love bright colors? Paint away. Mistakes wash off before the paint dries. Terra cotta is forgiving and easy to work with.
Clever Pot Painting Ideas for Every Style
From beginner-friendly designs to specialty techniques, these 39 ideas cover every skill level and style preference.
Easy & Beginner-Friendly Pot Painting Ideas
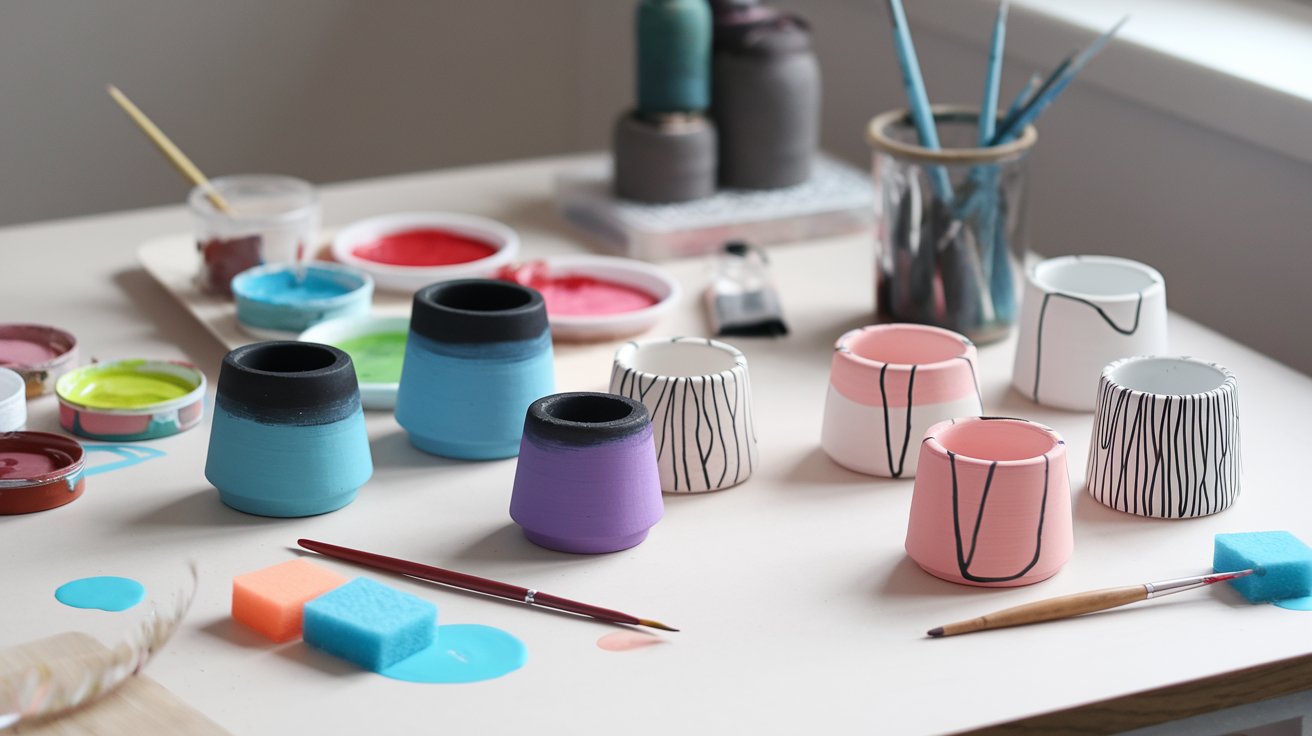
Simple designs that take 30 minutes or less and require zero artistic experience.
- Simple Color-Dip Pot Painting: Dip the bottom half of your pot in paint for a clean two-tone look. Works great with contrasting colors like white and navy.
- Easy Ombre Pot Painting: Start with your darkest color at the bottom and add white as you move up. Blend with a damp sponge for a professional gradient.
- Chalkboard Pot Painting: Cover your pot with chalkboard paint so you can write plant names or care instructions. Change labels whenever you want.
- Minimal Line Art Pot Painting: Draw simple faces, leaves, or geometric shapes with a thin brush. White lines on colored pots look clean and modern.
- Easy Stencil Pot Painting: Tape stencils to your pot and dab paint over them with a sponge. Perfect patterns every time with no freehand drawing.
- Painted Heart Pattern Pots: Use a heart-shaped sponge to stamp patterns all over your pot. Kids love helping with this fun and casual design.
- Rubber Band Stripe Pot Painting: Wrap rubber bands around your pot, paint over them, and remove when dry. Clean stripes appear in the original pot color.
- Splatter Paint Flower Pots: Dip an old toothbrush in thinned paint and run your thumb over the bristles to splatter. Layer colors for depth.
- Two-Color Ombre Chalk Paint Pots: Apply lighter chalk paint all over, then brush darker color from bottom up while wet. Blend the middle with a dry brush.
- Simple Succulent Pot Painting: Paint tiny succulent shapes in pastel colors using a small round brush. These mini paintings take 10 minutes.
- Easy Flower Pot Painting Ideas: Paint simple five-petal flowers around the rim with contrasting center dots. Loose, cheerful flowers suit cottage-style gardens.
- Simple Pot Painting Ideas for Home Decor: Match solid-colored pots to your throw pillows or wall colors. Paint the inside rim a contrasting shade for hidden color.
- Pot Painting Ideas Easy for Beginners: Start with solid base coats and add one accent like a painted rim. Use painter’s tape for straight edges.
Cute, Aesthetic & Decorative Pot Painting Ideas
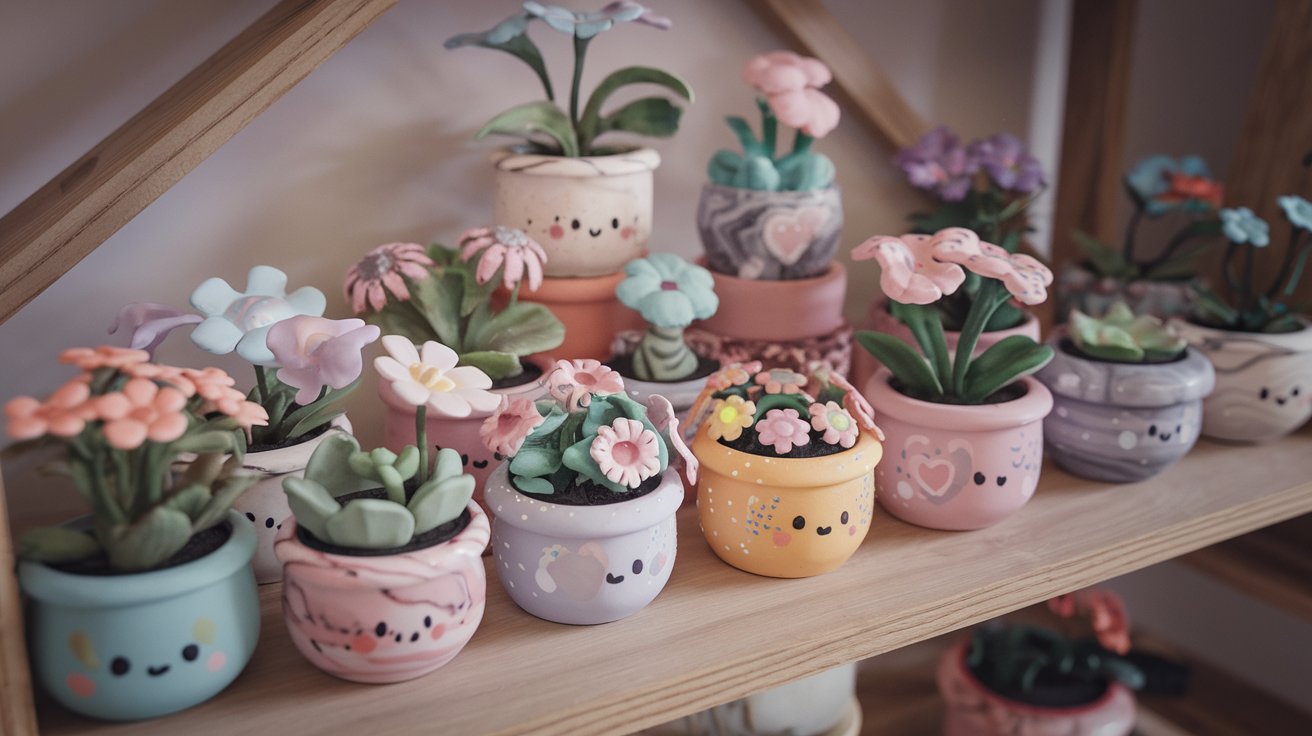
Charming designs that add personality and visual interest to any space.
- Cute Face Pot Painting Ideas: Paint simple smiley faces, winking eyes, or sleepy expressions. Each pot gets its own personality for a cheerful plant family.
- Pastel Aesthetic Pot Painting Ideas: Use soft pinks, mint greens, and lavenders for a dreamy look. Add white dots or tiny stars and group them together.
- Polka Dot & Fun Pattern Pots: Use a pencil eraser as a dot stamp. Make dots uniform or vary the sizes for playful patterns.
- Punny Flower Pot Painting Ideas: Write plant puns like “Aloe you vera much” with a fine-tip paint pen. These make people smile every time they water.
- Mini Pot Painting Ideas: Paint tiny 2-inch pots in solid colors with contrasting lips. Group mini pots on a tray for small succulents.
- Small Pot Painting Ideas for Desk Decor: Match pots to your office supplies with colors like coral and gold. Add your initial in a corner for personalization.
- Mini Succulent Pot Painting Ideas: Try ombre effects or metallic accents on tiny pots. Paint geometric triangles or diamonds for quick patterns.
- Gilded Gold Pot Painting Ideas: Paint pots in deep green or navy, then add gold leaf to the rim and bottom. Looks expensive but costs under $5.
- Faux Ceramic Pot Painting Ideas: Use white and light blue paint to mimic Chinese porcelain. Add loose floral patterns and a glossy topcoat.
- Trophy-Style Decorative Pot Painting: Paint pots in metallic gold, silver, or bronze. Add painted handles on the sides using darker metallic shades.
- Hanging Painted Pot Ideas: Paint only the visible front to save time. Try sunrise gradients or dripping paint effects while the pot is upside down.
- Stenciled Message Pot Painting: Use letter stencils to add words like “Grow” or “Bloom.” Place text at the same height on multiple pots.
- Marble-Effect Succulent Pots: Swirl white and gray paint together while wet. Add thin black veins with a detail brush and seal with glossy finish.
Terracotta, Clay & Specialty Pot Painting Ideas
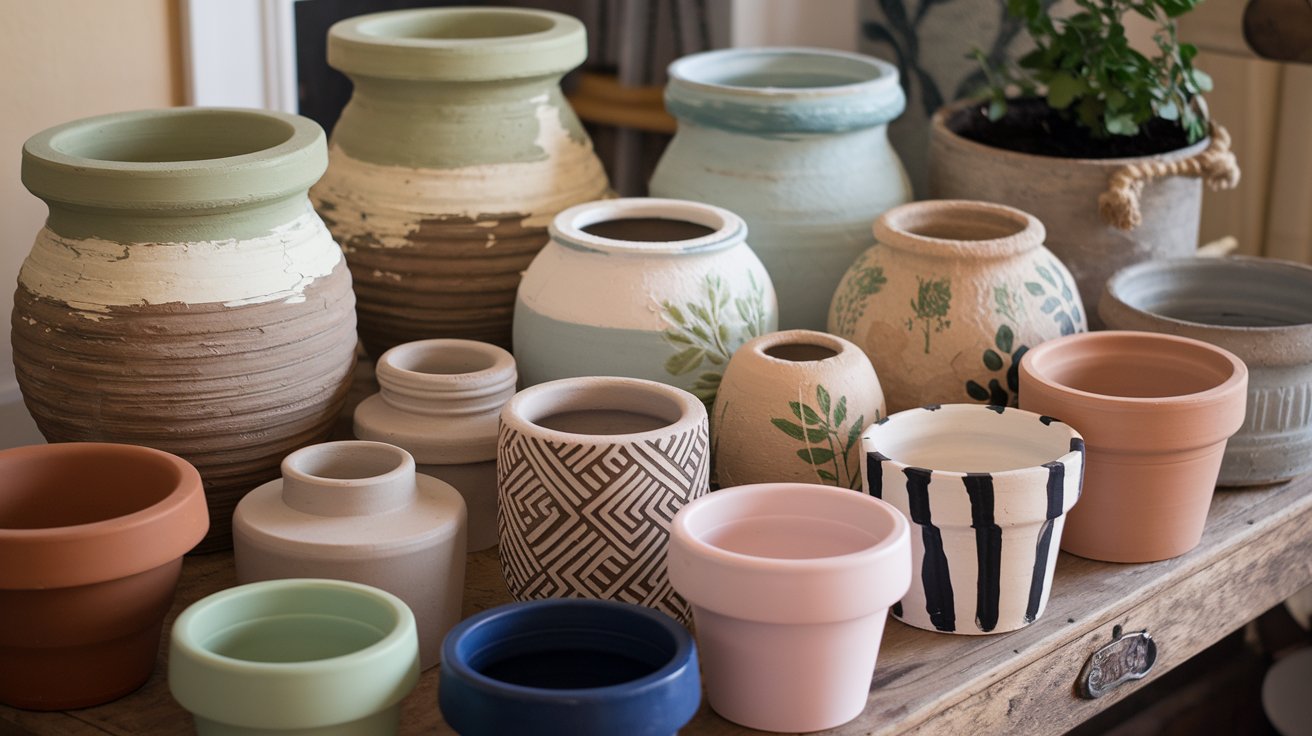
Specialized techniques for different materials and seasonal styles.
- Classic Terracotta Pot Painting Ideas: Leave the bottom third unpainted to show natural terracotta. Paint the top in cream or sage green and seal it.
- Aged Terracotta Pot Painting Ideas: Paint layers of white and cream, then sand edges before it cures. Rub dark wax into crevices for a vintage look.
- Coastal Terra Cotta Pot Painting Ideas: Use soft blues, sandy beiges, and crisp whites. Paint wave patterns or add rope details with hot glue.
- Clay Pot Painting Ideas for Herbs: Label each herb pot with its name and paint small herb illustrations. Use green as a base since it hides dirt.
- Black & White Clay Pot Painting Ideas: Try black pots with white patterns or white pots with black details. Mix different geometric designs across multiple pots.
- Decorative Clay Pots for Indoor Plants: Paint pots in your accent colors to match furniture. Add subtle textures with sponging techniques and seal them well.
- Mud Cloth Pot Painting Ideas: Copy African mud cloth patterns using black paint on white backgrounds. Geometric lines and crosses create bold statement pieces.
- Ceramic Pot Painting Ideas: Use enamel paint made for glass and ceramic. Clean with rubbing alcohol first and cure in the oven per paint instructions.
- Plastic Nursery Pot Painting Ideas: Paint black plastic pots instead of buying new ones. Use spray paint for smooth coverage and add designs with acrylics.
- Stained Concrete Pot Painting Ideas: Use concrete stain instead of regular paint. It penetrates the surface and won’t chip or peel over time.
- Moss-Effect Clay Pot Painting: Paint pots dark brown or gray, then dab sage green and olive while wet. This weathered look suits woodland gardens.
- Halloween Pot Painting Ideas: Paint pots orange for jack-o-lantern faces or try white ghosts and purple bats. Hold mums or Halloween candy on your porch.
- DIY Flower Pot Painting Ideas: Mix techniques from any category. Try color blocking with stencils or layer patterns like dots over stripes for custom creations.
Tips for Painting Flower Pots That Last Longer
Proper prep and sealing turn a weekend craft into a pot that lasts for years outdoors or indoors.
- Clean and dry pots for 24 hours. Prime terra cotta before painting for even color and better coverage.
- Use exterior paint for outdoor pots and acrylic for indoor. Apply 2-3 thin coats instead of one thick layer.
- Cover drainage holes with tape before painting. Never paint the inside of pots so they can drain properly.
- Seal with polyurethane or outdoor sealer. Wait 3-5 days before planting to let paint cure completely.
- Store terra cotta pots indoors during freezing weather. Reapply sealer each spring on outdoor pots.
Conclusion
I love how a simple coat of paint completely changes a basic pot. My first painted pots were messy and uneven, but they made me smile every time I watered my plants.
That’s what matters most. Start with one pot and a color you love. Try a simple design from this list. You’ll probably want to paint more once you see how fun and easy it is.
Share your finished pots in the comments below. I’d love to see what you create. And if you enjoyed these pot painting ideas, check out my other plant decor guides for more ways to brighten your space.
Frequently Asked Questions
What kind of paint works best for pot painting ideas?
Acrylic craft paint works great for indoor pots. For outdoor pots, use exterior acrylic or spray paint with UV protection. Always seal with a waterproof clear coat.
Do I need to seal terra cotta pots before painting?
Not required, but primer helps. It stops the pot from soaking up too much paint and prevents the orange color from showing through.
Can I paint plastic pots or just clay ones?
You can paint plastic pots too. Use spray paint for plastic or apply bonding primer first. Clean with rubbing alcohol before painting.
How long does painted pot paint last outdoors?
Painted pots last 2-3 years outdoors with proper sealing. Reapply sealer each spring and bring pots inside during freezing weather.
Should I paint the inside of flower pots?
Leave the inside unpainted so terra cotta can breathe and drain properly. Use a plastic liner pot inside if you want all-over color.