


Learning to draw a person easily is something I wish someone had broken down for me when I started. Most beginners feel stuck before they even pick up a pencil.
The good news? You don’t need talent. You need the right steps. In this guide, I’ll show you exactly how to draw a person using simple shapes and basic lines.
No art school needed. I’ve been sketching for years, and I’ll walk you through beginner basics, tools, breaking down the human figure, a clear step-by-step tutorial, and practice methods to help you improve fast.
Why Person Drawing is Perfect for Beginners

Drawing people feels hard at first, but every complex figure starts with basic shapes. Circles, lines, and ovals are all you need.
Beginners do well with this method because it removes pressure. You’re learning a skill, one line at a time, not drawing a masterpiece. The stick figure method has been used in art education for decades.
It builds muscle memory and helps your brain understand proportion without overthinking.
No prior experience needed, and by the end of this guide, you’ll know exactly what tools to use, how to break a figure into shapes, how to follow a step-by-step process, how to add details like clothes and a face, and how to practice and improve over time.
How to Start Easy Person Drawing (Beginner Basics)
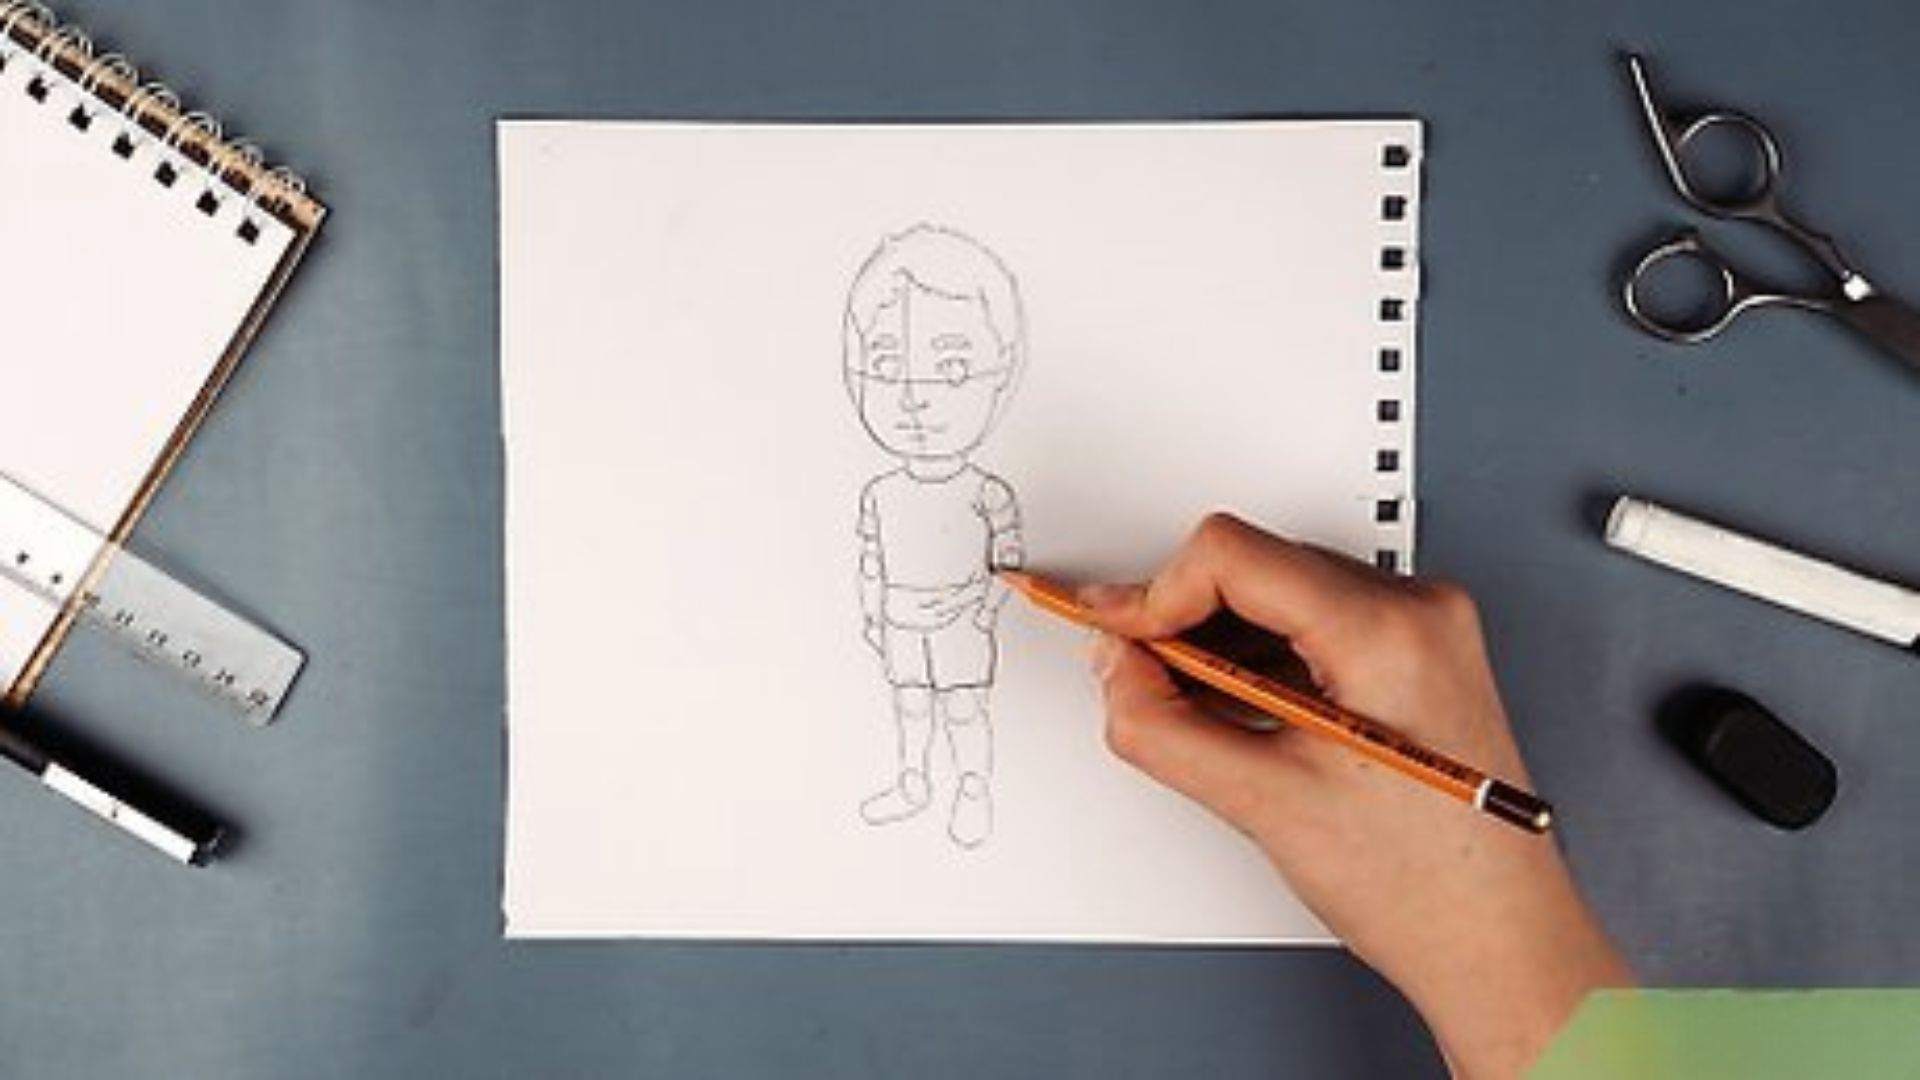
Before you draw a single line, get the right setup. Good tools and a short warm-up make a big difference.
Tools You Need for a Person Drawing Easy
You don’t need expensive supplies.
Start simple:
A pencil (HB or 2B works great), A good eraser, Plain white paper or a sketchbook, A ruler for straight lines (optional)
Avoid pens at the start. Pencils let you erase and adjust. That freedom is key when you’re still learning proportions and spacing.
Simple Warm-Up Exercises to Improve Control
Warm up your hand before drawing. This improves control and loosens stiffness.
Try these quick exercises:
Draw straight lines across the page, Draw circles of different sizes, Connect two dots with a curved line, Shade a small box from light to dark
Do this for five minutes before each session. It sounds basic, but it works. Your lines will be steadier and your shapes cleaner.
Understanding the Basics of a Person Drawing
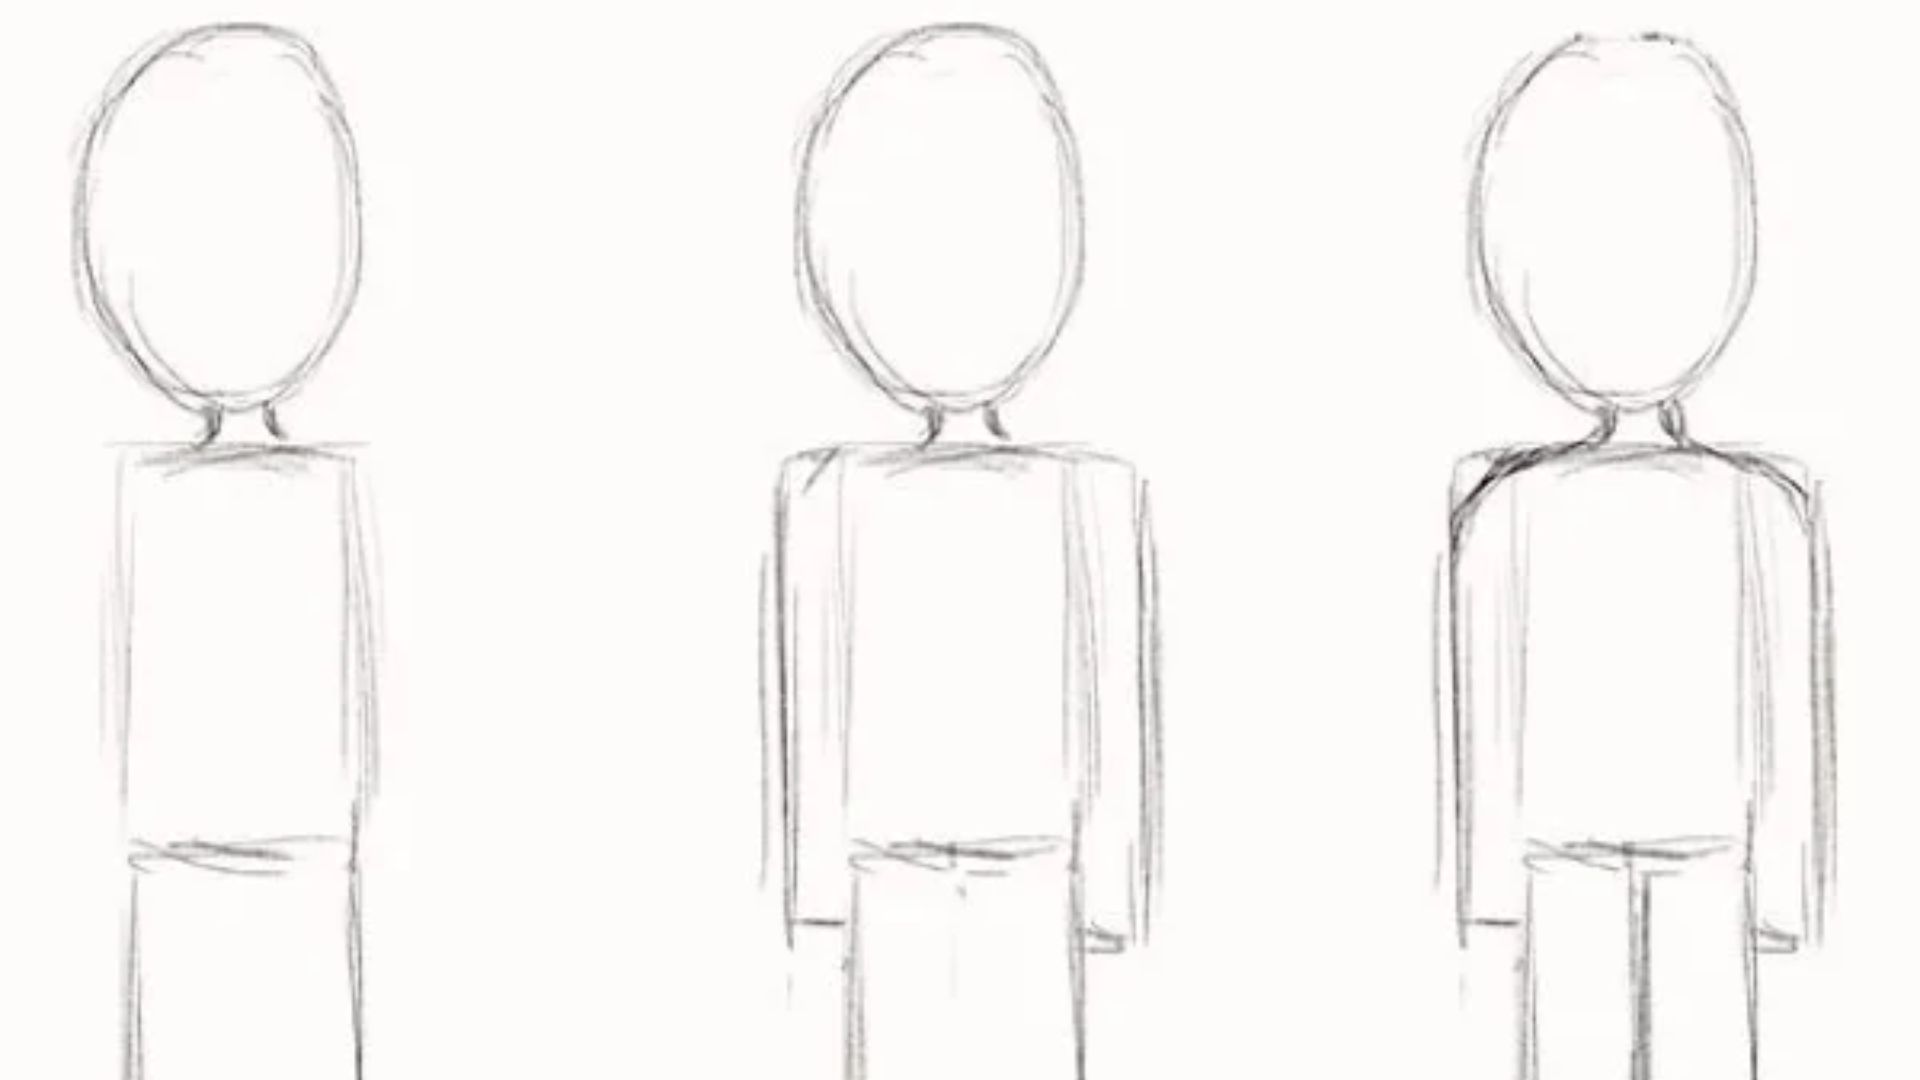
The human body looks complex, but it’s just a group of simple shapes put together.
Breaking Down a Person Drawing Easy into Simple Shapes
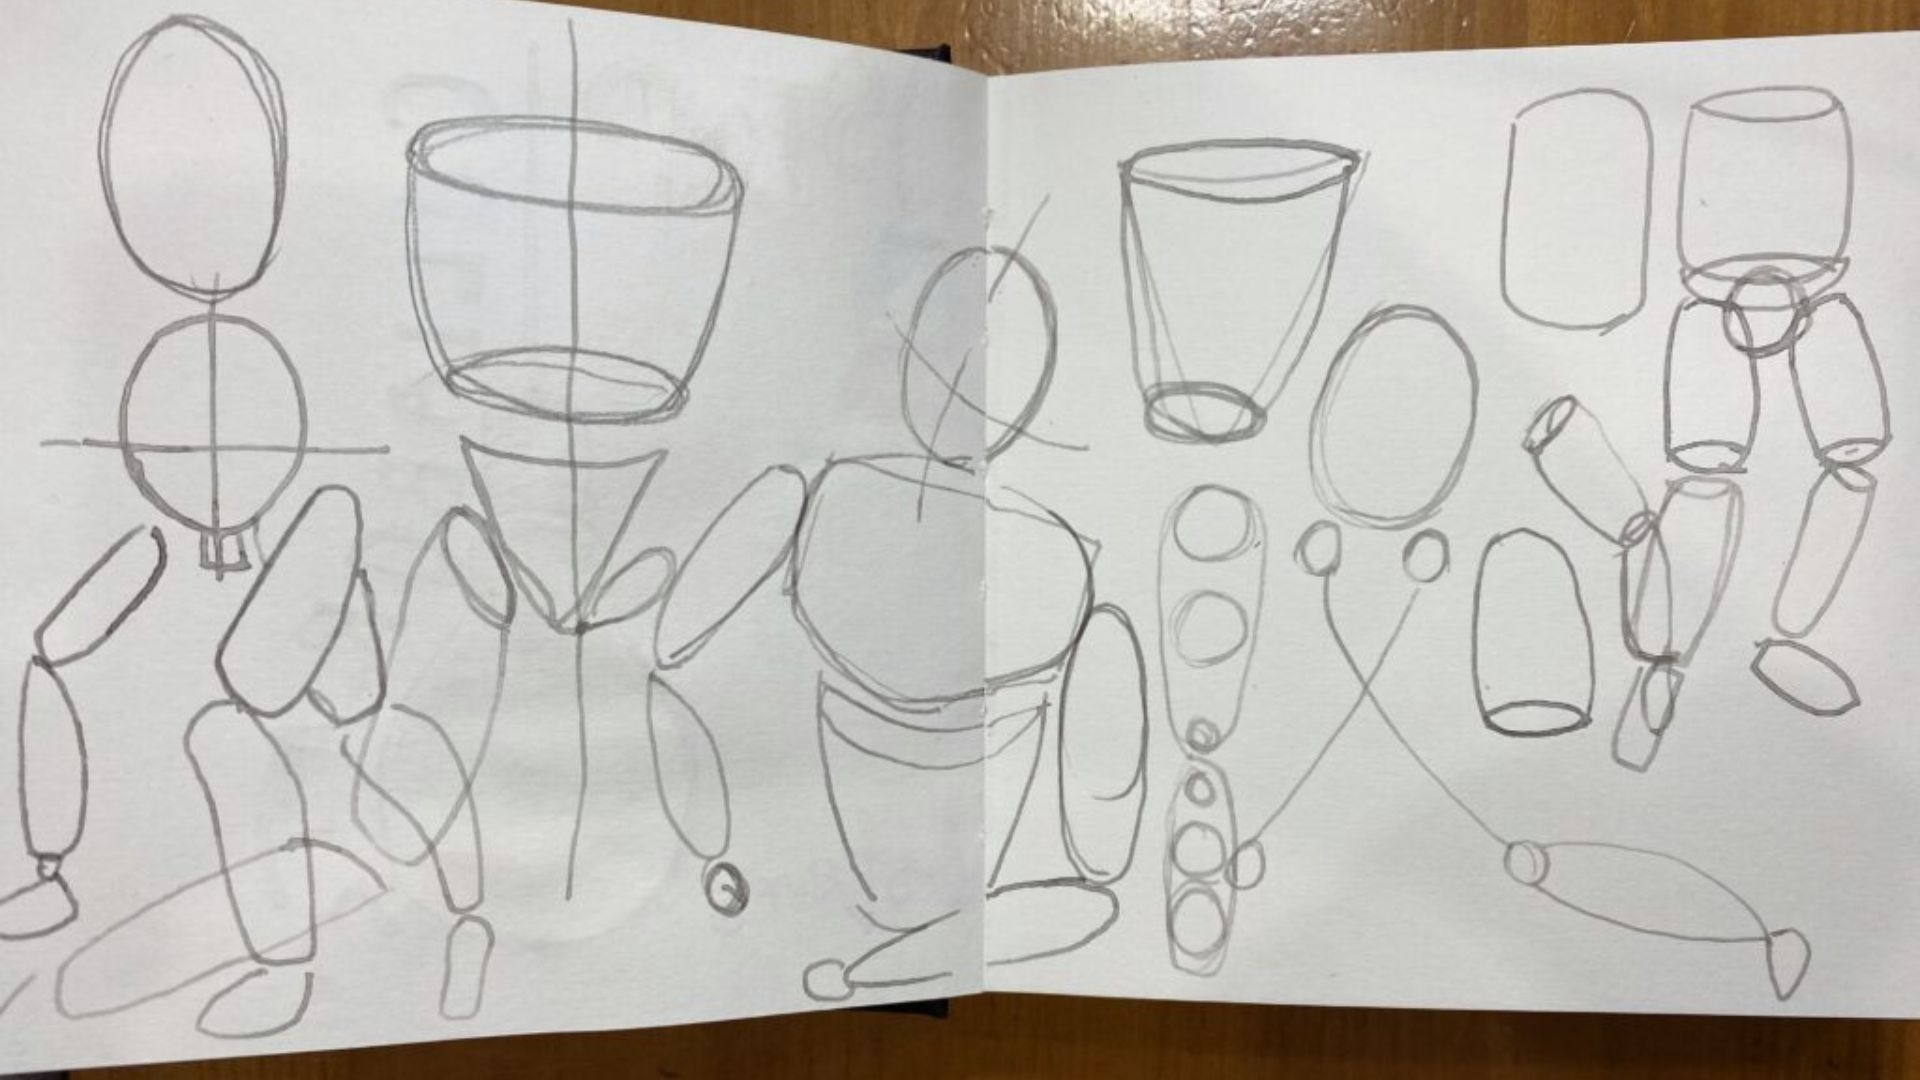
Think of the body in parts:
- Head: oval or circle
- Neck: short rectangle
- Chest: large oval or box
- Hips: smaller oval below the chest
- Arms and legs: long tubes or cylinders
- Hands and feet: small ovals or triangles
When you see the body as shapes, drawing becomes logical. You’re not guessing. You’re placing pieces in the right spots.
Using Circles and Lines to Build a Person Drawing Easy
Start with a stick figure. Add circles at each joint; shoulders, elbows, knees, wrists. These act as guides.
Then connect them with lines. This gives your figure movement and proportion before you add any detail.
This method is called “gesture drawing.” Artists use it to plan poses quickly. Even pros start here.
Step-by-Step Person Drawing Easy Tutorial
Follow these steps in order. Don’t skip ahead. Each step builds on the last.
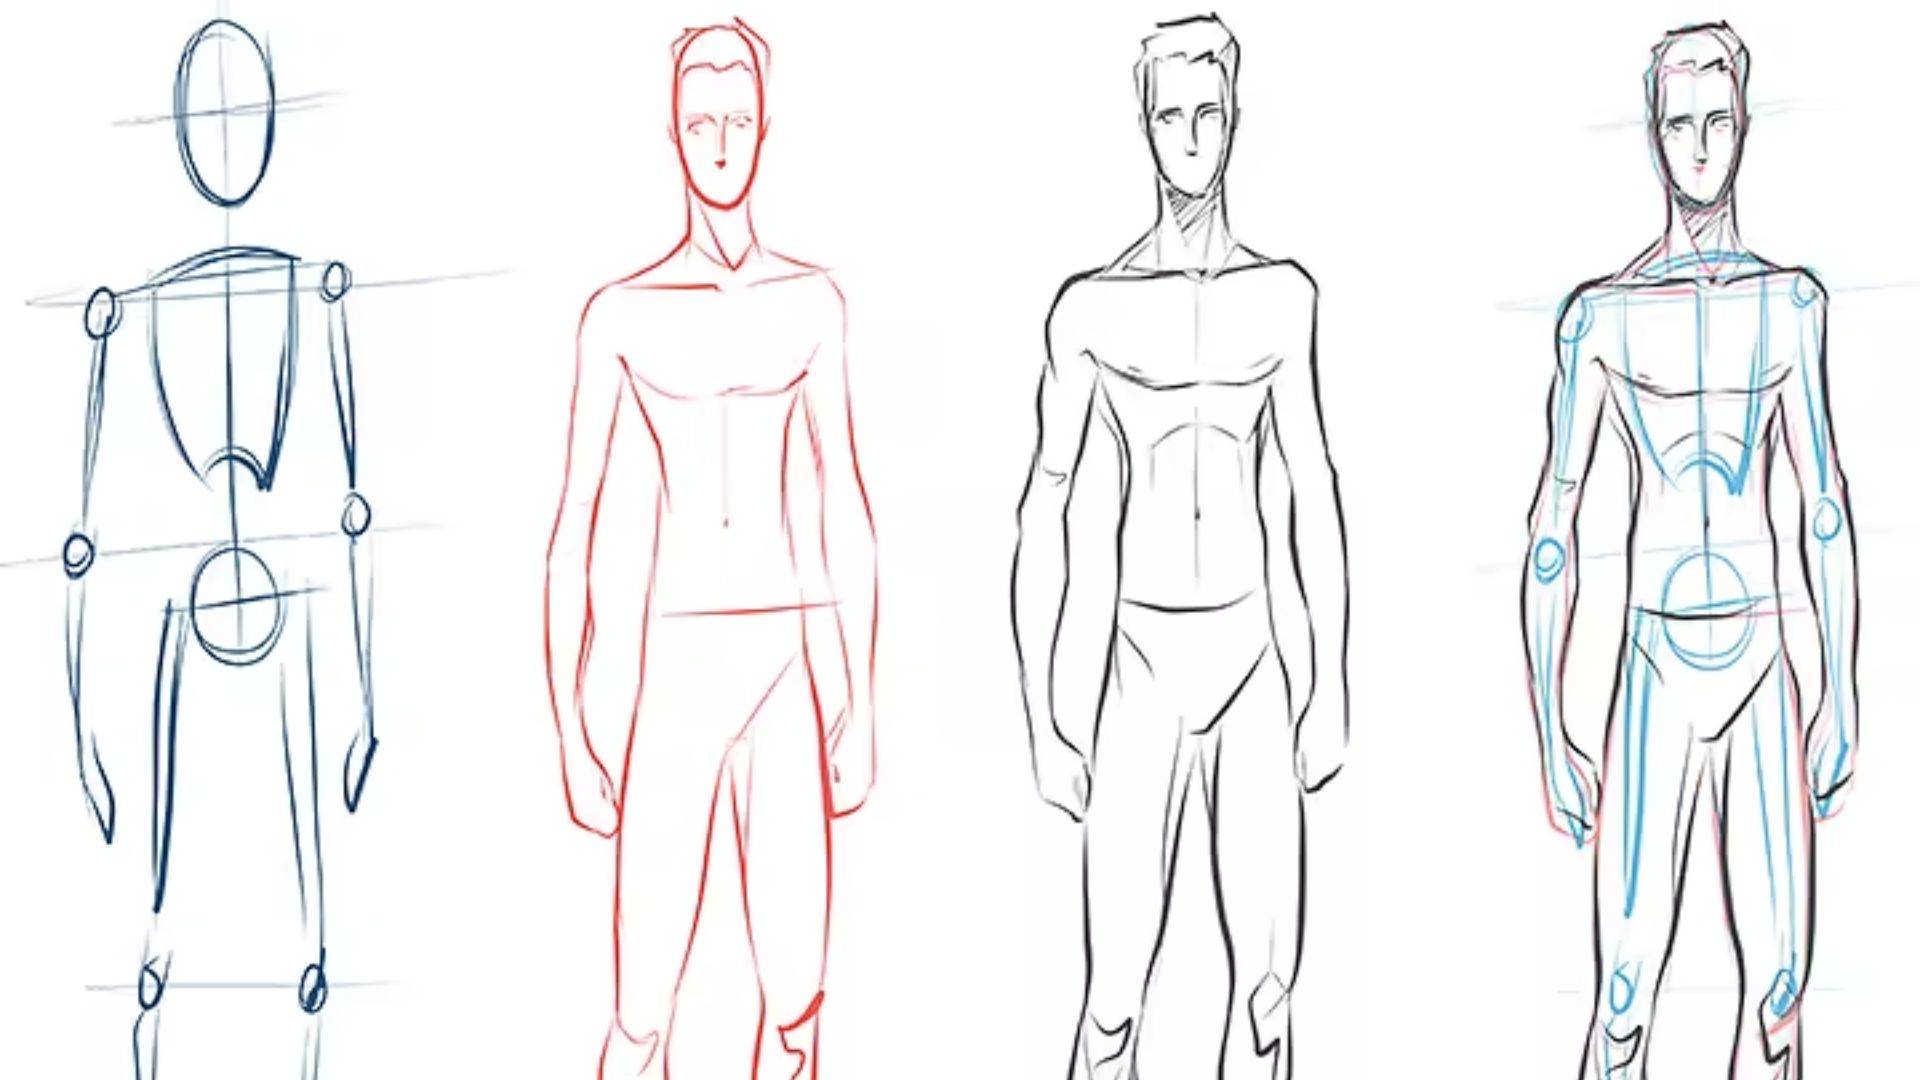
Step 1: Draw a Stick Figure (A Person Drawing Easy Base)

Draw a small oval for the head. Add a straight vertical line for the spine. Branch out two lines for the arms and two for the legs.
Add small circles at each joint.
This is your base. Keep it light. You’ll build on top of it.
Step 2: Add Basic Shapes for Easy Person Drawing Easy

Now flesh out the figure with shapes:
- Oval for the chest
- Smaller oval for the hips
- Tubes for upper and lower arms and legs
- Rounded shapes for hands and feet
Don’t press too hard. These are guide shapes, not final lines.
Step 3: Refine the Outline and Proportions
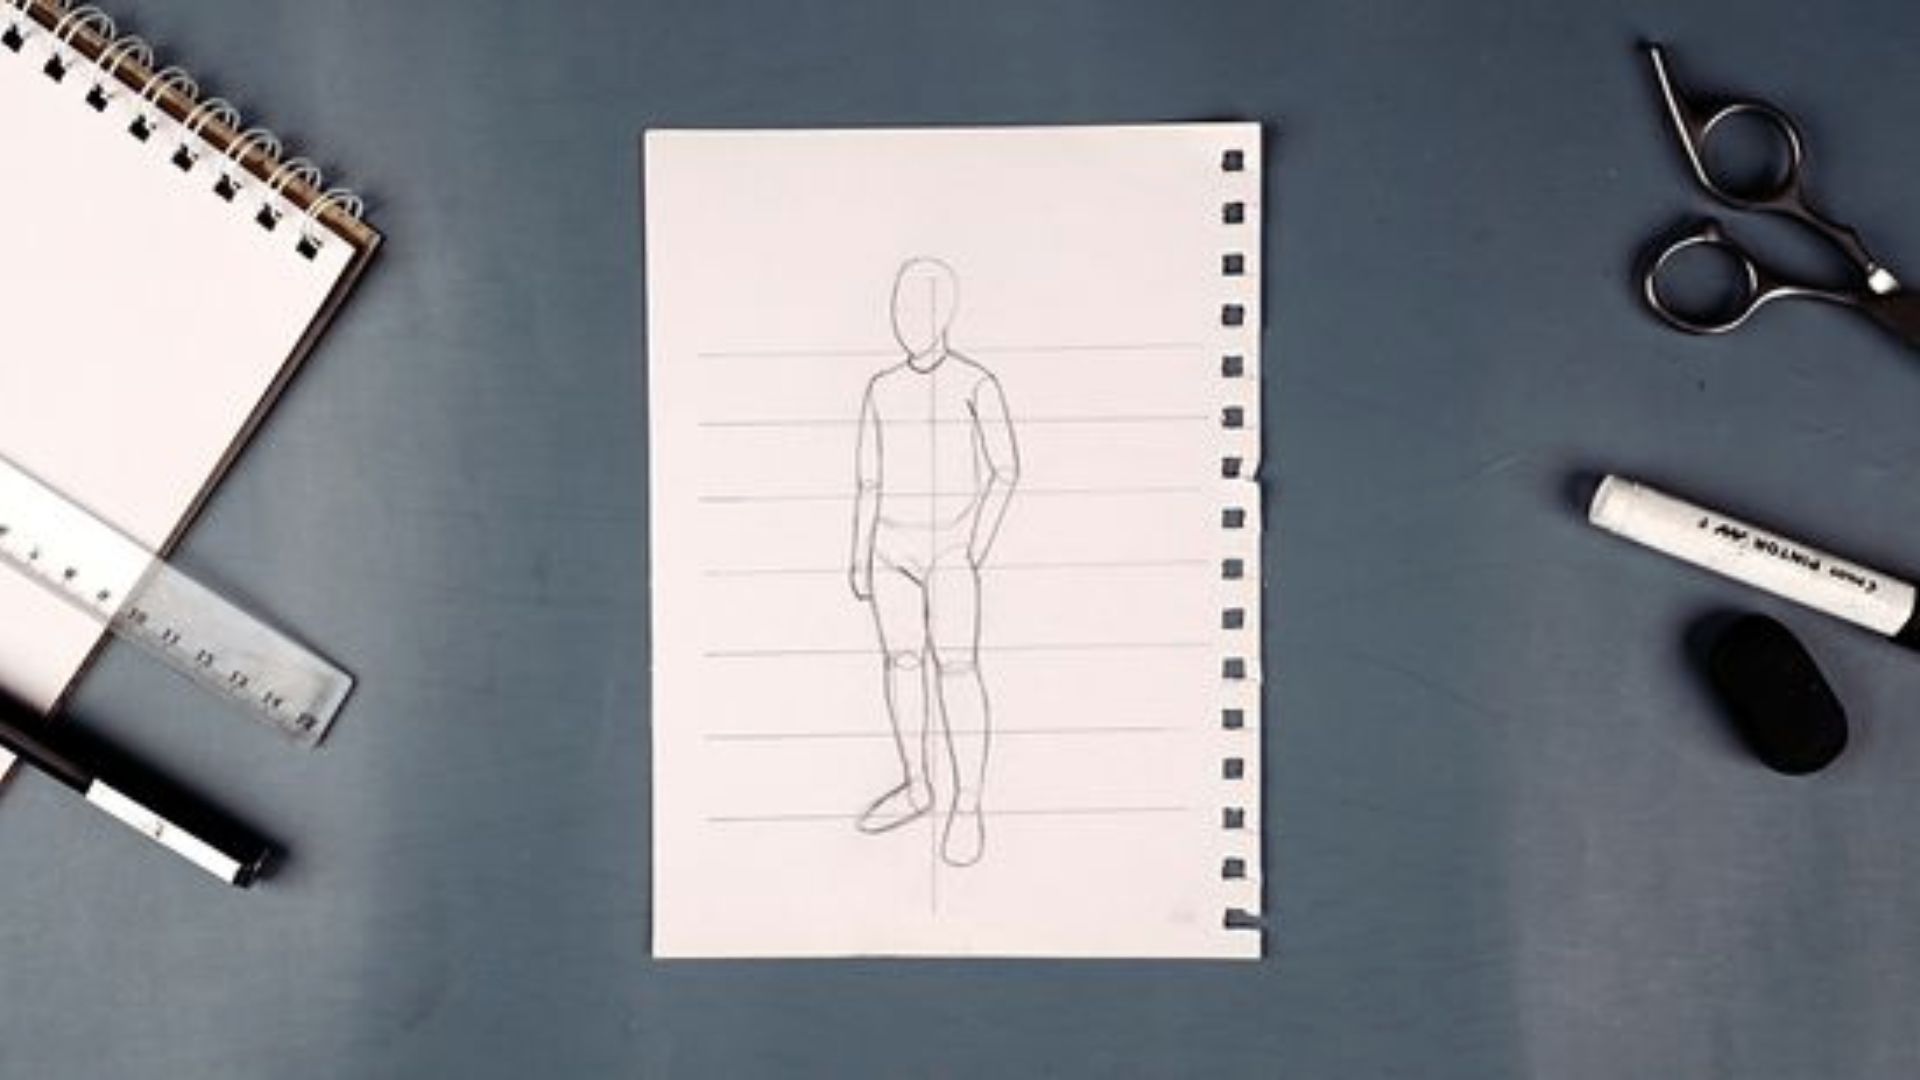
Look at your shape framework. Now draw smoother outlines around the shapes. Connect them naturally. The shoulders should be wide.
The waist should narrow. The hips should be slightly wider than the waist.
Erase the inner guide shapes as you go. Your figure is starting to take form.
Step 4: Draw Face and Features Easily
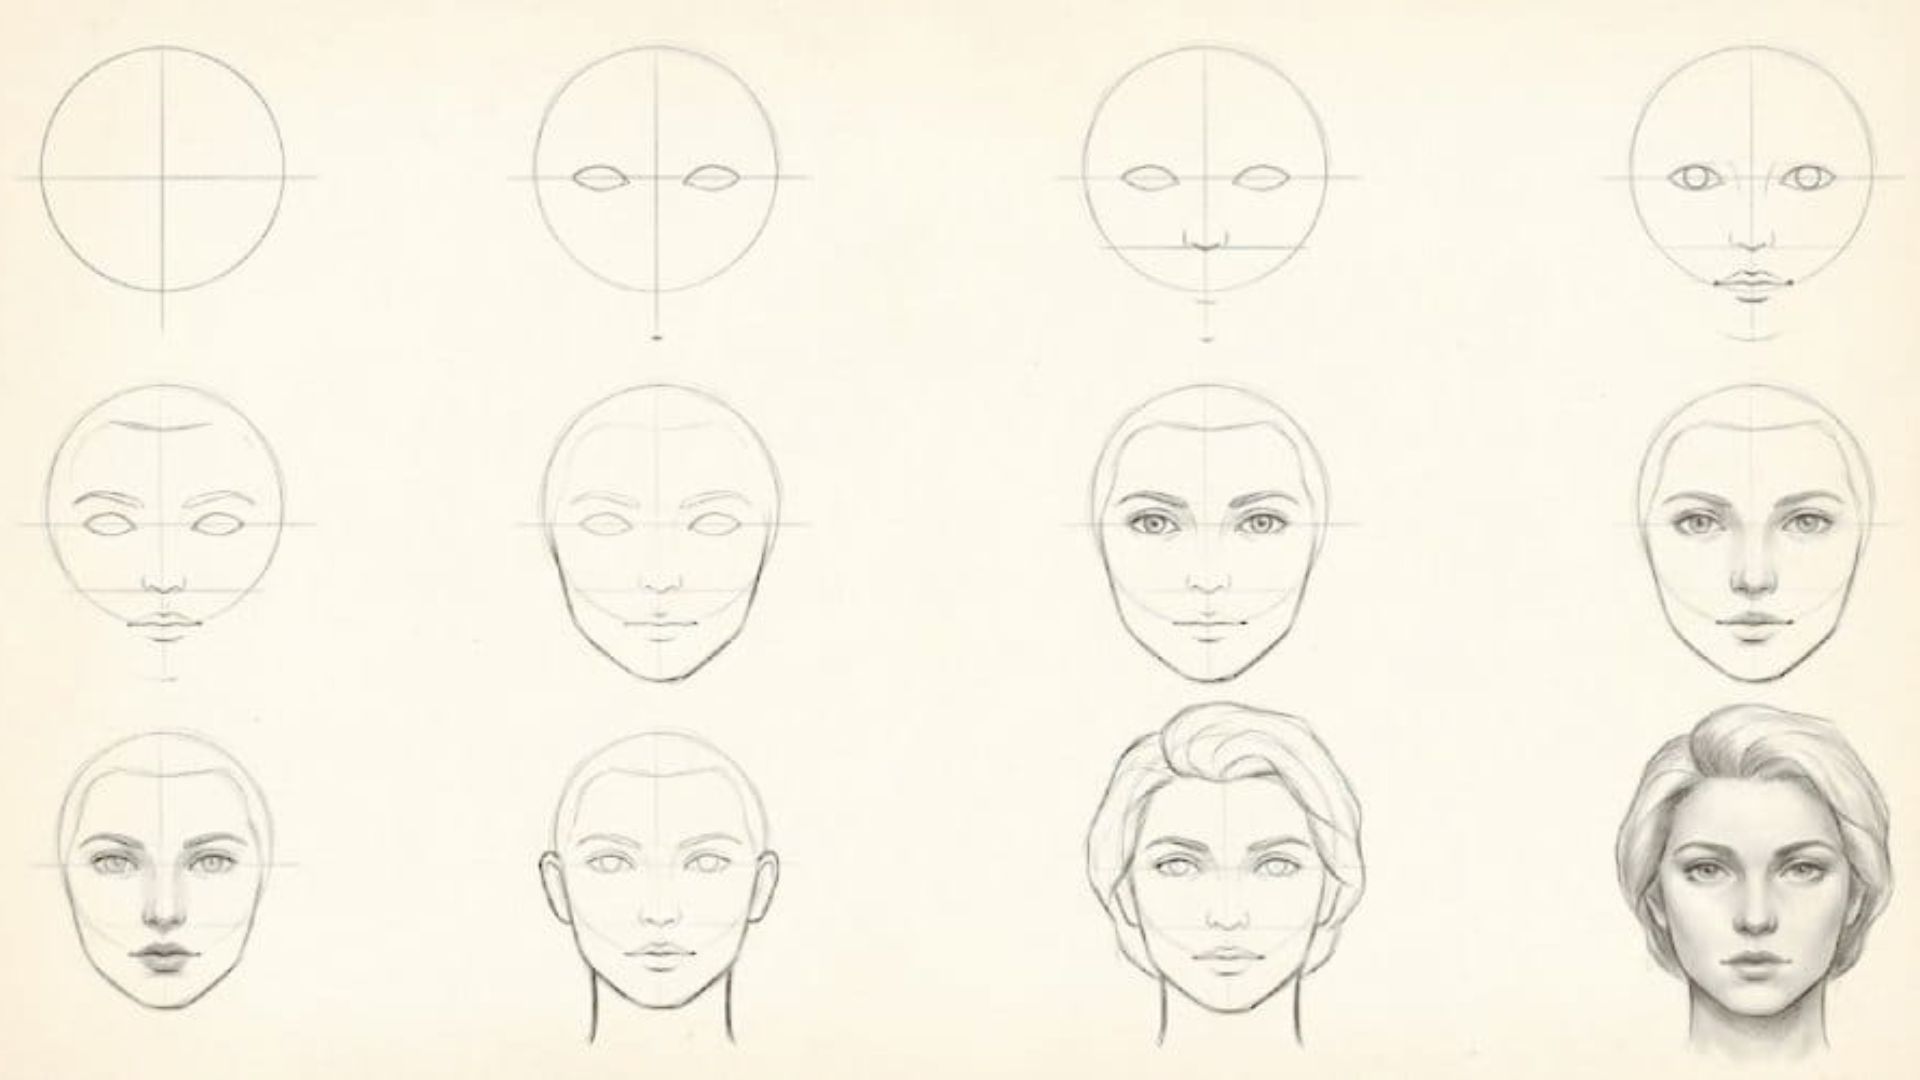
Divide the head oval into four equal sections using light cross lines.
Use these guides:
- Eyes go on the horizontal center line
- Nose sits halfway between eyes and chin
- Mouth goes halfway between nose and chin
- Ears align with the eyes on each side
Keep features simple at first. Two small ovals for eyes. A curved line for the mouth. A simple triangle or bump for the nose.
Step 5: Add Clothes and Final Details
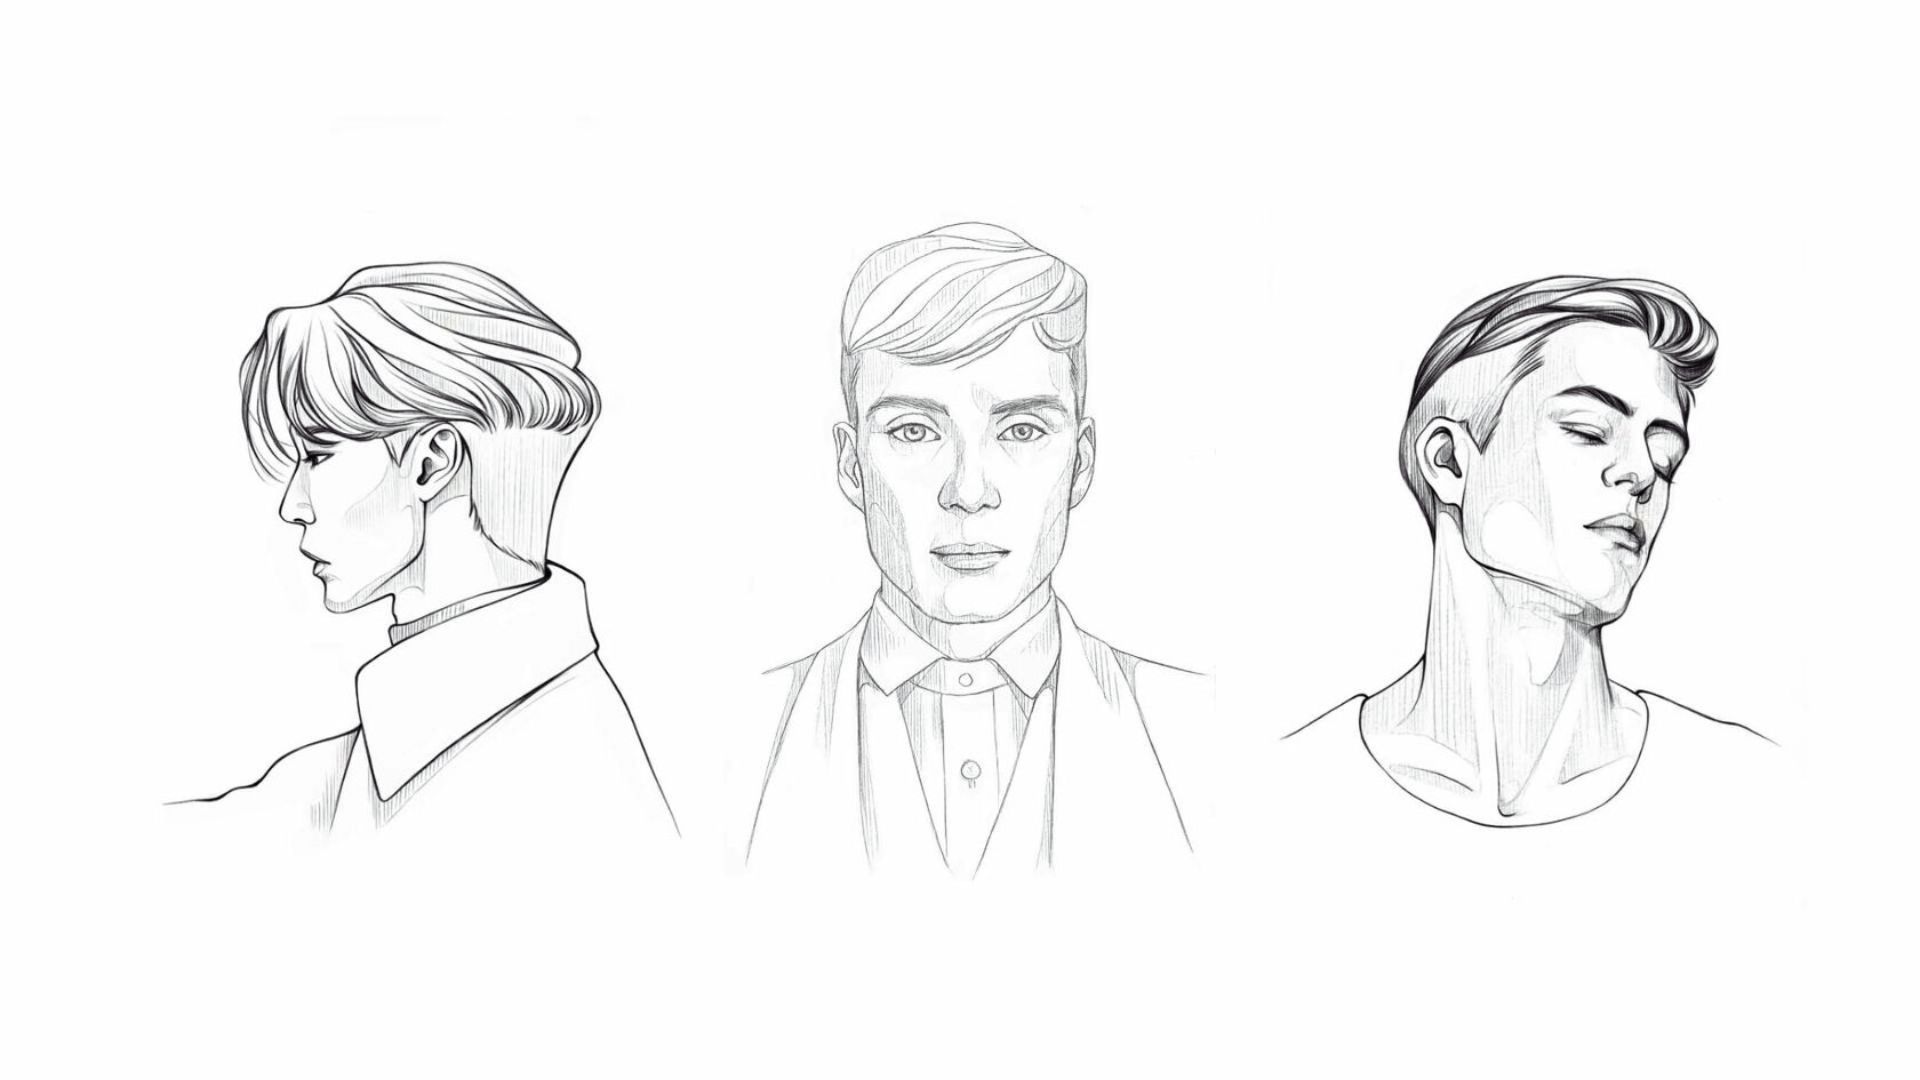
Clothes follow the body shape. Draw them slightly outside your figure outline.
Add:
- A shirt or top around the chest
- Pants or a skirt around the legs
- Simple shoes at the feet
Add small details last; fingers, collar, hair. Don’t be overcrowded. Less is more at this stage.
Practice Methods to Improve Person Drawing
Drawing once is not enough. Practice is what builds real skill.
Quick Sketching Techniques for Beginners
Set a timer for two minutes. Draw a full person at that time. Don’t overthink it. This is called quick sketching or gesture drawing.
Do five quick sketches per session. Speed forces your hand to move confidently. Over time, your figures will look more natural without much effort.
Drawing a Person from Different Angles Made Easy
Once you’re comfortable with the front view, try:
Side view (profile)
Three-quarter view (diagonal)
Back view
Each angle teaches you something new about the body. Start with the side view. It’s the second easiest after the front.
How to Add Details to a Person Drawing
Details bring your drawing to life. But add them slowly and carefully.
Simple Shading Techniques for Depth
Pick one light source. Imagine the light coming from the top left. Everything on that side stays light. The opposite side gets darker.
Use these shading methods:
- Hatching: parallel lines close together
- Cross-hatching: lines crossing each other
- Blending: smudging with your finger or a tissue
Start with hatching. It’s the easiest to control.
Adding Details Without Overcomplicating
Add one detail at a time. Hair first. Then facial features. Then clothing folds. Then shading.
If you add everything at once, the drawing looks messy. Take it slow. Step back after each detail and check if it looks balanced.
Tips to Master Easy Person Drawing Easy
Small habits lead to big improvement over time.
- Draw every day, even for just ten minutes
- Consistency beats long sessions done rarely
- Keep a sketchbook and fill one page a day
- Look back after a month to see your progress
- Short daily sessions build faster skill than occasional long ones
Conclusion
You’ve covered tools, basic shapes, a full step-by-step tutorial, practice methods, and shading tips.
Now try drawing a person in a different pose tomorrow and add a background next week. I remember my first person drawing an easy attempt looked like a wobbly alien, and that’s completely okay.
Every artist starts somewhere. Skills grow with practice, not perfection. Start today, make it messy, and keep going.
I’d love to see your progress, so drop a comment below and share how your first drawing turned out. You’ve got this.
Frequently Asked Questions
How long does it take to learn to draw a person easily?
Most beginners see clear improvement within two to four weeks of daily practice. Short daily sessions work better than occasional long ones.
Do I need to know how to draw before trying this guide?
No experience is needed. This guide starts from the very beginning with stick figures and basic shapes anyone can follow.
What is the easiest way to draw a person for beginners?
Start with a stick figure, then add simple shapes like ovals and rectangles. Build up details slowly from there.
Can I use a pen instead of a pencil for a person drawing easily?
It’s better to start with a pencil. Pencils let you erase mistakes, which is important when you’re still learning proportions.
How do I make my drawing look more realistic?
Focus on correct proportions, add shading using a single light source, and practice gesture drawing regularly to improve the natural look of your figures.
