

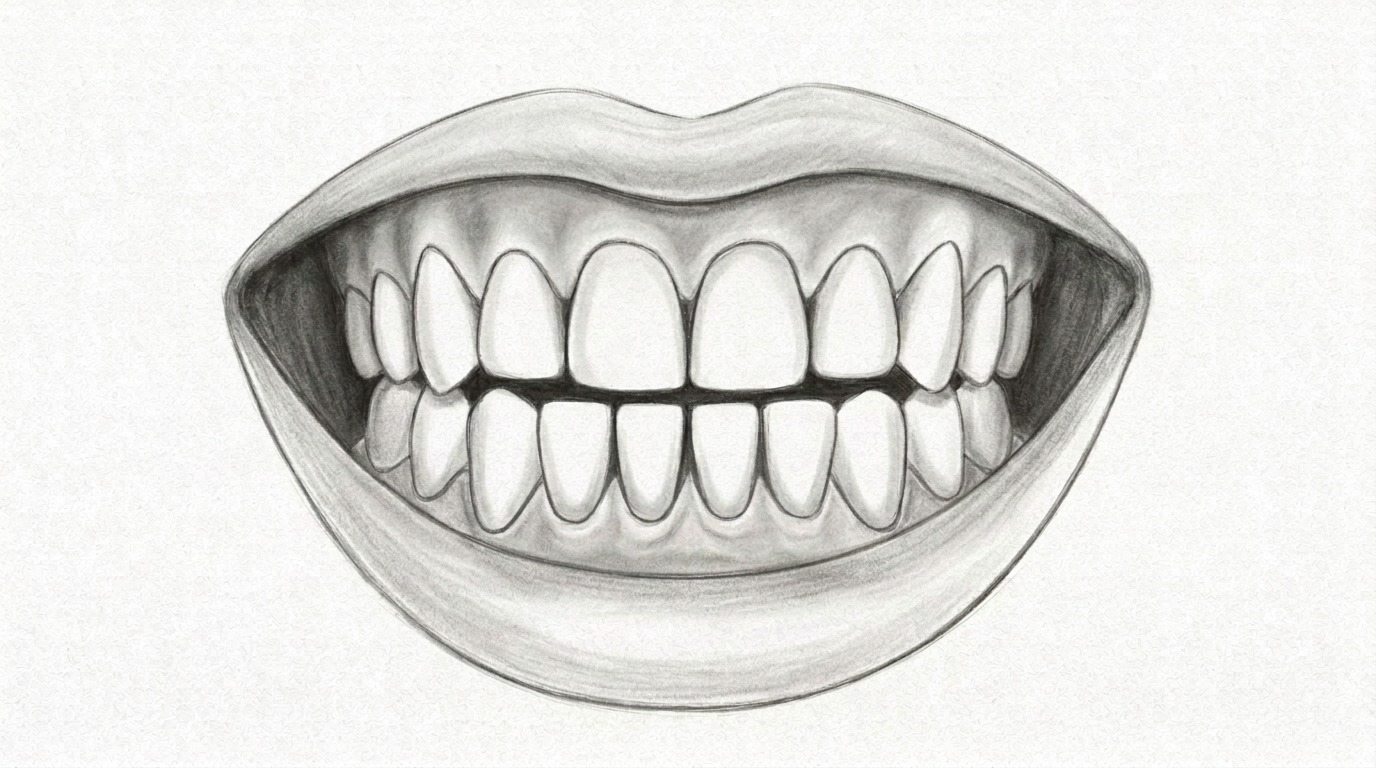
Have you been searching for how to draw teeth but feel unsure about how to make them look natural?
This guide will help you understand the simple steps needed to create a clear and realistic teeth drawing.
In this article, you’ll learn the materials needed, how to sketch the basic shape, add tooth details, create a smile, and use shading for depth.
With experience creating beginner-friendly drawing guides, I focus on making each step simple and practical.
If you are learning facial sketches or improving your art skills, this guide will help you draw teeth with confidence.
What Are Teeth?
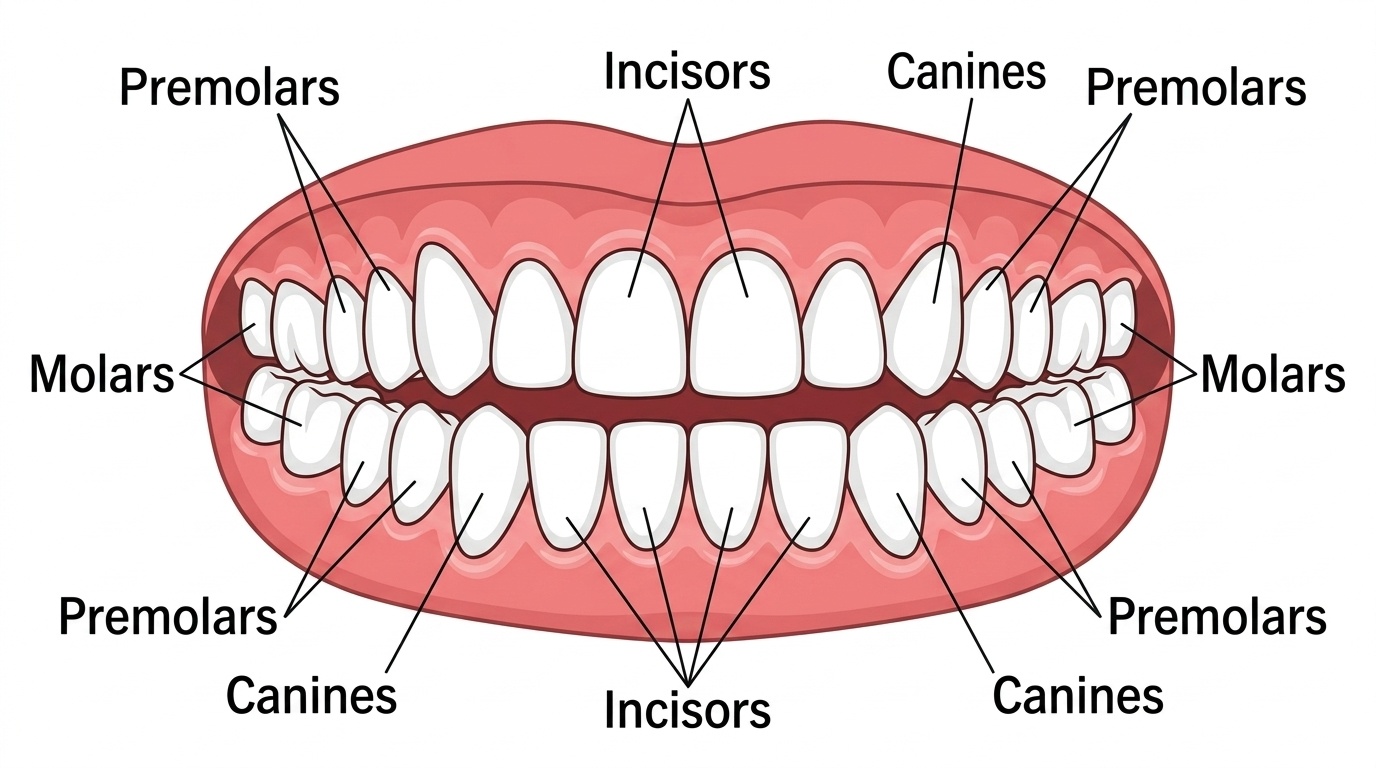
Teeth are hard structures inside the mouth that help with biting, chewing, and creating a natural smile.
In drawing, teeth may look simple, but understanding their shape and placement helps create a more realistic result.
A set of teeth includes different parts like front teeth, canines, and molars, each with a slightly different shape. The gums, spacing, and curves also affect how a smile looks in a sketch.
When learning how to draw teeth, it is important to notice these small details and understand how they connect together.
By studying basic tooth structure, you can create drawings that look more balanced, natural, and expressive.
Materials You Need to Draw a Teeth

You only need simple basic tools to create your teeth drawing easily.
- Pencil
- Eraser
- Drawing paper
- Black pen (optional)
- Colored pencils or markers
How to Draw Teeth Step by Step
Follow these simple steps to create a natural-looking teeth drawing by starting with basic shapes and slowly adding details.
Step 1: Draw the Basic Teeth Shape
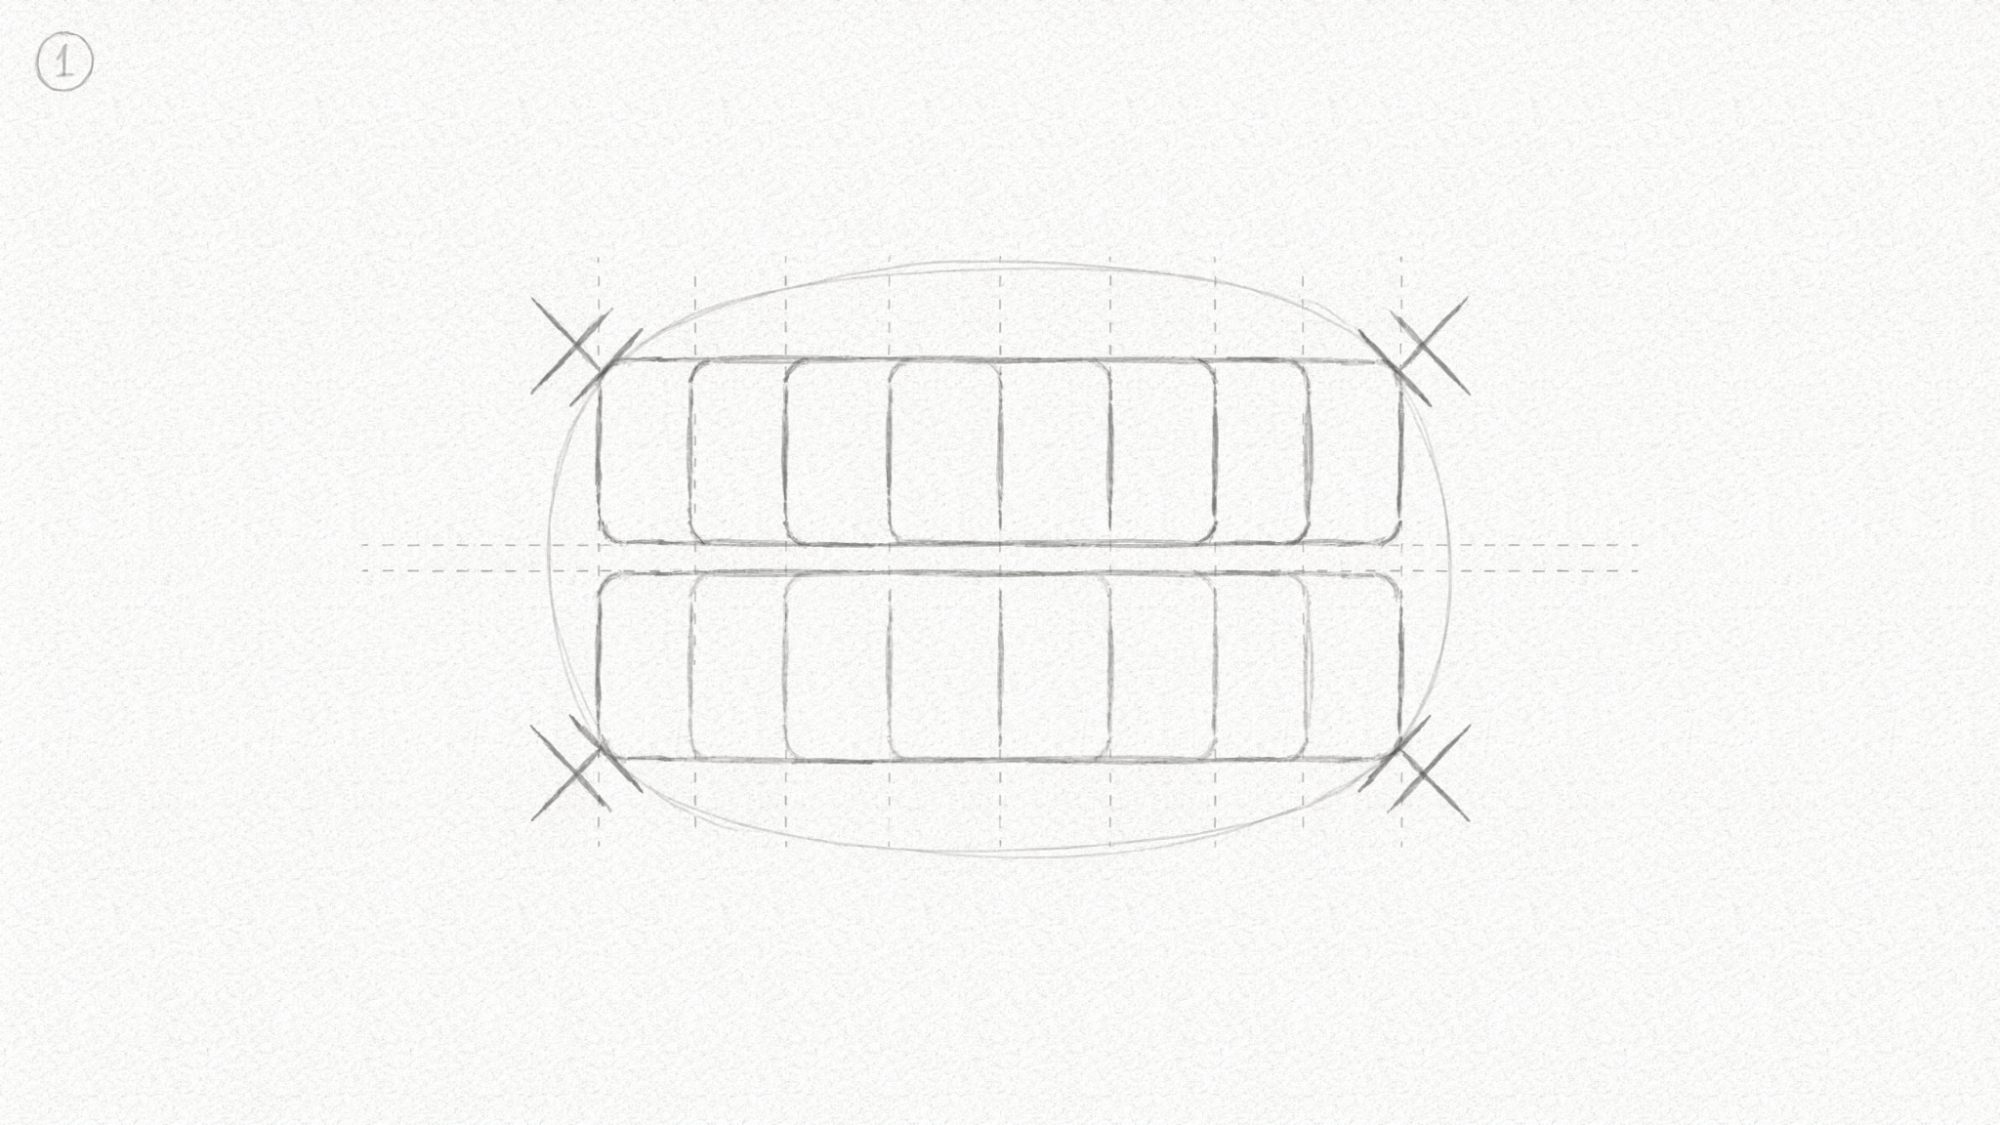
Start by creating simple rectangle or oval shapes to form the base of your teeth. Use light pencil strokes so you can easily adjust the size and placement.
Focus on creating a balanced structure before adding details. These basic shapes will help you build a neat and organized teeth drawing.
Step 2: Add the Tooth Outline and Structure
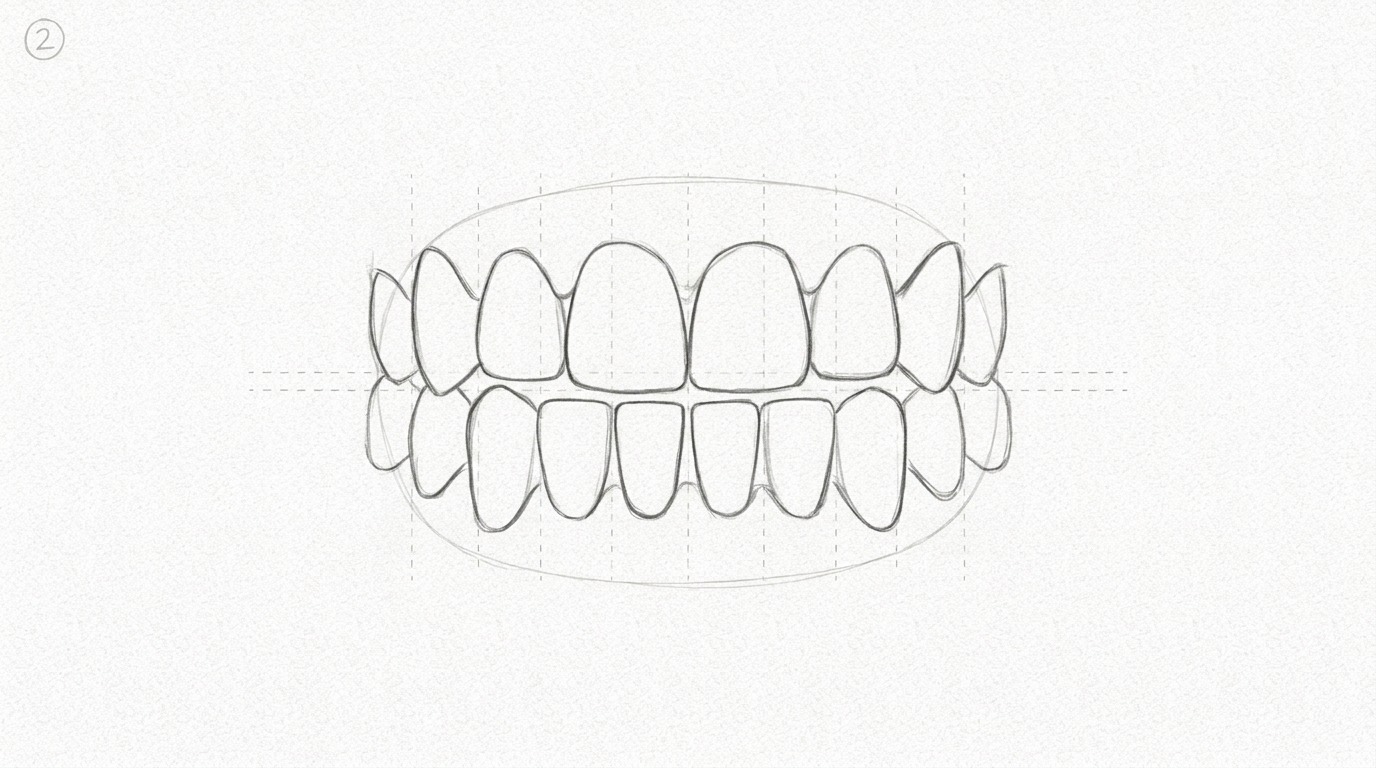
Now shape each tooth by adding soft curves and adjusting the edges. Pay attention to the size and spacing between each tooth to create a natural appearance.
Avoid making every tooth exactly the same because real teeth have small differences in shape and position.
Step 3: Draw the Gums and Tooth Details
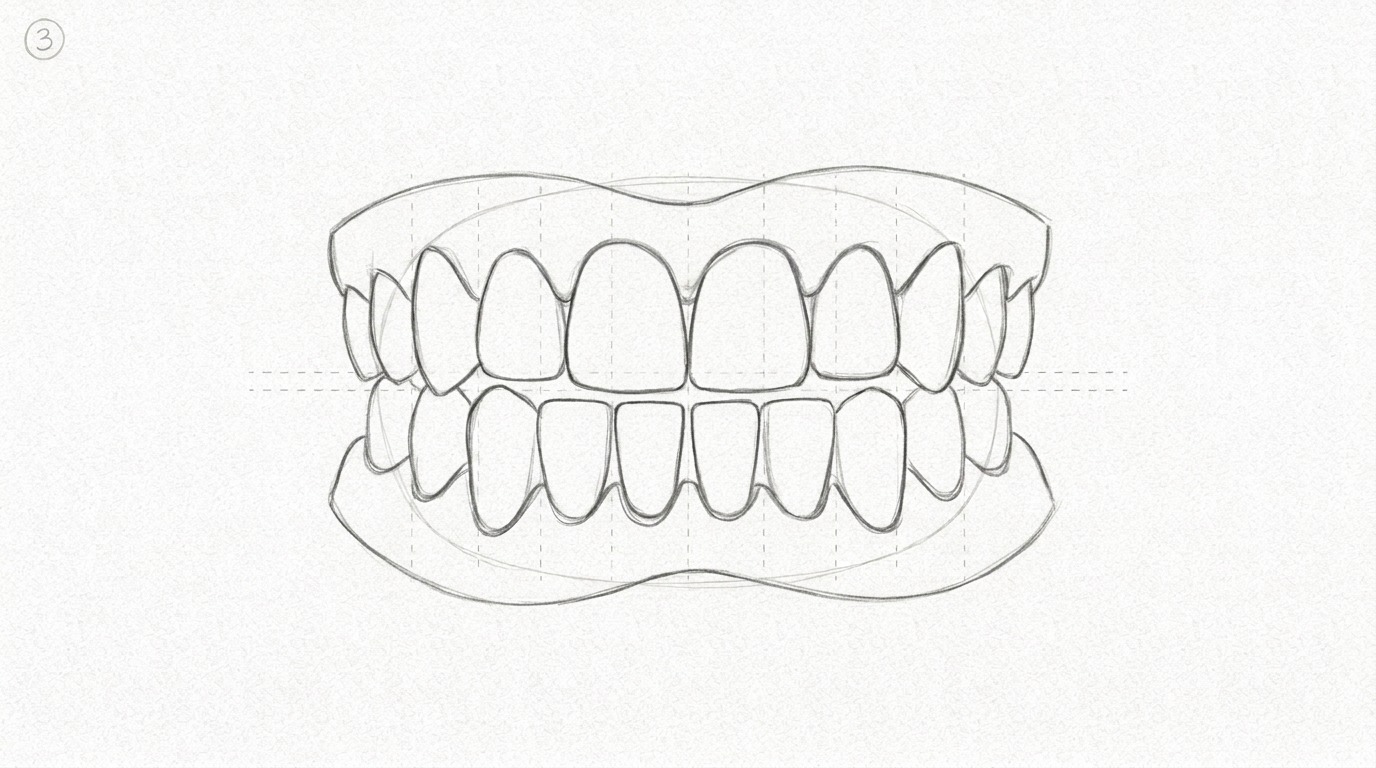
Add the gum line above the teeth to give your drawing more structure. Include small details like slight curves and differences between teeth.
Keep the details simple at first. A clean gum shape and proper spacing can make your teeth drawing look more realistic.
Step 4: Add the Smile Shape

Create the curve of the smile by adjusting the position of the teeth inside the mouth shape. Make sure the teeth follow the natural curve of the lips.
A balanced smile shape will help your drawing look more expressive and connected with the overall face.
Step 5: Add Shading and Depth

Add soft shadows between the teeth and around the gum area to create depth. Use lighter and darker tones to make the drawing look more three-dimensional.
Blend the shading carefully so the teeth appear smooth and natural without making the lines too heavy.
Step 6: Refine the Teeth Drawing

Clean up extra guidelines and improve the main outlines. Check the spacing, size, and shape of each tooth before finishing.
Make small adjustments where needed to create a cleaner drawing. Refining these details will help your teeth sketch look more polished.
Tips to Make Your Teeth Drawing Better
These simple tips can help you create a more natural and balanced teeth drawing while improving your sketching skills.
- Study real teeth references to understand shapes better.
- Focus on spacing and proportions first.
- Keep your pencil strokes light while sketching.
- Add details slowly instead of rushing.
- Practice drawing different smile shapes.
Common Mistakes When Drawing Teeth
Avoiding these mistakes can help your teeth drawing look cleaner and more realistic.
- Making teeth look too square or identical.
- Ignoring proper spacing between teeth.
- Adding too many dark lines too early.
- Forgetting the gum placement.
- Making every tooth the same shape.
Watch a Teeth Drawing Tutorial Video
A video tutorial can help you understand tooth shapes, spacing, and shading in a visual way. Follow along step by step, pause when needed, and practice each part to improve your drawing skills.
Teeth Drawing and Coloring | How to Draw Teeth Step by Step:https://www.youtube.com/watch?v=Mi011f5J6to
Conclusion
Learning how to draw teeth becomes easier when you understand basic shapes, spacing, and small details.
I enjoy seeing how simple lines can slowly turn into a natural-looking smile, and you can create the same progress with regular practice.
Take your time, try different styles, and enjoy improving your drawing skills step by step. Your artwork will grow as you keep practicing.
Start your next sketch today, share your drawing in the comments, share this guide with others, or try more easy drawing tutorials.
Frequently Asked Questions
How do you draw teeth easily?
Start by drawing simple shapes and arranging them in a natural row. Then add details like gums, spacing, and shading step by step.
Is how to draw teeth easy for beginners?
Yes, beginners can learn by practicing basic shapes and proportions. Simple steps make the process easier to understand.
How can I make teeth look realistic in a drawing?
Focus on spacing, soft curves, and light shading. Adding small details can make the teeth appear more natural.
What tools do I need to draw teeth?
A pencil, eraser, and paper are enough to begin. You can use blending tools or colors for extra detail.
How do you draw teeth in a smile?
Start with the mouth curve and place teeth along that shape. Adjust the size and spacing to create a natural smile.
