

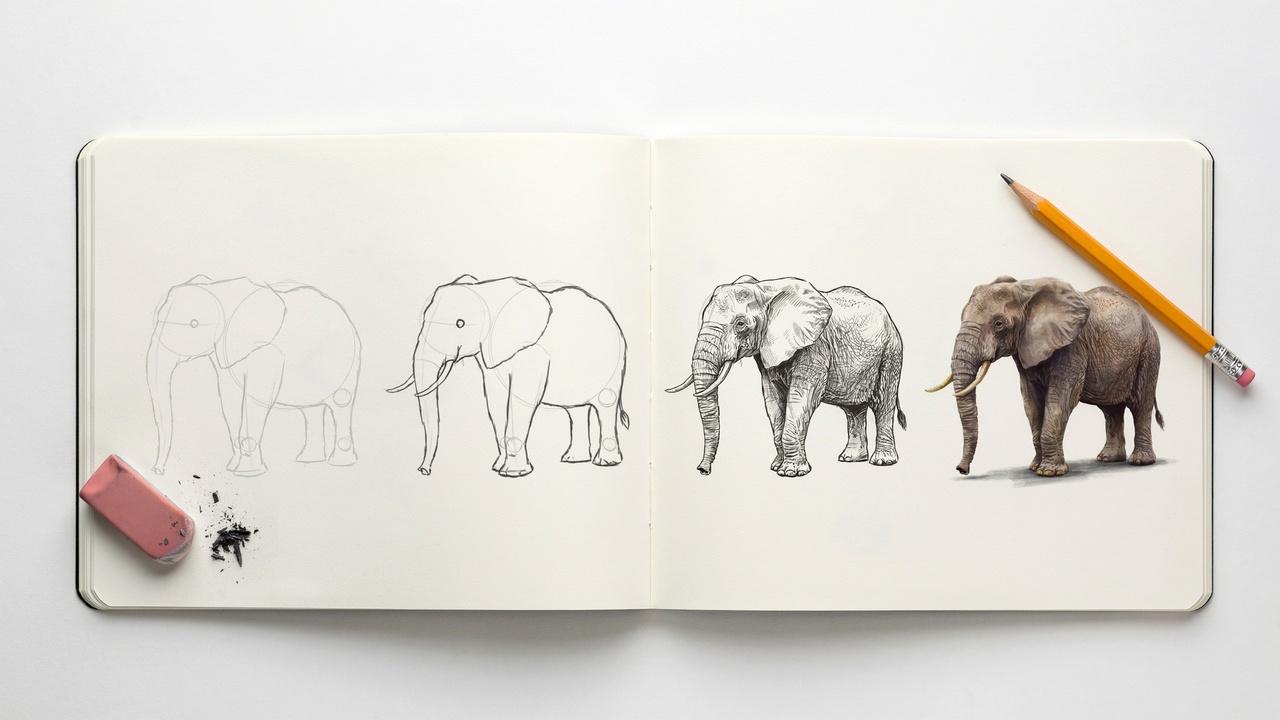
Want to learn how to draw an elephant but don't know where to start? You're not alone.
Many beginners give up because the trunk looks wrong or the legs feel uneven. This guide fixes that.
I've sketched dozens of elephants over the years, and I'm sharing exactly what works.
In this post, you'll find the supplies you need, a step-by-step drawing guide, tips for realistic shading, common mistakes to skip, and fun variations like cartoons and baby elephants.
Whether you're drawing for fun or for a school project, this guide walks you through each part slowly.
By the end, you'll have a complete elephant drawing you're proud of, plus simple tricks to make future sketches even easier.
Things to Know Before Drawing an Elephant
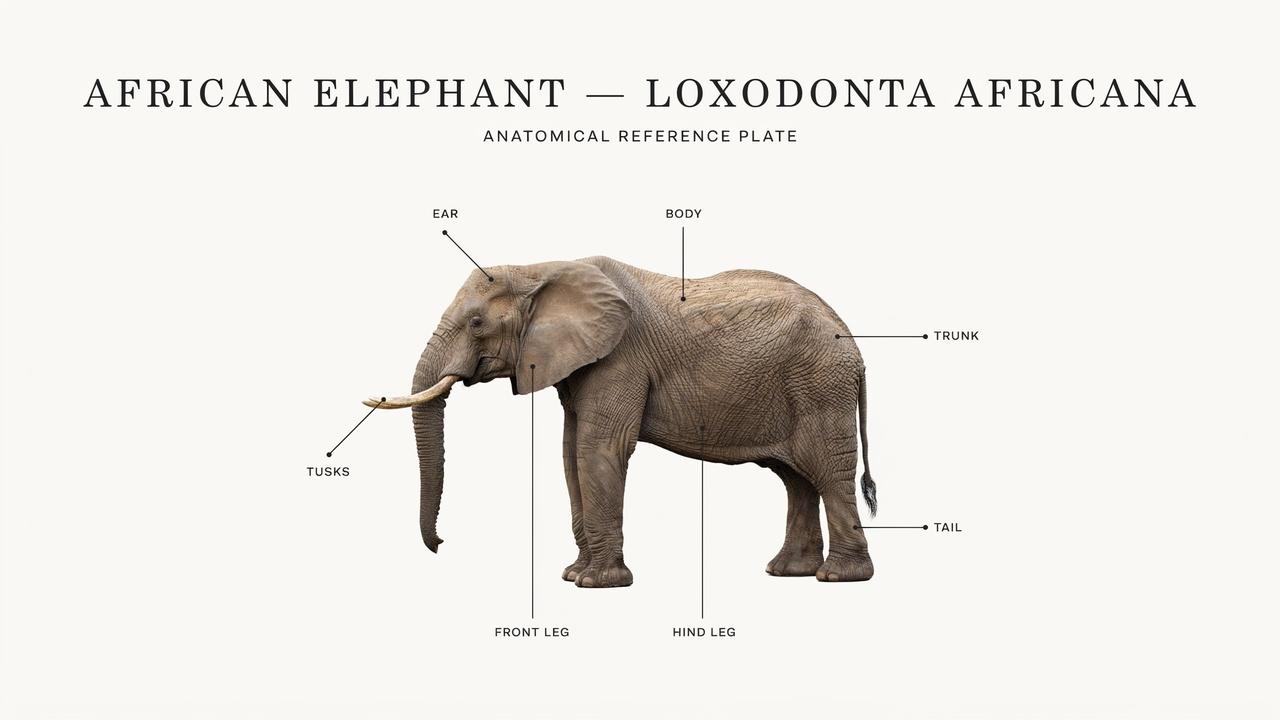
Drawing an elephant gets easier once you know a few basics.
Start with simple circles and ovals to build the body, head, and legs. Keep the head smaller than the body for the right balance.
Spend extra care on the ears since they are large with soft, rounded edges, and draw the trunk slowly with gentle curves and a few wrinkles near the base.
Make the legs thick and straight with wide, flat feet. Add light pencil strokes for the folds and rough patches in the skin, but don't overdo it.
Working from a clear photo helps you stay accurate on shape and posture. Like any skill, this takes practice.
Try different poses, take your time, and you'll see steady improvement.
Materials Needed for an Elephant Drawing
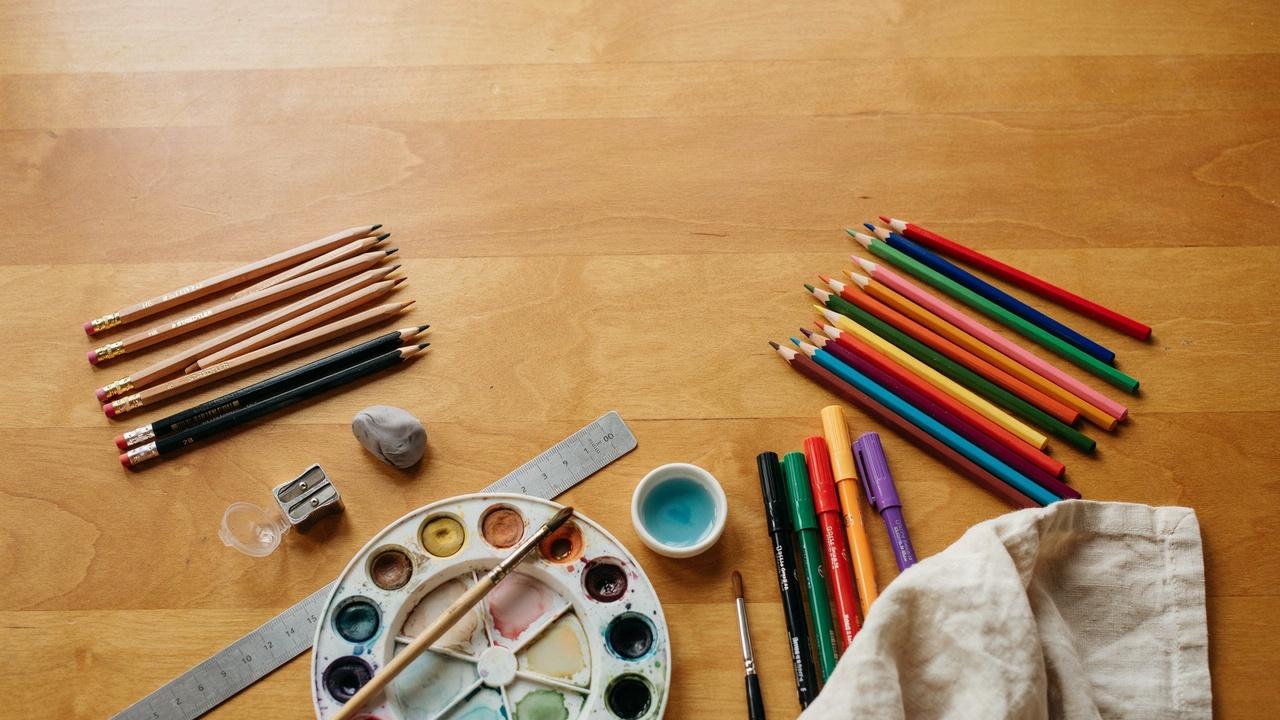
Before you start sketching, gather a few basic supplies. The right tools make the process smoother and more enjoyable from your very first line.
- A pencil, an eraser, and a sheet of paper are all you really need to get started.
- A sharpener keeps your lines clean, and a ruler can help with early guidelines if you want straighter shapes.
- If you want to add color later, colored pencils, markers, or watercolors all work well.
- Gray and brown shades give a natural look, but feel free to use any colors you like.
How to Draw an Elephant Step by Step
This part walks you through every stage of the drawing, from simple shapes to a finished elephant that's ready for shading or color.
Step 1: Draw the Head Guidelines
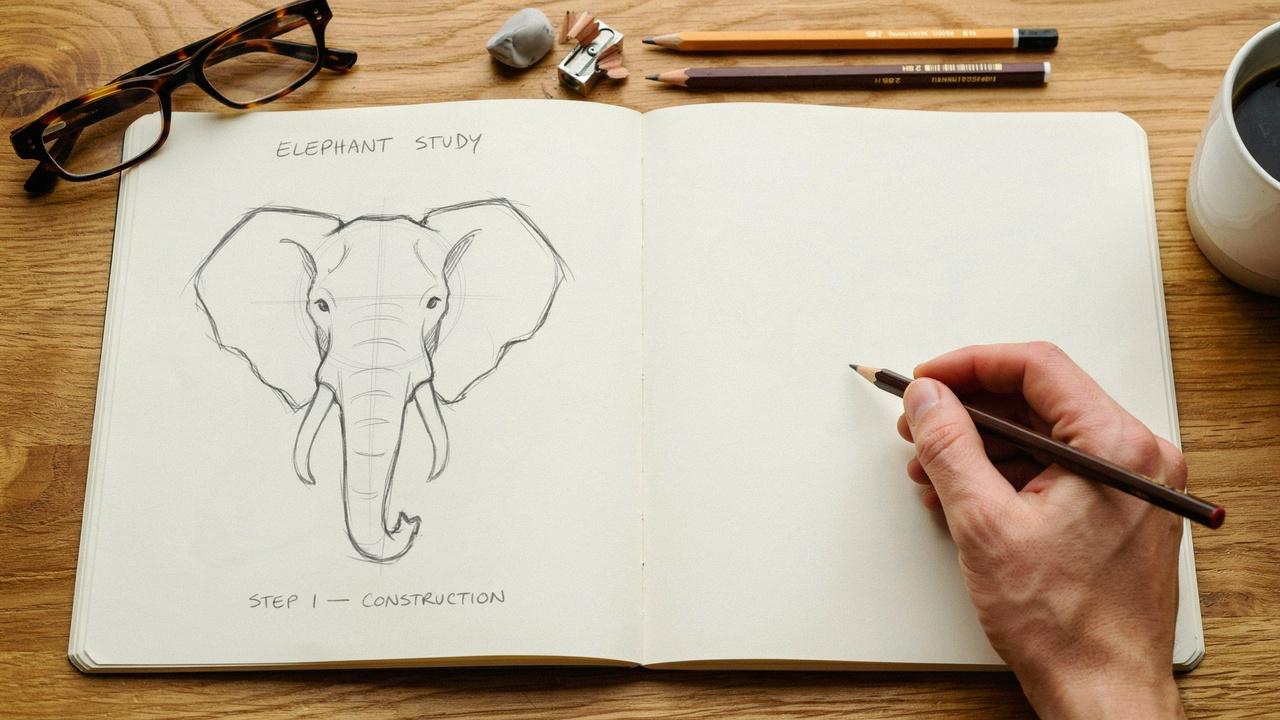
Start with a large oval for the head. Add a smaller circle near the bottom for the snout area.
These light shapes act as a base, so don't press too hard with your pencil.
Step 2: Draw the Trunk
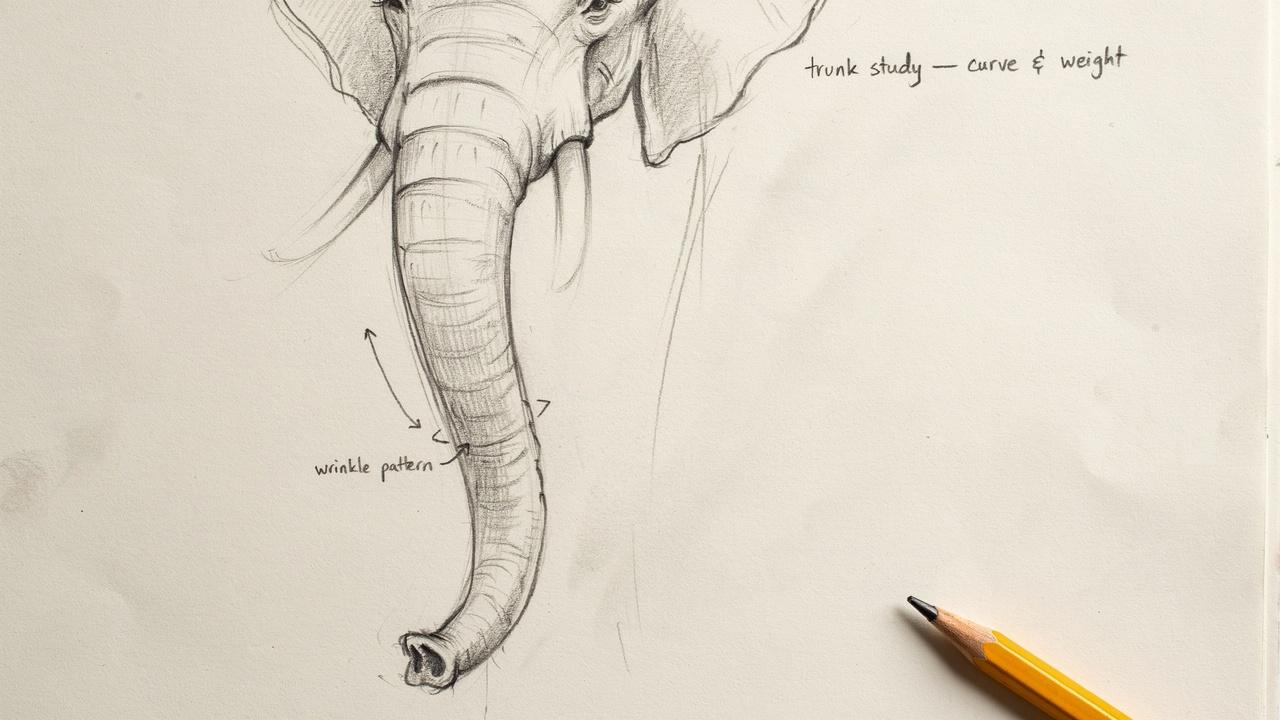
From the snout area, draw two curved lines that flow downward and slightly outward.
The trunk should be long and a little wavy, not stiff or straight.
Step 3: Sketch the Ears
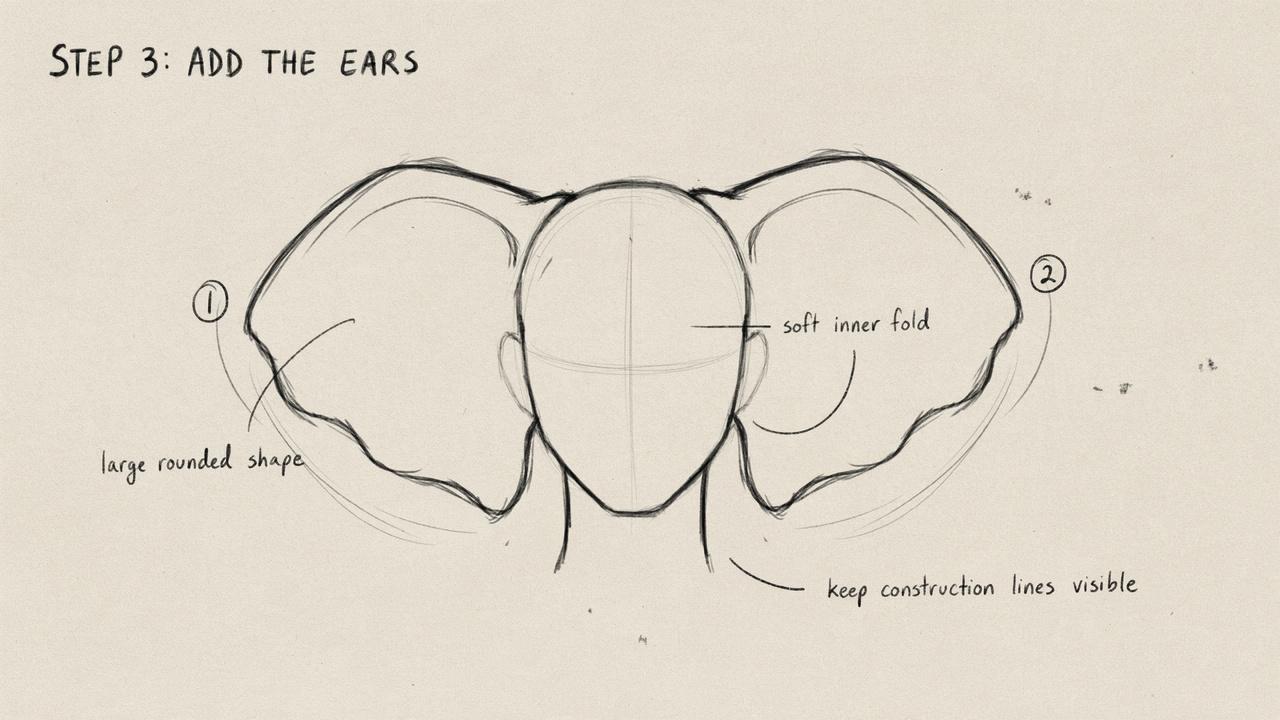
Draw two large, fan-shaped ears on either side of the head.
Elephant ears are wide and rounded at the edges, so keep your lines soft and curved.
Step 4: Add the Face Details
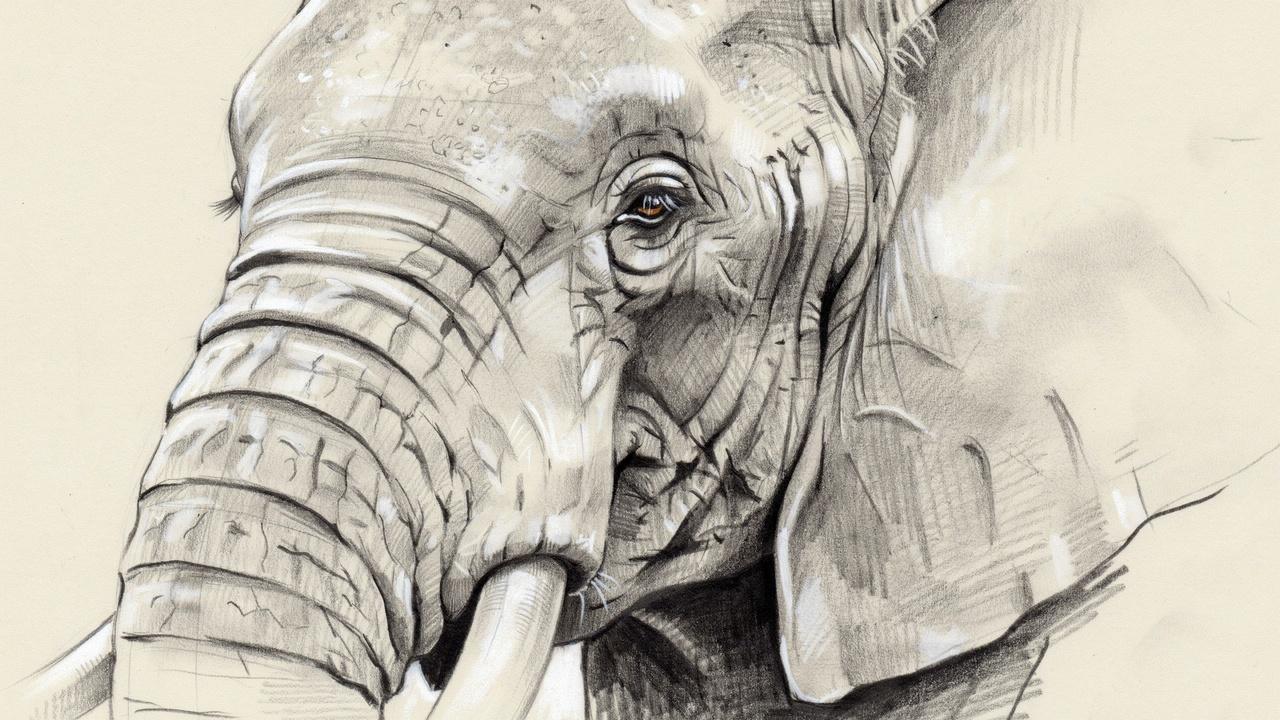
Add small, gentle eyes near the top of the head.
Sketch in tusks on either side of the trunk, and add a soft curved line for the mouth.
Step 5: Draw the Front Legs
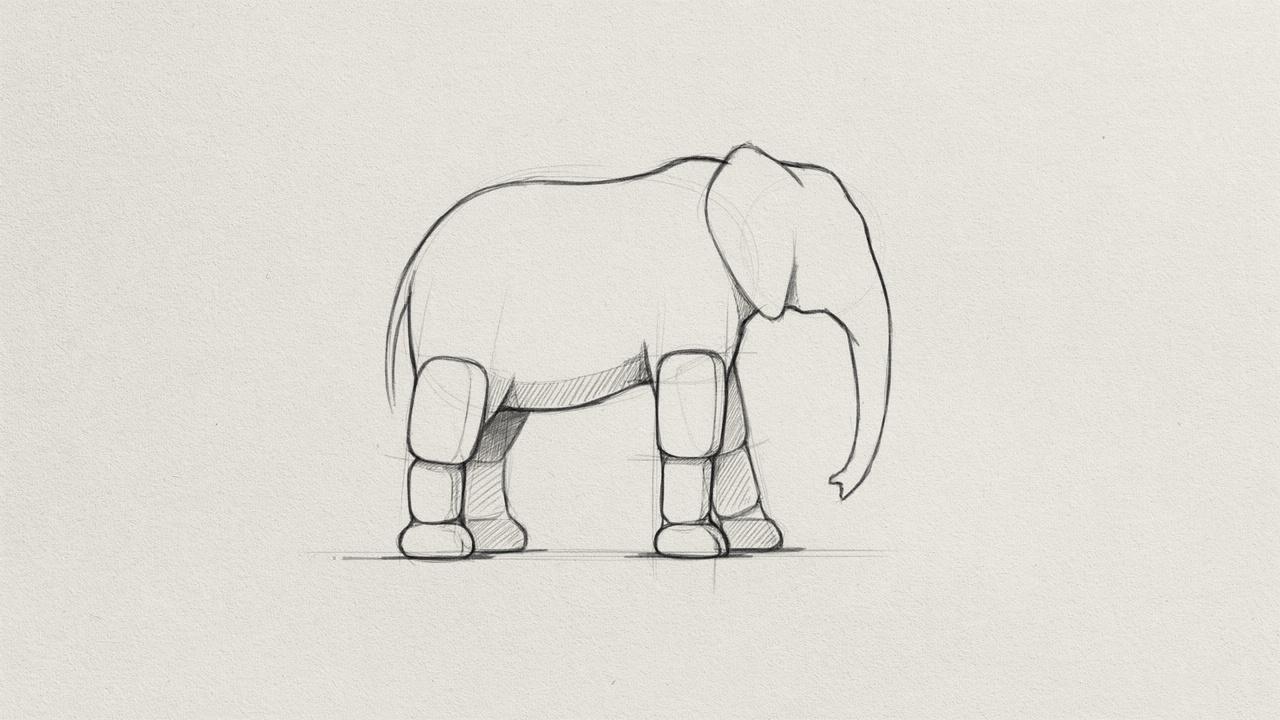
Draw two thick, straight legs below the head and body area.
Elephant legs are sturdy, so avoid making them too thin or tapered.
Step 6: Sketch the Main Body
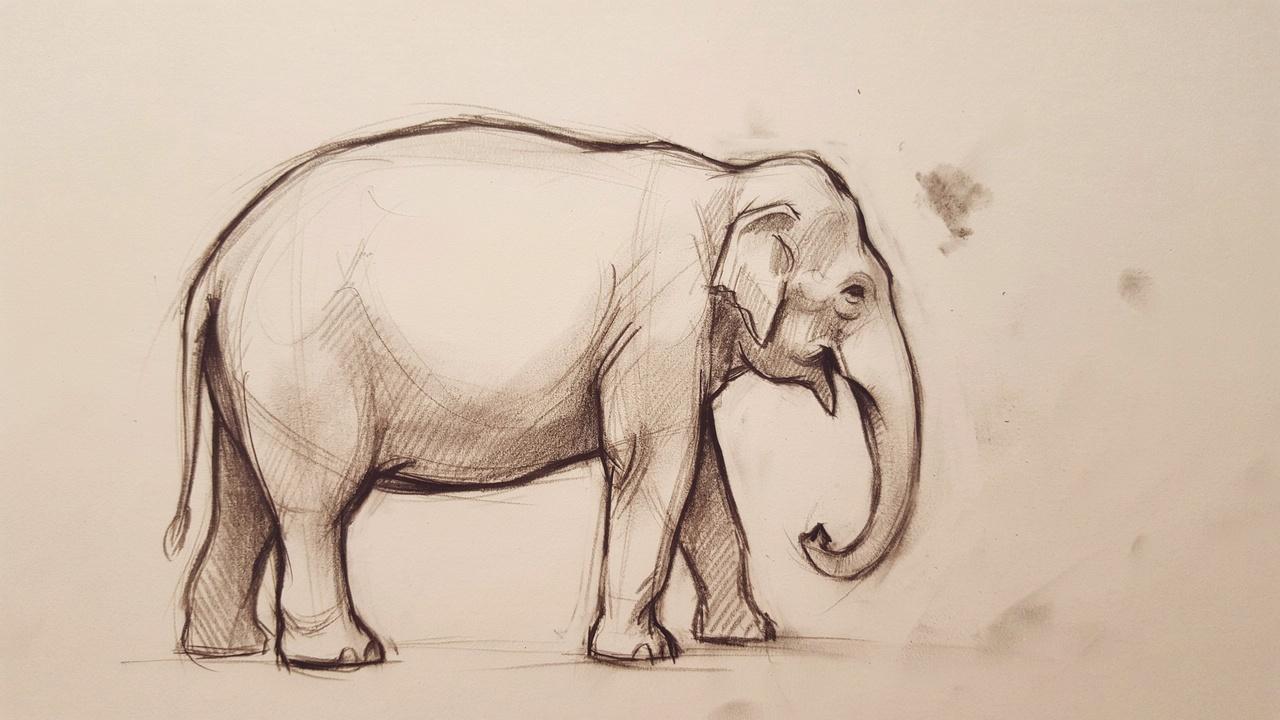
Connect the head to a large, rounded shape for the body.
The back should curve gently, and the belly should look full and heavy.
Step 7: Add the Hind Legs and Tail
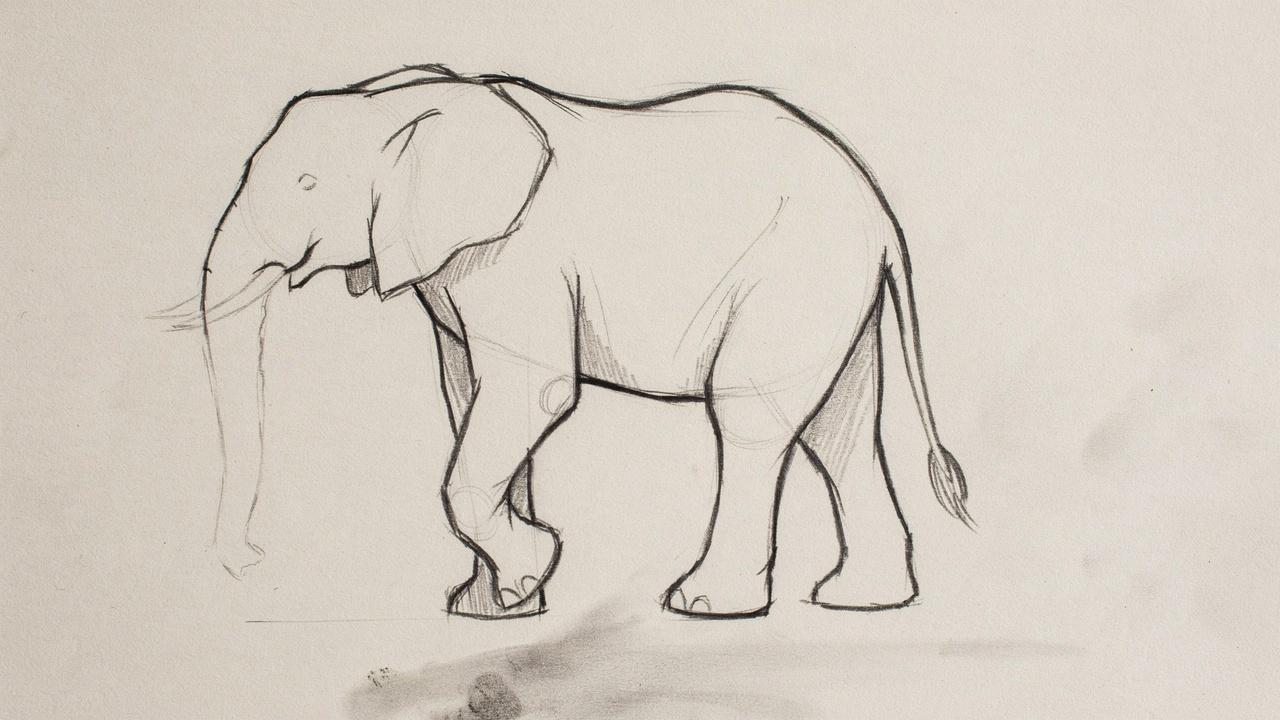
Draw two more thick legs behind the front pair.
Add a thin tail at the back with a small tuft at the end.
Step 8: Refine the Outline
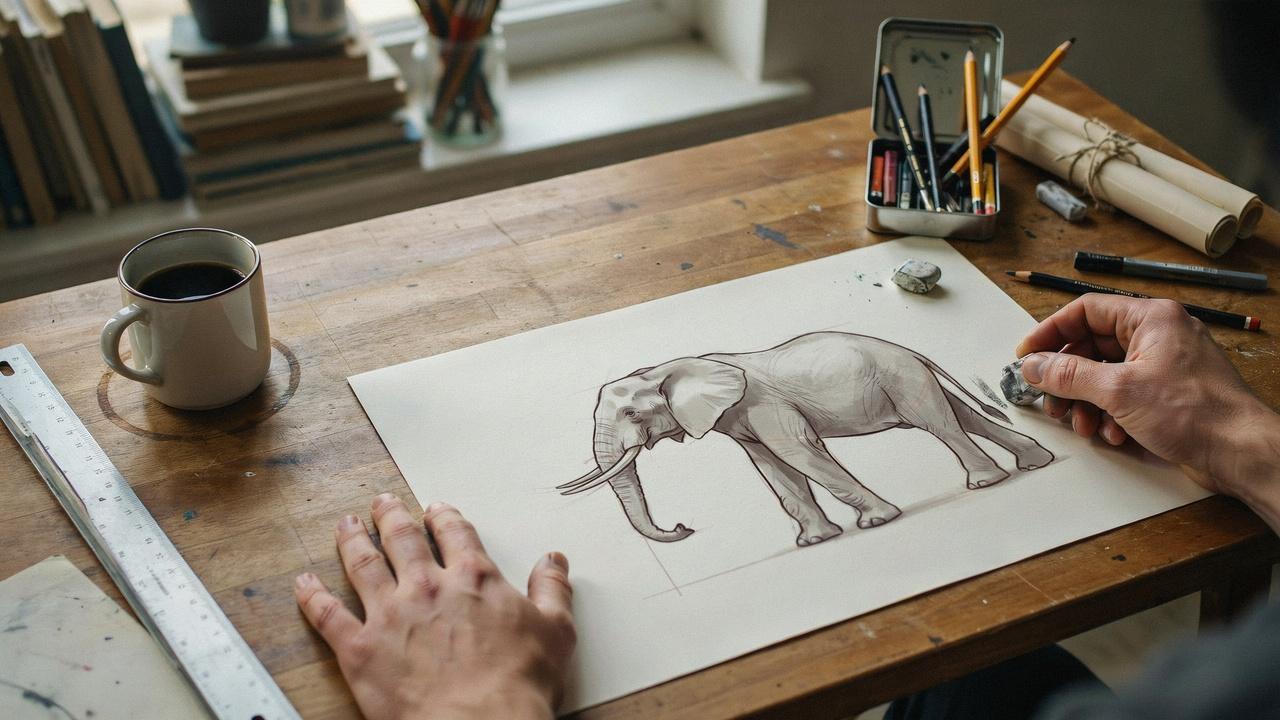
Go over your sketch and clean up the lines.
Erase any guidelines you no longer need, and smooth out rough edges around the body and legs.
Step 9: Add Texture and Details
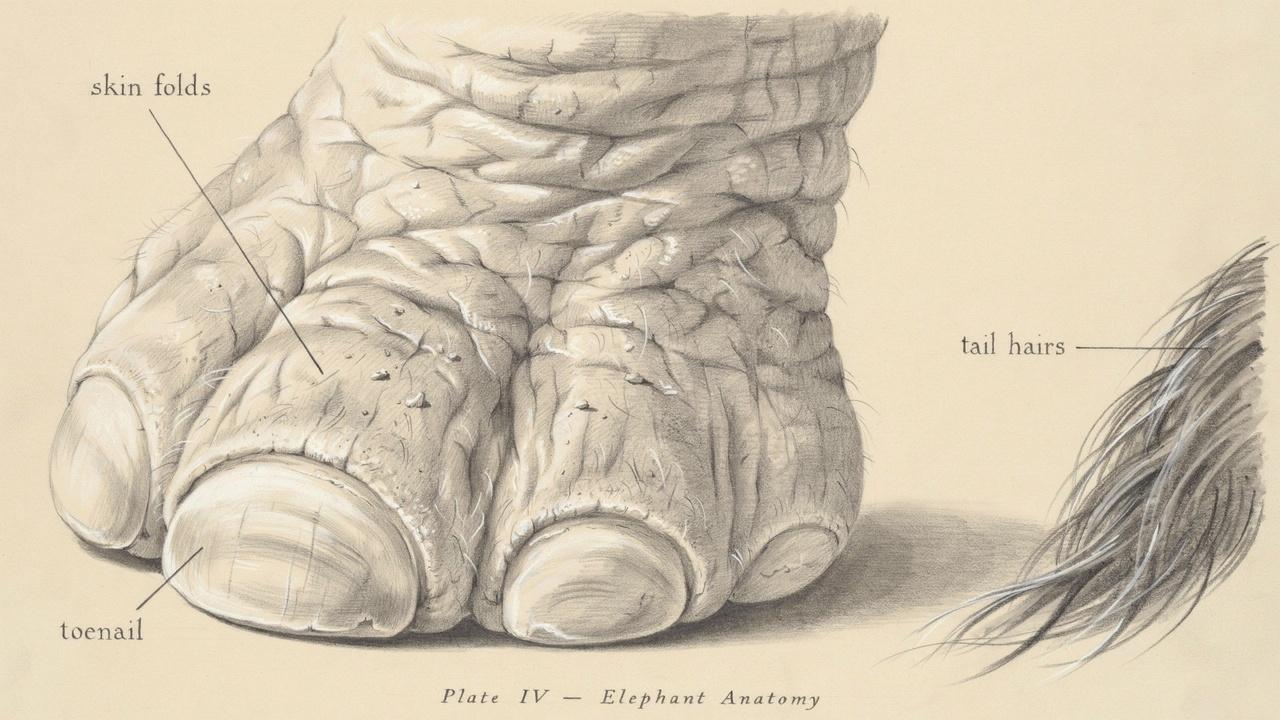
Add small details like toenails, skin folds near the joints, and a few short hairs on the tail.
These small touches add life to the drawing without overcomplicating it.
Step 10: Shade and Color Your Elephant
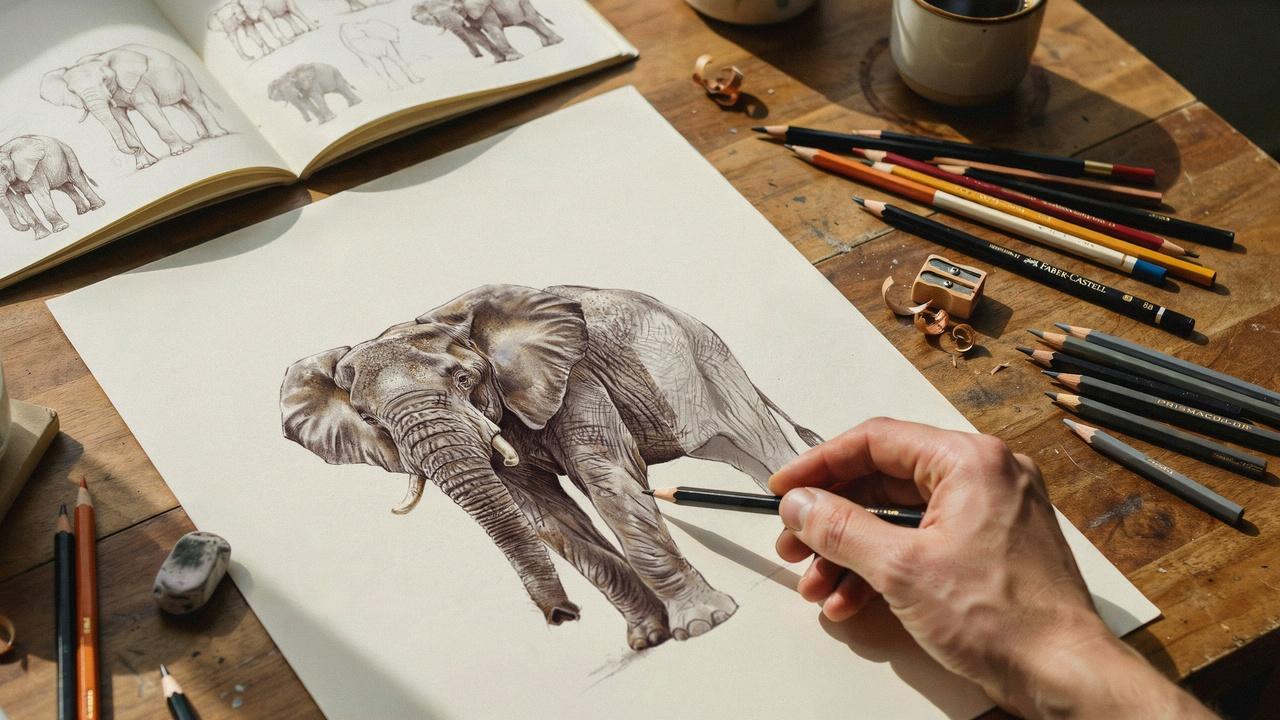
Use light pencil strokes to add shadow under the belly, legs, and ears.
If you're coloring, build up tone slowly instead of applying heavy color all at once.
How to Make Your Elephant Drawing Look More Realistic
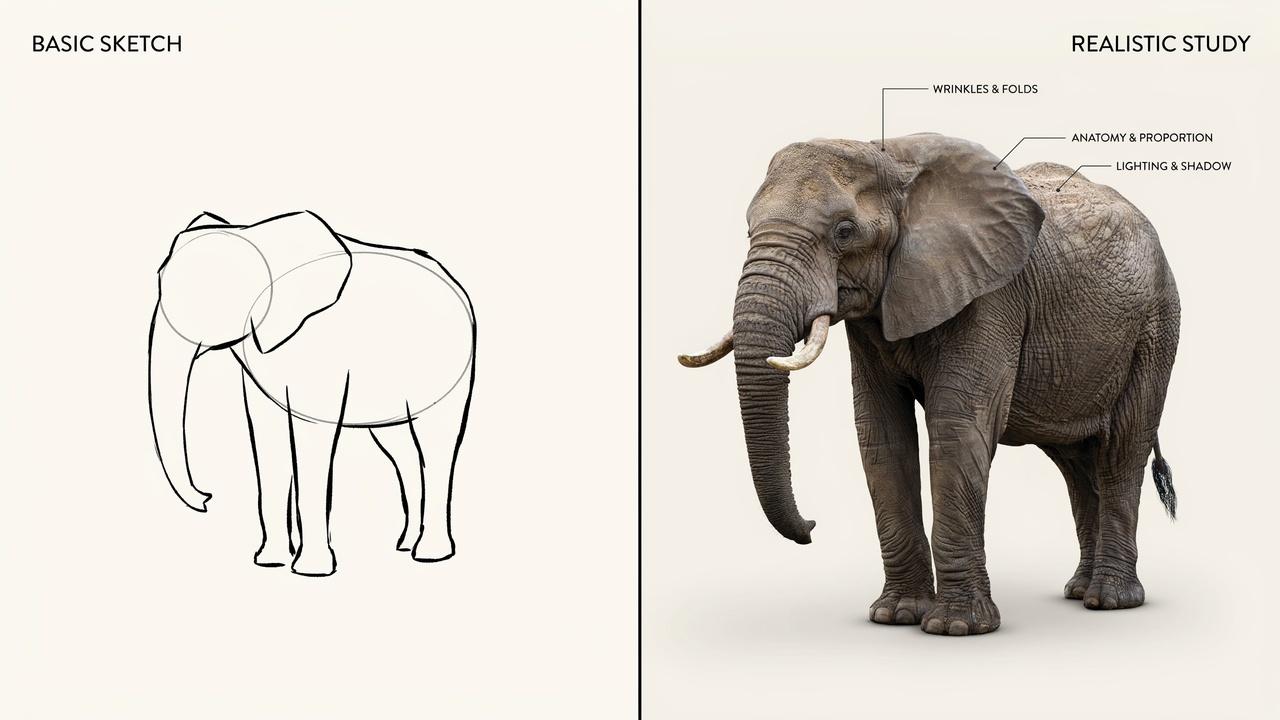
These tips help your elephant look more lifelike, with attention to anatomy, texture, shading, and natural movement.
Study Elephant Anatomy and References
Look at real photos of elephants before you draw.
Notice how their legs bend, how their ears sit, and how their skin folds around the joints.
Add Wrinkles and Skin Texture
Elephant skin is rough and full of folds.
Add short, curved lines around the trunk, legs, and ears to suggest texture instead of drawing it perfectly smooth.
Use Light and Shadow for Depth
Decide where your light source is coming from, then shade the opposite side of the body.
This simple step adds depth and makes the elephant look more three-dimensional.
Create a Natural Walking Pose
Instead of drawing all four legs straight, try bending one or two slightly.
A natural walking pose makes the elephant feel alive instead of stiff.
Common Mistakes to Avoid When Drawing an Elephant
Knowing what usually goes wrong can save you time. Here are a few common errors people make when drawing elephants.
- Making the trunk too short. A short trunk can throw off the whole drawing. Take your time and let the trunk extend further than feels natural at first.
- Drawing ears that are too small. Elephant ears are large and noticeable. If your ears look small compared to the head, try drawing them bigger and rounder.
- Incorrect leg placement. Legs that are placed too close together or too far apart can make the body look unbalanced. Check that all four legs support the body evenly.
- Ignoring body proportions. The head, body, and legs all need to match in scale. Step back and compare the sizes before adding final details.
- Adding too many details too early. Jumping straight into small details before the basic shapes are correct can cause mistakes later. Build the form first, then add texture and detail at the end.
- Drawing a stiff, flat pose. Straight, evenly spaced legs and a rigid body can make the elephant look frozen. Add slight bends in the legs and a gentle curve to the back for a more natural look.
Tips to Draw an Elephant Easily
These simple tips make the whole process easier, from breaking down shapes to checking your work as you go.
- Break the elephant into simple shapes. Think of the head as an oval, the body as a large rounded shape, and the legs as thick rectangles. Building from simple shapes makes the whole drawing easier to manage.
- Use negative space for better accuracy. Pay attention to the space between the legs and around the ears. Getting these gaps right helps the overall shape look correct.
- Check proportions before adding details. Before you add small details, compare the sizes of the head, ears, body, and legs. Fixing proportions early saves time later.
- Practice different elephant poses. Try drawing elephants standing, walking, or with their trunk raised. Practicing different poses helps you understand how the body moves and bends.
- Keep your lines light at first. Start with soft, light pencil strokes so mistakes are easy to erase. Once the shapes look right, go over them with darker, more confident lines.
Conclusion
You don't need fancy skills to get started, just patience and a willingness to redo a line or two.
When I first tried sketching an elephant, my trunk looked more like a noodle, but a few tries later, it finally felt right.
That's the fun part, really, watching your sketch slowly come together.
So grab a pencil and try this guide on how to draw an elephant for yourself.
Share your drawing in the comments, pass this post along to a friend who loves art, and check out our other drawing guides too.
Frequently Asked Questions
How do I Draw an Elephant if I'm a complete beginner?
Start with simple shapes like ovals and rectangles for the body and legs. Add details only after the basic form looks balanced.
What is the easiest way to Draw an Elephant Trunk?
Draw two curved lines that flow downward and slightly outward from the head. Keep the lines soft and wavy instead of straight.
How can I make my Elephant Drawing look more Realistic?
Add small skin folds near the joints and shade one side of the body for depth. Looking at real photos also helps a lot.
Why does my Elephant Drawing look unbalanced?
This usually happens when the legs are placed too close together or the body proportions are off. Step back and compare the sizes of the head, body, and legs.
What tools do I need to Draw an Elephant?
A pencil, eraser, and paper are enough to begin with. You can add colored pencils or markers later if you want to color your drawing.
