
I still remember staring at a blank page, wondering how people draw those adorable little characters with tiny smiles and big round eyes. It felt hard. But it's not.
This guide breaks down kawaii drawing into simple steps anyone can follow. You'll learn what kawaii art is, which tools to use, how to build characters from basic shapes, and how to add color.
I've helped many beginners start from zero and actually enjoy the process. No art degree needed. No fancy supplies required.
By the end, you'll know exactly how to draw your first kawaii character with confidence.
What Is Kawaii Drawing?

Kawaii drawing is a simple art style that makes things look cute and friendly. The word "kawaii" comes from Japan and means "cute."
The style uses soft shapes, big eyes, small smiles, and round faces. Everything stays minimal. Nothing is overdone.
It's also very forgiving. You don't need to draw perfectly. Simple lines and basic shapes are enough. Mistakes often end up looking cute anyway.
You can make almost anything kawaii, from food to planets to everyday objects. That's what makes it so easy to pick up as a beginner.
Important Tools for Kawaii Drawing

You don't need much to start. A pencil, eraser, black pen, and some paper are enough for traditional drawing. A fine-tip pen works great for clean outlines.
Colored pencils or markers help you add color later. Start with what you have and upgrade as you improve.
For digital drawing, apps like Procreate, MediBang Paint, and Adobe Fresco are popular choices.
Free apps on a phone or tablet work fine for beginners. Digital tools make it easy to undo mistakes and try different colors without wasting supplies.
How Basic Shapes Form the Foundation of Kawaii Drawing

Every kawaii character starts with a simple shape. Circles, squares, and triangles are all you need.
Creating Cute Designs with Circles
Circles are the base of almost every kawaii character. A simple circle becomes a face, a food item, or a planet. Add eyes, a small mouth, and some cheeks and you're done.
Practice drawing clean circles first. Everything else gets easier from there.
Building Characters from Squares and Rectangles
Squares and rectangles are great for objects like books, phones, and sandwiches. Round the corners slightly to keep things looking soft and kawaii instead of stiff and sharp.
Using Triangles to Draw Simple Kawaii Objects
Triangles work well for pizza slices, party hats, and mountains. Add a face and two tiny arms and you've got a fun character. Mixing shapes in one drawing makes your art feel more creative.
Understanding Kawaii Character Proportions

Kawaii characters follow simple but specific proportions. These are what set kawaii apart from realistic drawing.
Why Larger Heads Make Characters Look Cuter
The head is always bigger than the body in kawaii art. Large heads make characters look young and sweet. Most kawaii heads take up half or more of the full character height.
How Small Bodies Improve the Kawaii Style
Short arms, stubby legs, and tiny feet keep the body simple. Less body detail means less stress and a cleaner, cuter result.
The Importance of Soft and Rounded Shapes
Sharp angles feel harsh. Rounded edges feel friendly. Always soften your lines, even on squares and rectangles. Softness is what makes kawaii look kawaii.
How to Draw Expressive Kawaii Faces

The face carries all the personality. Keep it simple and expressive.
Drawing Large and Appealing Eyes
Large, simple eyes create an instant emotional connection. Add a small shine inside the eye to make it look alive. Try different eye shapes to find your style.
Creating Simple Mouths and Cute Smiles
Kawaii mouths are tiny. A small curve, a dot, or a "w" shape is enough. Less is more here. A minimal mouth almost always looks more kawaii than a detailed one.
Using Small Details to Show Personality
Rosy cheeks, small hearts, and tiny hats add personality without cluttering the drawing. Pick two or three small details and leave the rest clean. A few well-placed touches go a long way.
Step-by-Step Guide to Drawing Your First Kawaii Character
Ready to draw your first kawaii character? Follow these four simple steps and you'll have something cute on paper in minutes.
Step 1: Sketch a Simple Base Shape

Start with a light pencil sketch. Draw a large circle for the head. Below it, draw a small oval or rectangle for the body. Keep everything loose and light at this stage.
Don't press too hard with your pencil. You'll be refining these shapes later. The goal right now is to get the basic layout on paper. Think of this as your rough draft.
Step 2: Add Facial Features and Expressions
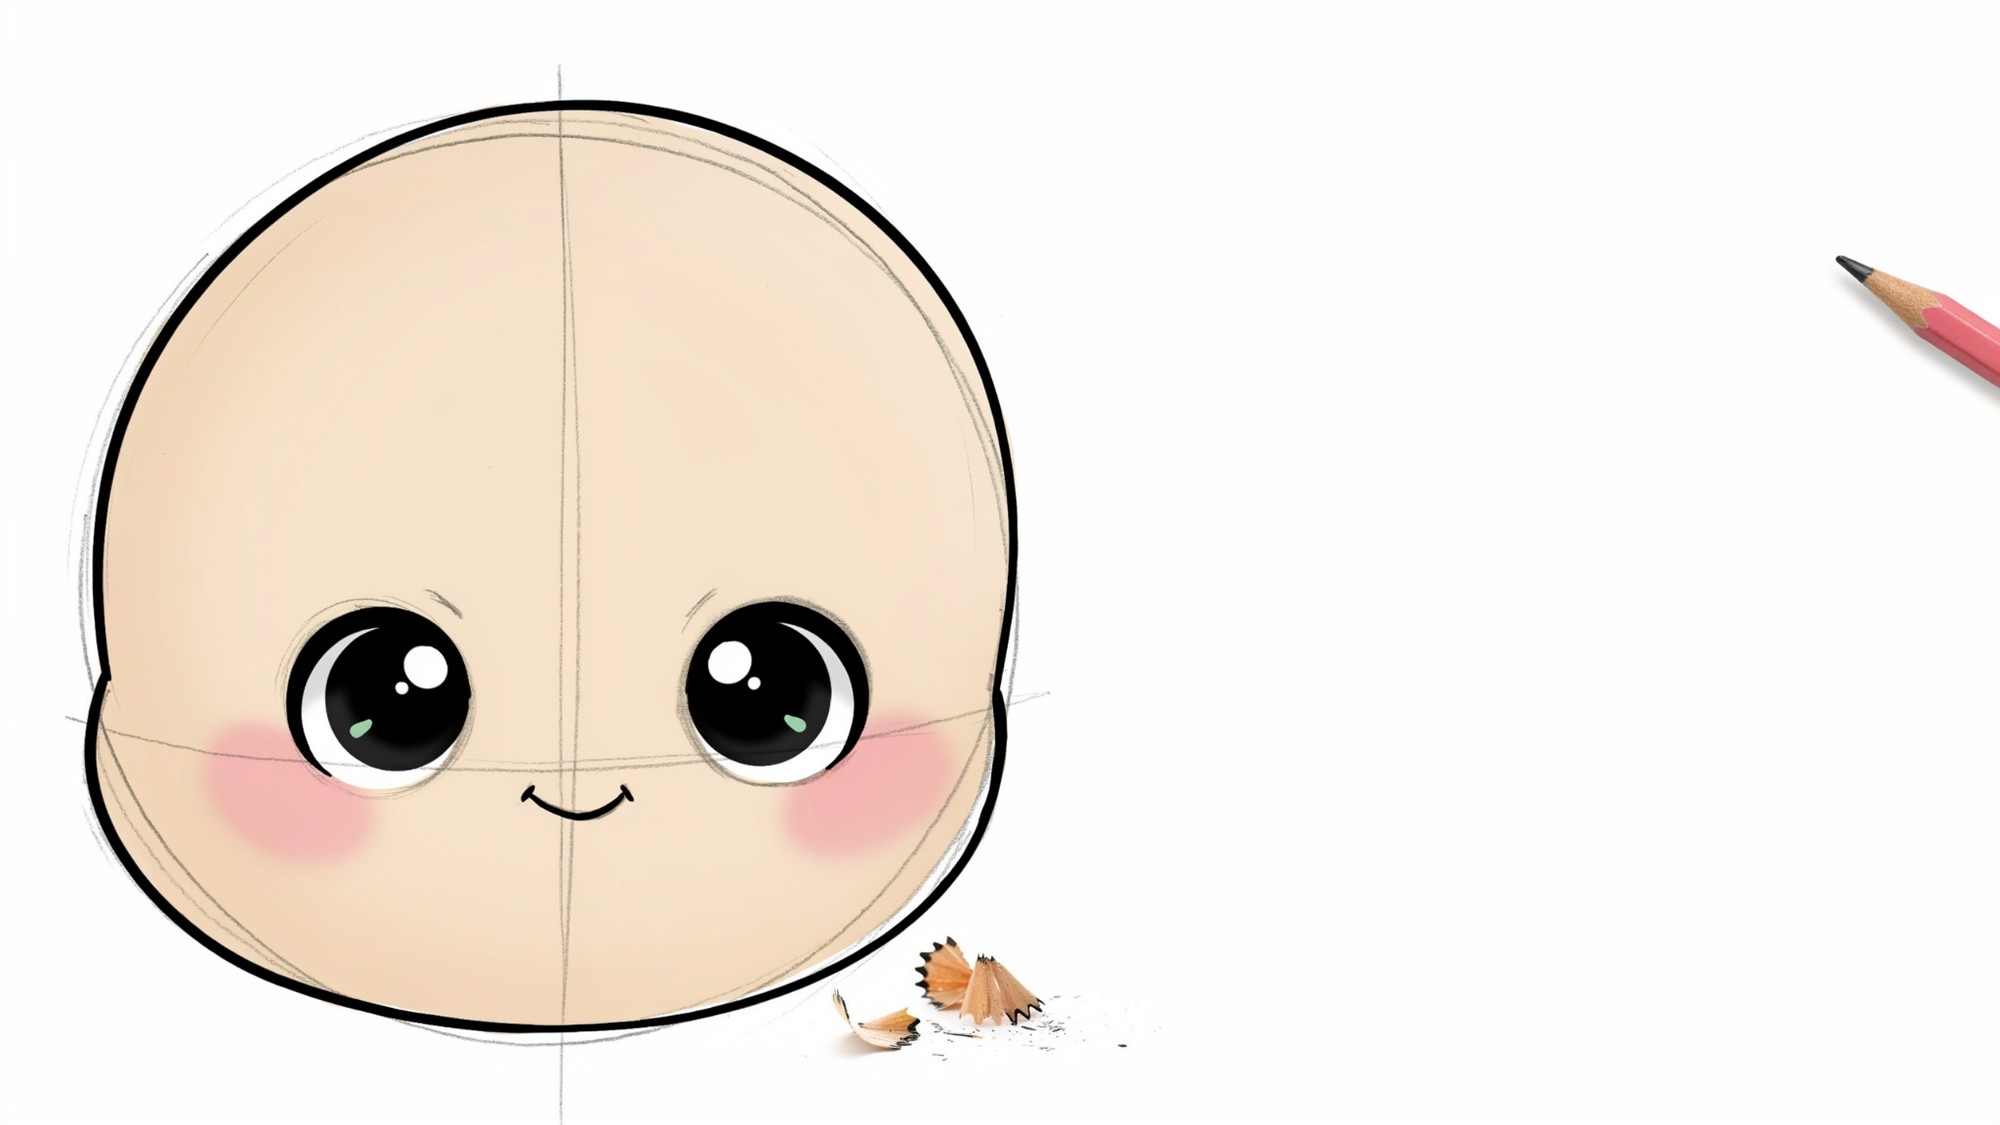
Now add the face. Draw two large circles or ovals for the eyes. Place them in the lower half of the head circle. Add a tiny mouth below the eyes.
You can include small dot nostrils if you like, but these are optional. Keep the features low on the face.
This placement is a kawaii trick that makes characters look younger and cuter. Add cheek blush marks if you want extra sweetness.
Step 3: Draw the Body and Extra Details

Add short, stubby arms on the sides of the body. Draw two small rounded legs at the bottom. You can add simple accessories like a bow, a hat, or a small item in the character's hand.
Keep the details minimal. Too many elements can make the drawing look crowded. Choose one or two fun additions and leave the rest clean.
Step 4: Refine the Outline for a Clean Look

Once you're happy with your pencil sketch, trace over it with a black pen or marker. Use smooth, confident lines.
Let the ink dry fully before you erase the pencil marks underneath. Clean outlines make a huge difference.
Your character will instantly look more polished and finished. After erasing, you're ready to add color.
Easy Kawaii Drawing Tutorials for Beginners

These three mini tutorials give you simple subjects to practice with right away.
How to Draw a Kawaii Saturn Planet
Start with a circle for the planet body. Draw an oval ring around the middle of the circle at a slight angle.
Add two large eyes and a small smile on the planet's face. You can add tiny stars around it for extra fun. Color the planet in soft purple or blue. Use a lighter shade for the ring.
Saturn is one of the most fun kawaii subjects because it's round, simple, and instantly recognizable.
How to Draw a Kawaii Pizza Slice
Draw a triangle with slightly curved sides for the pizza shape. Round the bottom point a little. Add a rectangular strip across the top for the crust.
Place a cute face in the middle of the triangle. Draw small circles for pepperoni. Add tiny wavy lines for cheese.
Pizza is a great practice subject because it combines different shapes and gives you room to add fun details without making things too complex.
How to Draw a Kawaii Love Letter
Start with a rectangle for the envelope. Draw a V-shaped flap on the top. Add a small heart seal in the center. Give the envelope a cute face just below the flap.
You can add tiny hearts or stars floating around it. Love letters are perfect for practicing symmetry and adding small accessories. Color the envelope in soft pink or red for a sweet look.
Beginner-Friendly Kawaii Drawing Ideas to Practice

Not sure what to draw next? Here are some fun categories to get you started.
Cute Food and Drink Characters
Food is one of the easiest kawaii subjects. Try donuts, sushi rolls, boba tea, or ice cream cones. Add a tiny face to any food item and it instantly looks kawaii. Start with foods you personally enjoy.
Adorable Animals and Pets
Cats, rabbits, bears, and pandas work great in kawaii style. Their round faces fit perfectly. A simple circle with two small ears and a tiny "w" mouth is all you need for a kawaii cat.
Everyday Objects with Kawaii Features
Any object can go kawaii with a face. Pencils, cups, clouds, and books all work well. Look around your room and try turning five objects into kawaii characters. It's a simple and fun practice habit.
Nature-Influenced Kawaii Creations
Flowers, suns, moons, and raindrops are great starting points. They're round, simple, and easy to color. A sleepy kawaii sun with tiny rays is a quick and sweet drawing to practice.
How to Add Color to Kawaii Drawings

Color brings kawaii art to life. The right colors make a character feel warm, playful, or sweet.
Stick to soft pastel shades like light pink, baby blue, mint green, and pale yellow. These feel gentle and sweet. Avoid heavy or dark colors on the main character.
Save those for outlines or small accents only.
Highlights add a polished touch. A tiny white dot in the eye makes it look alive. A white gel pen works great for this on paper. Digitally, just use a white brush on a top layer.
For shading, keep it simple. A slightly darker version of your base color on one side is enough. A small shadow under the chin or lower body adds depth without making things look heavy.
Common Kawaii Drawing Mistakes and How to Avoid Them
Avoiding these simple mistakes will save you time and frustration.
Making Shapes Too Detailed
Kawaii art thrives on simplicity. Too much detail makes characters look messy. Keep each element clean and minimal. When in doubt, leave it out.
Using Incorrect Character Proportions
Many beginners draw their heads too small. In kawaii art, the head should always be the largest part. Go bigger than feels natural. Practice this ratio until it feels normal.
Overcrowding the Drawing with Features
Too many accessories and patterns pull attention everywhere. Pick one or two focal points and keep the rest simple. White space makes kawaii drawings look cleaner and cuter.
Tips for Improving Your Kawaii Drawing Skills
These simple habits will help you grow as a kawaii artist and keep the process fun.
- Start with basic shapes like circles and simple faces before moving to full characters. Small wins early on build real confidence over time.
- Practice drawing the same face with different emotions like happy, sleepy, or surprised. Just changing the eyes and mouth creates a completely different mood.
- Repeat simple subjects often until your hand feels comfortable with the lines. Muscle memory makes drawing faster and more natural as you keep going.
- Look at kawaii artists you like and notice what draws you to their work. Use that as loose inspiration, not something to copy exactly.
- Pay attention to the small details you keep coming back to, like tiny stars or rosy cheeks. Those personal touches are the start of your own style.
Conclusion
Kawaii drawing is one of those things that feels scary at first but clicks faster than you'd expect. When I first tried it, I kept making the heads too small.
But once I let go of "perfect" and just played with shapes, everything got easier and way more fun.
You've got everything you need right here. Start with a circle, add a tiny smile, and see where it goes.
Try drawing one kawaii character today and drop it in the comments. I'd love to see what you create!
Frequently Asked Questions
Can a complete beginner learn kawaii drawing?
Yes, absolutely. Kawaii art is built on simple shapes and minimal details. Even if you've never drawn before, you can start with a circle and a small face and make something cute right away.
What is the best tool to start kawaii drawing?
A pencil, eraser, and a black pen are all you need to begin. Once you're comfortable, you can try colored pencils or a digital drawing app to add more variety to your work.
How long does it take to get good at kawaii drawing?
Most beginners start seeing real improvement within a few weeks of daily practice. The key is consistency. Even 10 to 15 minutes of drawing each day adds up quickly over time.
Do I need to know how to draw realistically first?
No. Kawaii art does not require realistic drawing skills. In fact, the style works better when you keep things simple and avoid realistic proportions or detailed shading techniques.
What are the easiest kawaii characters to draw for beginners?
Food items like donuts, pizza slices, and ice cream are great starting points. They have simple shapes and are easy to make look cute with just a face and a few small details added on top.