

Drawing abs can feel tricky at first. Most beginners struggle with proportion, shading, and muscle placement. I have spent years studying figure drawing, and abs were one of the hardest parts for me too. But once I learned the right approach, everything clicked.
This guide covers everything from basic step by step instructions to male and female differences, anime styles, and common mistakes to avoid.
No matter your skill level, you will find something useful here. The steps are simple, the explanations are clear, and by the end, you will feel much more confident drawing abs.
Understand Abs Anatomy Before You Draw
Before you start drawing abs, you need to know what you are actually looking at. The abs are made up of several muscles, not just one flat surface.
The main one is the rectus abdominis, which runs vertically from the chest to the pelvis and creates the six-pack shape. On the sides sit the obliques, which shape the waist and give the torso a tapered look. These muscles also shift with every pose.
They compress when a figure bends forward and stretch out when a figure leans back. Once you understand this basic structure, your drawings will look far more believable.
How to Draw Abs Step by Step
This section walks you through each stage of drawing abs, from the rough torso shape to final shading.
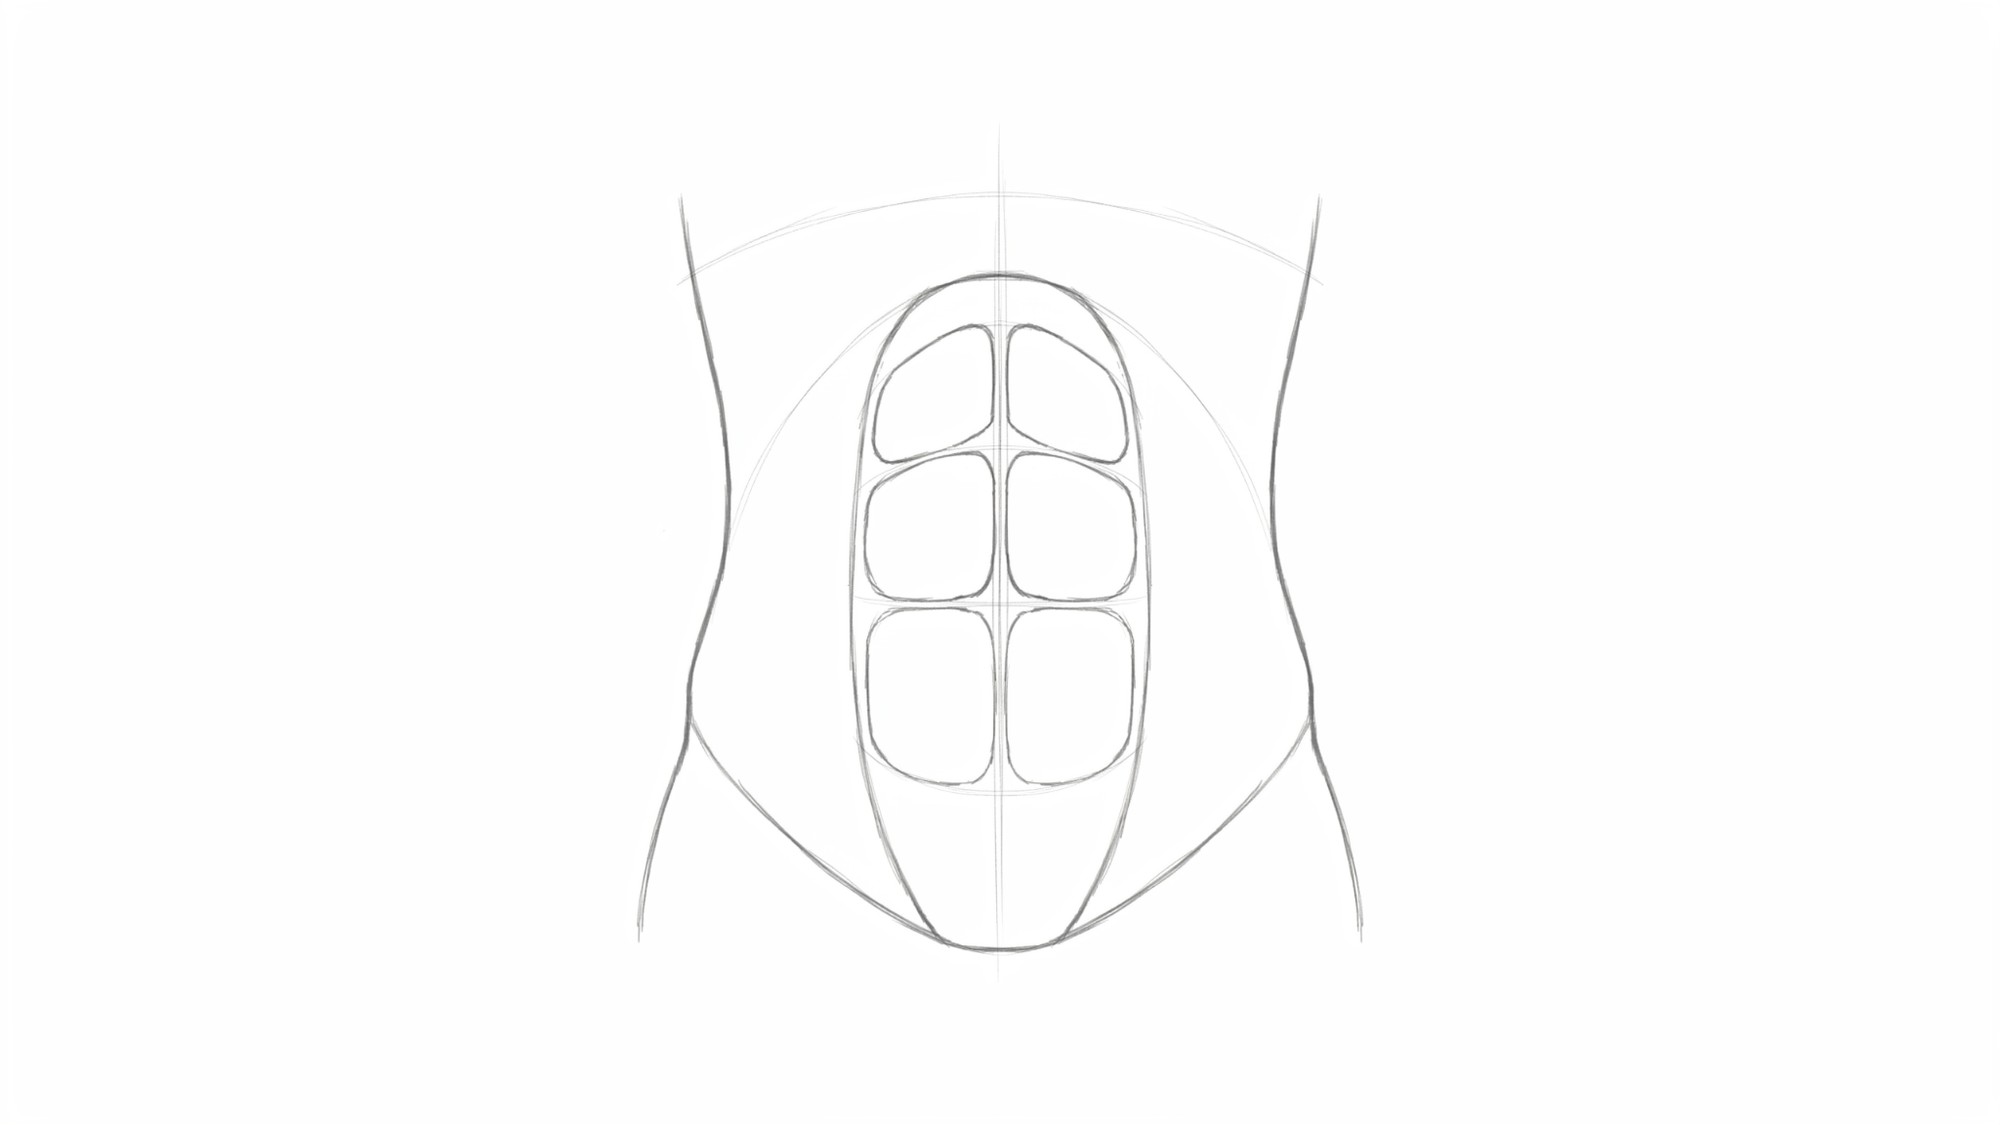
Step 1: Sketch the Basic Torso Shape
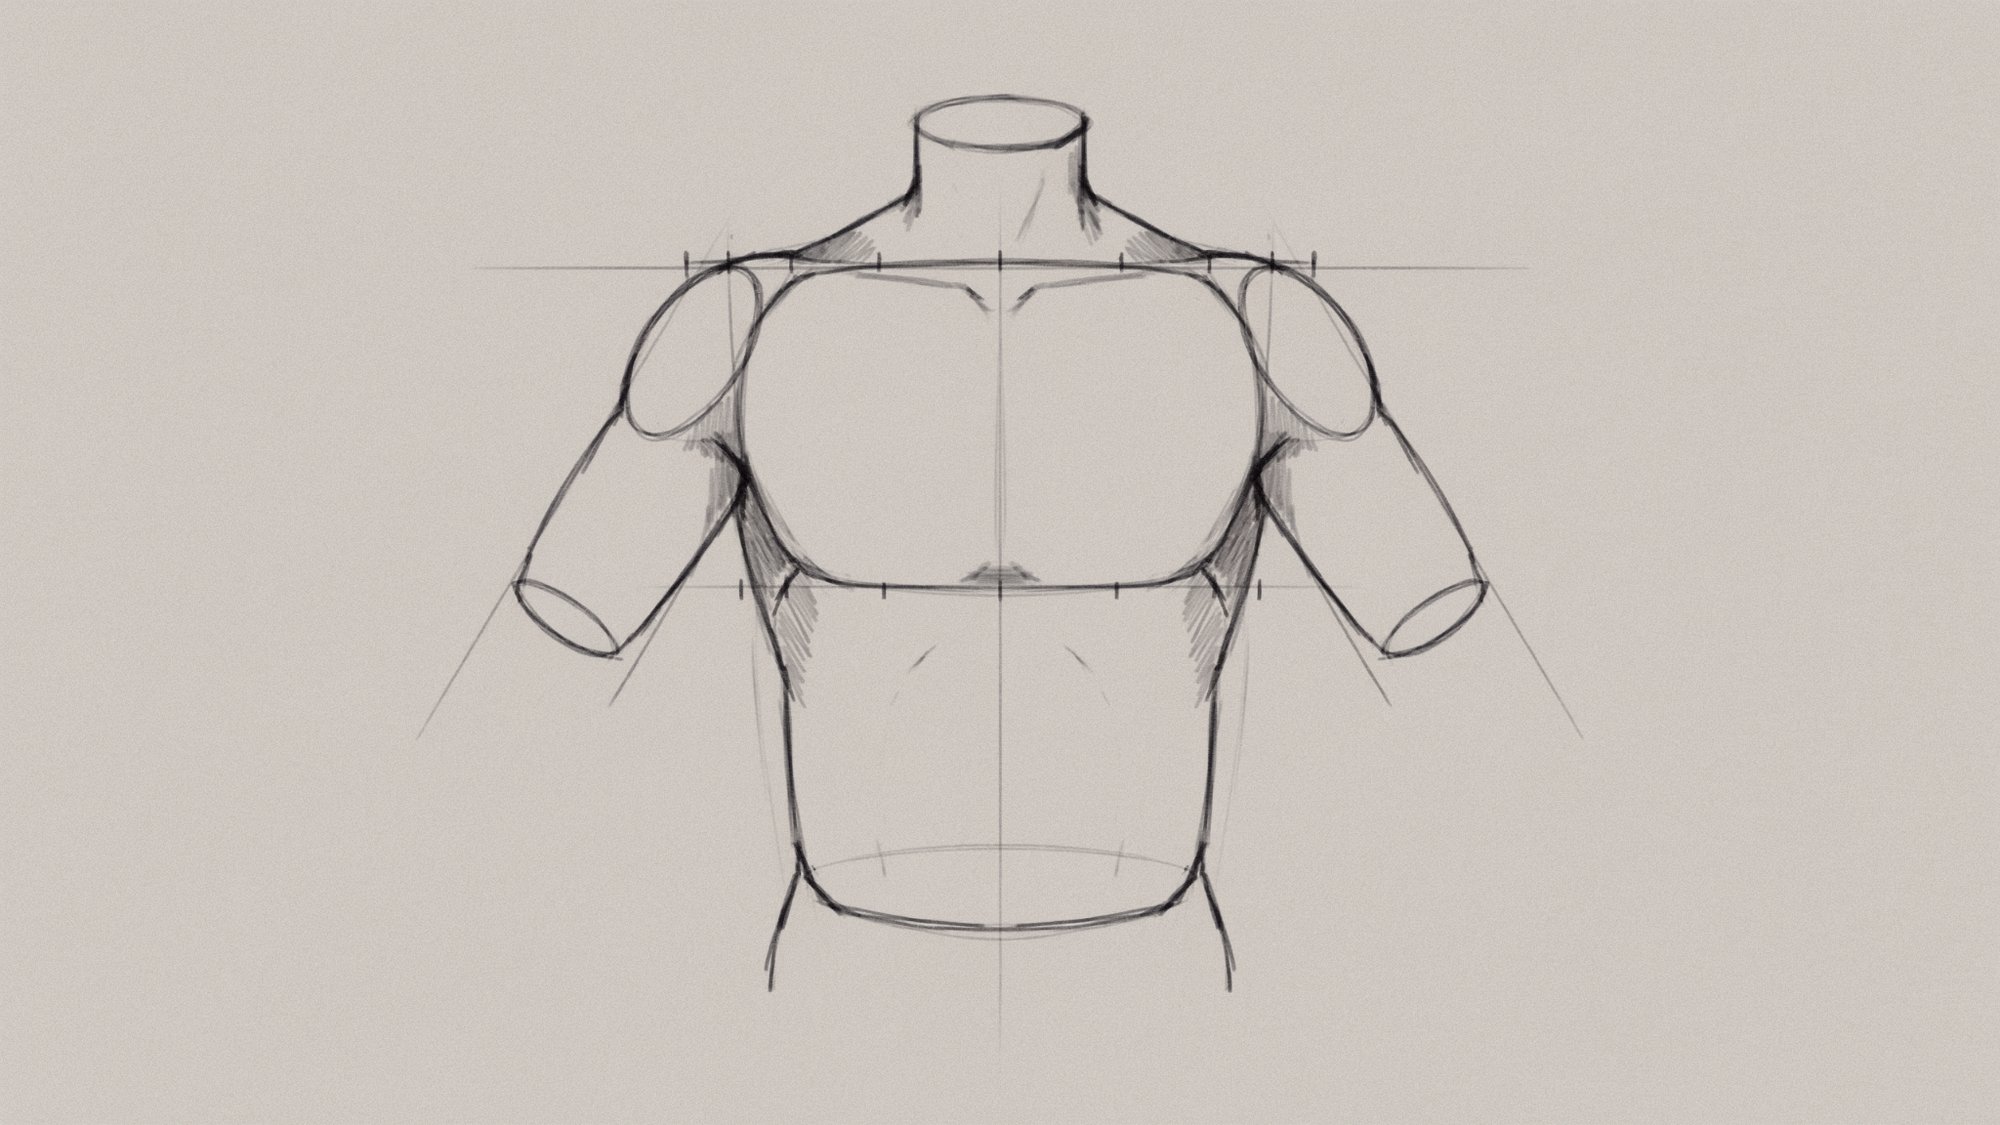
Start with a simple shape. Draw a rectangle that is slightly wider at the top and narrower at the bottom. This gives you the general outline of the torso.
Keep the lines light so you can adjust them later. Do not worry about details at this stage. You just want a clear base to build on.
Step 2: Draw the Center Line and Belly Button

Draw a straight vertical line down the middle of the torso. This is called the linea alba, and it splits the abs into two equal halves.
Then place the belly button roughly in the lower half of the torso. It sits just below the midpoint of the body. This line keeps both sides balanced and even.
Step 3: Outline the Rectus Abdominis

The rectus abdominis is the main ab muscle that runs from the chest down to the pelvis. Draw two long vertical shapes side by side along the center line.
They should look like two tall columns sitting next to each other. Keep them close together but leave a small gap for the center line you already drew.
Step 4: Add the Obliques and Waist
The obliques run along the sides of the torso. They start near the ribcage and angle down toward the hips. Draw a curved shape on each side of the rectus abdominis.
These shapes help define the waist. They also add width to the midsection and make the torso look more natural.
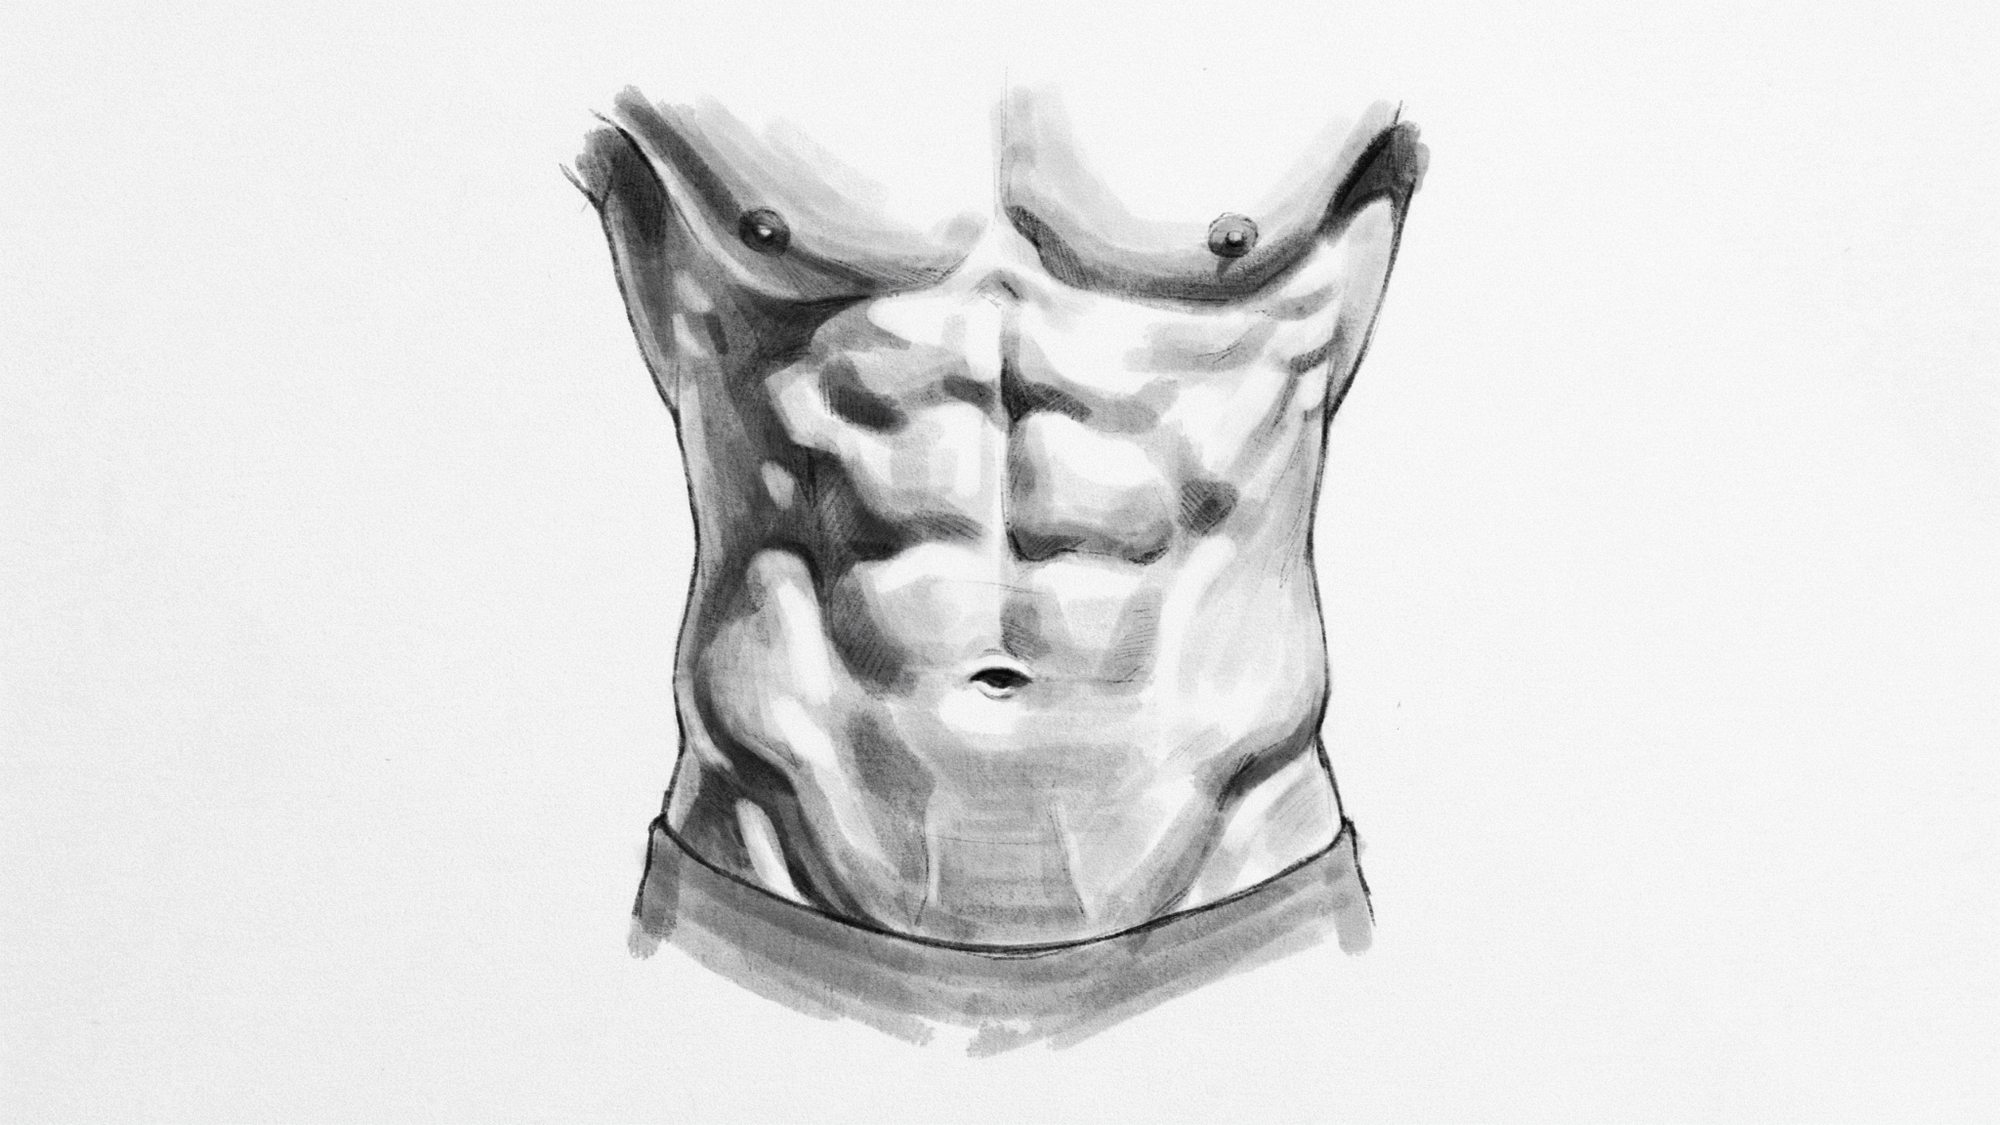
Step 5: Define the Individual Abs

Now divide the rectus abdominis into sections. Draw three horizontal lines across each column to create six sections total. These are the individual abs.
The top sections are usually a bit wider and rounder. The lower sections tend to be flatter and smaller. Do not make them all the same size or shape.
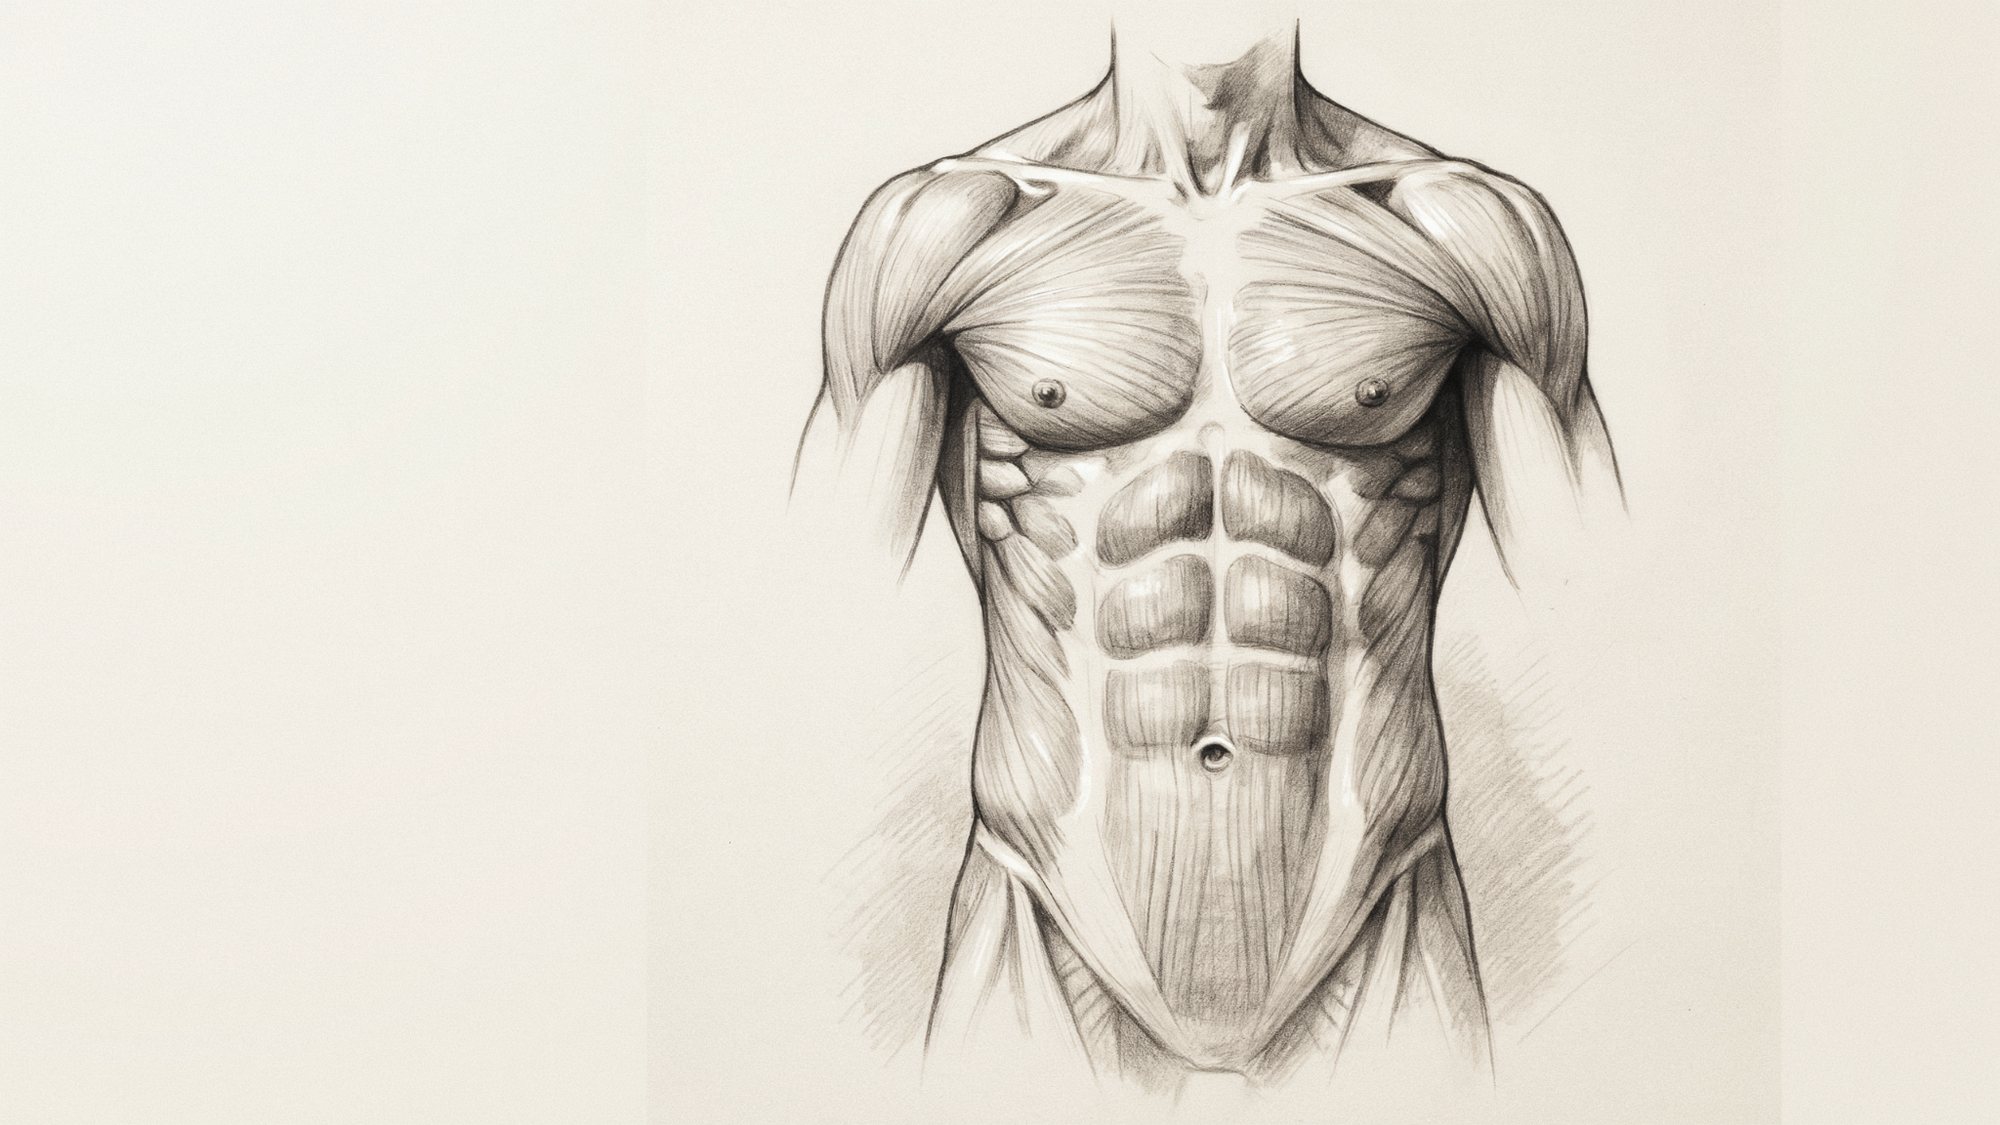
Step 6: Refine the Shapes and Contours

Go over your sketch and clean up the lines. Smooth out any rough edges. Make the shapes feel more organic and less boxy.
Real muscles have curves and soft edges, so avoid drawing them with perfectly straight lines. Pay attention to how the abs connect with the ribcage at the top and the pelvis at the bottom.
Step 7: Shade the Abs for Depth and Realism
Pick a light source and stay consistent with it. Shade the areas that would naturally fall in shadow, such as the lower edges of each ab section. Leave the top surfaces lighter.
Use gradual shading rather than hard lines to create a smooth, three-dimensional look. Soft blending works better than dark outlines when you want abs that look real.
7 How to Draw Abs Examples for Beginners
These seven examples cover different styles and body types so you can practice drawing abs in various ways.
1. Easy Abs Drawing

Start with a front-facing torso. Draw the center line, then add three rows of two rounded rectangles. Keep the lines simple and the shapes loose.
This version is good for total beginners. You do not need to worry about shading or detail. Just focus on placement and proportion.
2. Simple Abs Sketch
A simple abs sketch uses fewer lines and cleaner shapes. Draw the torso outline, mark the center, and add just enough line work to suggest the ab sections.
This style is good for practice because it forces you to focus on structure rather than getting lost in details.
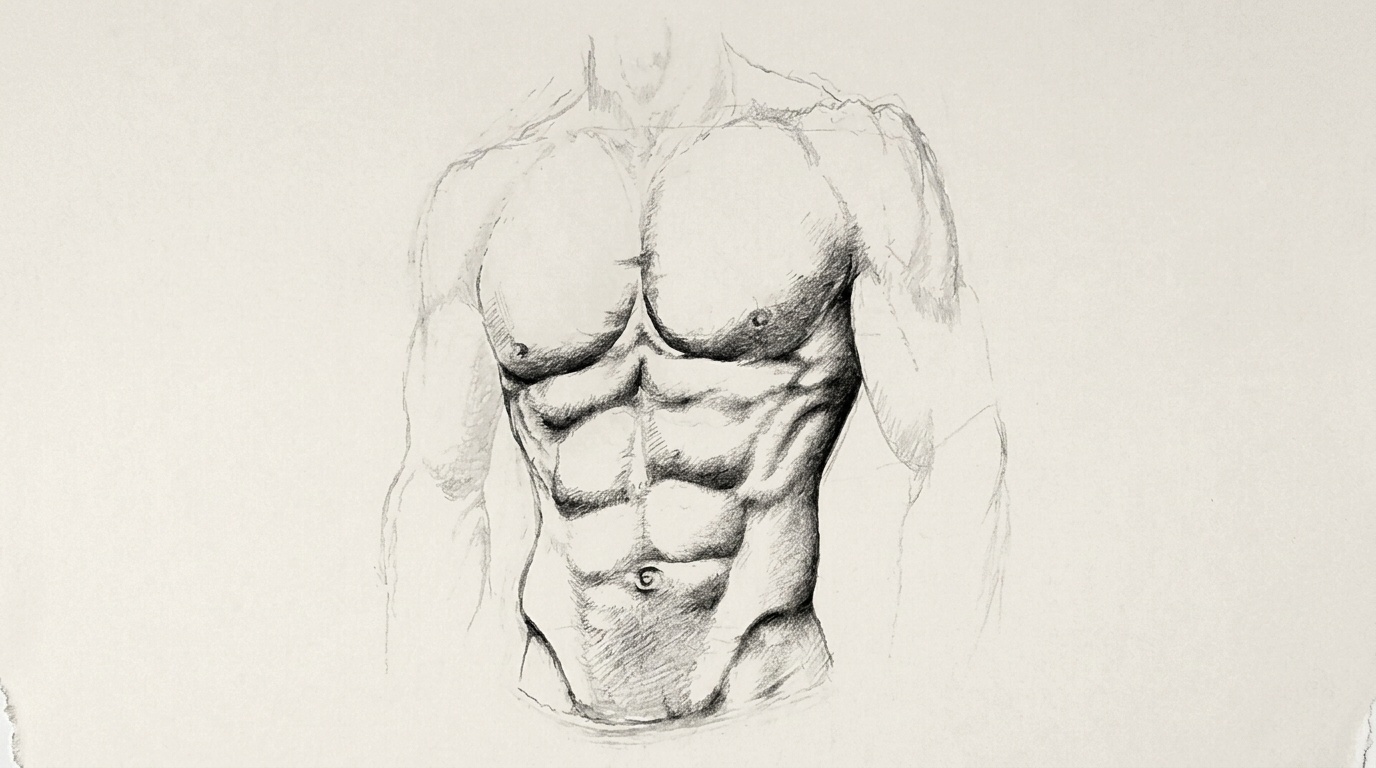
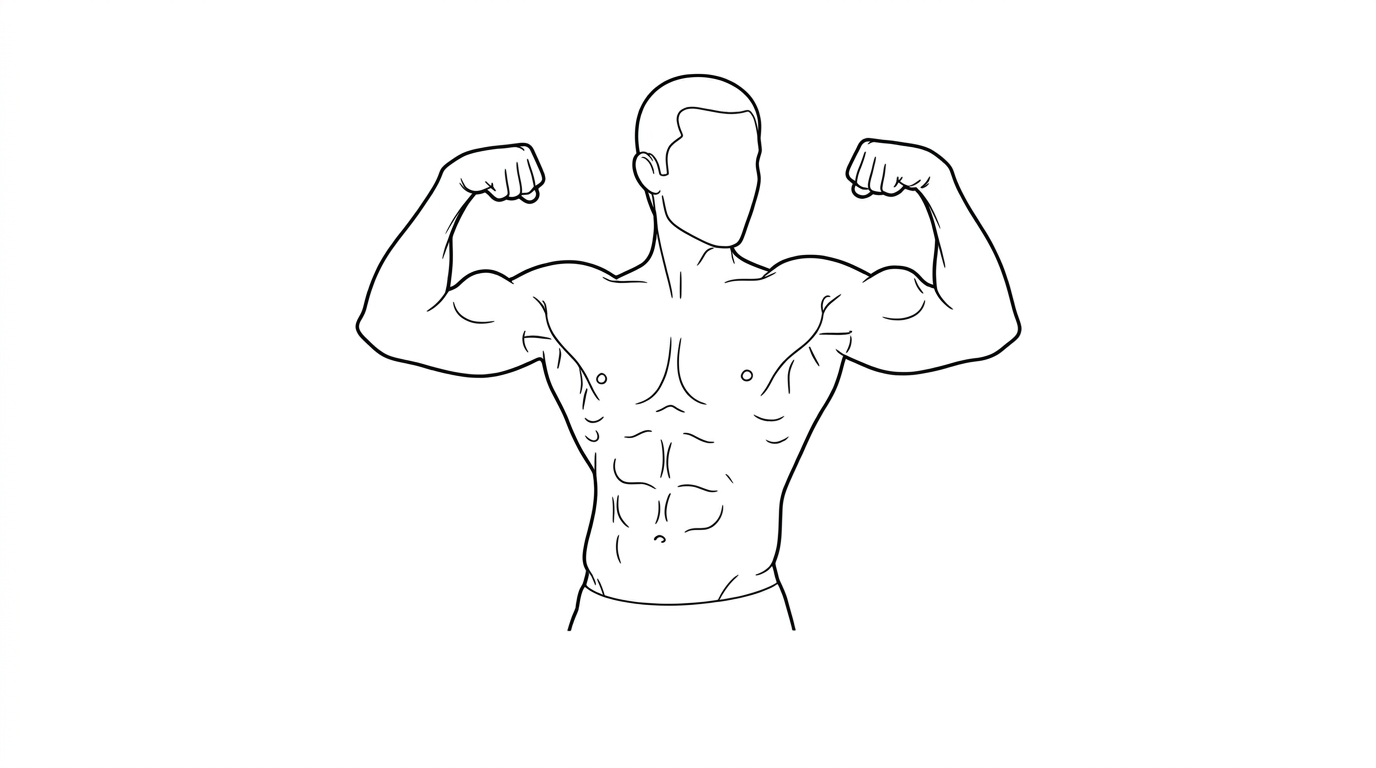
3. Male 6-Pack Abs
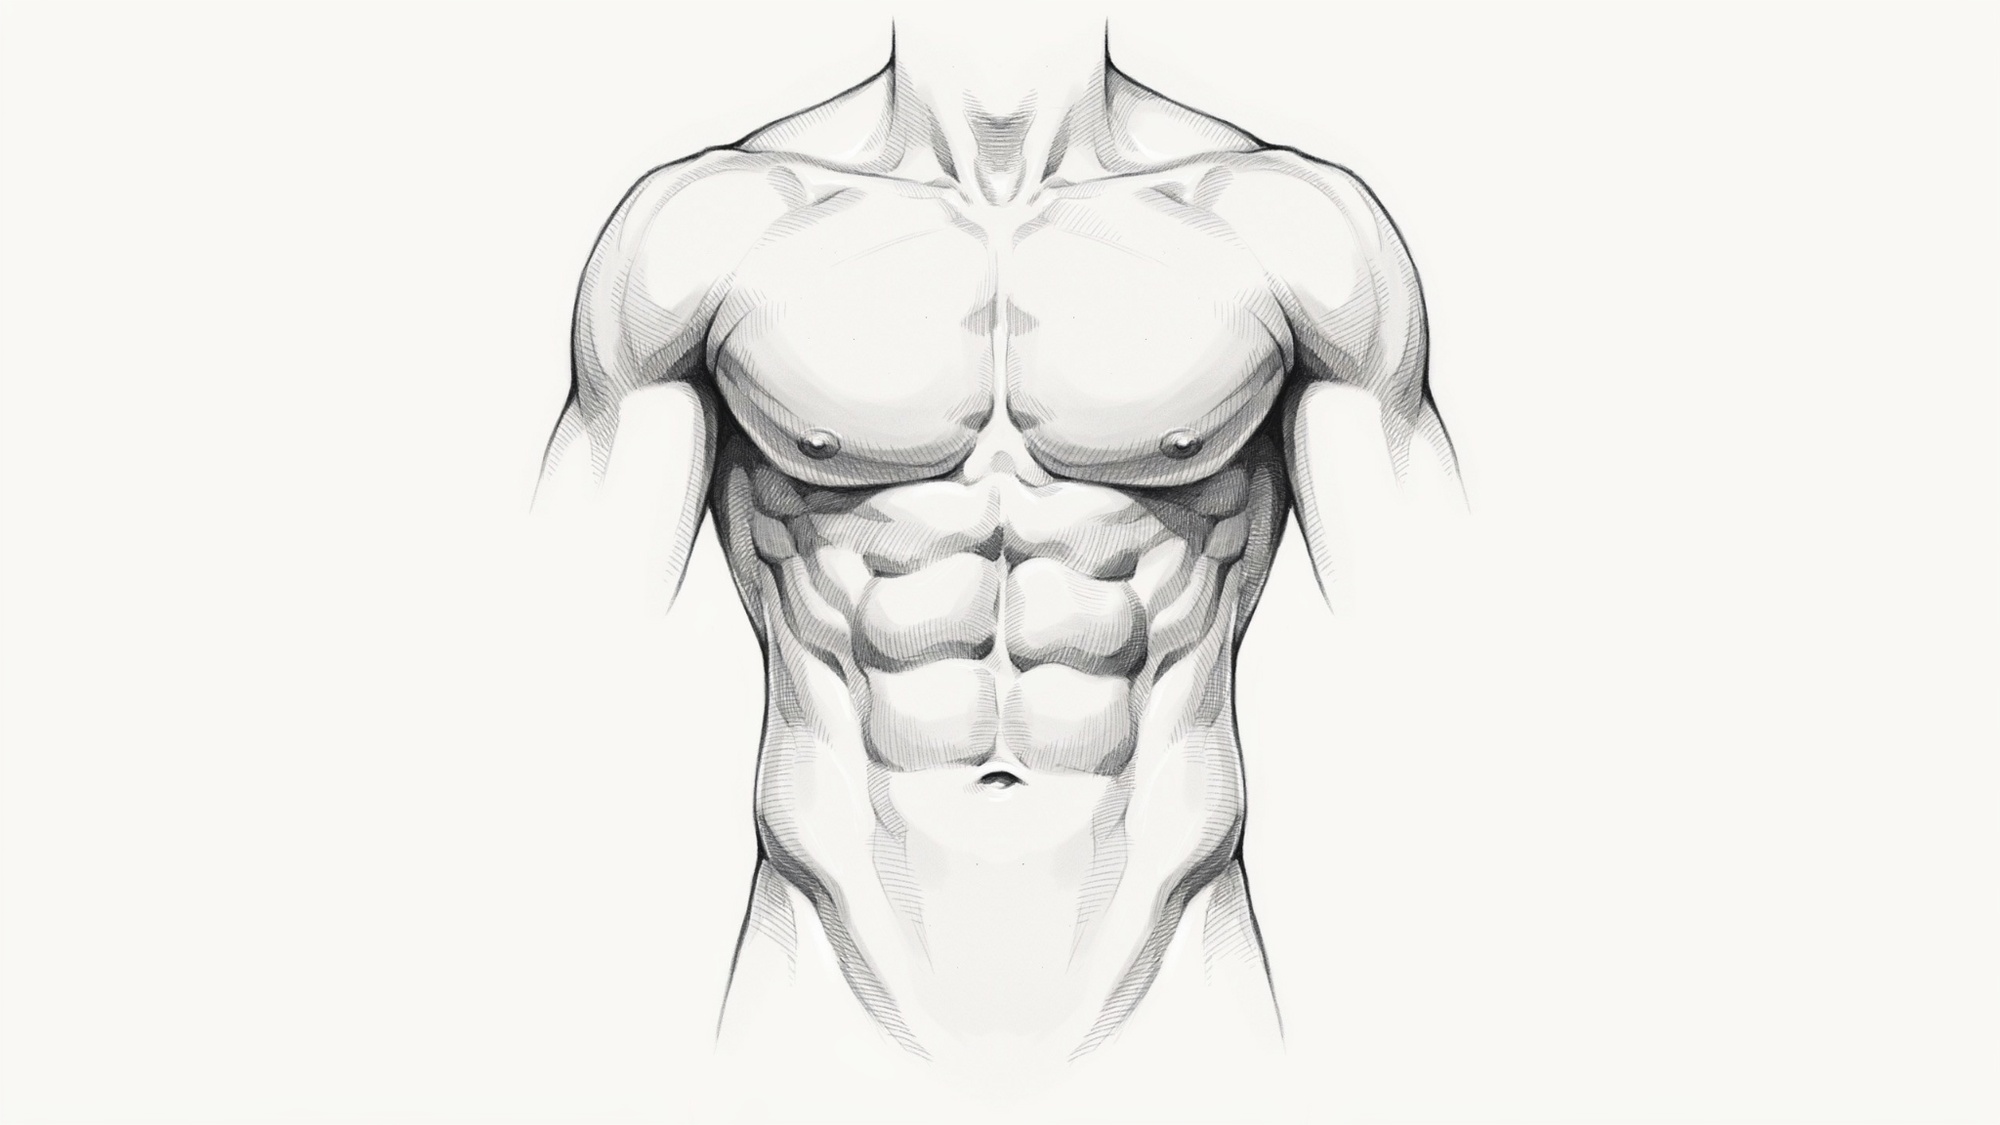
For a six-pack, draw six clearly defined sections arranged in two columns of three. The top row sits just below the chest muscles. Each row should get slightly smaller as you move down.
Add some shading between the sections to create depth. Male abs tend to be more angular and pronounced.
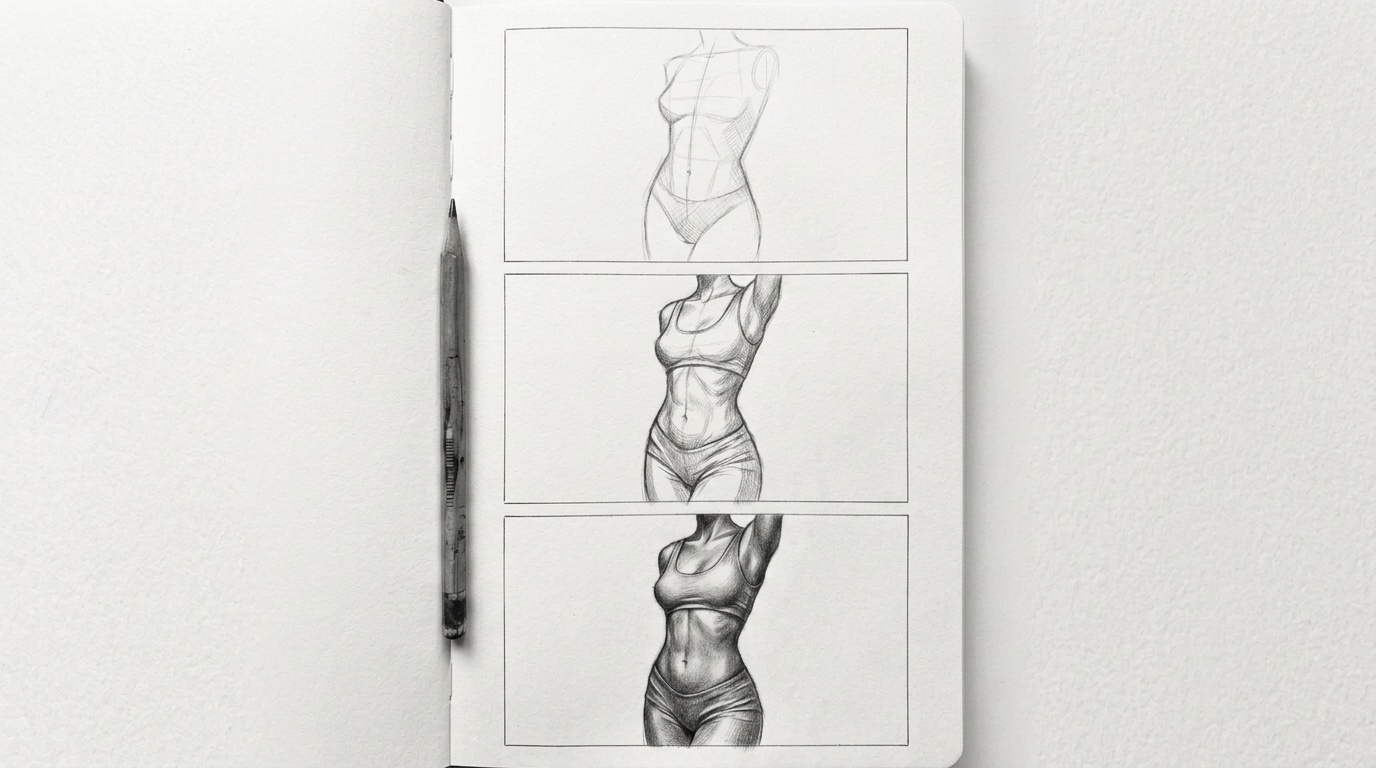
4. Female Abs Drawing

Female abs are typically softer and less defined than male abs. The sections are still present but more subtle. The waist curves inward more sharply, and the overall shape is rounder.
Use lighter shading and less contrast between the sections to get a natural look.
5. Athletic Abs

Athletic abs show more muscle tone and definition. The sections are clearly visible, and the obliques are more pronounced.
The torso is usually wider at the shoulders and narrower at the waist. Add more contrast in your shading to show the separation between muscle groups.
6. Anime Abs

Anime abs are often stylized and simplified. The muscle sections are drawn with clean, curved lines and minimal shading.
The torso shape is exaggerated, with a very narrow waist and broad chest. Use bold outlines and keep the details minimal for this style.
7. Cartoon Abs
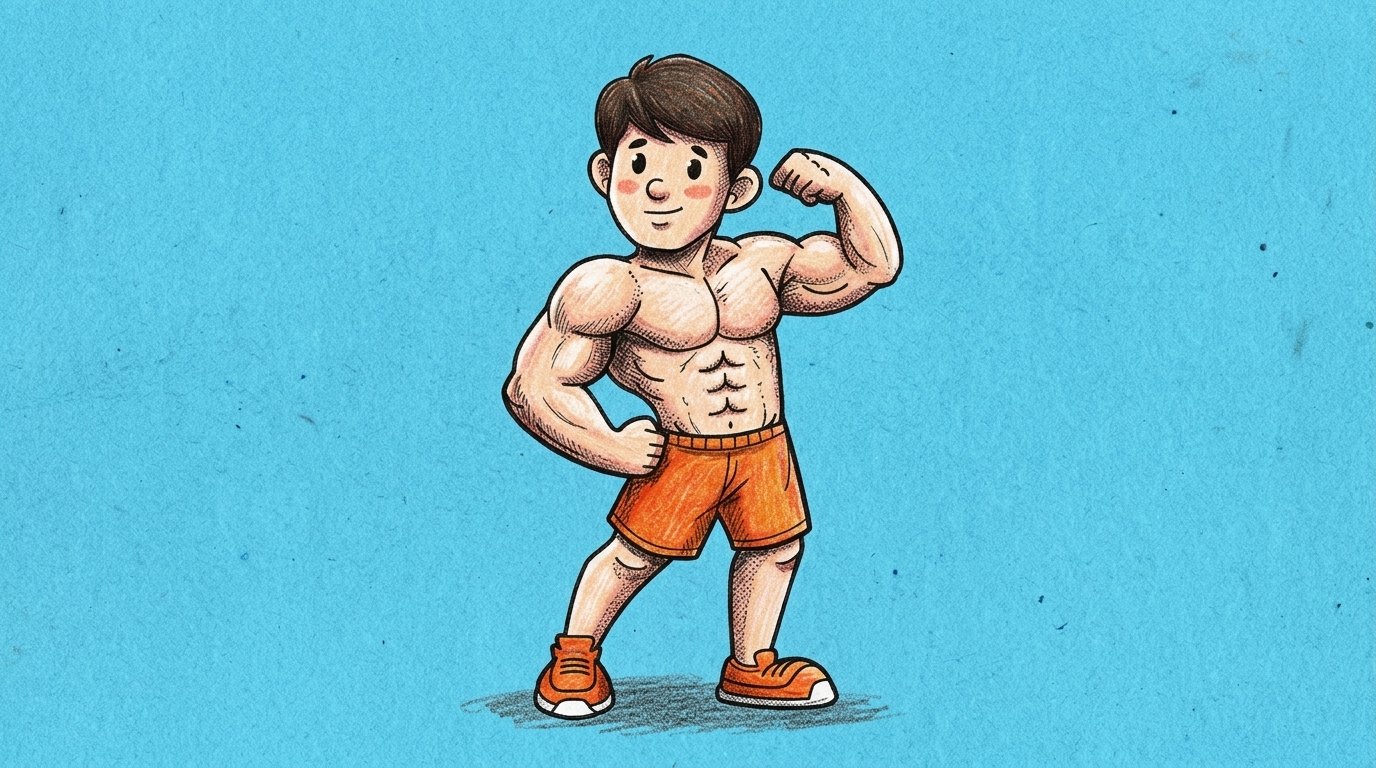
Cartoon abs are even more simplified. You can show them with just a few curved lines or basic shapes. The proportions do not need to be realistic.
Focus on making the shapes readable and clear rather than anatomically correct. Bold outlines and flat shading work well here.
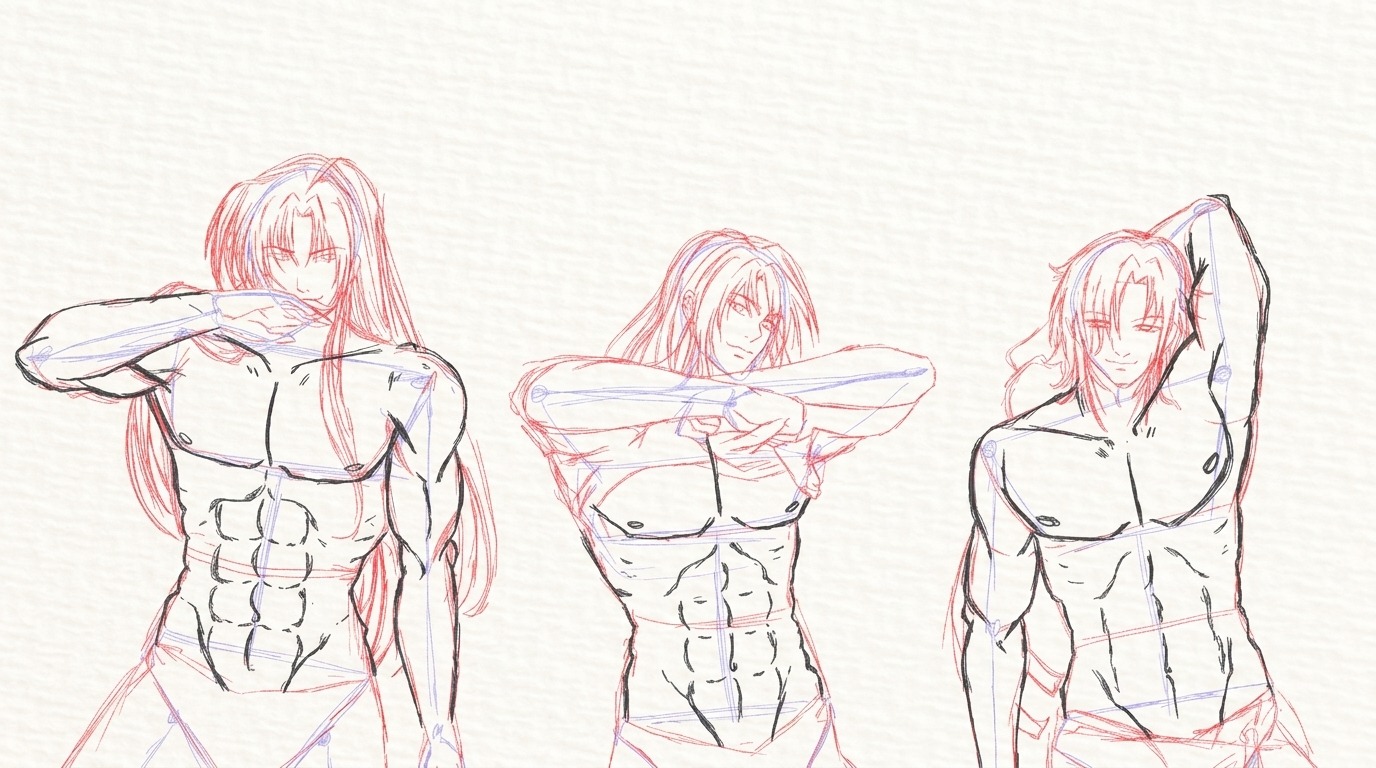
How to Draw Abs Male
Drawing male abs involves getting the proportions right and showing strong, defined muscle groups.
Male Torso Proportions
The male torso is typically wider at the shoulders and narrower at the hips. The chest sits broad and high. The waist comes in slightly before flaring back out at the hips.
When drawing abs, keep the torso roughly two to three heads tall from the base of the neck to the top of the hips. This gives a realistic proportion.
Drawing Defined Abs and Obliques
Male abs tend to show more definition because of lower body fat in reference poses. Draw each ab section with a clear shape and add firm edges between them.
The obliques on a male figure are thicker and more angular. They run from the lower ribs down to the hip bones. Draw them as broad, angled shapes on the sides of the torso.
Tips for a Realistic Male Physique
Study how the chest muscles connect to the abs at the top. The bottom of the pec muscles creates a natural line above the first row of abs. Keep your shading consistent with one light source.
Avoid making the abs look like a grid. Real muscle has subtle variation in shape and size between each section.
How to Draw Abs Female
Female abs have their own structure and proportions. Drawing them well means paying attention to the curves and softness of the figure.
Female Torso Proportions
The female torso has a narrower waist and wider hips compared to male figures. The chest is higher and the ribcage is slightly smaller.
The distance from the ribcage to the hips is often longer in proportion. When placing abs on a female torso, keep this extra space in mind. The lower abs sit closer to the hip line.
How to Draw Abs on Women Naturally
Female abs are usually less angular. Draw the sections with softer curves and lighter separation lines. The middle line is still there but may be less obvious.
Avoid drawing every section with a hard outline. Instead, use light shading to suggest the muscle shapes beneath the skin. This gives a more natural and proportional look.
Athletic vs Soft Female Abs
Athletic female abs have more visible definition. You can use stronger shading and clearer section lines here. Soft female abs look smooth with only slight muscle hints.
For softer abs, use very light shading and keep the outlines minimal. Both styles are valid. The choice depends on what kind of figure you are drawing.
How to Draw Abs Anime and Cartoon Style
Anime and cartoon styles handle abs differently from realistic art. They use simplified shapes and bold lines to suggest muscle without full anatomical detail.
How to Draw Anime Male Abs
Anime male abs are often drawn with clean curves and a clear center line. The sections are visible but not overly detailed. The torso shape is usually exaggerated with a very narrow waist.
Use smooth lines and light shading to define each section. Dark outlines between sections are common in this style.
How to Draw Anime Girl Abs
Anime girl abs are even more simplified. In many cases, just a few curved lines are enough to suggest muscle tone.
The waist is drawn very narrow, and the ab sections are subtle. Avoid heavy shading or strong outlines. A light touch works better for female anime figures.
How to Draw Cartoon Abs With Simple Lines
Cartoon abs focus on readability over realism. You can draw them with just three or four curved lines across the torso. Flat color fills work well for this style.
There is no need for detailed shading. Keep the shapes consistent and make sure they read clearly even at small sizes.
Common Mistakes When Drawing Abs
Many beginners make the same errors when drawing abs. Knowing these mistakes ahead of time can save you a lot of frustration.
Proportion and Size Mistakes
One common mistake is making the torso too tall. When it is too long, the abs look stretched and unnatural. Check your proportions often. Also, avoid making every ab section the same size.
The top sections are larger and more oval. The lower ones are smaller and flatter. Varying the size and shape of each row makes the abs look far more natural.
Outline and Structure Mistakes
Heavy black outlines around every ab section make the muscles look flat. Use shading instead of dark lines to separate the sections. Let light and shadow do the work. Also, never ignore the ribcage and pelvis.
The abs connect to both structures, and skipping them makes the abs look disconnected from the body. Always block in these areas first before drawing the abs.
Tips to Make Your Abs Drawings Look More Realistic
Small changes in your process can make a big difference in how your abs drawings turn out.
- Start with the overall body gesture before adding ab details. A slight twist or bend in the torso makes the figure feel alive.
- Always pick a light source before shading. Keep the top of each ab section bright and darken the area just below it.
- Practice drawing abs from different angles, not just the front. Side and three-quarter views build a better understanding of muscle placement.
- Use athlete photos or anatomy references to see how muscles shift with movement. Real references speed up your learning faster than guessing.
- Keep your early lines light so fixing proportions stays easy. Build up detail gradually as your sketch gets more accurate.
Conclusion
Drawing abs is not about getting everything perfect on the first try. When I started, my abs looked more like a grid of boxes than actual muscles. The real shift happened when I stopped rushing and started paying attention to shapes, light, and proportion.
Take it one step at a time. Practice a little each day and you will see real progress.
Try drawing abs today and drop your results in the comments. We would love to see how you are improving!
Frequently Asked Questions
How do I make abs look realistic in my drawing?
Focus on shading rather than heavy outlines. Use a clear light source and let shadows define the shape of each muscle section.
Do I need to know anatomy to draw abs?
You do not need to be an anatomy expert. Learning just the basic muscle groups like the rectus abdominis and obliques is enough to get started.
How many ab sections should I draw?
Most figures show six sections arranged in two columns of three. The top sections are slightly larger and the bottom ones are smaller and flatter.
What is the biggest mistake beginners make when drawing abs?
Making every ab section the same size and shape is the most common mistake. Real abs vary slightly in size and position, so keep each section a little different.
Can I draw abs without using a reference?
You can, but using a reference gives much better results. Even a quick look at an athlete photo helps you understand how muscles actually look and move.