

I used to think landscapes were only for advanced artists. So I avoided them for months and stuck to simpler subjects instead.
Then I broke the process down into simple steps and everything changed.
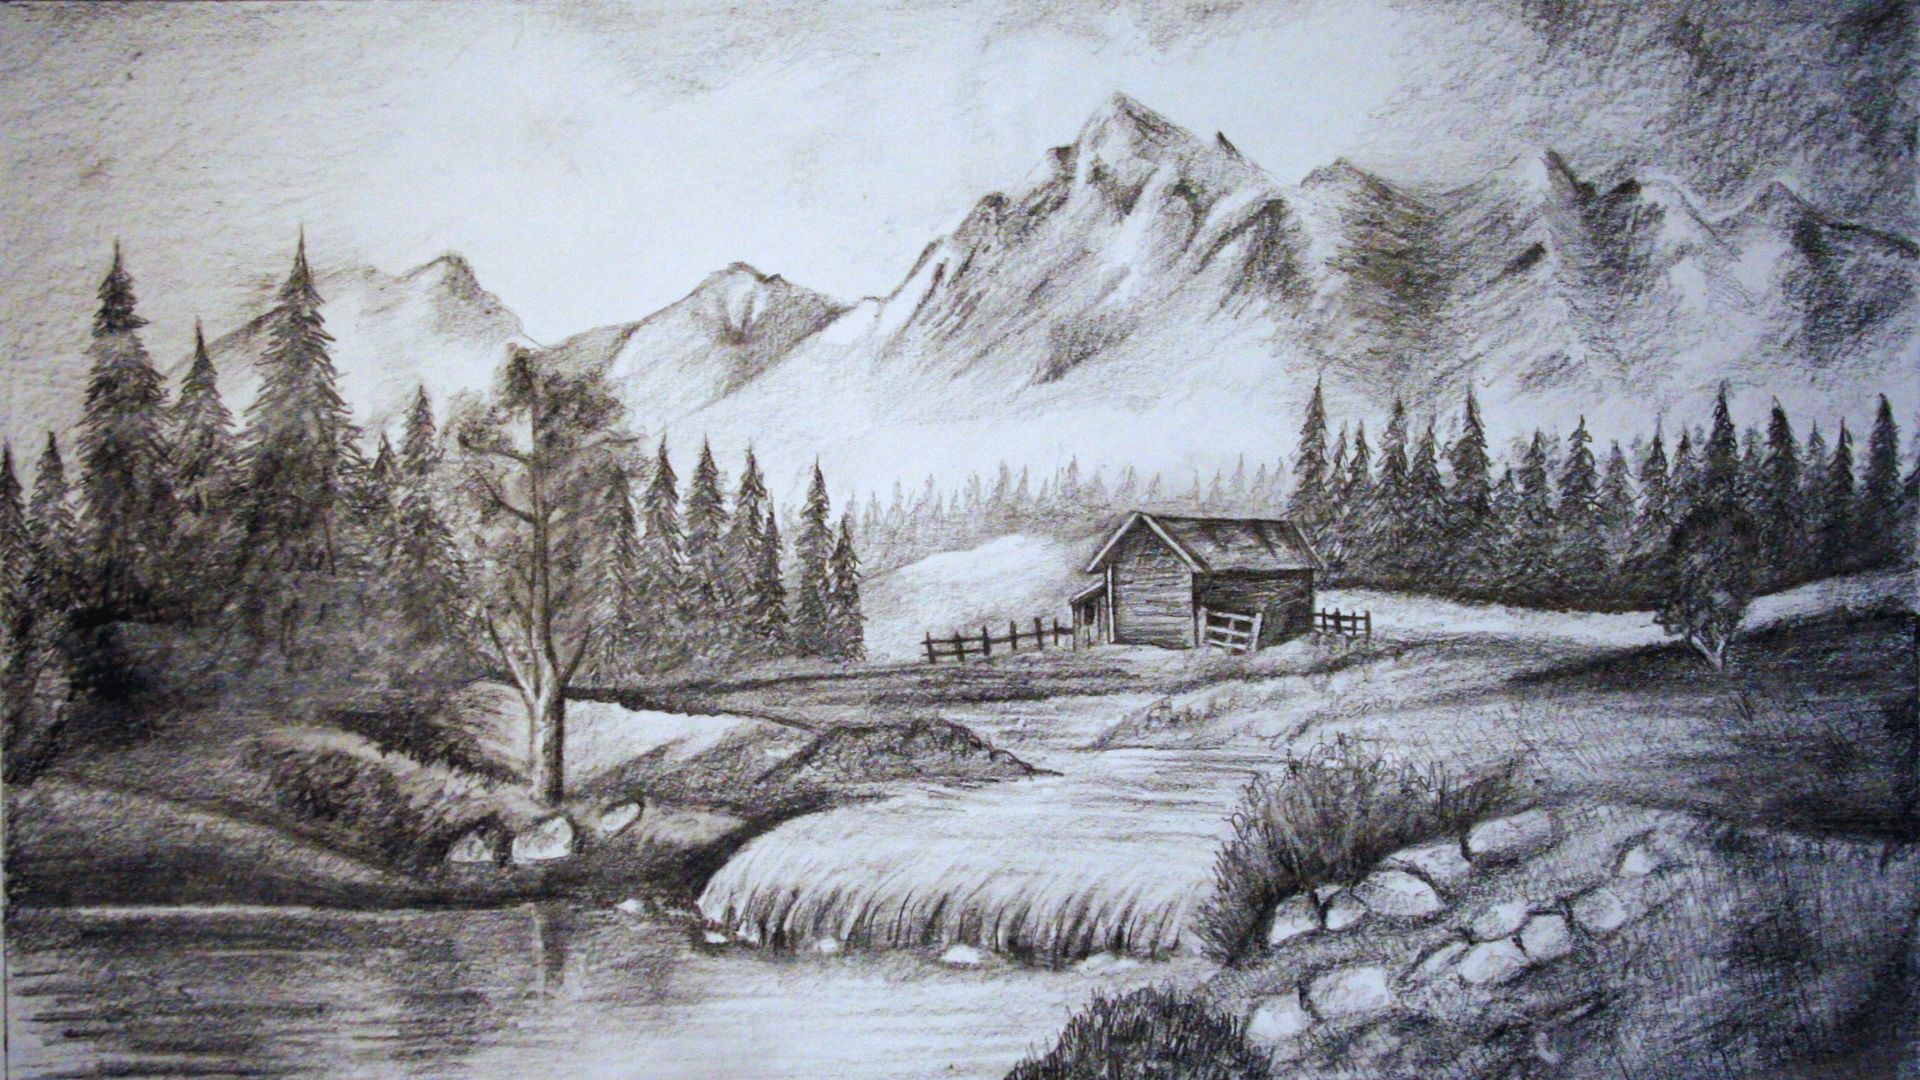
This guide will show you how to draw a landscape step by step, covering every stage clearly and simply.
You will know exactly what to do and when to do it. No guessing, no frustration, no wasted paper.
I have tested this method myself many times, so you can trust every step here.
What This Guide Covers
This guide walks you through everything you need to draw a landscape from scratch.
You will go through the right materials, five clear steps, and practical tips that actually help. Each section is written simply so you can follow along without any confusion.
No prior drawing experience needed. Just a pencil, some paper, and a willingness to practice.
By the end, you will have a complete landscape drawing and a method you can use again and again.
Materials and Tools Required

Before you start, gather everything you need so nothing slows you down mid-drawing. Here is what you will need:
- A graphite pencil, sharp and ready
- A blade or sharp tool for scraping pencil dust
- A soft blending cloth, sponge, or blending stump
- Drawing paper with a smooth surface
- An eraser for clean corrections
Having the right tools from the start makes every step feel easier and more controlled.
How to Draw a Landscape Step by Step (For Beginners)
Follow these five steps in order and you will have a complete landscape drawing by the end.
Step 1: Create Pencil Dust on the Paper
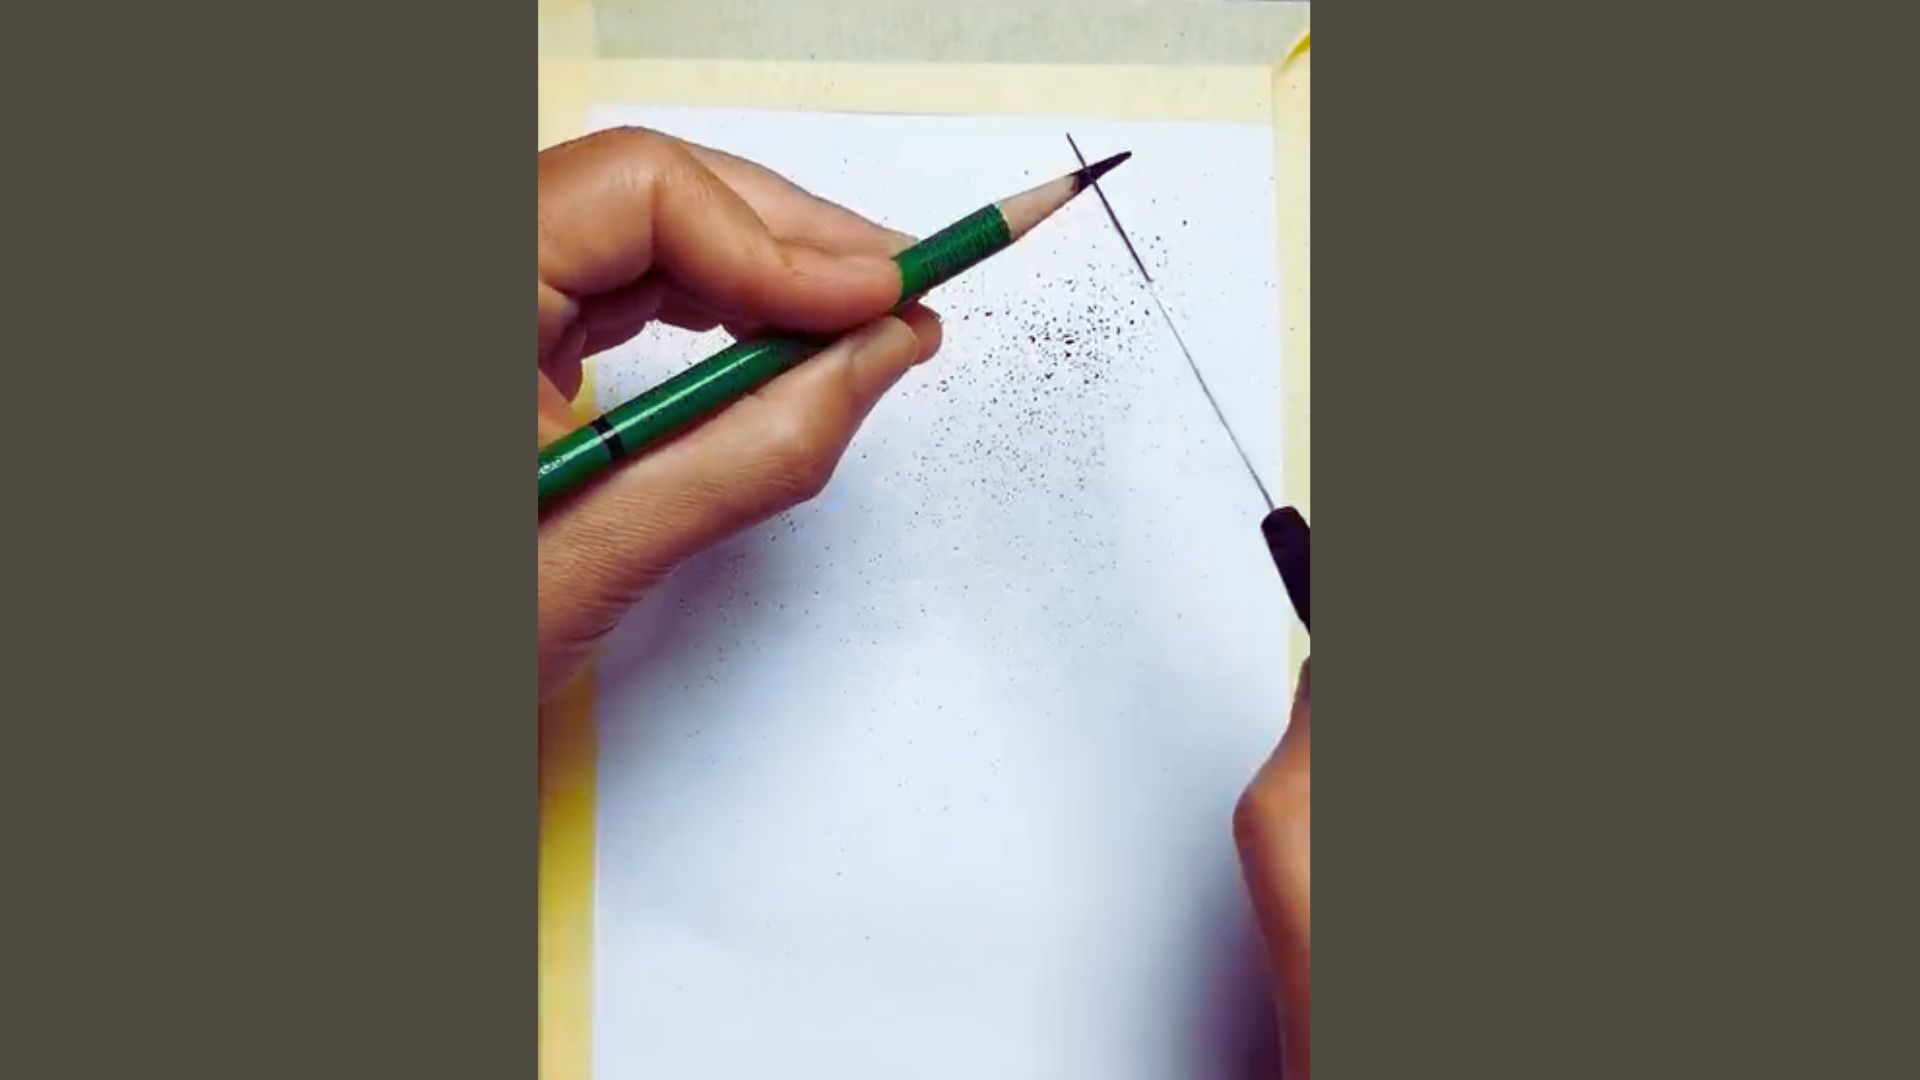
Start by sharpening a graphite pencil and scraping the lead gently with a blade over the paper. This creates fine graphite dust directly on the surface.
The dust will be blended later to form the base texture of the landscape background. Do not press too hard at this stage.
A light, even layer of dust is all you need to get started. Think of this step as laying the foundation before anything else goes on the page.
Step 2: Blend the Graphite Dust
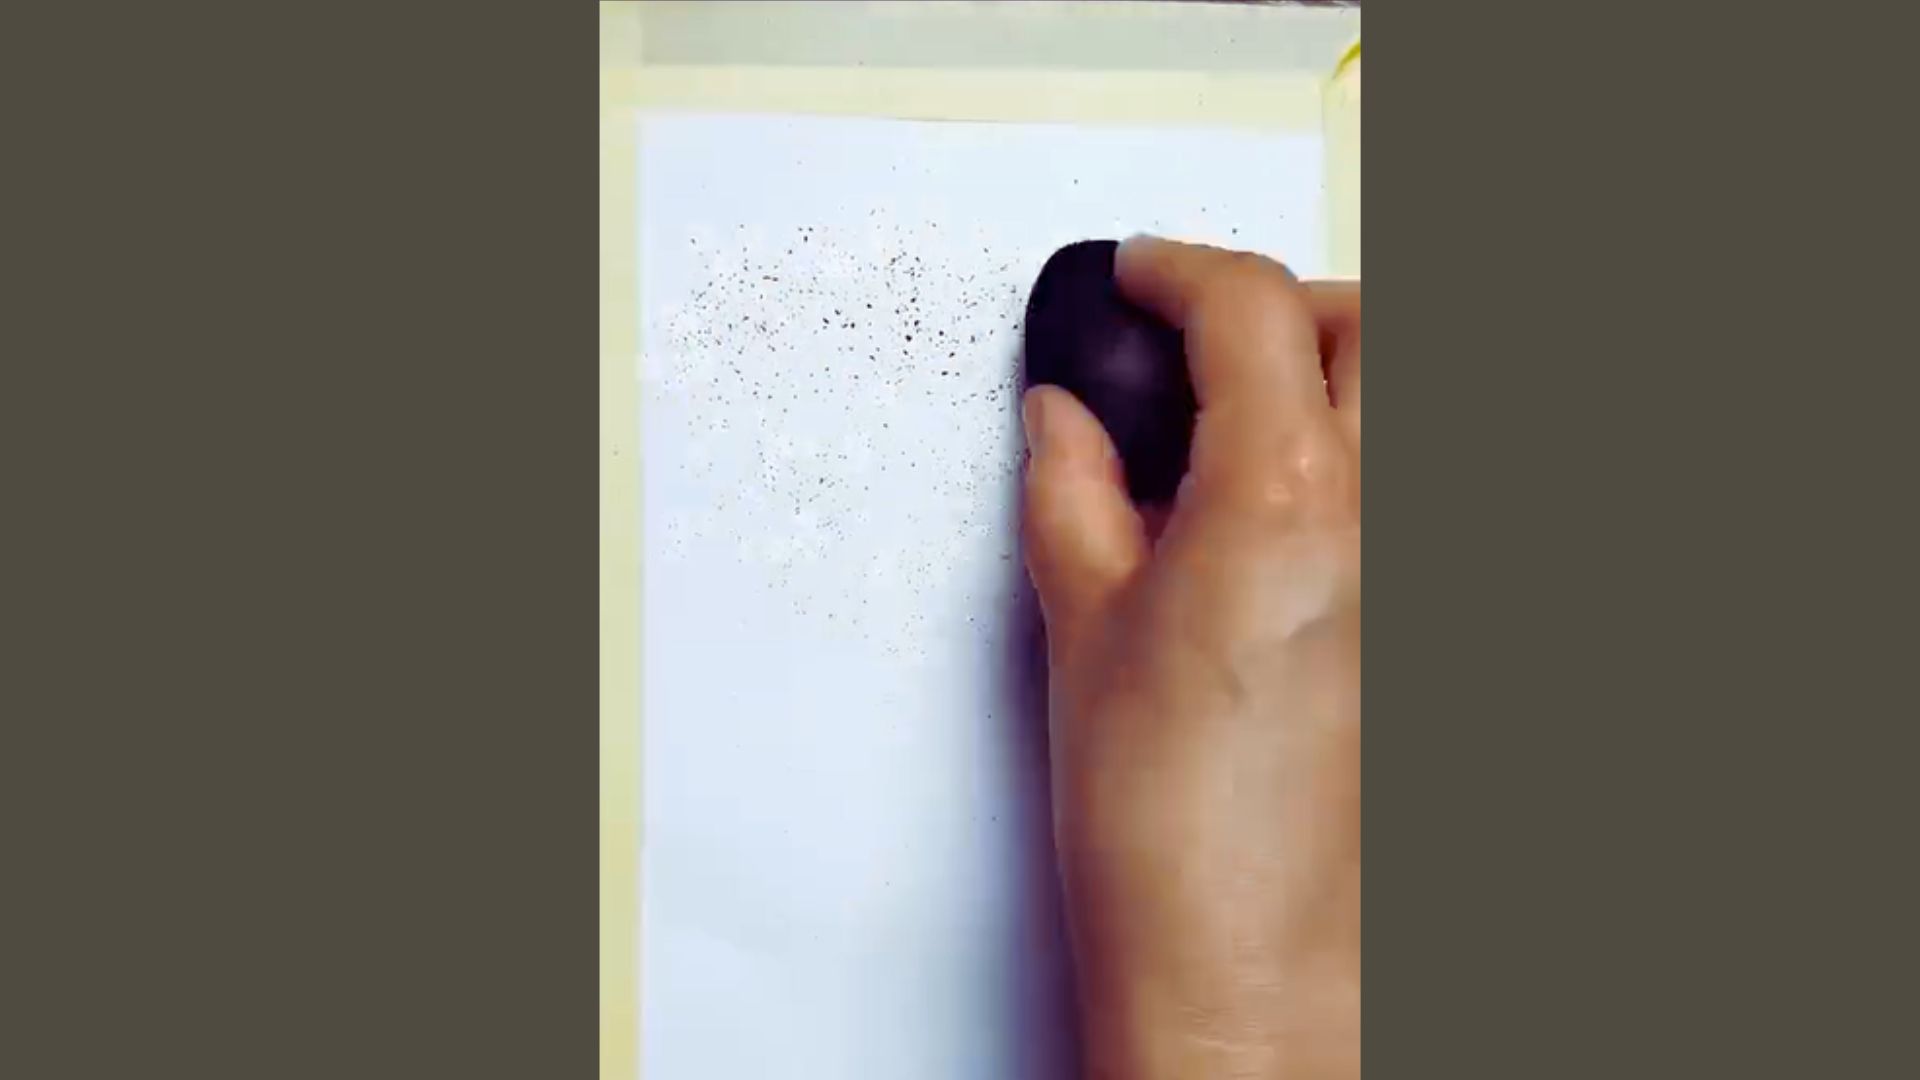
Use a soft blending cloth, sponge, or blending stump to spread the graphite dust across the paper.
Move in slow, circular motions to create a smooth and even grey background. This soft base layer helps build depth and atmosphere for the whole drawing.
Take your time here and make sure the coverage feels consistent. Uneven blending at this stage will show up later in the finished piece.
A clean, smooth background makes every detail you add on top look more polished.
Step 3: Draw the Distant Tree Line
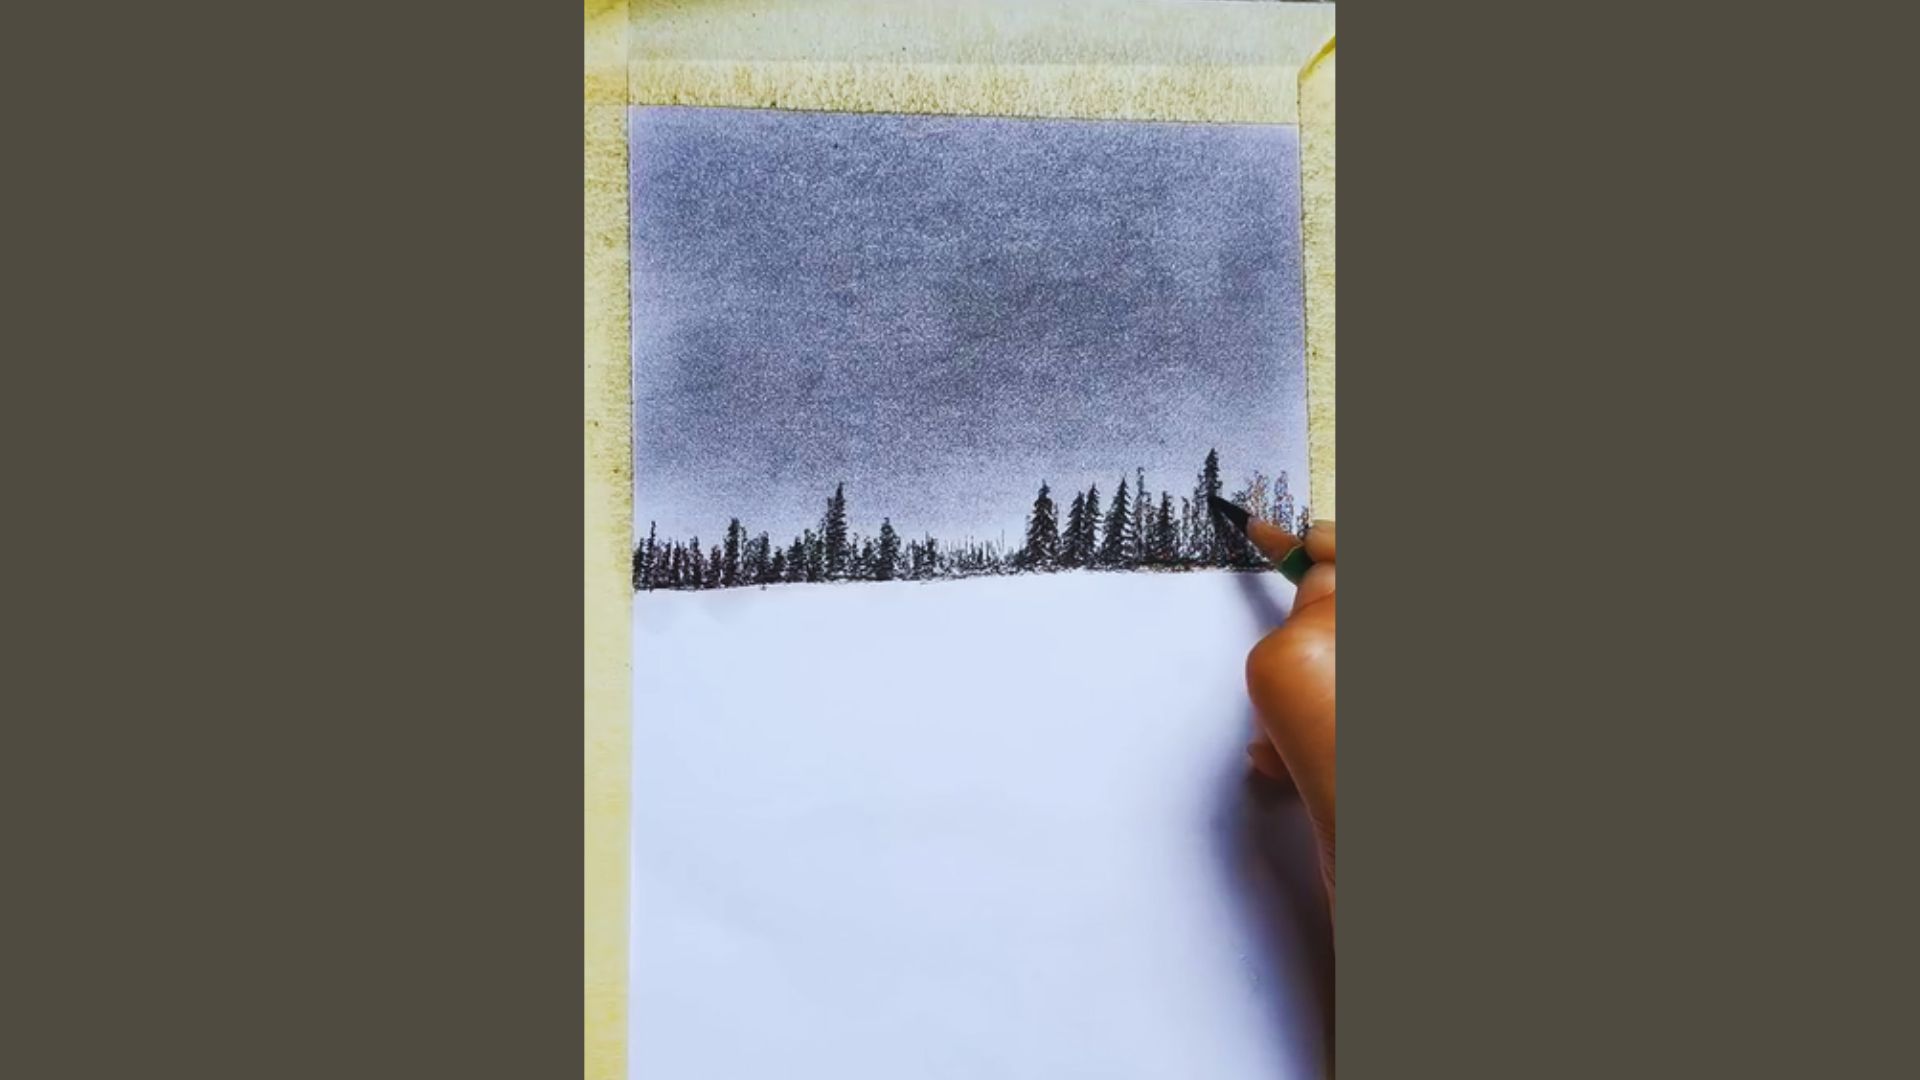
Using a sharp pencil, lightly sketch a horizontal ground line across the paper. Then draw small pine trees along that line, varying the height and spacing to give the forest a natural look.
This adds depth to the background and makes the scene feel like it stretches back into the distance.
Keep the trees light and less detailed since they are meant to sit far away in the composition.
The contrast between the detailed foreground and soft background is what makes a landscape feel real. Work slowly and trust the process.
Step 4: Sketch the Winding Path
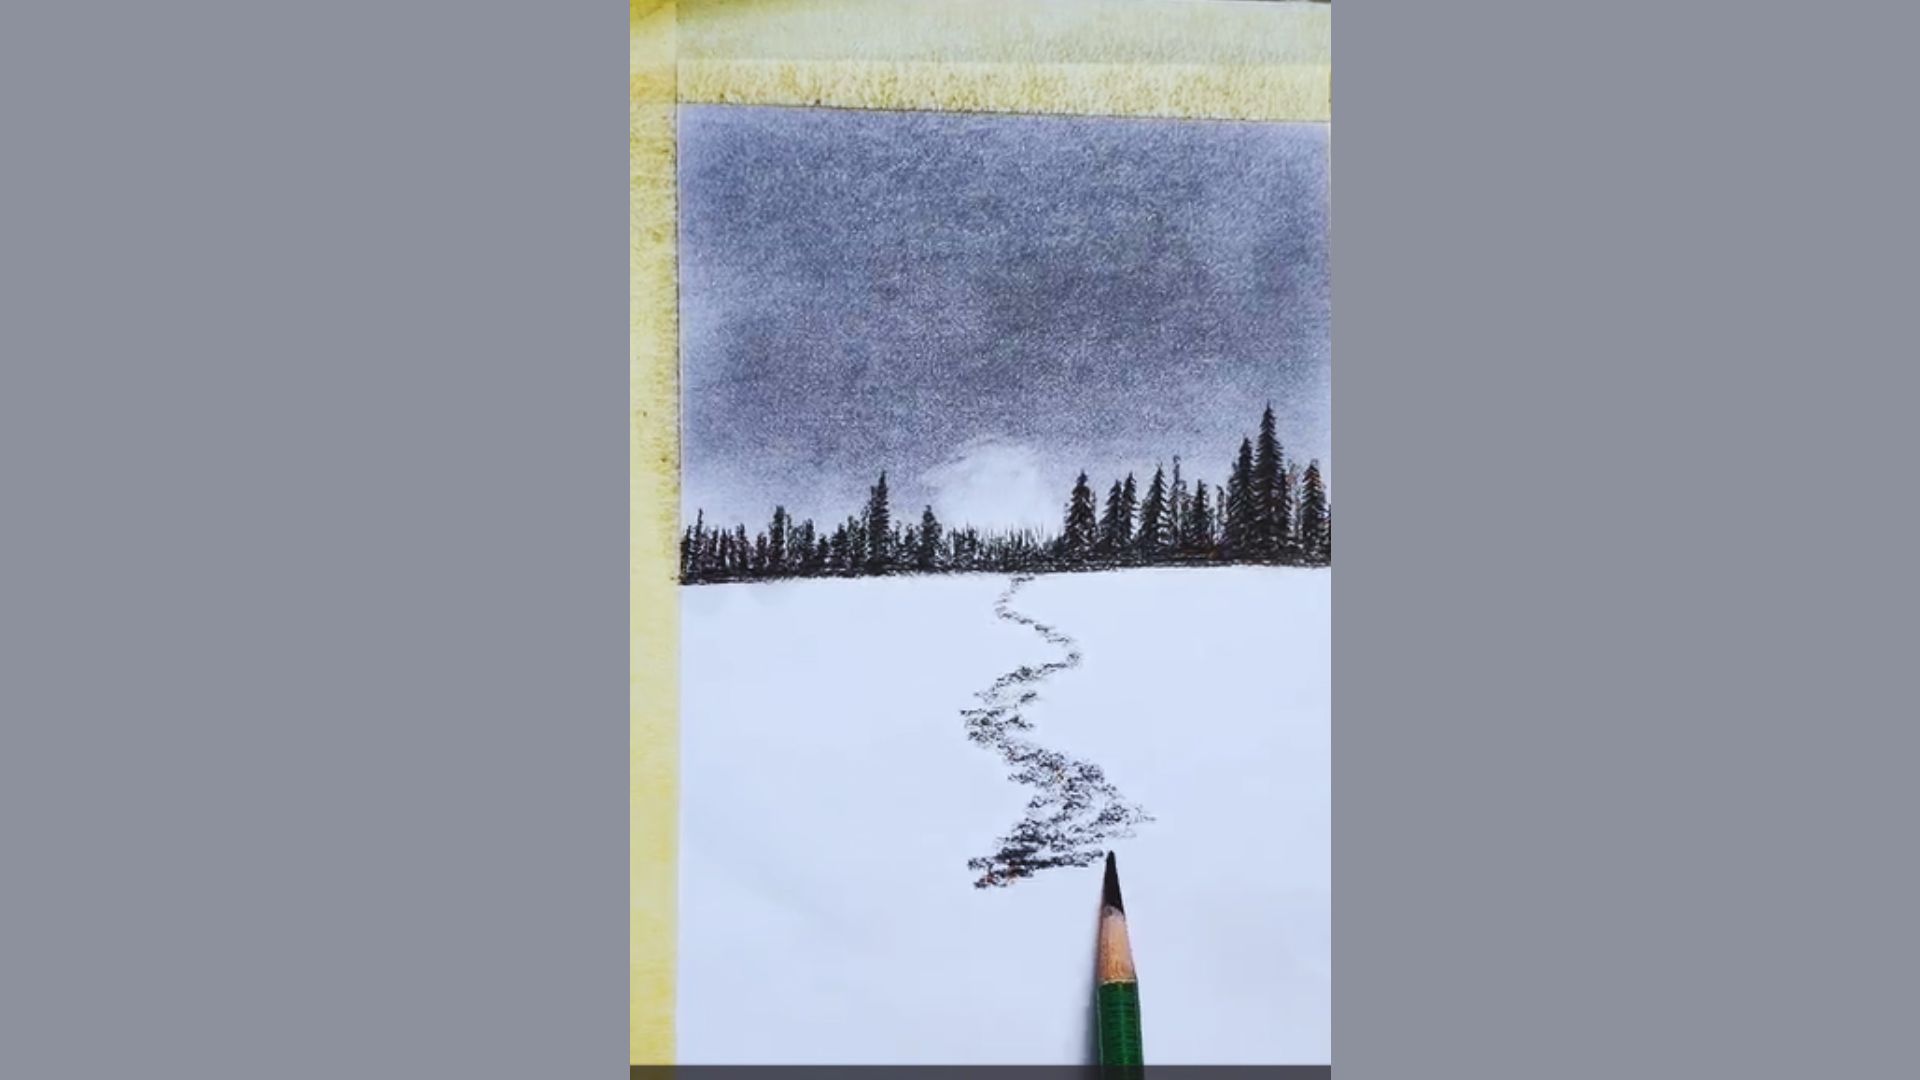
Draw a narrow, winding path starting from the bottom of the paper and leading toward the tree line.
Use light, rough strokes to build a natural texture along the edges. Make the path wider in the foreground and gradually narrower as it moves toward the background.
This technique, called perspective, is what gives a flat drawing a sense of distance and space. Do not worry about making it perfect at this stage.
The rough, uneven edges of a hand-drawn path actually make it look more natural and grounded.
Step 5: Add Texture and Depth to the Path
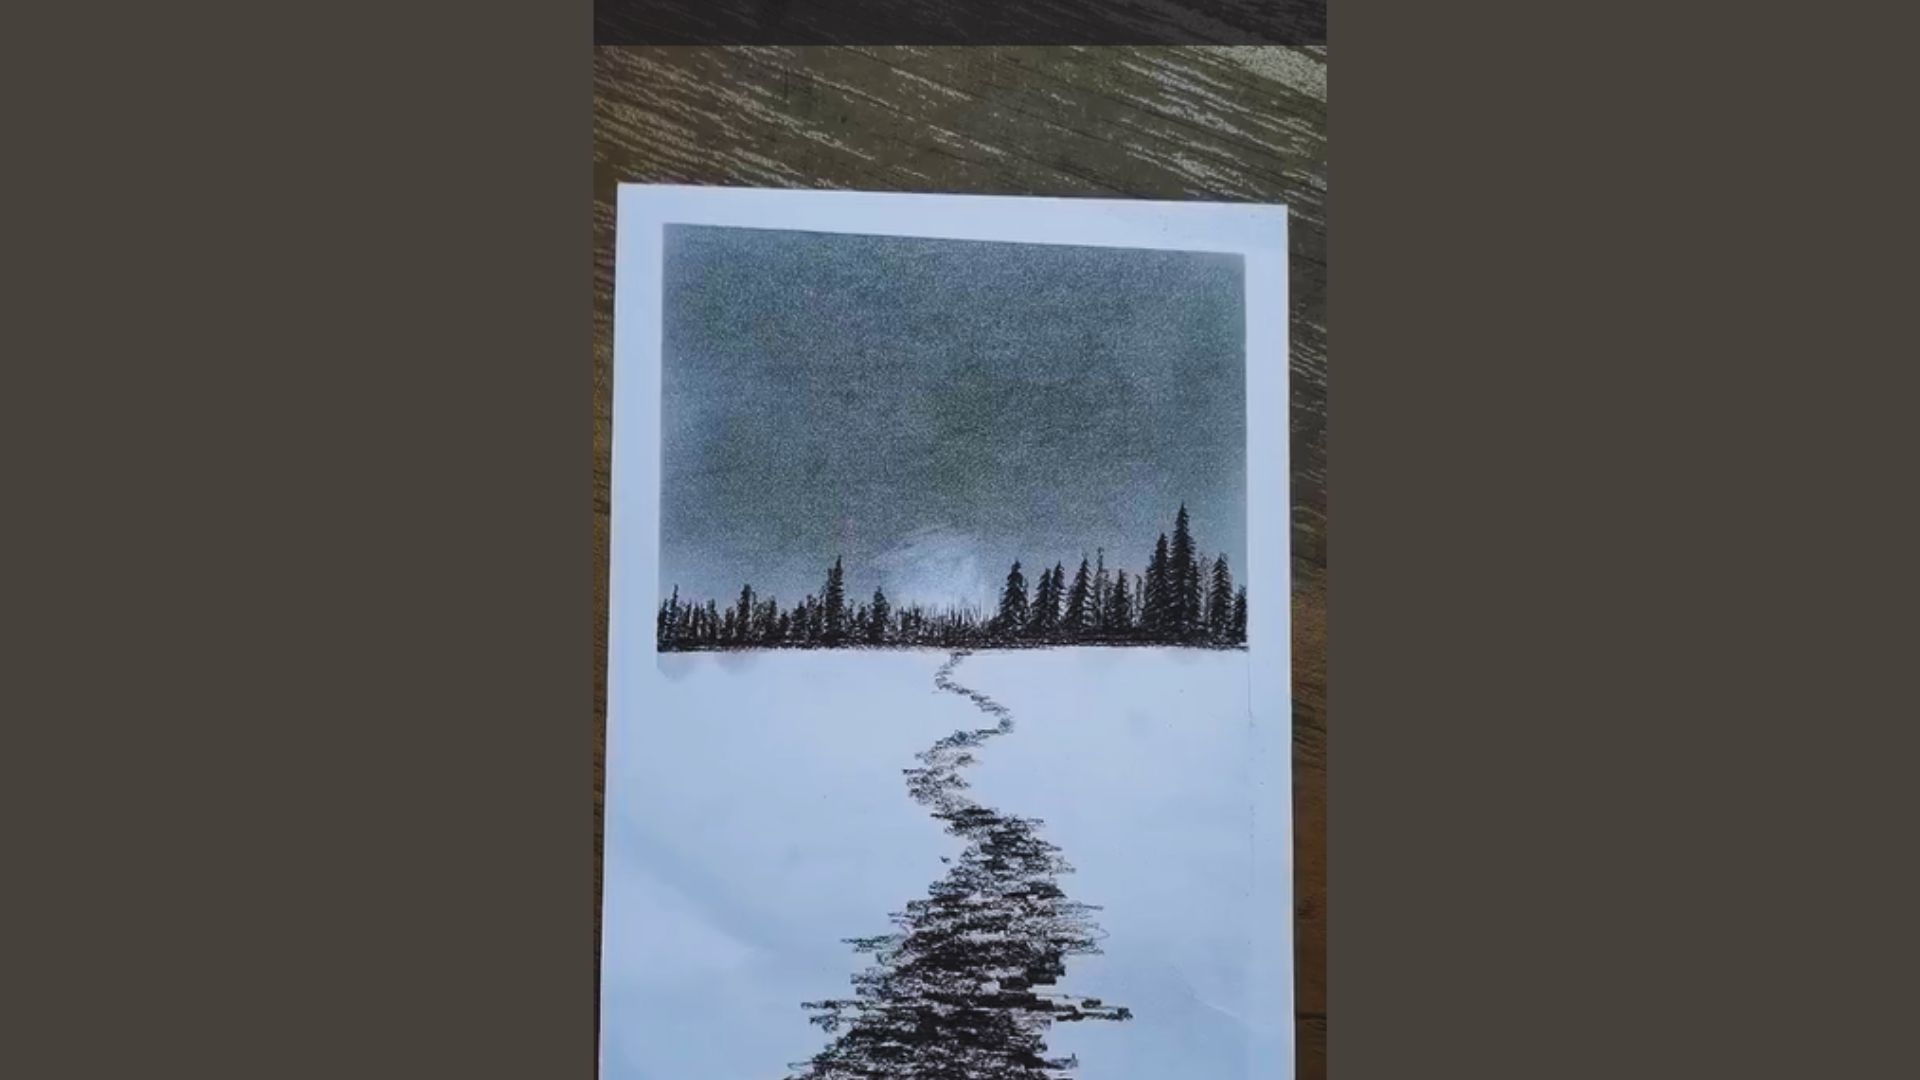
Use your pencil to build darker tones and rough textures along the winding path. Apply uneven strokes to create a natural ground effect that feels lived in.
Make the foreground darker and more detailed while keeping the distant part lighter to push the sense of depth.
This is where your drawing starts to come alive. Spend extra time on the foreground since that is where the viewer’s eye goes first.
Small details like pebbles, shadows, or grass edges along the path can make a big difference in the final result.
Tips to Improve Your Landscape Drawing Skills
These small habits will make a noticeable difference in your drawings over time.
- Practice blending regularly. Smoother blending creates more depth in your backgrounds.
- Study real landscapes. Observing nature teaches you how light, shadow, and distance actually look.
- Start light and build slowly. It is easier to add pressure than to fix a mark that went too dark.
- Use varied pencil pressures. Light strokes for distance, heavier strokes for the foreground.
- Draw the same scene more than once. Repetition helps you spot mistakes and improve faster.
Every artist improves with practice, and landscapes are no different.
Conclusion
Learning how to draw a landscape step by step felt overwhelming for me at first.
But once I broke it down into simple stages, it stopped feeling so hard. I want that same feeling for you.
Start with step one today and work through it at your own pace. You do not need to rush. Leave a comment below and tell me which step you found most helpful.
If this guide made drawing feel more approachable, share it with someone who wants to start drawing too.They will appreciate it.
Frequently Asked Questions
What pencil is best for drawing a landscape?
A graphite pencil works best. Use a softer grade like 2B or 4B for shading and blending.
Can a complete beginner follow these steps?
Yes. Each step is written for beginners. Just follow the order and take your time.
How long does it take to draw a landscape like this?
Most beginners finish in one to two hours, depending on how much detail you add.
Do I need special paper for this technique?
Smooth drawing paper works best. Textured paper can make blending harder to control.
How do I fix mistakes in a graphite landscape drawing?
Use a soft eraser to lift graphite gently, then re-blend the area to keep it smooth.