


I tried drawing an axolotl for the first time without any guide. It was a mess. The gills looked like spaghetti, and the body was all wrong.
So I figured it out the hard way, and now I'm sharing exactly what works.
In this blog, I'll show you how to draw an axolotl step by step. I cover everything from the basic shapes to tips.
I also share easy variations, common mistakes, and beginner tips to make the process simple and fun.
I've helped beginners get this right, and you can too.
Understanding the Basic Shapes of an Axolotl
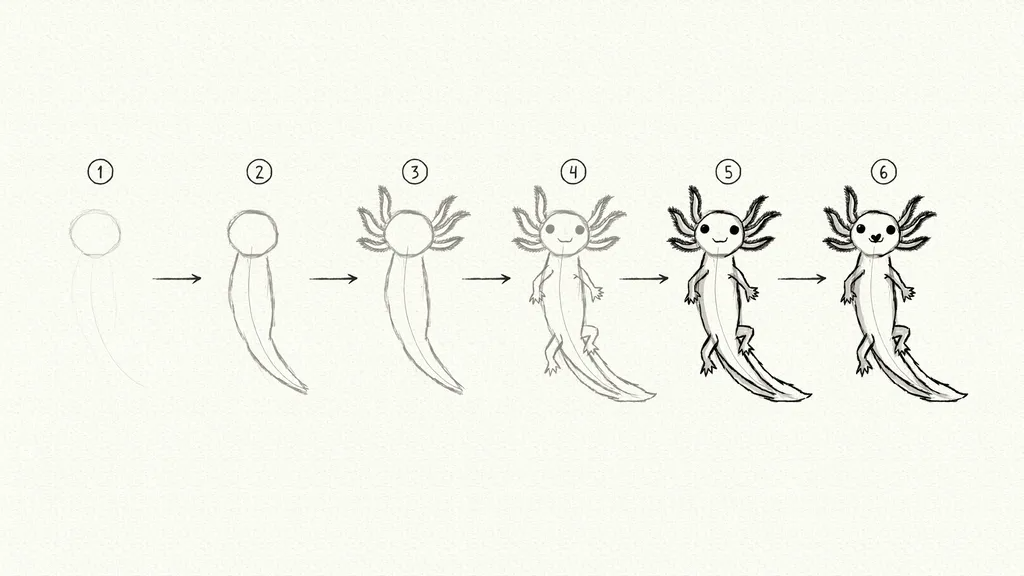
Before you pick up a pencil, look at the axolotl as a collection of simple shapes.
The head is a large rounded oval. The body is a long, soft rectangle that narrows at the tail.
The gills are feathery stalks that fan out from the sides of the head. The legs are short and stubby.
Breaking it down this way makes the whole thing feel less scary. You are not drawing a complicated creature. You are connecting basic shapes.
Materials You'll Need

Keep it simple. You don't need fancy supplies.
- Pencil
- Eraser
- Drawing paper
- Black marker (optional)
- Colored pencils or crayons
How to Draw an Axolotl Step by Step
Take it one step at a time and the whole thing gets a lot less intimidating.
Step 1: Draw the Outline of the Head

Start with a wide, rounded oval near the center of your paper. Make it slightly wider than it is tall. Leave space on all sides for the body, gills, and legs.
Step 2: Add the Eyes and Smiling Mouth

Place two small circles in the upper part of the head for the eyes. Add tiny dots inside each one. Draw a gentle curved line below the eyes for the mouth. A slight upward curve gives it that happy look.
Step 3: Sketch the Three Gills on Each Side
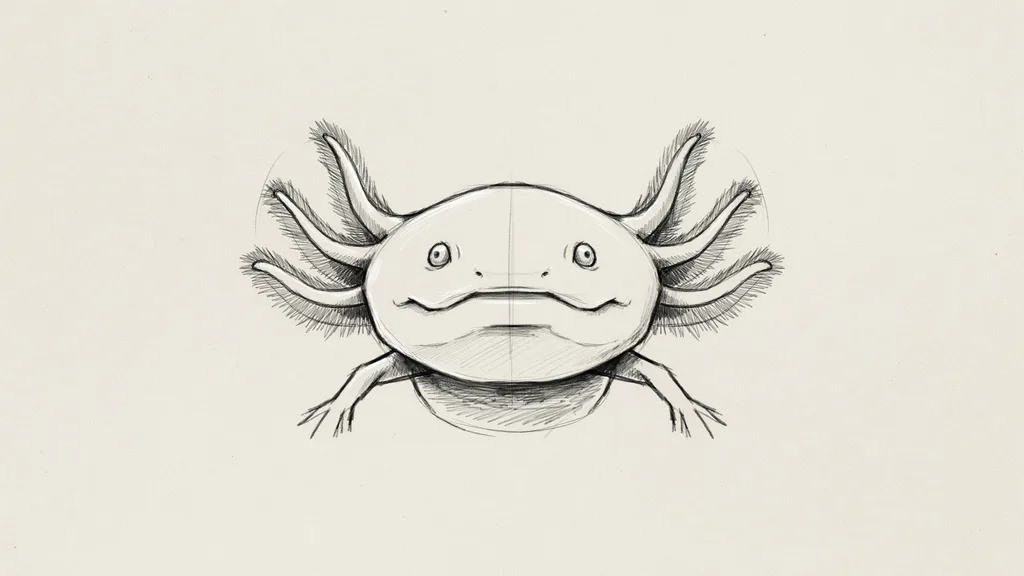
Draw three thin, slightly curved stalks rising from each side of the head. Space them out so they fan upward and outward. Keep them light for now.
Step 4: Draw the Feathery Gill Details

Add small branching lines along each gill stalk. Think of them like tiny feathers or leaves on a stem. These don't have to be perfect. Messy lines actually make them look more natural.
Step 5: Outline the Long Body

From the bottom of the head, draw two smooth lines flowing outward and then tapering inward toward the tail. The body should look like a long, wide teardrop lying on its side.
Step 6: Add the Front Legs

Draw two small, stubby legs near the front of the body. Axolotls have tiny rounded toes. Add three to four small bumps at the end of each leg.
Step 7: Draw the Back Legs and Feet

Repeat the same process near the back of the body. The back legs sit a bit lower and slightly behind. Keep them short and thick.
Step 8: Create the Tail Shape
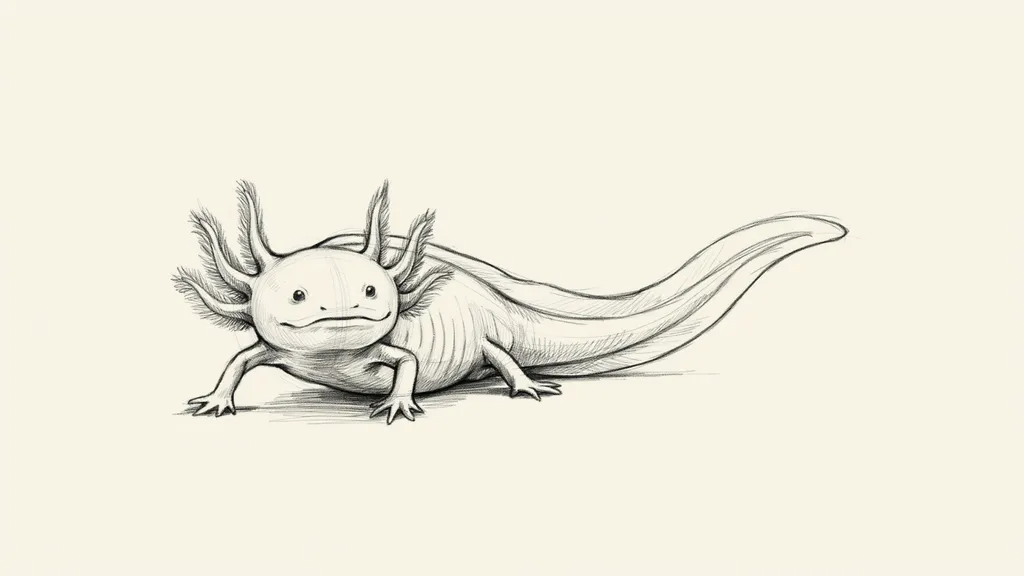
Extend the body into a pointed tail. The tail should curve slightly upward at the tip. Keep it smooth and flowing.
Step 9: Add the Dorsal Fin Along the Tail

Draw a wavy line running along the top of the tail and part of the back. This is the dorsal fin. It doesn't have to be perfectly even. A few gentle waves work great.
Step 10: Draw Bubbles Around the Axolotl
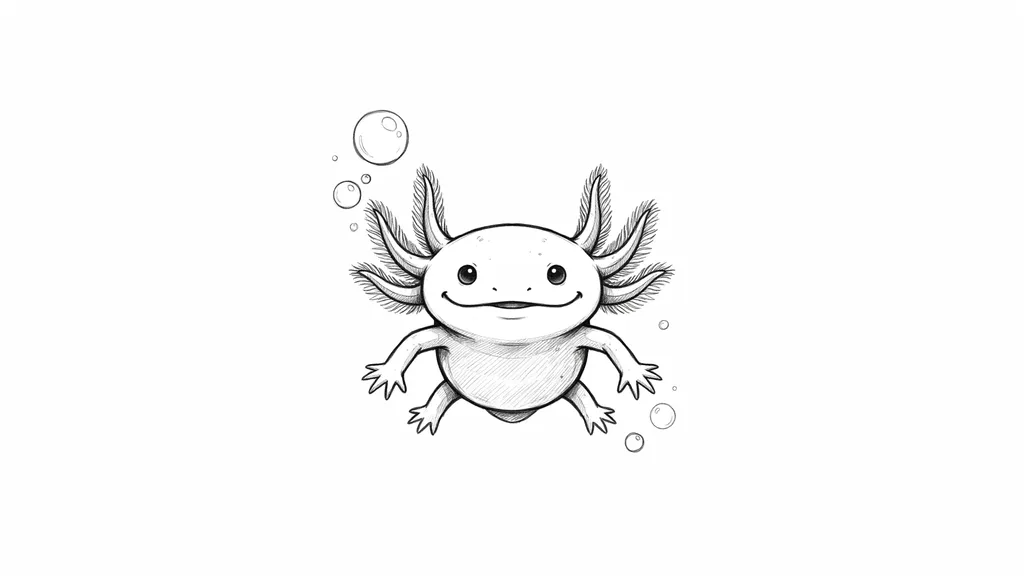
Add small circles of varying sizes around the axolotl. This gives it an underwater feel. Scatter them loosely, not in a straight line.
Step 11: Refine and Ink the Final Outline
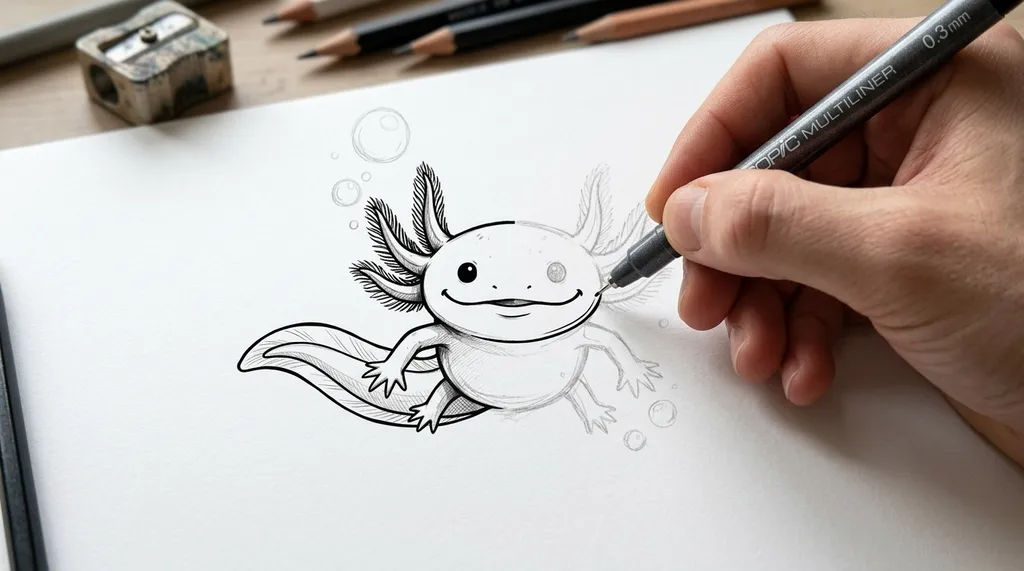
Go over your pencil lines with a black marker once you're happy with the sketch. Use a thin tip for details like gill branches and toe bumps. Let it dry fully before erasing pencil marks underneath.
Step 12: Color Your Axolotl
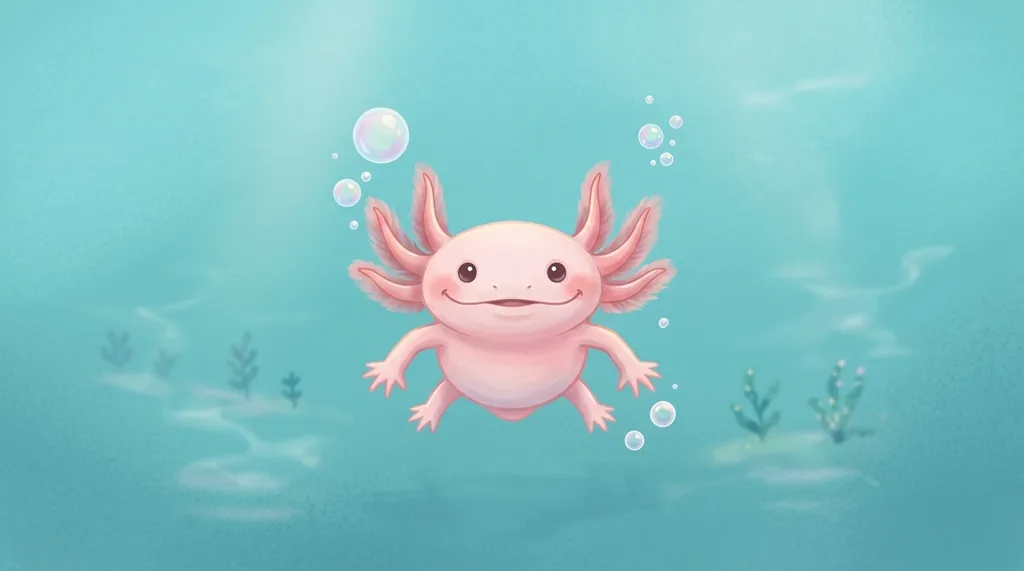
Fill in the body with your chosen color. Axolotls come in pink, white, brown, and golden shades. Add a bit of darker color around the edges to give it depth.
Easy Axolotl Drawing Variations
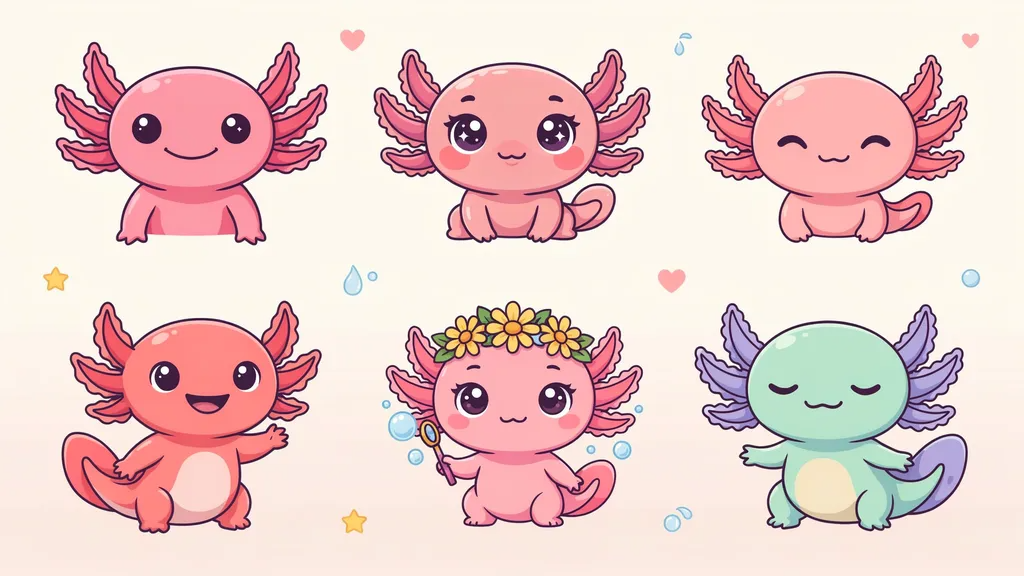
Once you know the basic version, try these fun styles:
Cute Cartoon Axolotl
Simplify the shape and make the eyes very large. Round off every edge. This version is perfect for kids or quick sketches.
Kawaii Axolotl with Big Eyes
Draw oversized circular eyes with shine dots inside. Add blush marks under each eye. Keep the body very round and small.
Baby Axolotl Drawing
Make the head much larger than the body. Keep the gills short and fluffy. Big eyes and a tiny mouth make it look young and sweet.
Chibi Axolotl Design
Chibi style means a big head and tiny body. Exaggerate the head size and shrink everything else. This style is popular in fan art.
Smiling Axolotl Character
Add a wide open smile with small teeth. Give it eyelashes or eyebrows for expression. This version has a lot of personality.
Beginner Tips for Drawing an Axolotl
A few simple habits now will save you a lot of frustration later.
- Start with very light pencil lines. You will erase and adjust a lot at first.
- Focus on the head first. Getting the head right makes everything else easier to place.
- Don't rush the gills. They are the most eye-catching part, so take your time with them.
- Use reference photos. A quick image search gives you a clear look at real axolotl proportions.
- Practice the gill branches separately on scrap paper before adding them to your main drawing.
- Ink only after you are fully happy with the pencil version.
- Coloring in layers gives a softer, more finished look than trying to fill everything at once.
Common Axolotl Drawing Mistakes to Avoid
Most beginners make the same errors, and they're all easy to fix.
- Making the gills too stiff. Real axolotl gills are soft and feathery, not rigid like antlers.
- Drawing the body too short. The body should be noticeably longer than the head.
- Skipping the dorsal fin. Many beginners forget it, and the drawing looks flat without it.
- Making the legs too long. Axolotl legs are short and stubby, not like a lizard's.
- Overcrowding the bubbles. A few well-placed bubbles look better than too many scattered ones.
- Inking too early. Always finalize your pencil sketch first.
- Using one flat color. Even a little shading makes a huge difference in the final result.
Conclusion
Drawing an axolotl is one of those things that feels hard until you break it into steps. Once you start with the basic shapes and build from there, it all comes together.
I used to struggle with the gills most. Now they're my favorite part to draw.
Take your time with each step. Don't worry about getting it perfect on the first try. The more you practice, the easier and more fun it gets.
Try one of the variations once you feel comfortable with the basic version.
Which style are you going to try first, the kawaii version or the chibi design?
Frequently Asked Questions
Is drawing an axolotl hard for beginners?
Not at all. When you break it into simple shapes, it becomes very manageable. Starting with the head and working outward makes the process straightforward.
What is the easiest axolotl drawing style for kids?
The cute cartoon version works best for younger artists. It uses large eyes, rounded shapes, and minimal detail, so it's quick and fun to finish.
Do I need special art supplies to draw an axolotl?
No. A basic pencil, eraser, and paper are all you need to start. A black marker and colored pencils are optional but help with the final look.
How do I make the gills look realistic?
Draw thin, slightly curved stalks and add small branching lines along each one. Keeping the lines loose and slightly uneven makes them look natural instead of stiff.
What colors should I use for an axolotl drawing?
Pink, peach, white, golden yellow, and brown are all accurate options. Use a lighter base color and add a darker shade along the edges for a more finished result.
