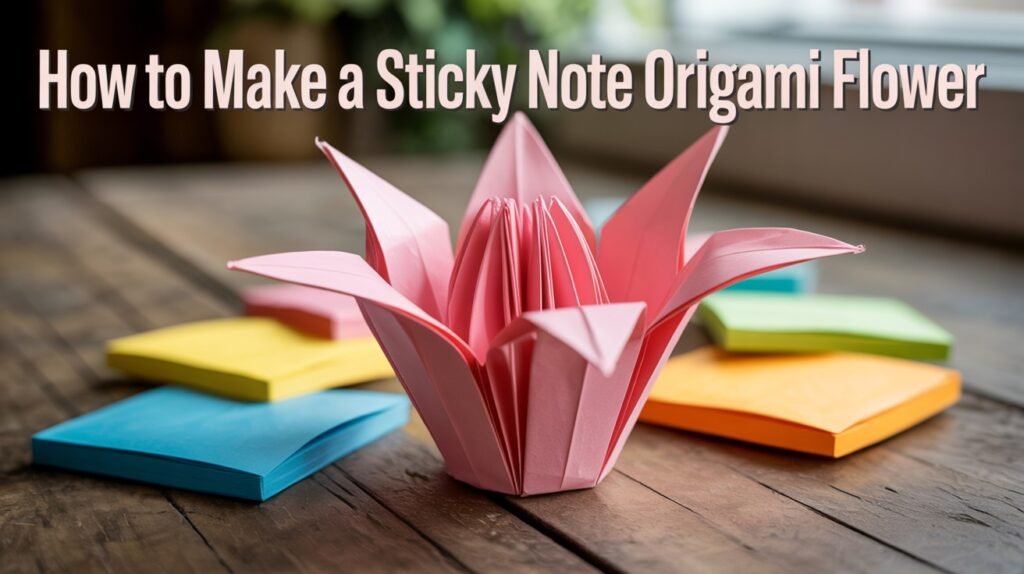
Looking for a fun and creative way to brighten your workspace or make someone smile?
Learning how to craft a sticky note origami flower is the perfect solution! This delightful project transforms ordinary office supplies into beautiful miniature blooms that cost practically nothing to make.
Whether you’re a busy professional wanting to add personality to your desk, a parent seeking an engaging activity with kids, or someone who loves simple crafts, this sticky note origami flower tutorial is ideal for you.
In just a few minutes, you’ll master the art of folding colorful sticky notes into charming flowers that make wonderful gifts, desk decorations, or classroom rewards.
Get ready to turn those everyday yellow squares into something truly special – no experience required, just a willingness to fold and create!
Why Use Sticky Notes Origami Flowers

Sticky notes are perfect for creating origami flowers, and here’s why they’re better than regular paper:
Super Easy to Use – Sticky notes come pre-cut in perfect squares, so no measuring or cutting needed. Just grab and start folding!
Budget-Friendly Fun – At just pennies per flower, you can make dozens without breaking the bank. Perfect for classroom projects or party decorations.
Built-in Adhesive – The sticky backing helps hold your folds in place and makes it easy to attach your finished flowers anywhere you want.
Vibrant Colors Available – From bright pinks to sunny yellows, sticky notes come in rainbow colors that make your origami flowers pop with personality.
Beginner-Friendly – The small size makes them less intimidating for new crafters, while the sturdy paper holds creases well without tearing.
Instant Decoration – Once folded, your sticky note flowers can stick directly to walls, notebooks, or gifts without needing glue or tape.
Ready to start creating? Let’s turn those simple office supplies into beautiful blooms!
Materials Needed

Here’s everything you need to create your sticky note origami flower:
- Colored sticky notes – 6-8 notes per flower (any size works)
- Your hands – No special tools required!
- Flat surface – Table or desk for easy folding
- Optional: Pen or pencil – For adding flower centers or details
That’s it! With just basic sticky notes and a few minutes, you’ll have beautiful origami flowers ready to brighten any space.
Step-by-Step Guide to Make a Sticky Note Origami Flower
Here are some steps by which you can make your origami flowers in just a few minutes:
Step 1: Prepare Your Sticky Notes
- Take 6 sticky notes in your favorite color
- Remove them from the pad carefully to avoid damage
- Place them on a flat surface with sticky side down
- Make sure all notes are the same size for best results
Step 2: Create the Basic Petal Shape
- Fold one sticky note in half diagonally to make a triangle
- Press the crease firmly with your finger
- Fold the triangle in half again to create a smaller triangle
- This creates your first petal – repeat with remaining 5 notes
Step 3: Shape Each Petal
- Open the folded triangle partially to create a cone shape
- The sticky part should be on the inside of the cone
- Gently curve the edges to make it look like a real flower petal
- Hold the bottom point firmly while shaping
Step 4: Assemble Your Sticky Note Origami Flower
- Take your first petal and stick it to the second petal using the adhesive
- Continue adding petals one by one in a circular pattern
- Press each connection firmly to ensure petals stay together
- Adjust the flower shape by gently spreading or tightening petals
Step 5: Final Touches
- Fluff and arrange petals to create a full, rounded flower
- Press the center gently to secure all connections
- Your sticky note origami flower is now ready to display or gift!
Creative Ways to Use Sticky Note Origami Flowers
|
Use |
Description |
|
Desk Decoration |
Brighten your workspace |
|
Gift Toppers |
Replace expensive bows |
|
Wall Art |
Create colorful patterns |
|
Bookmarks |
Add to book pages |
|
Party Decor |
Perfect for celebrations |
|
Thank You Cards |
Personal touch on notes |
These sticky note origami flowers add charm anywhere you place them!
Conclusion
Creating a sticky note origami flower is one of the simplest yet most rewarding crafts you can master.
We’ve covered everything from why sticky notes are perfect for origami to the easy step-by-step folding process that anyone can follow.
These colorful blooms cost practically nothing to make, require no special tools, and can brighten any space instantly.
Whether you’re decorating your desk, adding charm to gifts, or spending quality time with kids, sticky note origami flowers offer endless creative possibilities.
You probably already have everything needed sitting in your desk drawer right now. Ready to start crafting? Grab some sticky notes and try making your first flower today!
Share your colorful creations in the comments below – we’d love to see your unique designs and creative uses for these delightful paper blooms.
Frequently Asked Questions
How Many Sticky Notes do I Need For One Origami Flower?
You’ll need 6-8 sticky notes to create one full sticky note origami flower. Using more notes makes a fuller, more beautiful bloom.
Can I Use Different Colored Sticky Notes Together?
Absolutely! Mixing colors creates stunning rainbow effects. Try alternating pink and yellow or using gradient shades for a beautiful ombre sticky note origami flower.
How Long does It Take to Make a Sticky Note Origami Flower?
Each flower takes about 5-10 minutes once you get the hang of it. Beginners might need 15 minutes for their first sticky note origami flower.
Will My Sticky Note Origami Flowers Fall Apart Over Time?
With proper folding and pressing, they last for weeks. The adhesive backing helps hold everything together much better than regular origami paper flowers.

