

I used to fill every inch of my drawings. More detail, more shading, more everything. Then I tried negative space, and it completely changed how I draw.
The idea is simple. Instead of focusing on the object, you focus on the space around it. That shift alone makes your art look sharper and more intentional.
If you have never tried it, you are in for a good surprise.
Here are 13 negative space drawing ideas that are easy to start with and hard to put down.
What Is Negative Space in Drawing?
Negative space is the empty area around and between the subjects in your drawing. The subject itself is the positive space.
Most beginners focus only on the object. But the space around it shapes how the whole drawing feels.
It creates balance. It guides the eye. It makes your subject stand out without adding more detail.
Learning to see and use negative space is what separates good art from great art.
Why Artists Love Negative Space Drawings

Negative space drawings do something most techniques don’t. They make your subject pop without extra detail. The contrast handles it all.
They also sharpen your observation skills fast. You stop drawing from memory and start drawing what you actually see.
And the thinking shifts too. Instead of focusing on what to draw, you focus on what to leave out. That one change opens up a lot of room for creativity.
List of 13 Negative Space Drawing Ideas
Here are negative space drawing ideas to try. Each one helps you see, think, and draw differently.
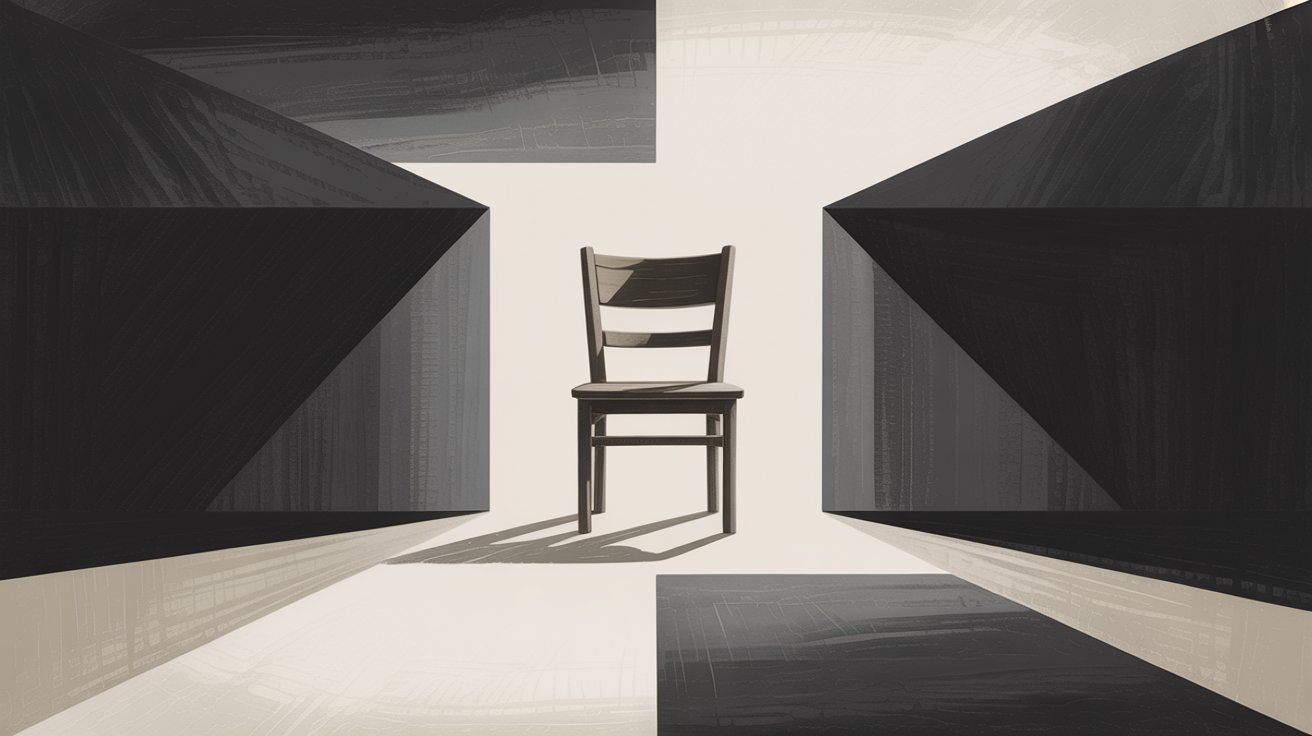
1. Chair outline with shaded background

Draw a simple chair and shade everything around it. Leave the chair itself white. The shape becomes clear without drawing a single interior line. It’s a great starting point for beginners getting used to this technique.
2. Tree with disconnected branches

Draw a tree and leave gaps between the branches. The sky peeking through becomes part of the art. Those empty spaces give the tree a natural, airy feel that a fully drawn tree often misses.
3. Window frame with outdoor view
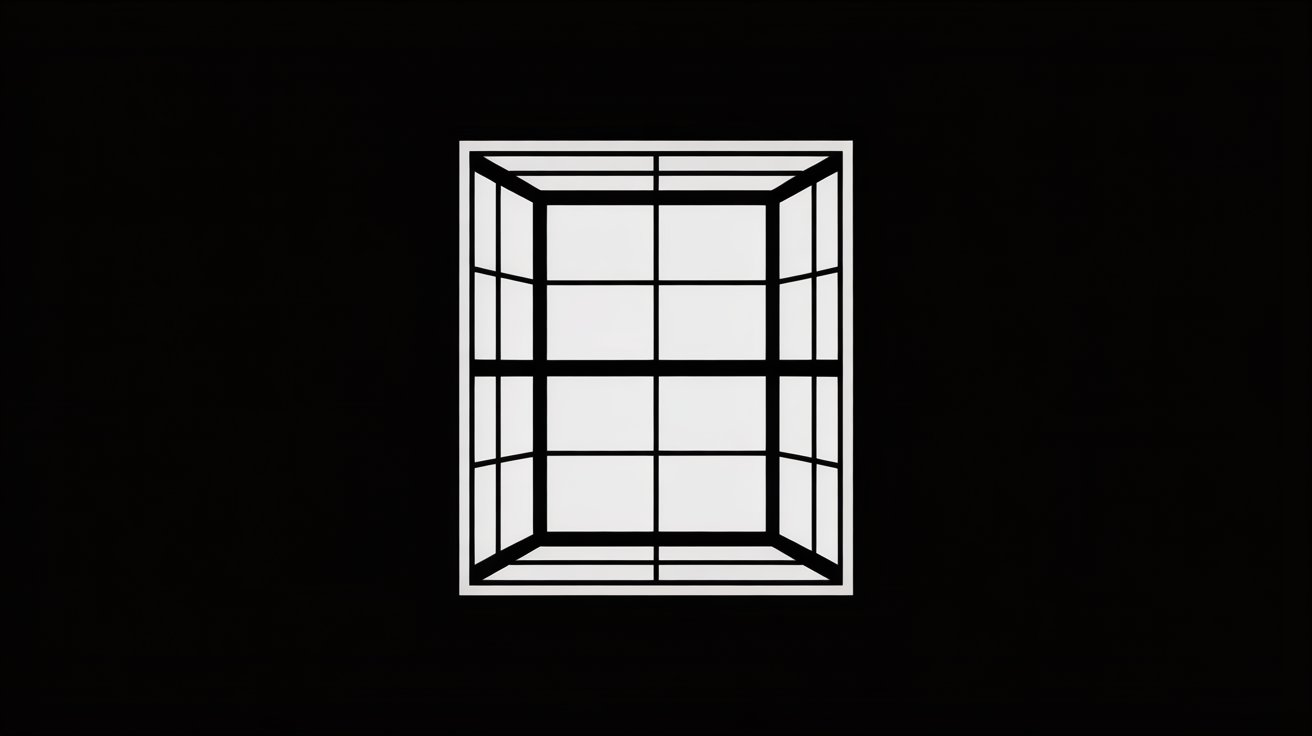
Use the window frame as your border. Fill in the view outside with dark shading. The frame and glass become the negative space. It’s a simple setup that produces a very clean, graphic result.
4. Coffee mug silhouette

Shade everything around a mug outline and leave the mug white. The shape speaks for itself. This is one of the easiest ideas to start with and still looks sharp when done right.
5. Flower vase with dark background

Fill the background with solid dark color and let the vase shape stay light. The contrast makes the vase look almost three-dimensional. Simple flowers at the top add a nice finishing touch.
6. Plant leaves and gaps between them

Focus on the spaces between the leaves, not the leaves themselves. Shade those gaps and watch the leaf shapes appear. This one trains your eye to see shapes you’d normally overlook completely.
7. Animal silhouette (cat, bird, etc.)

Pick a simple animal shape and shade around it. A sitting cat or a bird in flight both work well. The silhouette comes through clearly without any interior details needed at all.
8. Human figure in motion (dancing or running)

Capture a running or dancing pose and shade the space around it. Movement becomes visible through shape alone. The energy of the pose comes through even without facial features or clothing details.
9. Hand gesture drawing

Trace a hand gesture and shade the background around it. The fingers and gaps between them create interesting shapes. This one is easy to practice since your own hand is always available as a reference.
10. Train station or cityscape

Shade the sky and surroundings and leave the buildings or station structure light. The architecture stands out instantly. Urban shapes have strong geometric lines that work really well with this technique.
11. Shell or stone composition
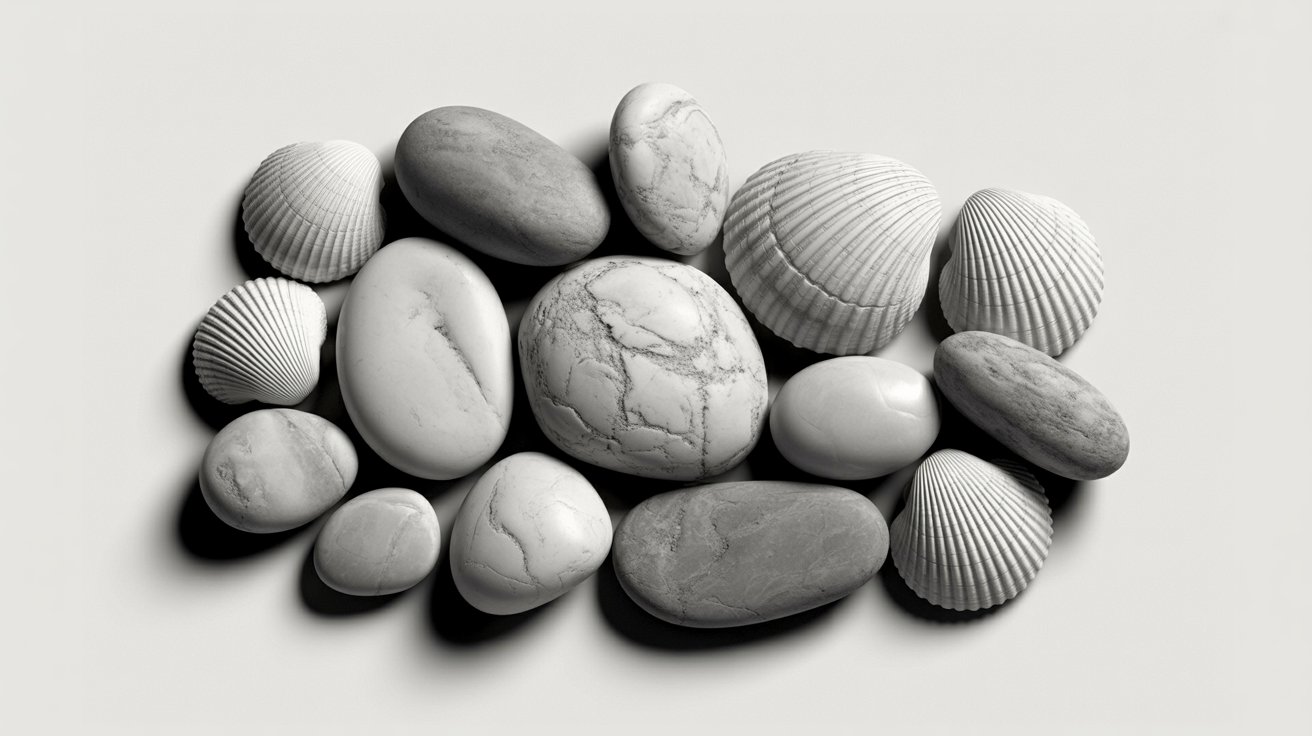
Arrange a few shells or stones and shade around the group. The objects hold their shape without internal detail. Natural forms have organic edges that create interesting negative space patterns around them.
12. Black paper with white highlights

Flip the usual approach. Use black paper and add white to show the light areas. The negative space becomes the background itself. This reversal feels fresh and produces a very striking final piece.
13. Colored background with light subject outline

Use a bold colored background and keep your subject in a lighter tone. The color contrast replaces the need for dark shading. It adds a modern, graphic feel to a classic negative space idea.
Tips to Create Negative Space Art
- Focus on the empty area around your subject, not just the subject itself. That space is where the real drawing happens.
- Strong contrast is your best tool. A dark background against a light subject makes the shape read clearly and quickly.
- Keep your subject simple when starting out. Basic shapes are easier to work with and still produce great results.
- Try different shading styles like hatching, blending, or flat fills. Each one gives your negative space a completely different feel.
- Don’t be afraid to bring in color. A bold background with a light subject outline can make your art look sharp and modern.
Conclusion
Negative space changed the way I look at drawing. I started with a simple mug silhouette and kept going from there.
The key is to start small and keep practicing. Mix pencils, ink, or color. Try different subjects. You will surprise yourself with what you create.
The more you practice, the more your eye sharpens. So grab a sheet of paper and start today.
Which idea from this list will you try first? Drop it in the comments below!
Frequently Asked Questions
What is negative space in drawing?
Negative space is the empty area around and between your subject. Learning to see and use it makes your drawings look more balanced and intentional.
Do I need special tools to try negative space drawing?
No, you just need paper and a pencil to get started. Once you get comfortable, you can bring in ink, charcoal, or color.
Is negative space drawing good for beginners?
Yes, it is actually one of the best techniques for beginners. It trains your eye to observe shapes more carefully from the very first try.
How do I make my negative space art look clean?
Start with a simple subject and use a strong contrast between light and dark. The cleaner your edges, the sharper your final drawing will look.
How often should I practice negative space drawing?
Even 10 to 15 minutes a day makes a real difference. The more you practice, the faster your observation skills and overall drawing accuracy will improve.