

Making slime at home can be fun, but finding a recipe that actually works is not always easy. If you're searching for how to make slime with laundry detergent, you're in the right place.
This guide will show you simple methods, easy-to-follow steps, and helpful tips to create slime with confidence.
We'll solve common problems like slime that is too sticky, too hard, or won't form properly.
You'll also learn about different slime variations, safety tips, storage methods, and ingredient options. Everything is explained in a clear and beginner-friendly way.
I've tested and researched many DIY slime methods, and the simplest recipes are often the most reliable for beginners.
What Is Laundry Detergent Slime?

Laundry detergent slime is a type of homemade slime made by combining glue with liquid laundry detergent.
The detergent acts as an activator, helping the glue change from a liquid into a stretchy, moldable texture.
As the ingredients mix together, the slime begins to hold its shape while staying soft and flexible.
This method is popular because it uses supplies that many people already have at home. It is also simple enough for beginners to try without needing a long list of ingredients.
Many DIY enthusiasts enjoy detergent-based slime because it can be customized with colors, glitter, or other fun additions.
Materials You Need to Make Slime

Gather these simple supplies before you begin.
- White school glue
- Liquid laundry detergent
- Mixing bowl
- Spoon or craft stick
- Food coloring (optional)
- Glitter or beads (optional)
- Measuring spoons
Safety Tips Before Making Slime
Follow these precautions to keep slime-making safe and enjoyable.
- Wash hands before and after use to keep the slime clean and reduce the chance of spreading germs.
- Avoid contact with eyes and mouth since laundry detergent is not meant to be ingested or used near sensitive areas.
- Use slime under adult supervision for young children to ensure ingredients are handled safely and used correctly.
- Store slime properly after use in an airtight container to keep it fresh and prevent contamination.
- Stop using if skin irritation occurs and wash the affected area with water. If irritation continues, discontinue use completely.
How to Make Slime with Laundry Detergent: Basic Recipe
Follow these simple steps to make a basic batch of slime at home using common supplies.
Step 1: Pour Glue into a Bowl

Start by measuring the amount of white school glue you want to use. Pour it into a clean mixing bowl with enough space for stirring.
Using the correct amount of glue helps create a consistent slime texture. Make sure your bowl and tools are dry before you begin.
Step 2: Add Food Coloring (Optional)

If you want colored slime, add a few drops of food coloring to the glue. Stir thoroughly until the color is evenly distributed. You can mix different colors to create unique shades.
This step is optional but adds a fun personal touch.
Step 3: Add Laundry Detergent Slowly
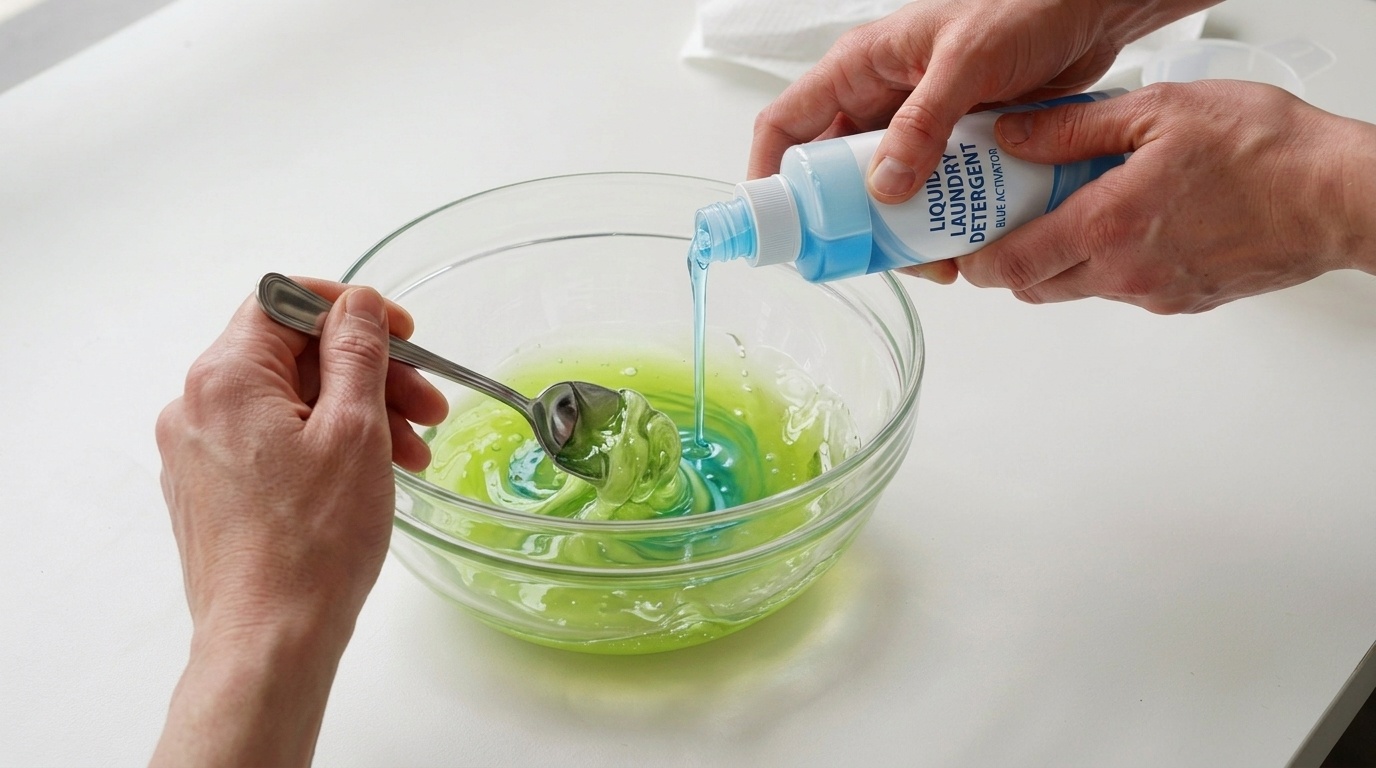
Pour a small amount of liquid laundry detergent into the glue. Stir continuously while adding more detergent as needed. Adding it gradually helps prevent the slime from becoming too firm.
The mixture will slowly begin to thicken.
Step 4: Mix Until Slime Forms
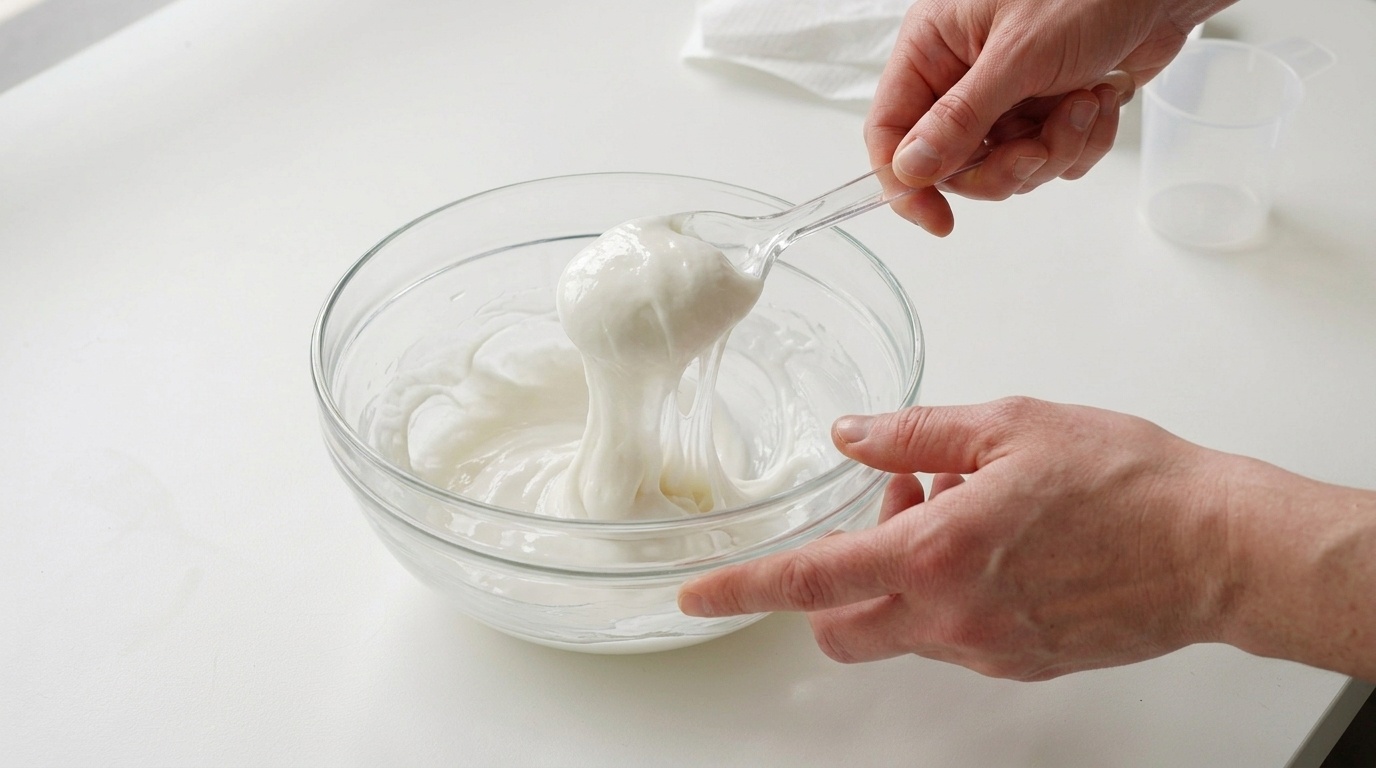
Keep stirring as the ingredients combine. You will notice the mixture pulling away from the sides of the bowl and becoming less sticky.
If needed, continue mixing for another minute or two. The goal is a soft and stretchy consistency.
Step 5: Knead the Slime

Take the slime out of the bowl and knead it with your hands. This helps improve its texture and elasticity.
If it feels too sticky, add a tiny amount of detergent. If it feels too firm, work it gently until it softens.
Different Ways to Make Slime with Laundry Detergent
Try these variations to create different slime textures and styles.
| Slime Type | Extra Ingredients Needed | How to Make It |
| Fluffy Slime | Shaving cream | Mix shaving cream into the glue before adding detergent. This creates a soft, airy texture that feels light and fluffy. |
| Glitter Slime | Fine craft glitter | Add glitter to the glue mixture before activating it. Stir well so the glitter spreads evenly throughout the slime. |
| Colored Slime | Food coloring | Add a few drops of food coloring and mix thoroughly. Combine colors carefully to create custom shades and effects. |
| Stretchy Slime | Extra glue and less detergent | Use slightly more glue and add detergent slowly. This helps keep the slime flexible and improves its stretchiness. |
Common Problems and How to Fix Them
Most slime issues are easy to fix with a few small adjustments.
Slime Is Too Sticky
If your slime sticks to your hands or surfaces, it likely needs a bit more activator.
- Add small amounts of laundry detergent at a time.
- Knead the slime thoroughly after each addition.
- Avoid adding too much detergent at once.
- Continue kneading until the texture becomes smooth.
Slime Is Too Hard
Overactivated slime can feel stiff and difficult to stretch.
- Add a small amount of glue to soften it.
- Work the slime gently with your hands.
- Knead for several minutes to improve flexibility.
- Make adjustments gradually to avoid overcorrecting.
Slime Falls Apart
Crumbly slime often means the ingredients are not balanced properly.
- Adjust the glue-to-detergent ratio.
- Mix the ingredients longer.
- Knead the slime until it comes together.
- Add a small amount of glue if needed.
Slime Feels Too Wet
Wet slime may need more time or a slight adjustment.
- Let the slime rest for a few minutes.
- Add activator gradually if necessary.
- Stir and knead thoroughly before making changes.
- Avoid rushing the mixing process.
Tips for Better Homemade Slime
These simple tips can help you get more consistent results.
- Measure ingredients carefully.
- Add detergent slowly instead of all at once.
- Mix thoroughly before adjusting the recipe.
- Store slime in an airtight container.
- Experiment with colors and textures for variety.
How to Store Slime Properly
Proper storage helps keep slime soft, stretchy, and usable for longer.
- Use airtight containers to reduce air exposure.
- Keep slime away from direct heat and sunlight.
- Seal containers tightly after each use.
- Wash hands before handling slime to keep it clean.
- Make a fresh batch if the slime becomes dry, stiff, or develops an unusual odor.
Conclusion
Learning how to make slime with laundry detergent is easier than it may seem once you understand the basics.
The first time I made slime, I was surprised by how much a small change in ingredients affected the texture. That's part of the fun, experimenting and finding what works best for you.
Now that you have the steps, tips, and fixes, you're ready to make your own slime at home. Give it a try, have fun with different variations, and let your creativity take over.
If you enjoyed this guide, leave a comment, share it, or try more DIY projects.
Frequently Asked Questions
Can I use any laundry detergent to make slime?
Not all detergents work the same way. Liquid detergents that contain activating ingredients usually give the best results.
Why is my slime still sticky after mixing?
Your slime may need a little more detergent or extra kneading. Add activator slowly to avoid making it too firm.
How long does homemade slime last?
When stored properly in an airtight container, slime can stay usable for several days or even weeks.
Can I add glitter or food coloring to slime?
Yes, both can be added during mixing. They are an easy way to customize the look of your slime.
What should I do if my slime becomes hard?
Try kneading it gently or mixing in a small amount of glue. This can help restore a softer texture.