

Drawing Frosty is a fun way to enjoy winter art, but many beginners are not sure where to start. If you're looking for an easy frosty the snowman drawing tutorial, you're in the right place.
In this guide, I'll show you simple step-by-step instructions that make the drawing process easy to follow.
You'll learn how to sketch Frosty's basic shapes, add his famous hat and scarf, draw facial features, and finish your artwork with color and details.
My goal is to help you create a Frosty drawing without feeling confused or overwhelmed.
I've used these beginner-friendly techniques many times because simple shapes are often the easiest way to build drawing confidence.
If you're drawing for fun, a school project, or holiday decorations, this guide will help you create a Frosty the Snowman you're proud of.
Understanding Frosty the Snowman’s Basic Shape

Before adding details, it helps to understand Frosty's overall shape. The easiest way to draw him is by breaking his body into simple circles.
Start with a medium-sized circle for the head, then add a larger circle for the middle section and an even larger one for the bottom.
These circles create the classic snowman look and help keep your drawing balanced. Pay attention to the size of each section so the body looks natural and proportionate.
Draw your guidelines lightly with a pencil so you can easily erase and adjust them if needed.
Taking a few extra moments to build a strong foundation will make the rest of your Frosty the Snowman drawing much easier and more enjoyable.
Materials You Need for Frosty the Snowman Drawing

Gather a few basic supplies before you begin your drawing.
- Pencil
- Eraser
- Black marker or fine liner
- Colored pencils, crayons, or markers
- Drawing paper
Step-by-Step Frosty the Snowman Drawing Tutorial
Follow these simple steps to create a fun and beginner-friendly Frosty the Snowman drawing from start to finish.
Step 1: Draw the Head
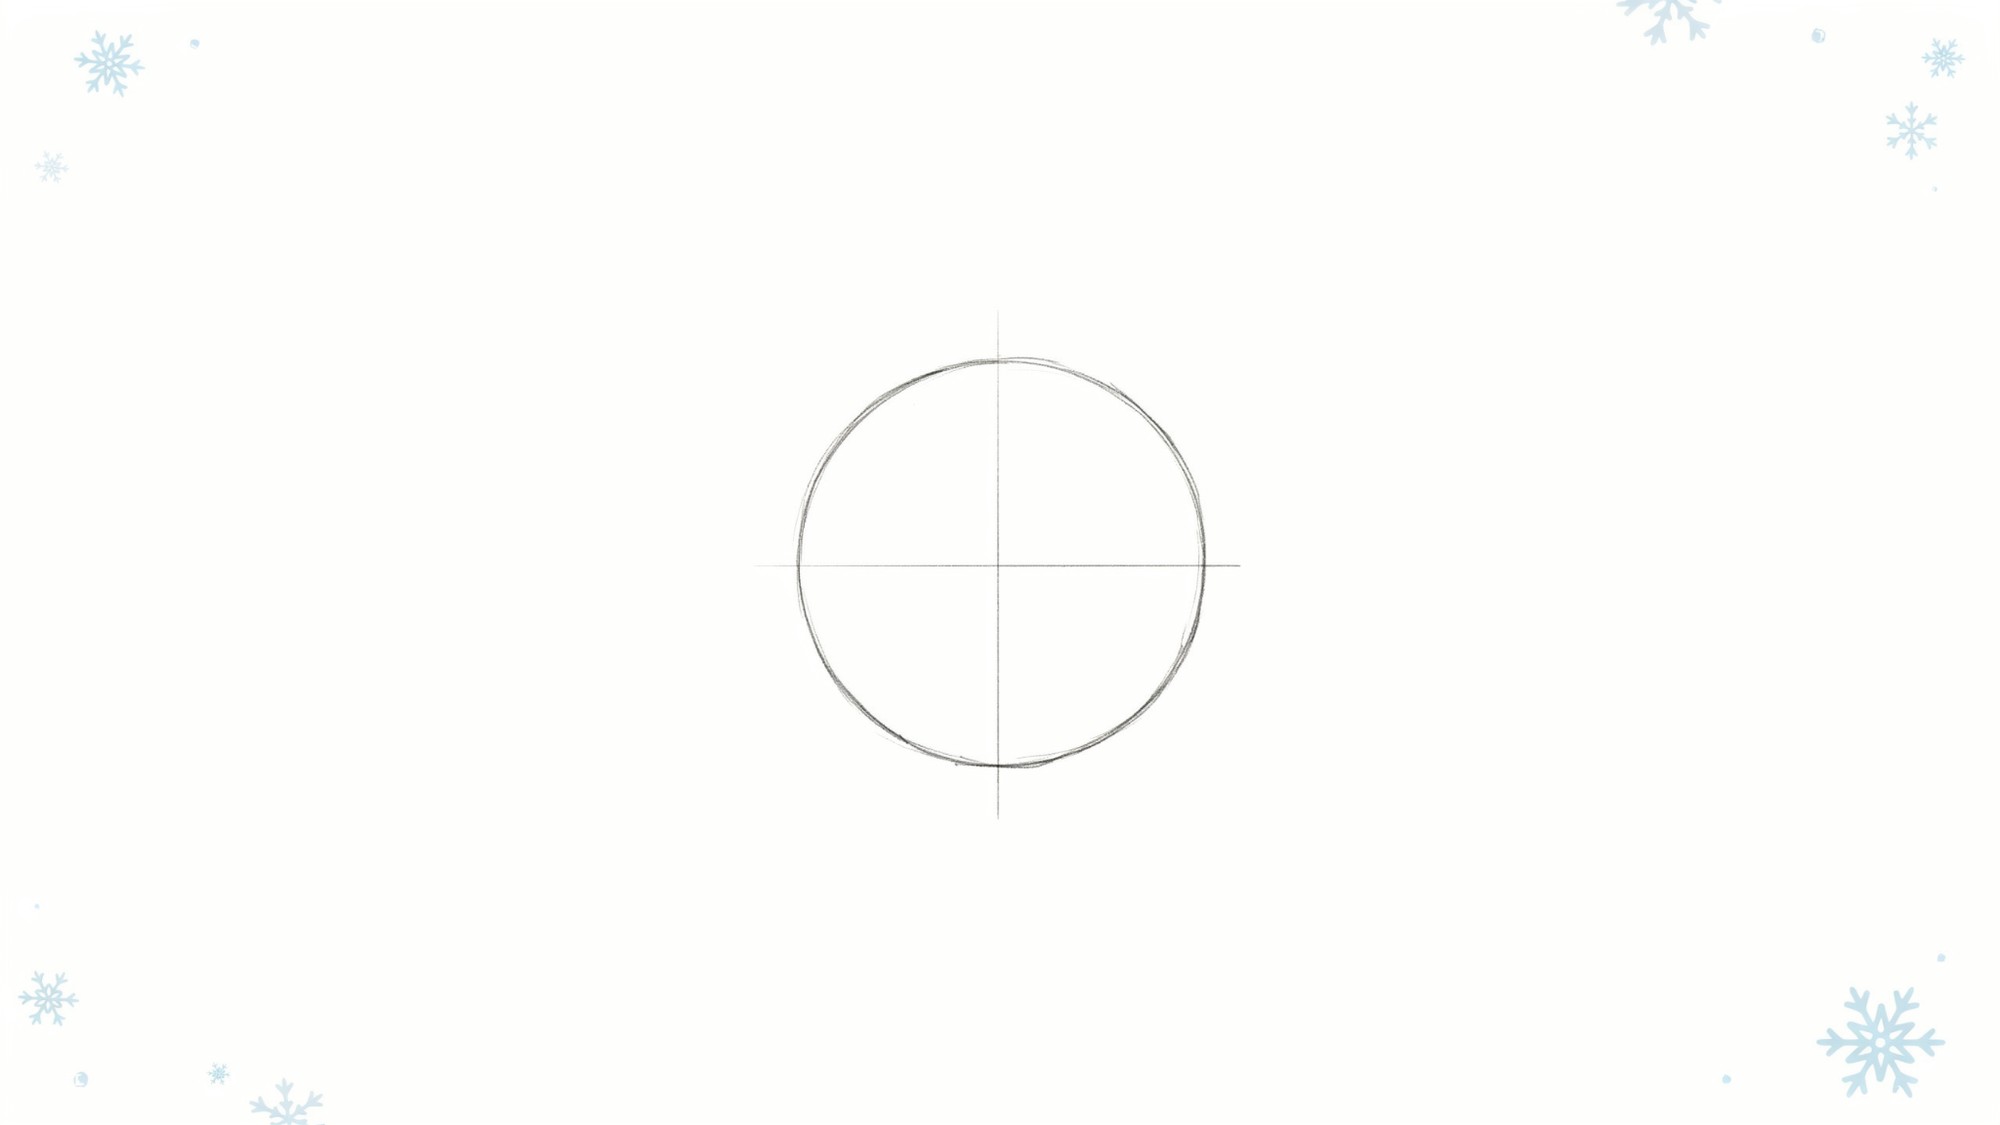
Start by drawing a large circle near the top of your paper. This circle will become Frosty's head. Keep your pencil lines light so you can make changes if needed.
Leave enough space inside the circle for the eyes, nose, and smile.
Step 2: Sketch the Body
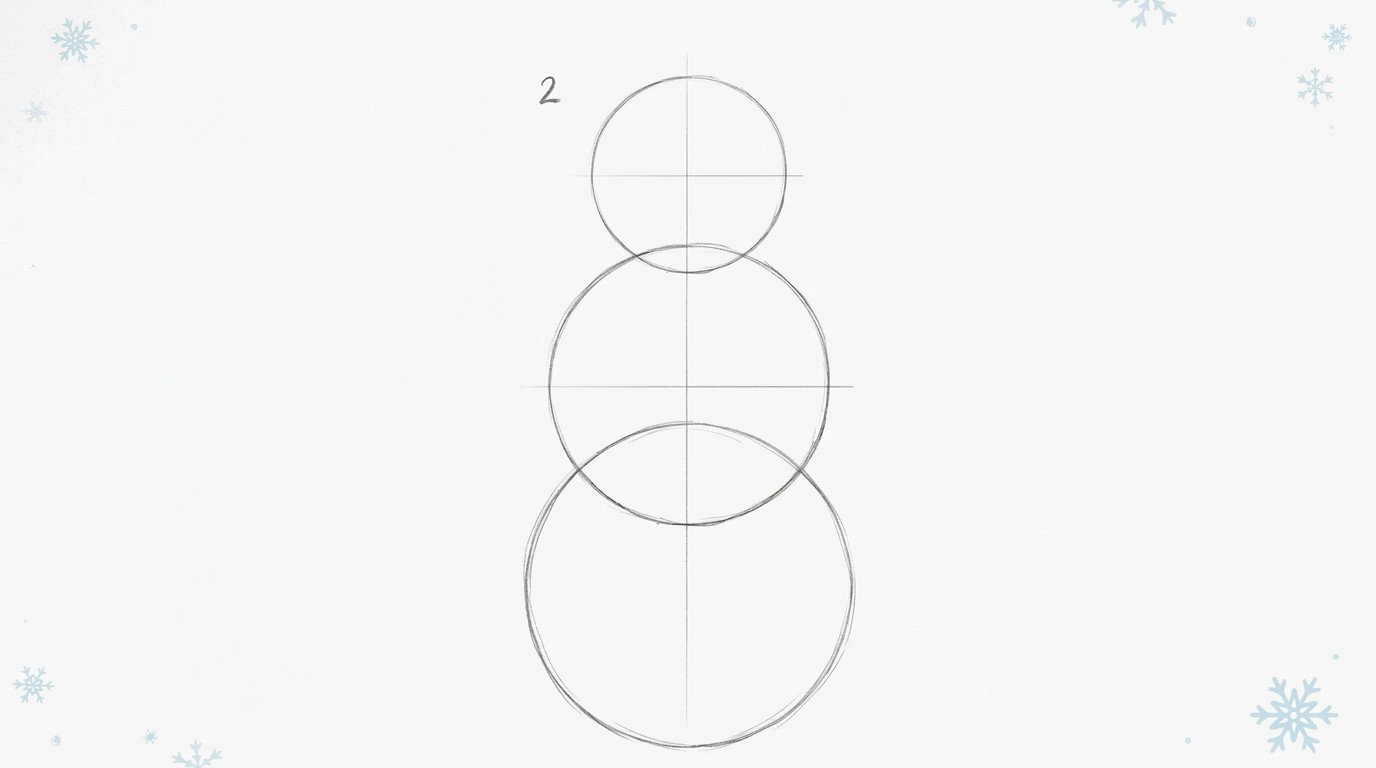
Draw two larger circles underneath the head. The middle circle should be slightly bigger, while the bottom circle should be the largest.
Together, these shapes create Frosty's classic snowman body and help keep the proportions balanced.
Step 3: Add the Hat
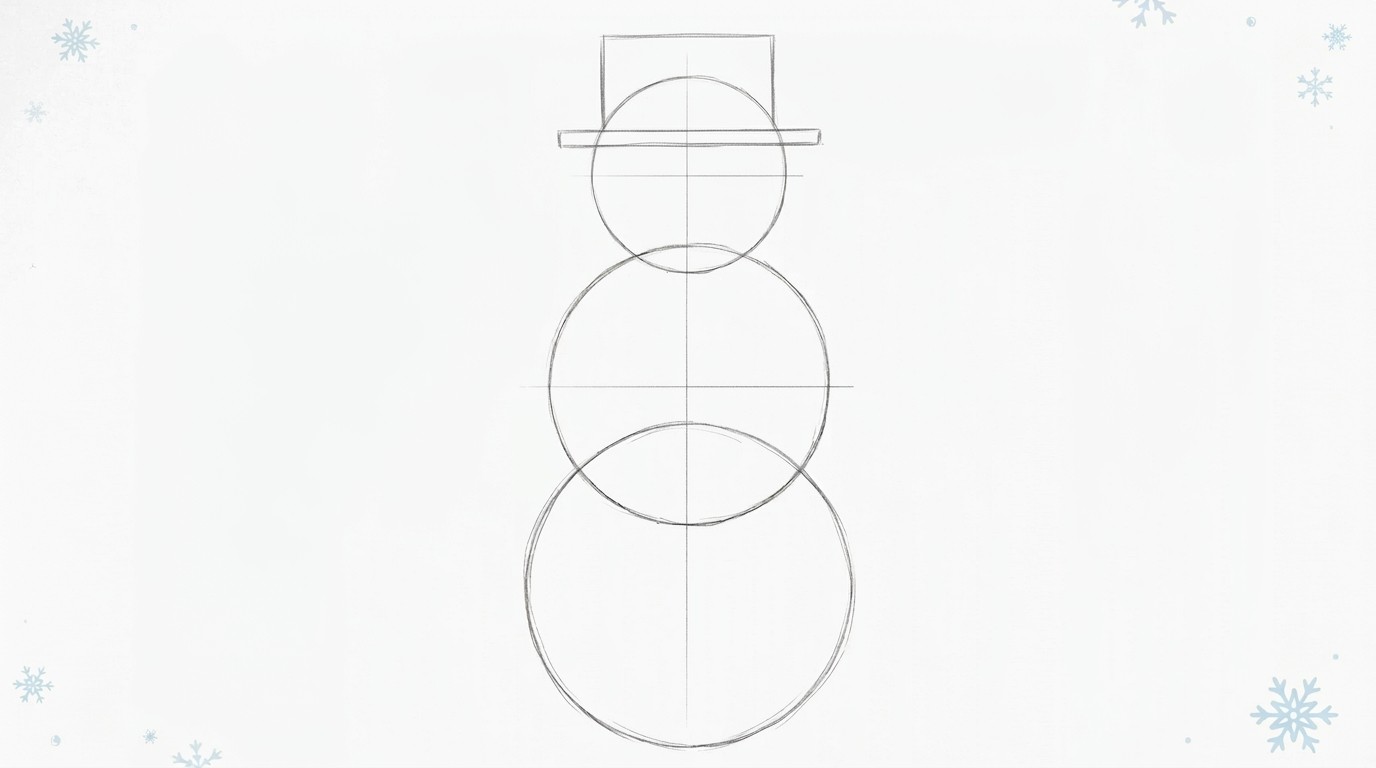
Sketch a simple top hat sitting on top of Frosty's head. Begin with a rectangle and add a brim underneath it.
Keep the lines clean and symmetrical so the hat looks balanced and fits naturally on the head.
Step 4: Draw the Face
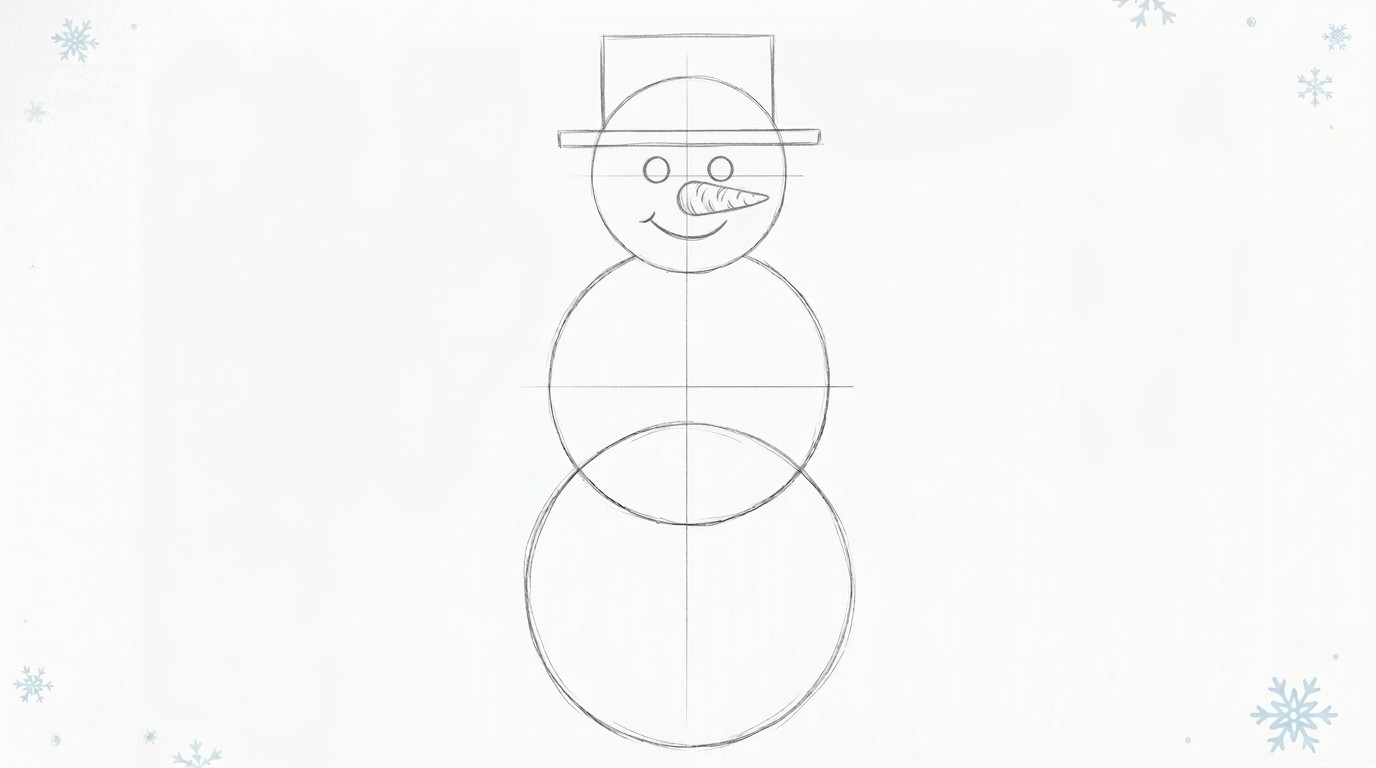
Add two small eyes, simple eyebrows, and a cheerful smile. Draw a carrot-shaped nose in the center of the face, pointing slightly outward.
These features give Frosty his friendly and recognizable expression.
Step 5: Create the Arms
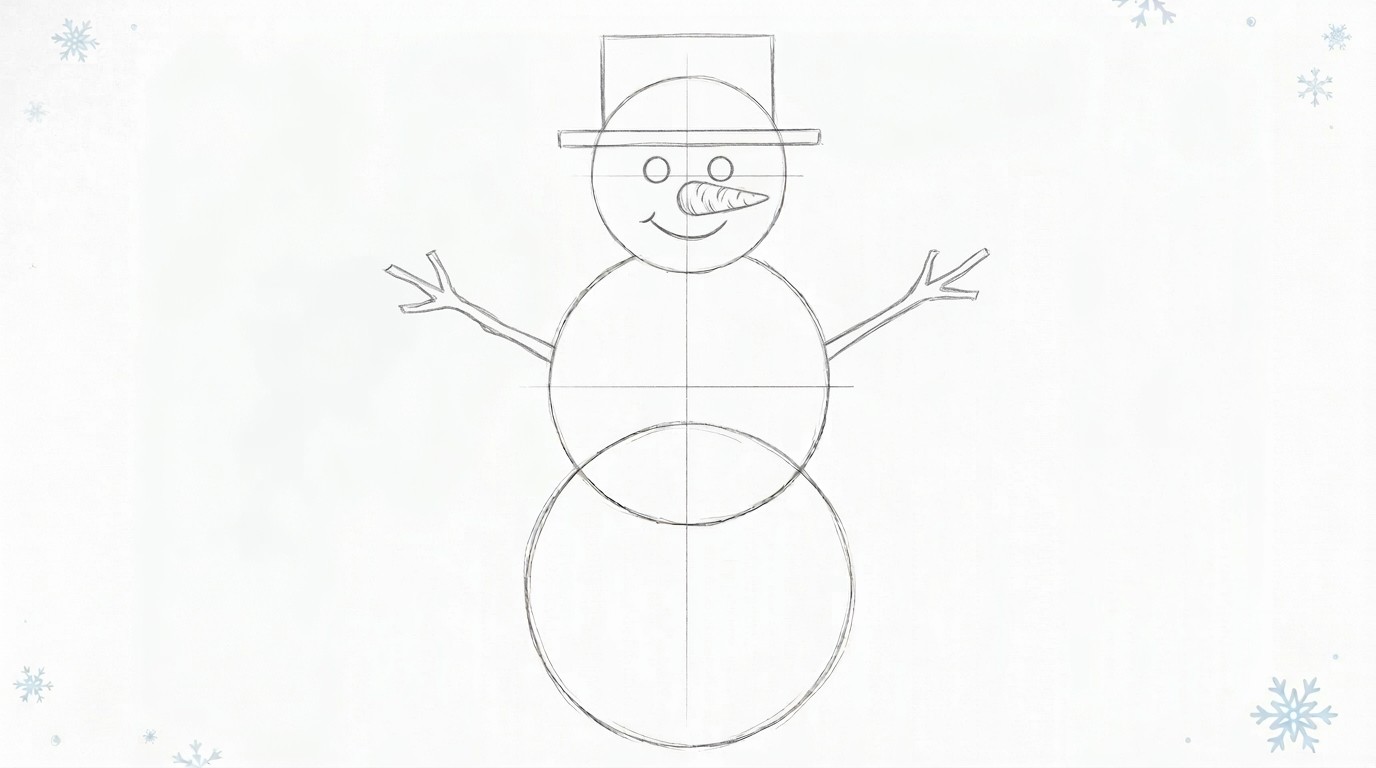
Draw thin, twig-like arms extending from each side of the middle body section. Add a few small branches at the ends to make them look more realistic.
Keep the shapes simple to maintain the cartoon style.
Step 6: Add the Scarf
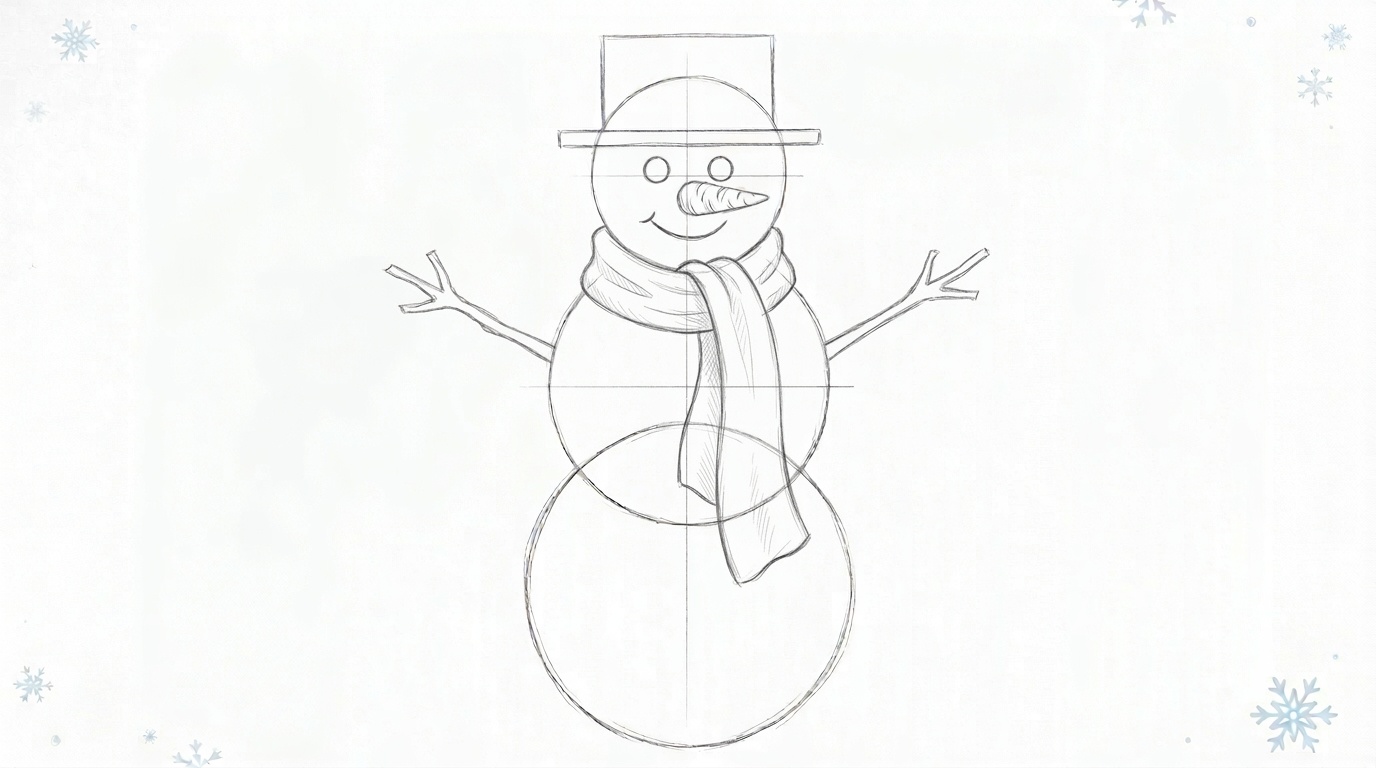
Wrap a scarf around Frosty's neck where the head and body connect. Draw the hanging ends of the scarf and add a few folds for texture. This detail makes the drawing feel warm and festive.
Step 7: Draw Buttons and Extra Details

Add a row of round buttons down the front of Frosty's body. You can also draw mittens, snowflakes, or other decorative elements to personalize your artwork.
Small details help bring more character to the drawing.
Step 8: Outline Your Drawing
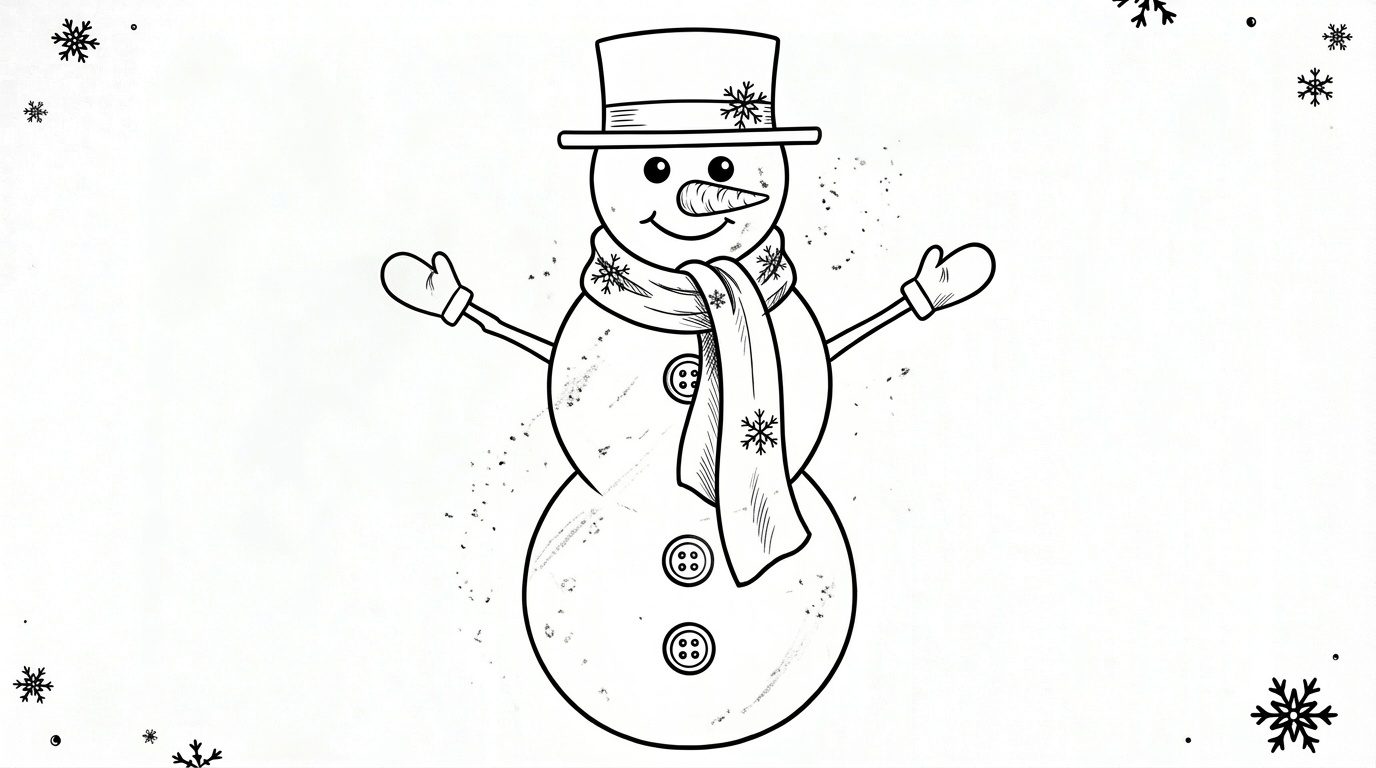
Carefully trace over the final lines using a black marker or fine liner. Once the ink is dry, erase any visible pencil marks. This step makes the drawing look cleaner and more polished.
Step 9: Color Frosty the Snowman

Color the hat black, the carrot nose orange, and the scarf with your favorite bright colors. Use light blue shading around the snow sections to add depth and dimension.
Gentle shading can make Frosty look more lively and realistic.
Easy Frosty the Snowman Drawing Tips for Beginners
Keep these simple tips in mind to make your Frosty drawing process smoother and more enjoyable.
- Start with simple shapes: Build Frosty using circles and basic forms before adding details.
- Draw lightly before outlining: Use light pencil strokes so mistakes can be erased easily.
- Focus on proportions rather than perfection: Make sure the head and body sections look balanced instead of worrying about perfect lines.
- Practice facial expressions: Experiment with different smiles, eye shapes, and eyebrows to give Frosty more personality.
Common Mistakes to Avoid
Avoiding these common errors will help your drawing look cleaner and more balanced.
- Making the circles uneven: Try to keep the body sections round and properly aligned.
- Drawing arms too thick: Frosty's twig arms should be thin and branch-like.
- Overcrowding details: Too many decorations can make the drawing look cluttered.
- Skipping the initial sketch: Starting with a rough outline helps maintain proper proportions and placement.
Conclusion
I hope this frosty the snowman drawing guide helped make the process simple and enjoyable.
One thing I’ve noticed is that the best drawings often start with basic shapes and a little patience.
As you finish your artwork, imagine adding your own creative touches to make Frosty unique. Every drawing is a chance to build confidence and have fun along the way.
If you tried this tutorial, leave a comment with your experience, share it with a friend, or try more drawing guides for your next creative project.
Frequently Asked Questions
Is frosty the snowman drawing good for beginners?
Yes, it’s a great beginner project because it uses simple circles and basic details. The steps are easy to follow and don't require advanced skills.
How long does a frosty the snowman drawing take?
Most beginners can finish the drawing in about 15 to 30 minutes. Adding color and extra details may take a little longer.
What is the easiest way to draw Frosty?
Start by sketching three circles for the head and body. Then add the hat, face, scarf, and other small details step by step.
Can kids follow this frosty the snowman drawing tutorial?
Yes, the tutorial is designed with simple instructions that children can understand. Adult guidance may help younger artists.
How can I make my Frosty drawing look better?
Try adding light blue shading, a winter background, or colorful accessories. Small details can make the drawing more interesting and lively.