
>
A lacrosse stick is more than just sports equipment. I have always found it to be a fun and interesting subject to draw, no matter your skill level.
The first time I tried a lacrosse stick drawing, I had no idea where to start, but breaking it into simple shapes made everything click.
In this guide, I will show you exactly how to create a lacrosse stick drawing step by step using easy techniques anyone can follow.
I have tested this method myself, so you can trust it actually works.
You will learn how to sketch the head, shaft, and mesh, then finish it off with color and shading. Let's get started and bring your drawing to life.
Understanding a Lacrosse Stick and Preparing to Draw

Before starting your lacrosse stick drawing, it helps to become familiar with the equipment's basic structure and gather the right supplies.
A standard lacrosse stick consists of several key parts, including the head, throat, shaft, end cap, and mesh.
The head is the curved top section that holds the mesh, while the throat connects the head to the shaft.
The shaft forms the long handle of the stick, and the end cap is attached to the bottom for a finished appearance.
The mesh is the net-like pattern woven inside the head and is one of the most recognizable features of a lacrosse stick.
To create your drawing, you only need a few basic materials. A pencil is ideal for sketching the initial shapes, while an eraser helps correct mistakes and refine details.
Drawing paper provides a clean surface for your artwork, and colored pencils, crayons, or markers can be used to add color once the outline is complete.
A black marker is also useful for creating bold, clean final lines.
Step-by-Step Lacrosse Stick Drawing Tutorial
A lacrosse stick has five key parts, and getting their proportions right is the secret to a balanced, realistic drawing.
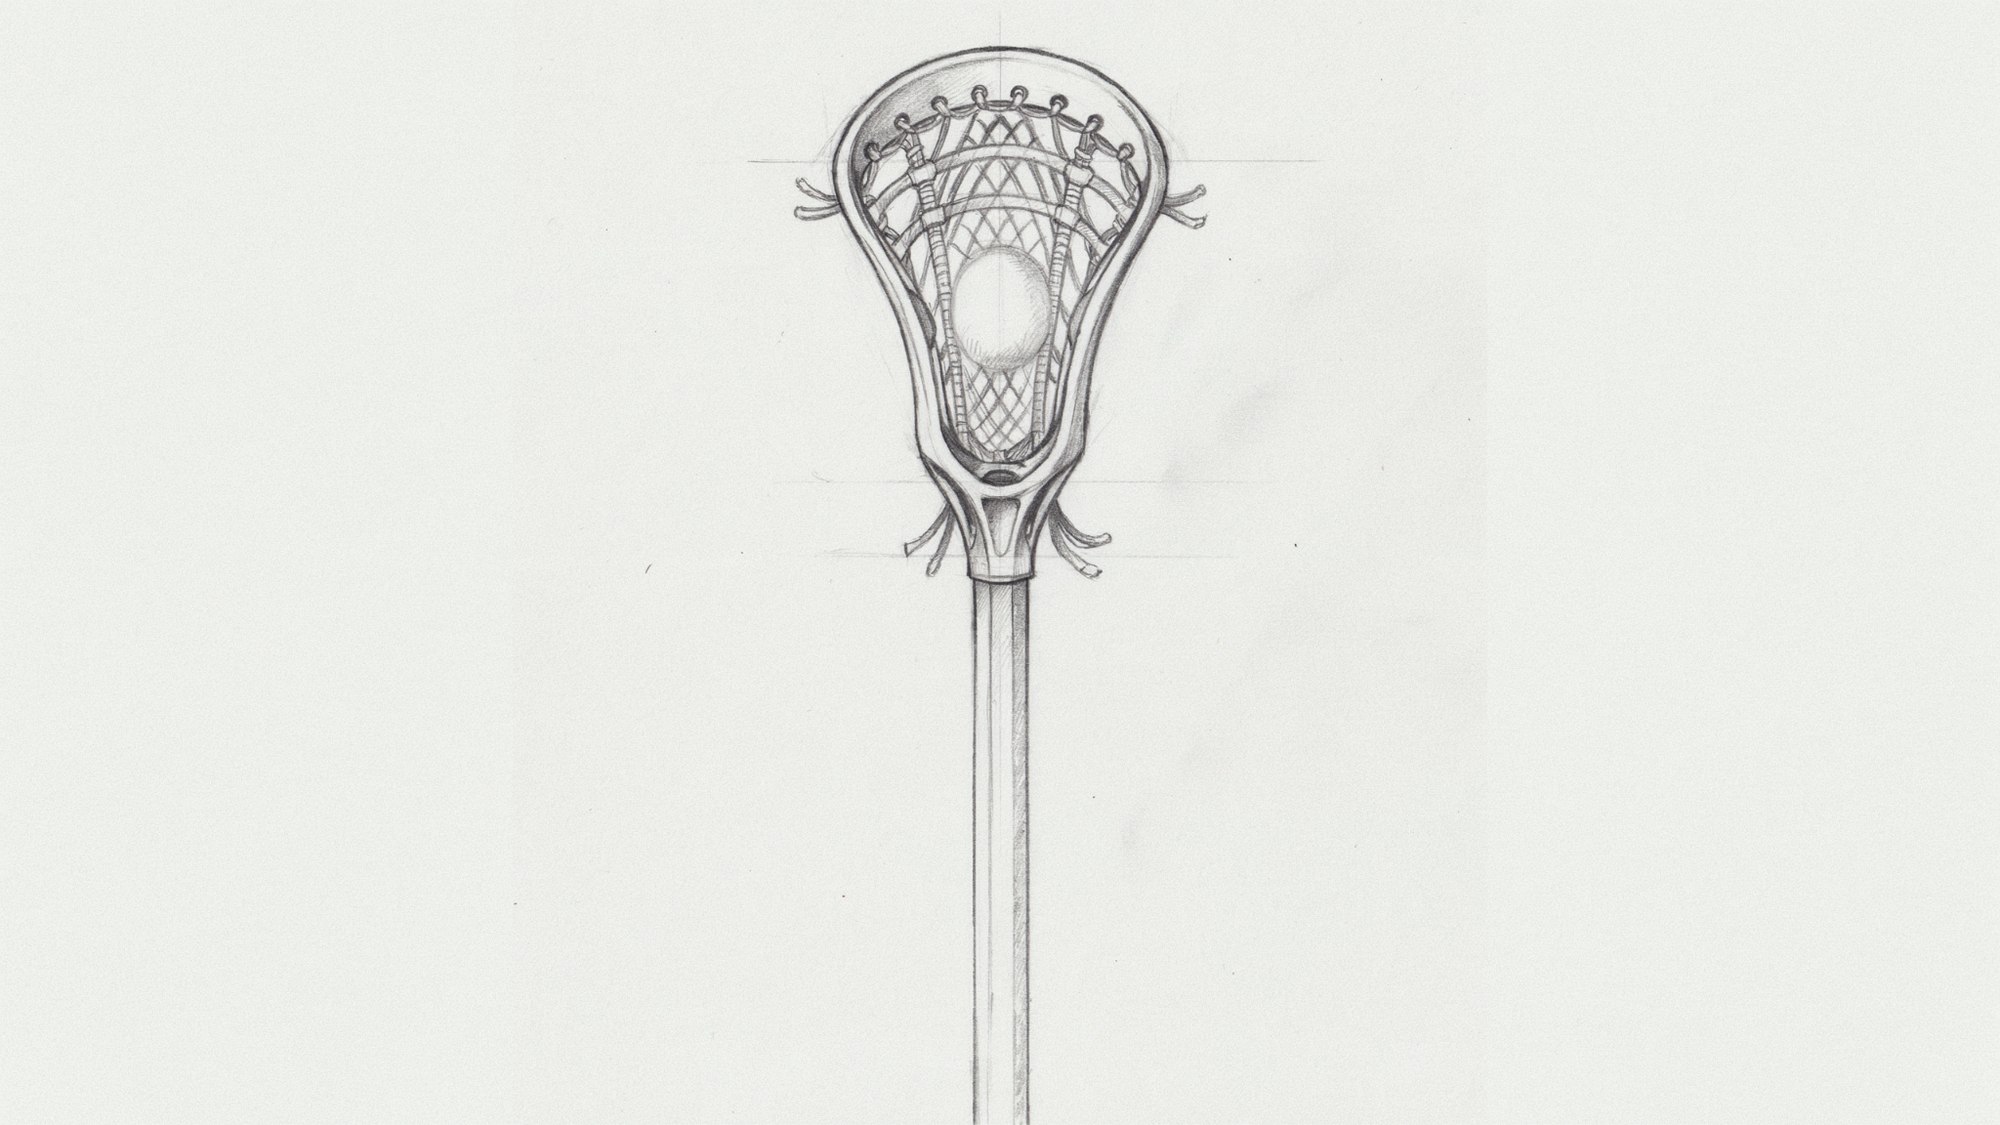
Step 1: Draw the Head of the Lacrosse Stick

The head is the most recognizable part of the stick, so it is a good place to start.
Begin by sketching the outer shape of the head. It has a curved, slightly wavy outline that widens toward the top and narrows near the bottom.
Do not worry about making it perfect on the first try. A light pencil sketch gives you room to fix things as you go.
Once your basic shape is down, go back and smooth out the curves. Clean up any wobbly lines and refine the edges so the head looks neat and even on both sides.
Take your time with this step because a well-shaped head makes the rest of the drawing much easier to build on.
Step 2: Add the Throat
img src=”https://themastercraft.com/wp-content/uploads/2026/07/dip-ynNxkwW02mTi.jpg” alt=”Lacrosse stick drawing with the throat section added beneath the head.”>
The throat is the small section that joins the head to the shaft below it.
Draw a short, slightly cylindrical shape beneath the head. It should taper a little, growing narrower as it moves down toward the shaft.
Think of it as a bridge between the wide head and the slim handle.
After drawing it, check that the throat sits centered under the head. If it leans to one side, the whole stick will look crooked.
Make small adjustments now so everything lines up properly before you move on to the next part.
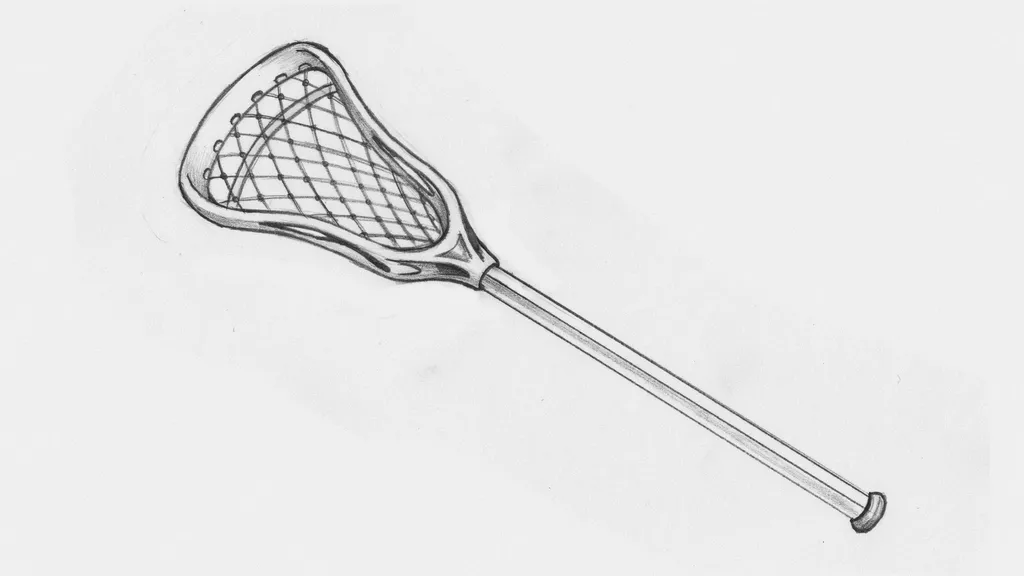
Step 3: Draw the Shaft
The shaft is the long, straight handle that makes up most of the stick's length.
Extend two parallel lines downward from the base of the throat. Keep both sides of the shaft even and consistent in width all the way down.
This part of the stick is simple, but staying consistent matters a lot here.
If your lines start to drift or bend, use a light guideline or a ruler to help you stay on track. The shaft does not need to be thick.
A slim, clean handle looks much more realistic and proportionate next to the head above it.
Step 4: Outline the End Cap

The end cap finishes off the bottom of the shaft and keeps the drawing from looking unfinished.
Draw a small, rounded cylindrical shape at the very base of the shaft. It should be slightly wider than the shaft itself so it stands out as a separate piece.
Keep it simple because it is a small detail, but it adds a lot to the overall realism of your lacrosse stick drawing.
Go back and define the edges of the end cap so it reads clearly. A couple of clean lines around it are all you need to make it look polished and intentional.
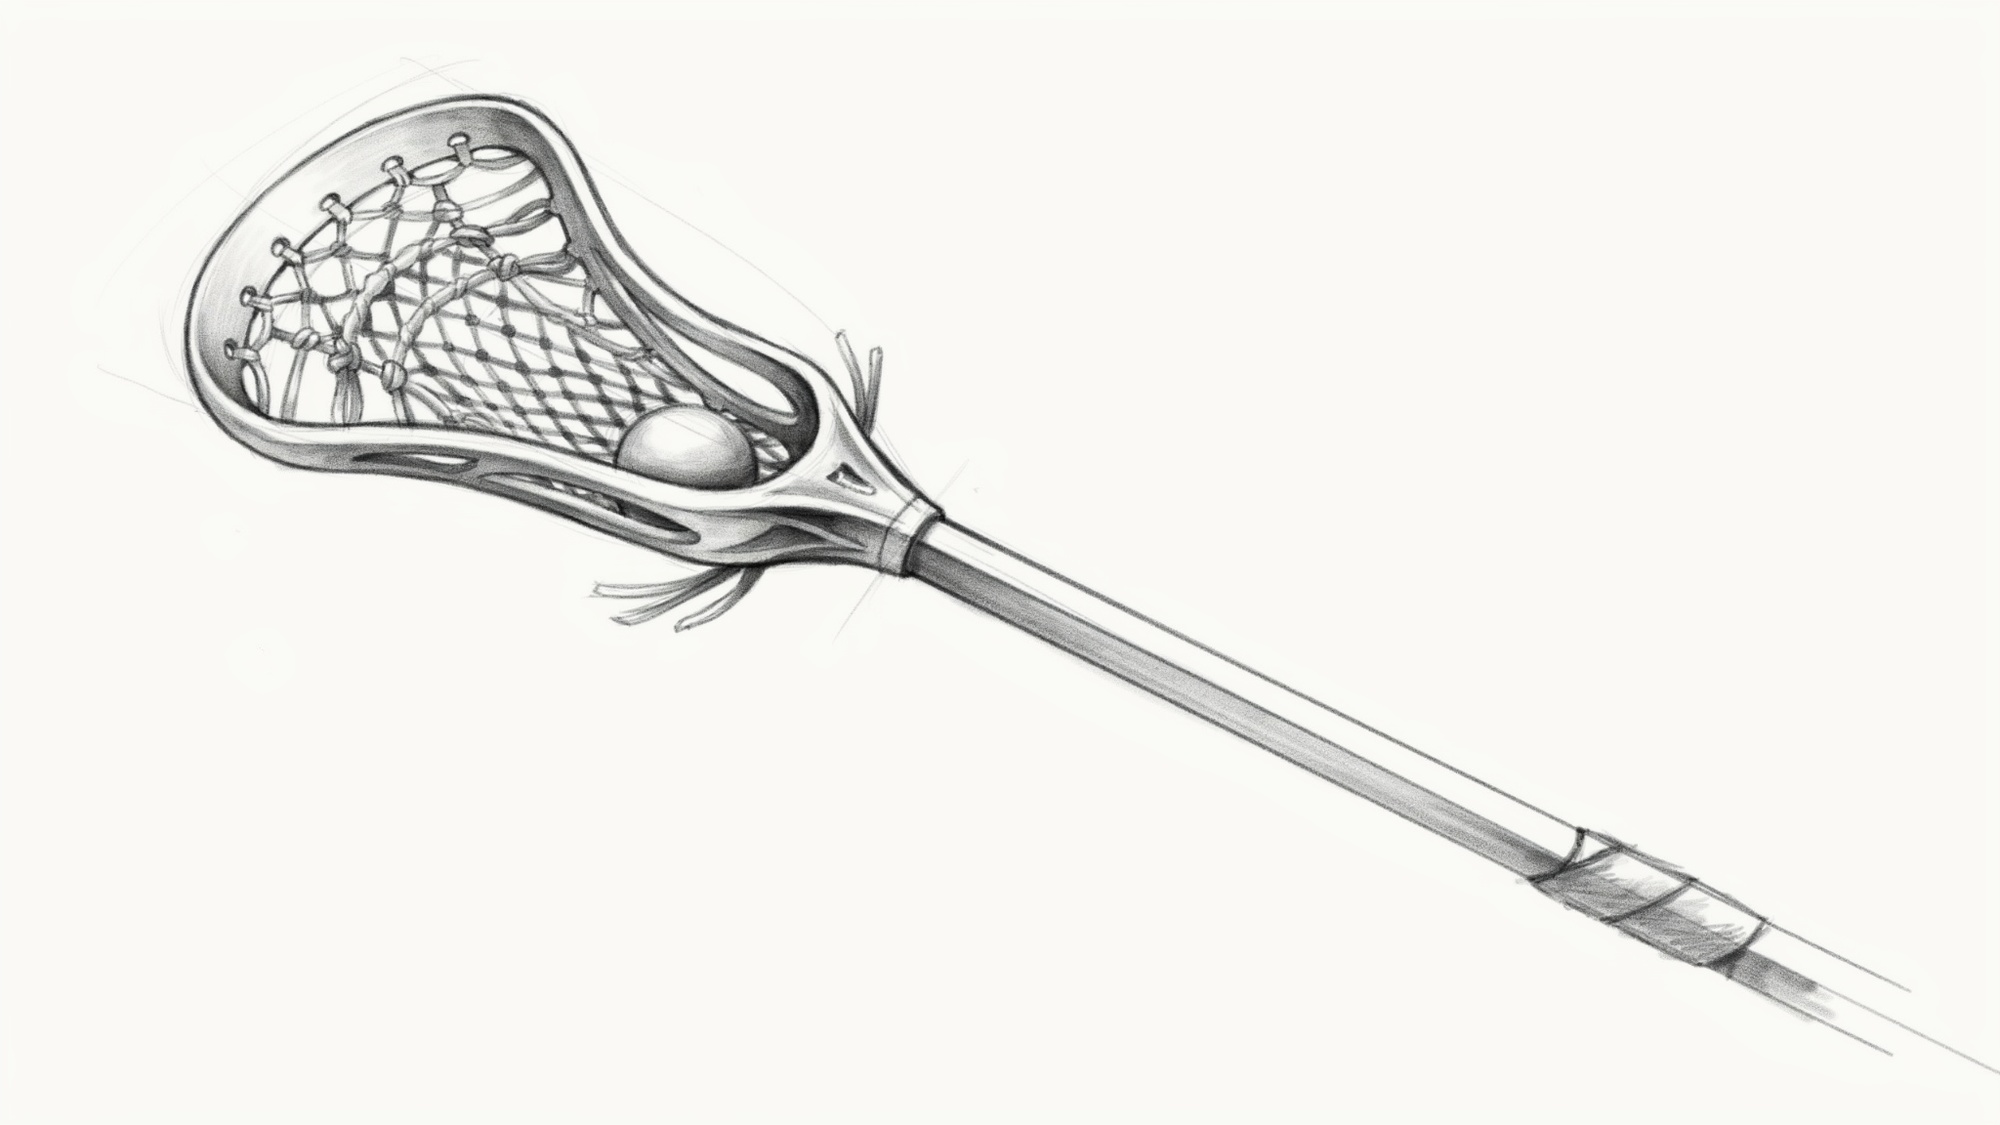
Step 5: Draw the Mesh
The mesh is what makes a lacrosse stick come to life, and it is one of the most fun parts to draw.
Start by drawing evenly spaced diagonal lines across the inside of the head. Try to keep the spacing consistent as you go.
Once your diagonal lines are in place, draw a second set of lines going in the opposite direction to create a crisscross pattern.
This net-like design does not need to be flawless. Slight imperfections actually make it look more natural and hand-drawn.
Focus on keeping the lines roughly even and the pattern balanced across the whole head area.
Step 6: Refine and Finalize the Drawing
Now it is time to bring everything together and clean up your work.
Erase any guidelines or extra pencil marks that are no longer needed. Look at the overall drawing and check for symmetry.
Make sure both sides of the shaft are even, the head looks balanced, and the mesh pattern sits neatly within the head.
If you want a sharper, more finished look, trace over your final pencil lines with a black marker or fine liner pen.
This step is optional but it really makes the drawing pop. Let the ink dry completely before erasing any remaining pencil marks underneath.
How to Color a Lacrosse Stick Drawing
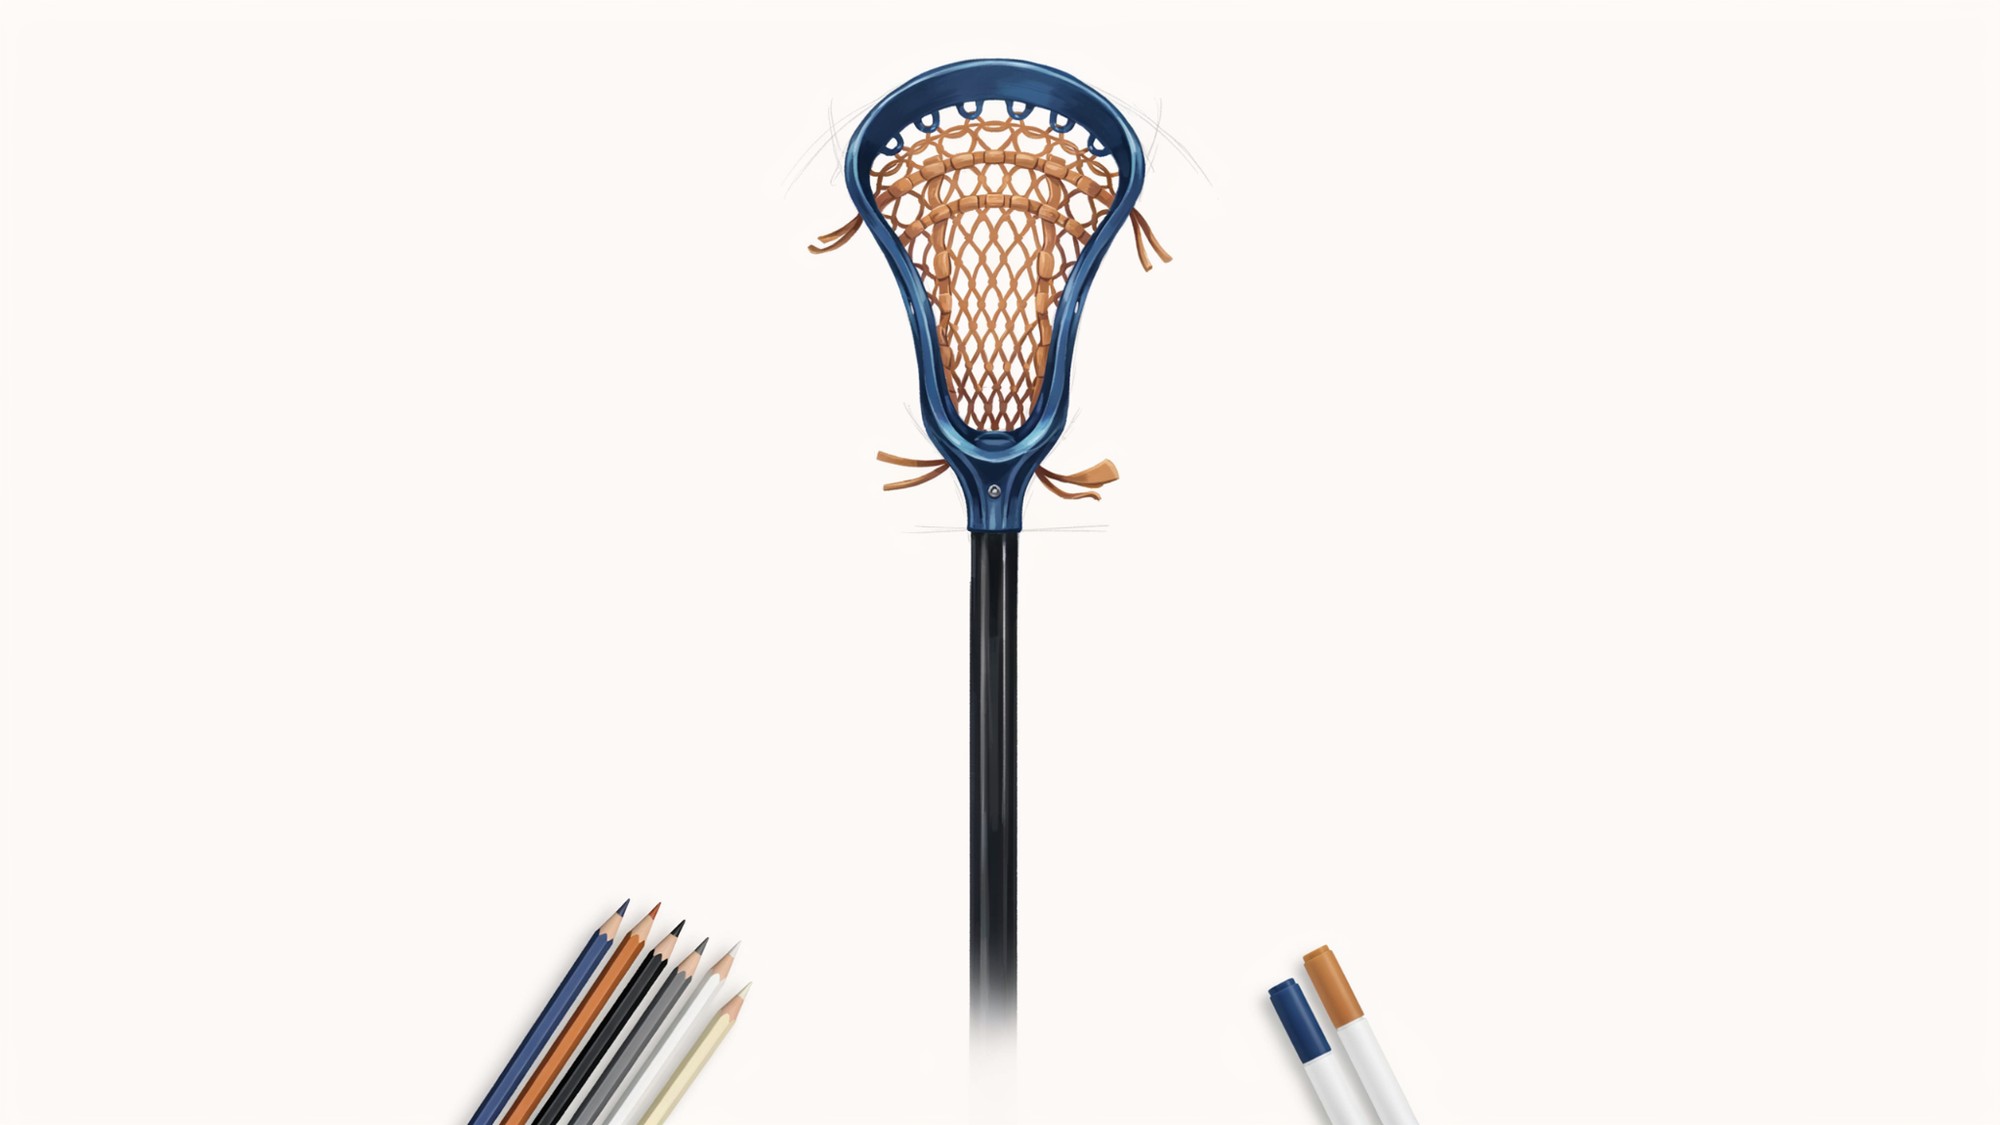
Adding color brings your drawing to life and makes it feel complete.
You can go with realistic colors that match actual lacrosse equipment, like black, white, silver, or navy blue.
Or you can get creative and use any color combination you like. There are no rules when it comes to personalizing your artwork.
Once you pick your colors, think about adding simple shading. Leave a small highlight area on the shaft and head to suggest where light would hit the stick.
Add slightly darker tones on the opposite side to create depth. This technique does not need to be complicated.
Even a small amount of shading adds dimension and makes your lacrosse stick drawing look much more three-dimensional.
Common Mistakes to Avoid When Drawing a Lacrosse Stick
A few small habits can save you a lot of frustration along the way.
- Head proportions: Keep the head sized to match the shaft so the drawing does not look unbalanced. Check the size often as you sketch.
- Mesh lines: Slow down and keep the spacing between lines even. Rushed lines make the mesh look messy and uneven.
- Shaft alignment: Draw a faint center guideline before starting the shaft. This keeps both sides straight and saves on erasing later.
- End cap detail: Do not skip defining the edges of the end cap. A few clean lines make it look finished and intentional.
- Coloring too early: Avoid adding color before your sketch is fully refined. Finalize your lines first so the color sits cleanly on top.
Fun Ways to Customize Your Lacrosse Stick Drawing
Once you have the basics down, there are many ways to make your drawing your own.
Try adding team colors or a logo to the shaft. This is a great way to show team support or just make the stick look more personal.
You can use bold stripes, letter initials, or patterns that feel best to you.
You can also draw a lacrosse ball resting inside the mesh to add more life to the scene. A small round circle with a few curved stitch lines is all you need.
If you want to go further, place the stick inside a full sports scene. Draw a field beneath it, add some grass or lines, or include other pieces of equipment nearby.
These extra details turn a simple drawing into a full illustration.
Conclusion
Working through a lacrosse stick drawing step by step is one of the most satisfying things for any beginner artist to experience.
I still remember the first time I tried it myself, redrawing that stubborn mesh pattern again and again until it finally clicked into place. Once it did, the whole drawing suddenly came together and made sense.
Go back through each step at your own pace, try out different colors, and keep experimenting with small details along the way. Your next drawing will always turn out better than your last one did.
If you found this guide helpful, drop a comment below or share it with a friend who loves to draw too.
Frequently Asked Questions
What pencil is best for drawing a lacrosse stick?
A standard HB pencil works well for sketching the basic shapes. Use a lighter grade like 2H for guidelines so they erase cleanly later.
How do I keep the shaft of my drawing straight?
Use a ruler or draw a faint center guideline first. This gives you a reference line to follow and keeps both sides of the shaft even.
Can beginners draw a lacrosse stick without any experience?
Yes, absolutely. The stick is made up of simple shapes like cylinders and curved lines. Following the steps one at a time makes it very manageable for beginners.
How do I make the mesh pattern look realistic?
Draw the diagonal lines slowly and keep the spacing even. Adding a second set of crossing lines creates the net look. Slight imperfections are fine and actually add character.
What colors should I use for a lacrosse stick drawing?
You can use realistic colors like black, white, or dark blue to match real equipment. You can also choose any colors you like to make the drawing personal and creative.