

Lilies are one of the most satisfying flowers to draw. The petals are bold, the shape is clear, and the lines are forgiving for beginners.
I started drawing lilies when I was still figuring out how to hold a pencil right, and trust me, it gets easier fast.
In this tutorial, I will walk you through every step in a simple, easy-to-follow way. No fancy tools, no prior skills needed.
By the end, you will have a lily you are genuinely proud of.
Supplies You Need to Draw a Lily

You do not need a full art kit to get started. A few basic tools are all it takes.
Basic Materials
Your basic kit is all you need to get started:
- A pencil (HB for light lines, 2B for darker strokes)
- An eraser (a kneaded one works best)
- Plain paper (printer paper, sketchbook, anything works)
Optional Tools for Better Results
Want to take your lily sketch further? These help:
- Fineliner pens (great for clean, confident outlines)
- Blending tools like a tortillon or cotton swab (smooth out your shading fast)
Step-by-Step Guide on How to Draw a Lily
This is where the real work begins. Follow each step carefully and your lily will come together better than you expect.
Step 1 – Draw Basic Guidelines

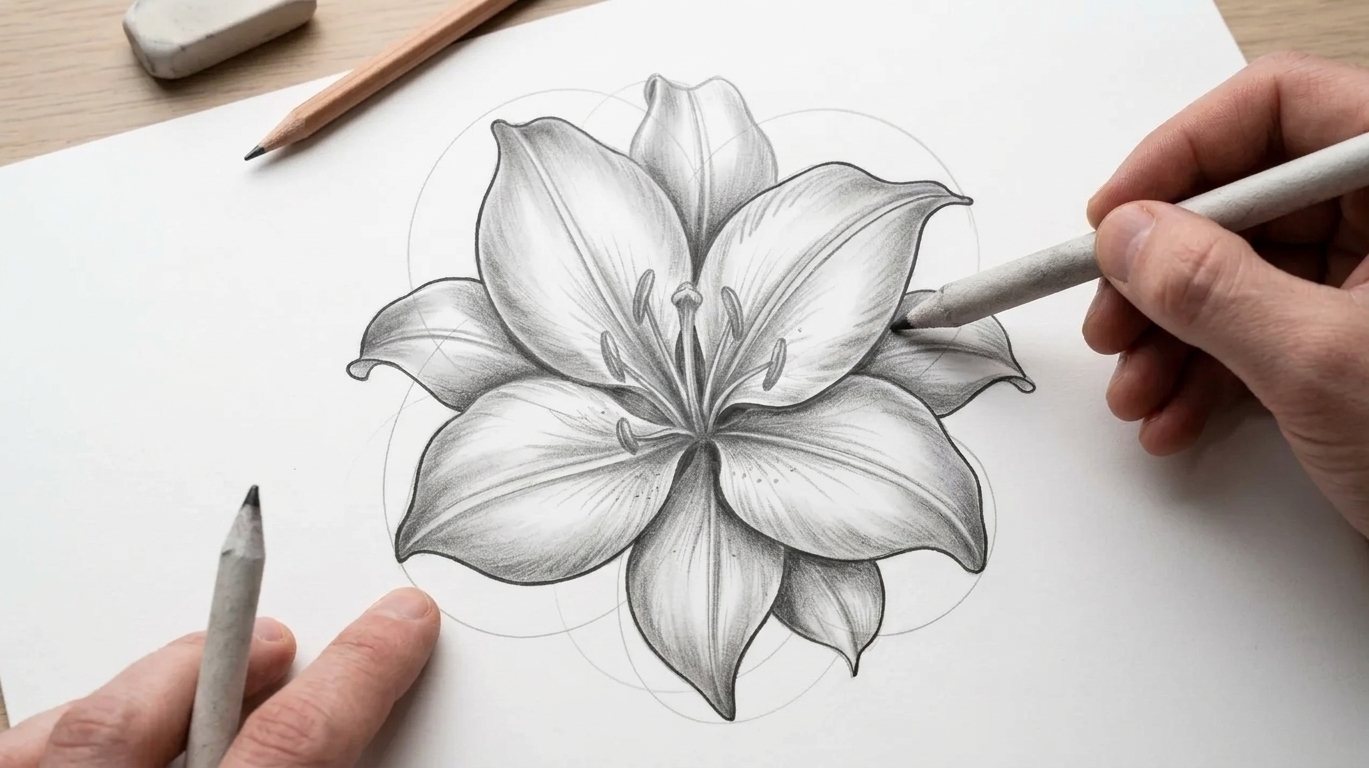
Start light. Sketch a rough circle to mark where your flower will sit. Add a smaller circle inside it. These are just guides, so keep your lines loose and easy to erase. Do not press too hard with your pencil at this stage.
Step 2 – Sketch the Main Petals

Draw three large petals from the center outward. Do not worry about making them perfect. Slightly uneven shapes actually look more natural. Let the petals extend a little beyond your guideline circle. Think of each petal as a long, soft oval curving outward.
Step 3 – Add Background Petals

Now add three more petals sitting behind the first layer. Make these ones slightly smaller. Overlap them with the front petals. This simple trick adds depth and makes your lily look more realistic. Space them evenly between the front petals for a balanced look.
Step 4 – Draw the Lily Center (Stamen)

Add thin filaments rising from the center, each with a small rounded tip. Vary the lengths so they look natural. Keep them slightly clustered together. Do not make them too stiff or uniform. This small detail brings the whole flower to life instantly.
Step 5 – Refine and Ink the Drawing

Go over your best lines with a fineliner pen if you have one. Clean up any rough or stray pencil marks. Define the edges of each petal clearly. This step makes your sketch look polished and intentional. Take your time and only trace the lines you like.
Step 6 – Add Details to Petals

Draw fine, light lines running from the center outward along each petal. Do not overdo it. A few strokes per petal are enough to suggest texture. Keep them soft and natural looking. These lines give your lily character without making the drawing feel too busy or heavy.
Step 7 – Shade and Add Depth
Darken the areas closest to the center and where petals overlap each other. Use gradual, gentle shading rather than heavy marks. Build up the tone slowly.
This gives your lily a three-dimensional feel without making it look overworked or messy from too much pencil pressure.
Step 8 – Erase Guidelines and Final Touches

Carefully erase all remaining pencil guidelines. Clean up the edges and adjust contrast where needed. Step back and look at the full drawing. Make any small fixes you feel are necessary. Once everything looks clean and balanced, your lily drawing is complete and ready to show.
Tips to Make Your Lily Drawing Look Better
A few small habits can make a big difference in how your final drawing turns out.
- Focus on curves, not perfection. Lilies in real life are never perfectly symmetrical, so let your lines flow naturally.
- Always sketch with light pressure first. This makes it much easier to erase and adjust lines without damaging your paper.
- Practice drawing petal shapes on their own before adding them to the full flower. It builds muscle memory fast.
- Step back from your drawing every few minutes. Looking at it from a distance helps you spot things that need fixing.
- Do not rush the shading stage. Building tone slowly with soft strokes always looks better than pressing hard all at once.
Conclusion
Drawing a lily is simpler than it looks. You start with basic shapes, build the petals layer by layer, add a few details, and you are done.
The more you practice, the more natural it feels. Try drawing lilies from different angles or in different styles once you get comfortable.
Every sketch teaches you something new. I hope this guide helped you get started. Drop your drawing in the comments. I would love to see it!
Frequently Asked Questions
Can a complete beginner learn how to draw a lily?
Yes, absolutely. Lilies are one of the easiest flowers to sketch because their shapes are simple and forgiving for beginners.
What pencil is best for drawing a lily?
An HB pencil works well for light guidelines and an 2B is great for darker, bolder lines. Both are easy to find and affordable.
How long does it take to draw a lily step by step?
Most beginners finish a basic lily sketch in 20 to 30 minutes. With regular practice, you will get faster and more confident over time.
Do I need special paper to draw a lily?
No, regular printer paper works just fine when you are starting out. As you improve, you can move to a sketchbook for better results.
Can I use the same steps to draw other flowers?
Yes, the basic techniques used here work for many other flowers too. Once you get comfortable with lilies, roses and tulips become much easier to draw.