

Dreadlocks looked impossible to draw the first time I tried. Too much texture, too much overlap, too much going on. I kept giving up halfway through.
Then I figured out the one thing most beginners get wrong about how to draw dreads, and everything changed. It wasn't about drawing more. It was about thinking differently.
This guide breaks it all down in a way that actually makes sense, even if you've never drawn hair before. What I'm about to show you will make you wonder why you ever found this hard.
Understanding the Basics of Drawing Dreads
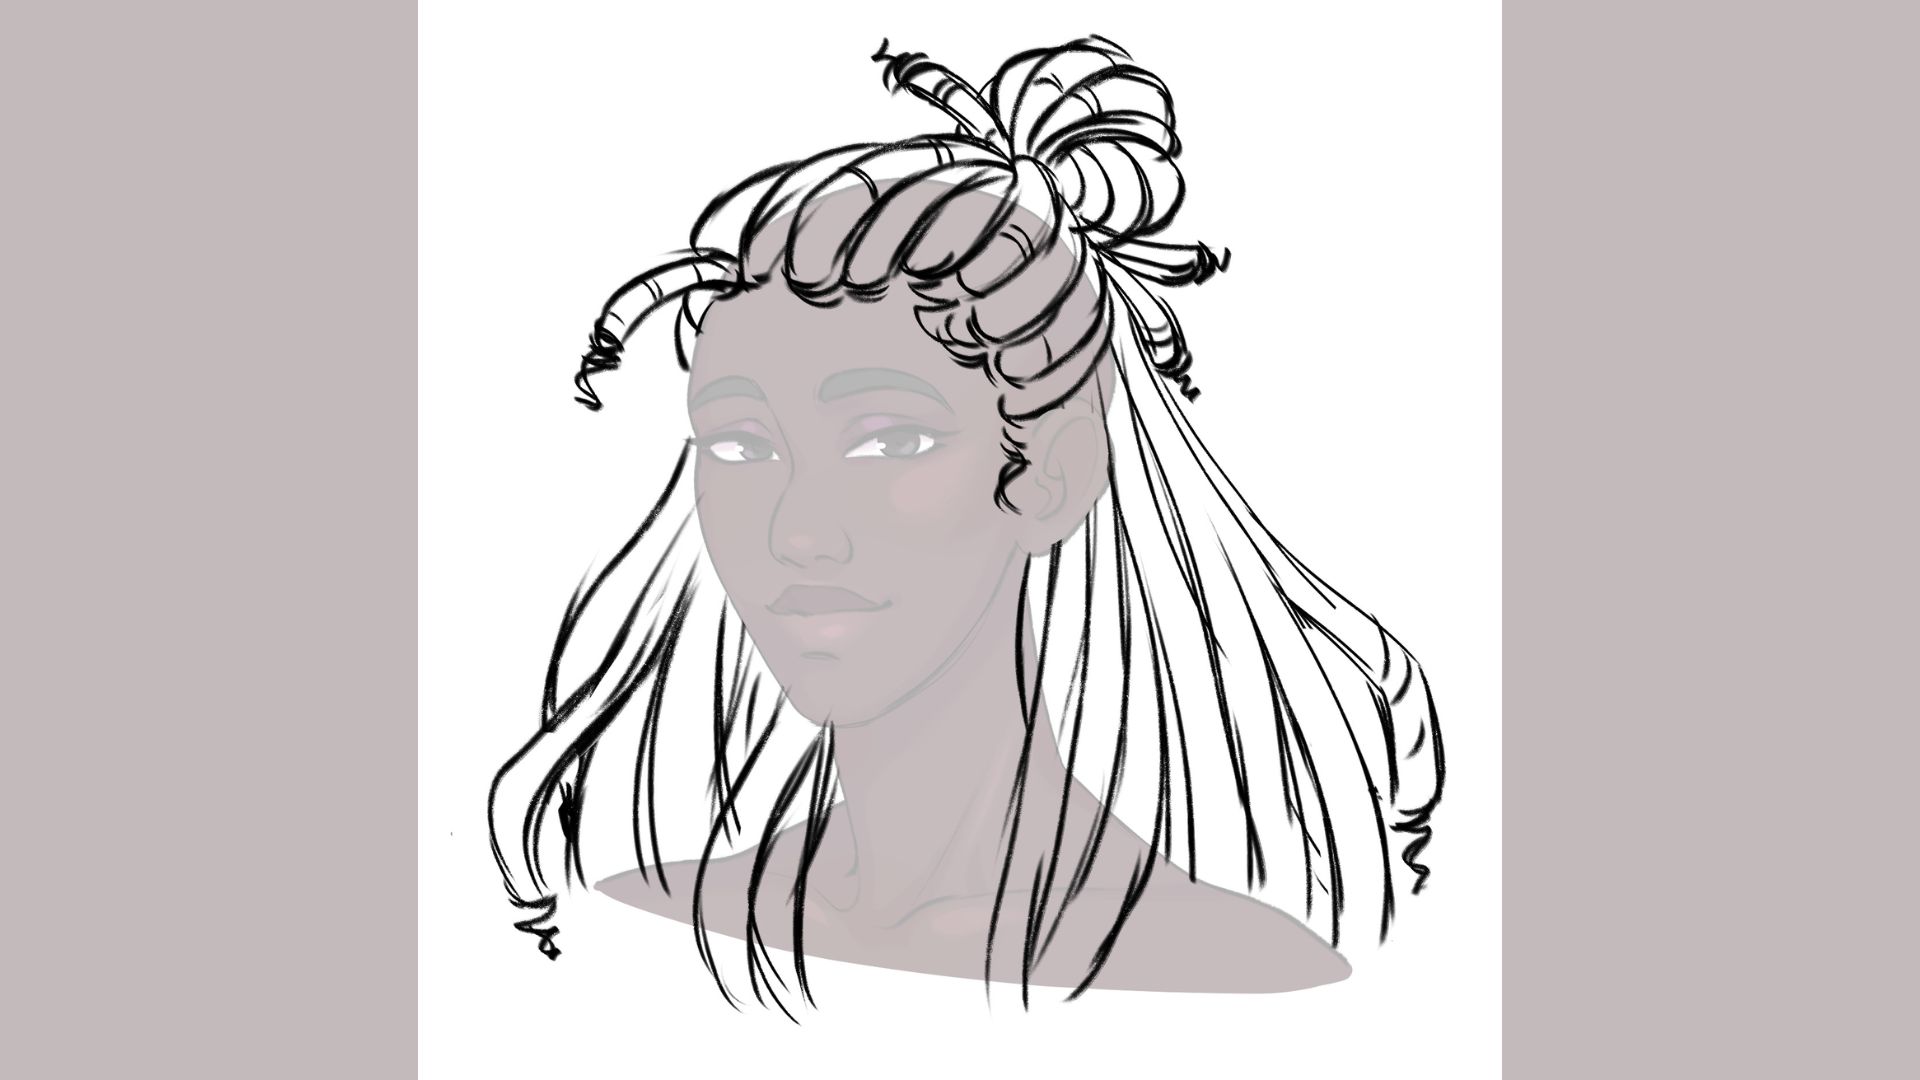
Dreadlocks aren't just tangled hair. They're thick, rope-like forms with real volume and texture. Each one has a slightly irregular shape, which is actually what makes them interesting to draw.
Most beginners make the mistake of trying to draw every single strand. That's where it gets overwhelming fast. The key is to think in groups and shapes first.
For tools, a regular pencil and eraser are enough to start. A blending stump helps with shading, and if you're working digitally, a textured brush works best for that rough dread surface.
Realistic dreads look heavy and organic. Cartoon dreads are simpler with clean lines and less detail. Knowing which style you're going for before you start saves a lot of rework.
How to Draw Dreads Step by Step (Beginner-Friendly Guide)
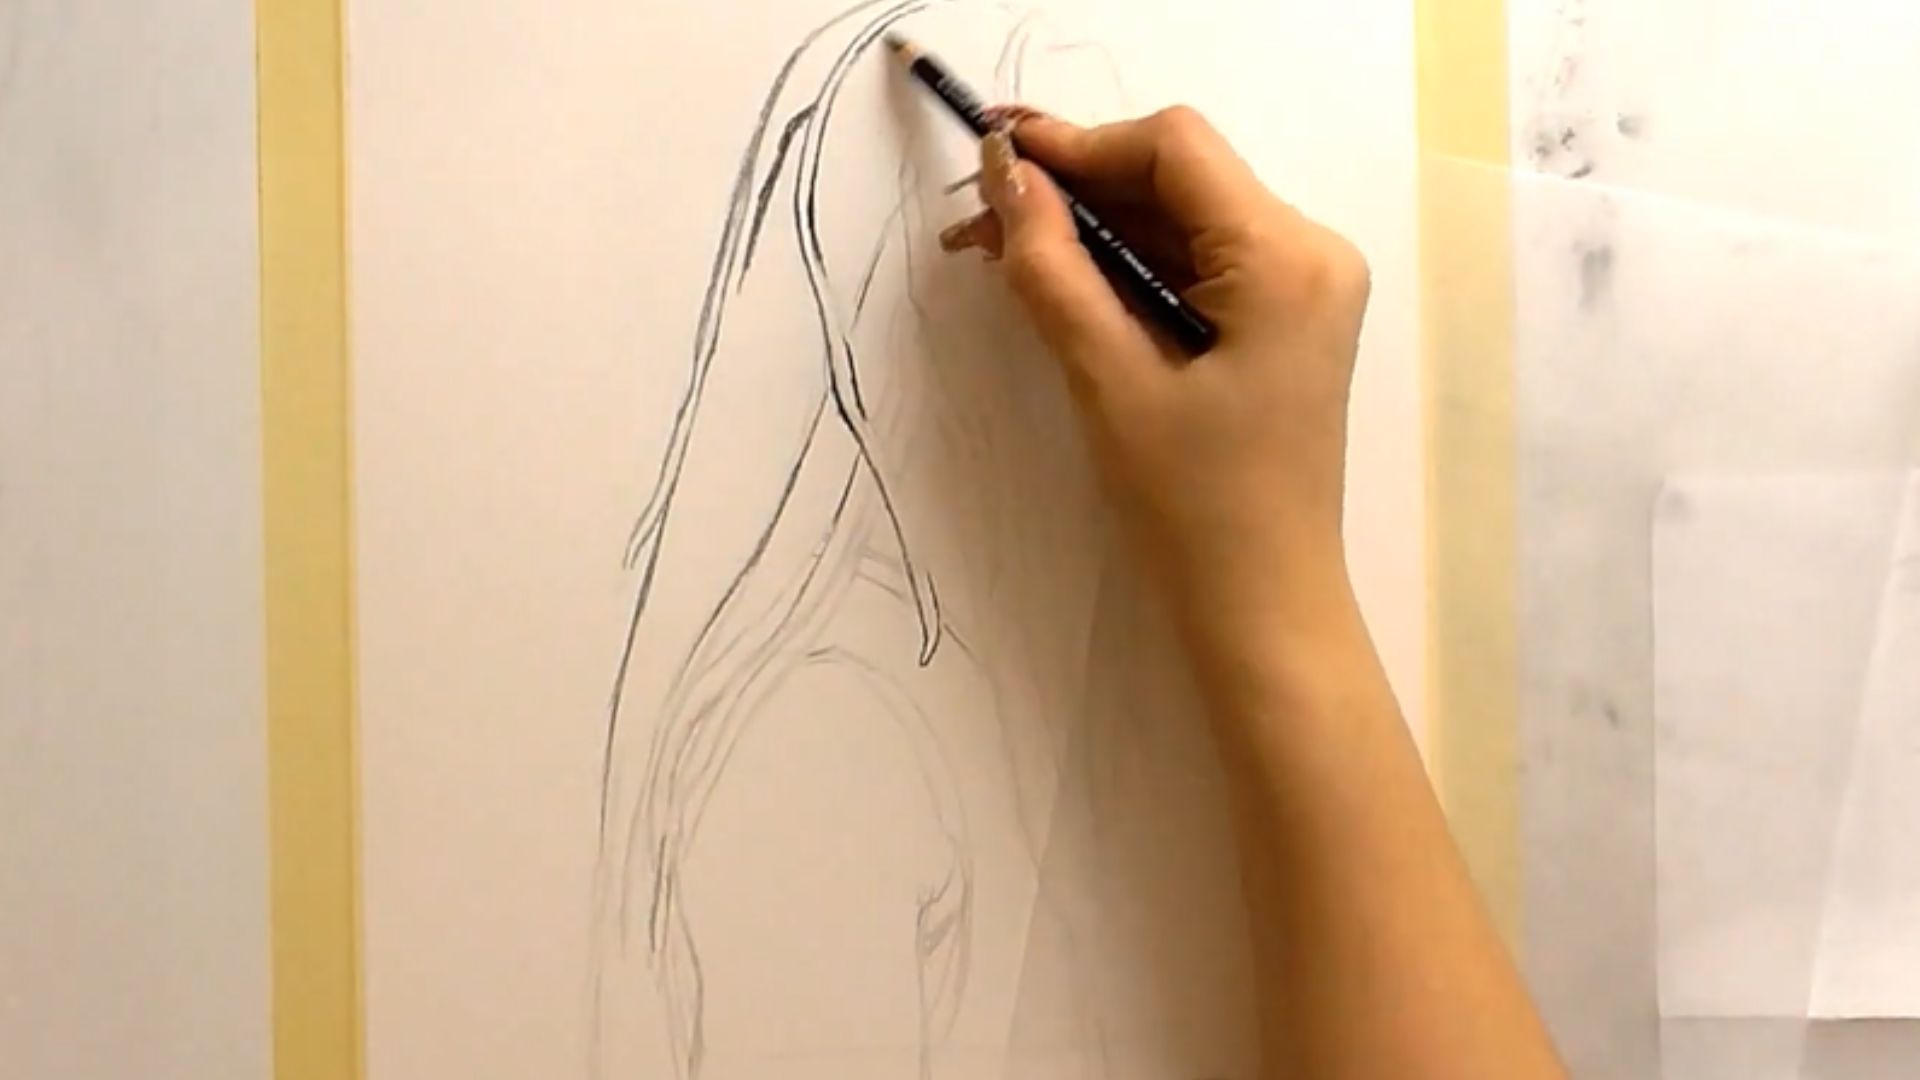
Go through each step lightly before committing to dark lines. Building from loose sketches to detailed work is the whole game here. Take it one step at a time and don't skip ahead.
Step 1: Start with the Head and Hairline
Begin with a light oval or rounded skull shape. This gives you the structure everything else sits on. Don't worry about making it perfect at this stage.
Lightly mark where the hairline starts. This changes depending on your character but usually sits about a third of the way down the head.
The hairline direction also tells you which way the dreads will flow. Getting this right early makes every step after it easier.
Step 2: Map the Overall Shape of the Dreads

Before drawing individual dreads, sketch the full mass of hair as one big shape. Think of it like drawing a cloud or a bush around the head.
This silhouette is what gives the hairstyle its identity. A wide, full shape reads very differently from a long, narrow one.
Don't rush to details here. A solid silhouette is the foundation of a convincing dread drawing.
Step 3: Divide Hair into Sections
Now break that big shape into sections. Think of it like dividing a pizza, loose and uneven, not perfectly equal.
Each section will become a group of dreads. This grouping technique is what keeps the drawing from looking like a tangled mess.
Avoid trying to draw each dread as its own separate thing at this point. Sections first, individual forms later.
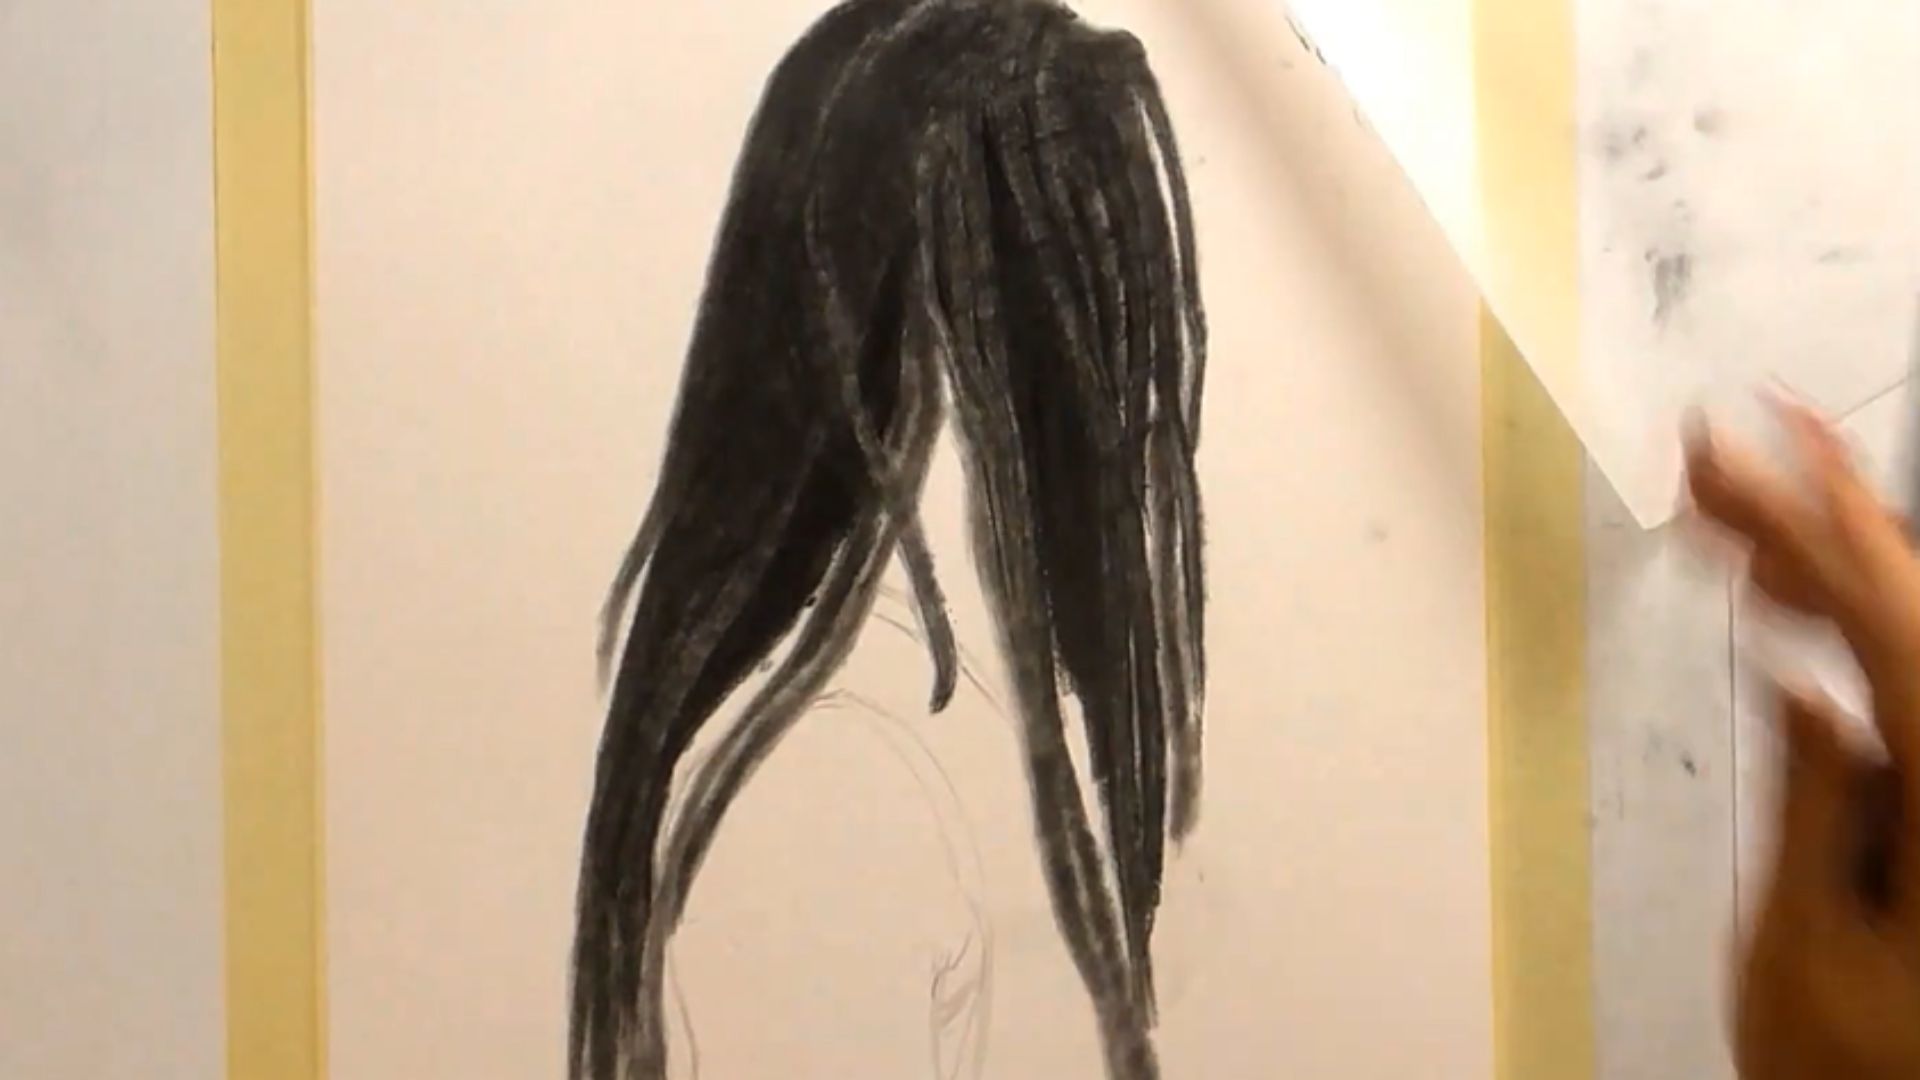
Step 4: Sketch Basic Dreadlock Forms
Inside each section, start drawing tube-like shapes. These are the individual dreads. They should taper slightly toward the ends and vary in thickness.
Not all dreads are the same size. Mixing thicker ones with thinner ones immediately makes the drawing look more natural and less stiff.
Keep these shapes loose. You're building the form, not finalizing it yet.
Step 5: Add Flow and Direction
Dreads don't just hang straight down. They curve, overlap, and move depending on gravity and the character's pose.
For a natural look, let some dreads fall forward and others tuck behind. Curved dreads feel alive. Perfectly straight ones feel flat and unnatural.
Think about where the weight of the hair would pull. That sense of gravity is what sells the realism.
Step 6: Refine the Outline

Go back over your shapes and clean up the outer edges. Define where dreads overlap each other and which ones sit on top.
Overlapping is important. It creates the layered look that makes hair feel three-dimensional instead of flat.
Add a bit of depth between the layers by making the edges of the back dreads slightly softer than the front ones.
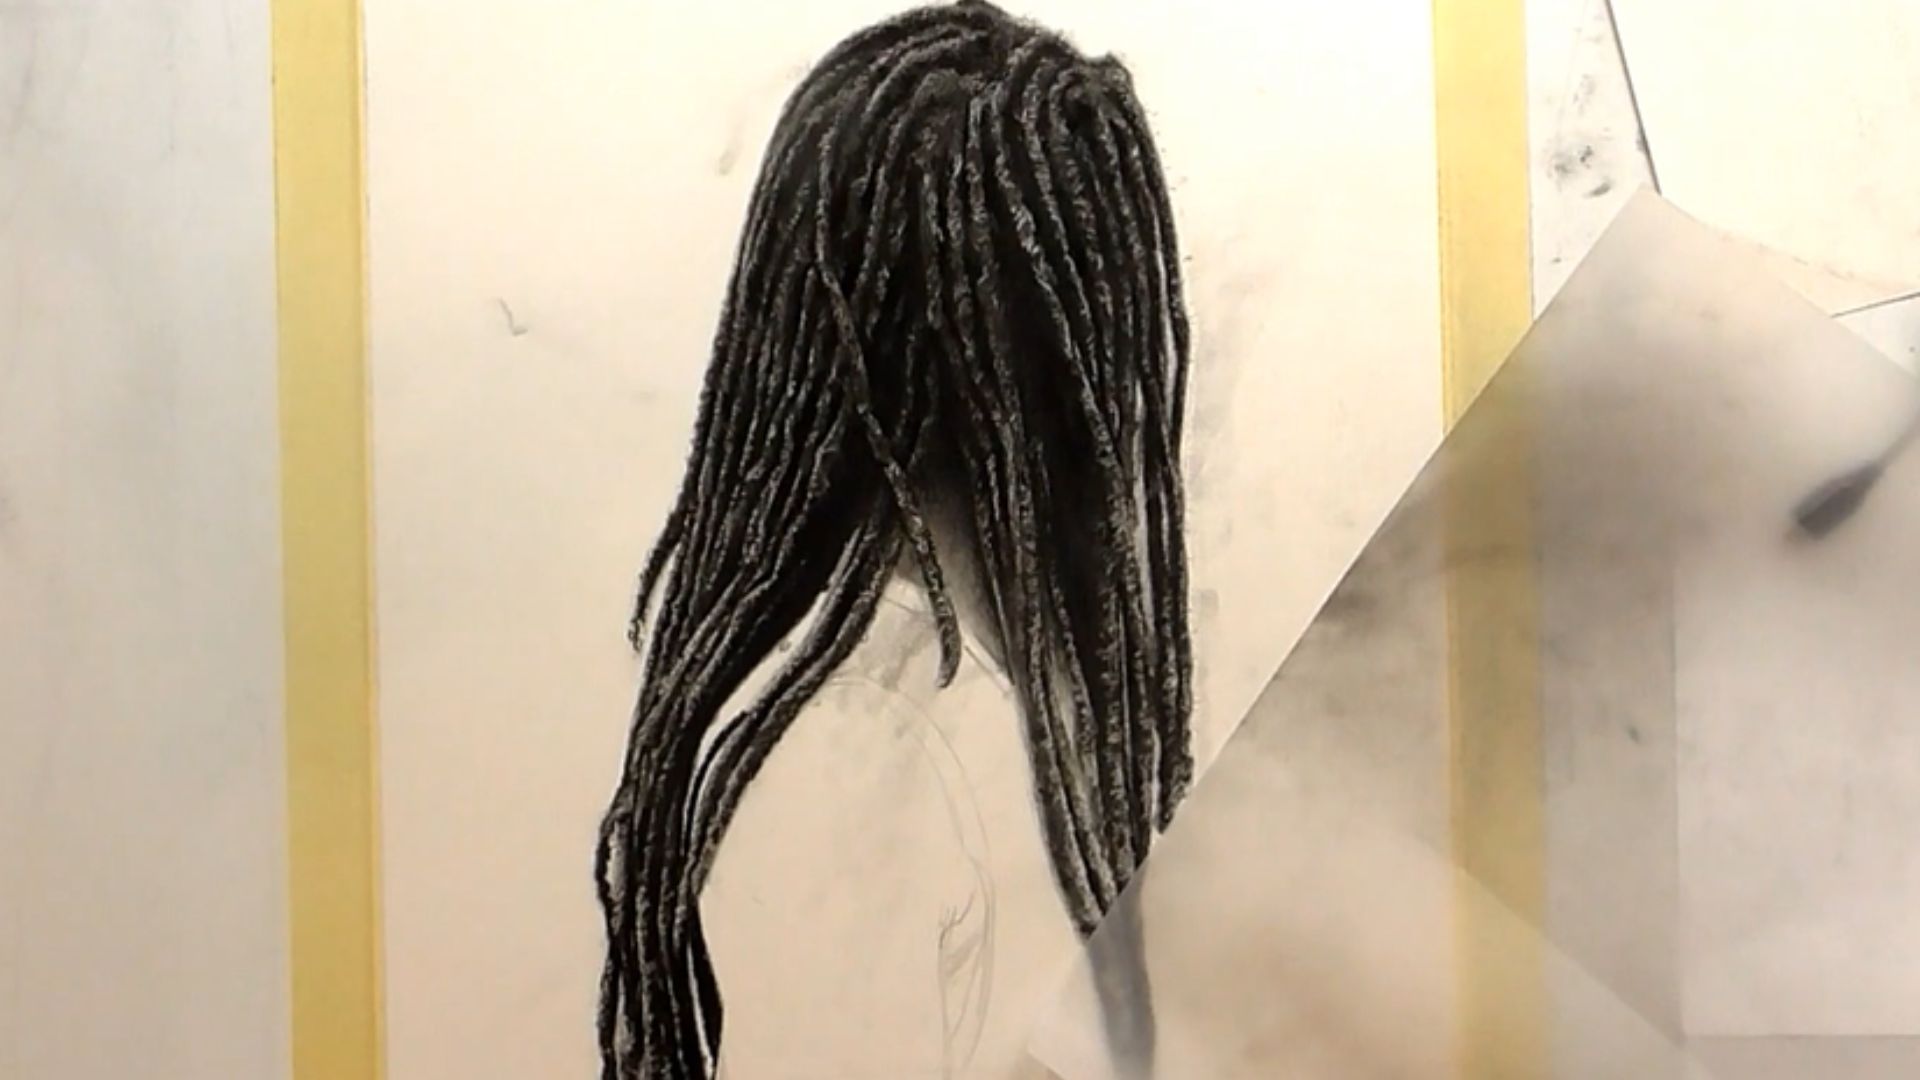
Step 7: Draw Texture Details
This is where dreads start looking like dreads. Use short, slightly uneven lines along the surface of each form to suggest the knotted, rough texture.
Don't go overboard. A few well-placed texture lines are more effective than covering every inch of the drawing in marks.
Focus on the middle and ends of each dread where texture is most visible. Near the roots, keep it a bit smoother.
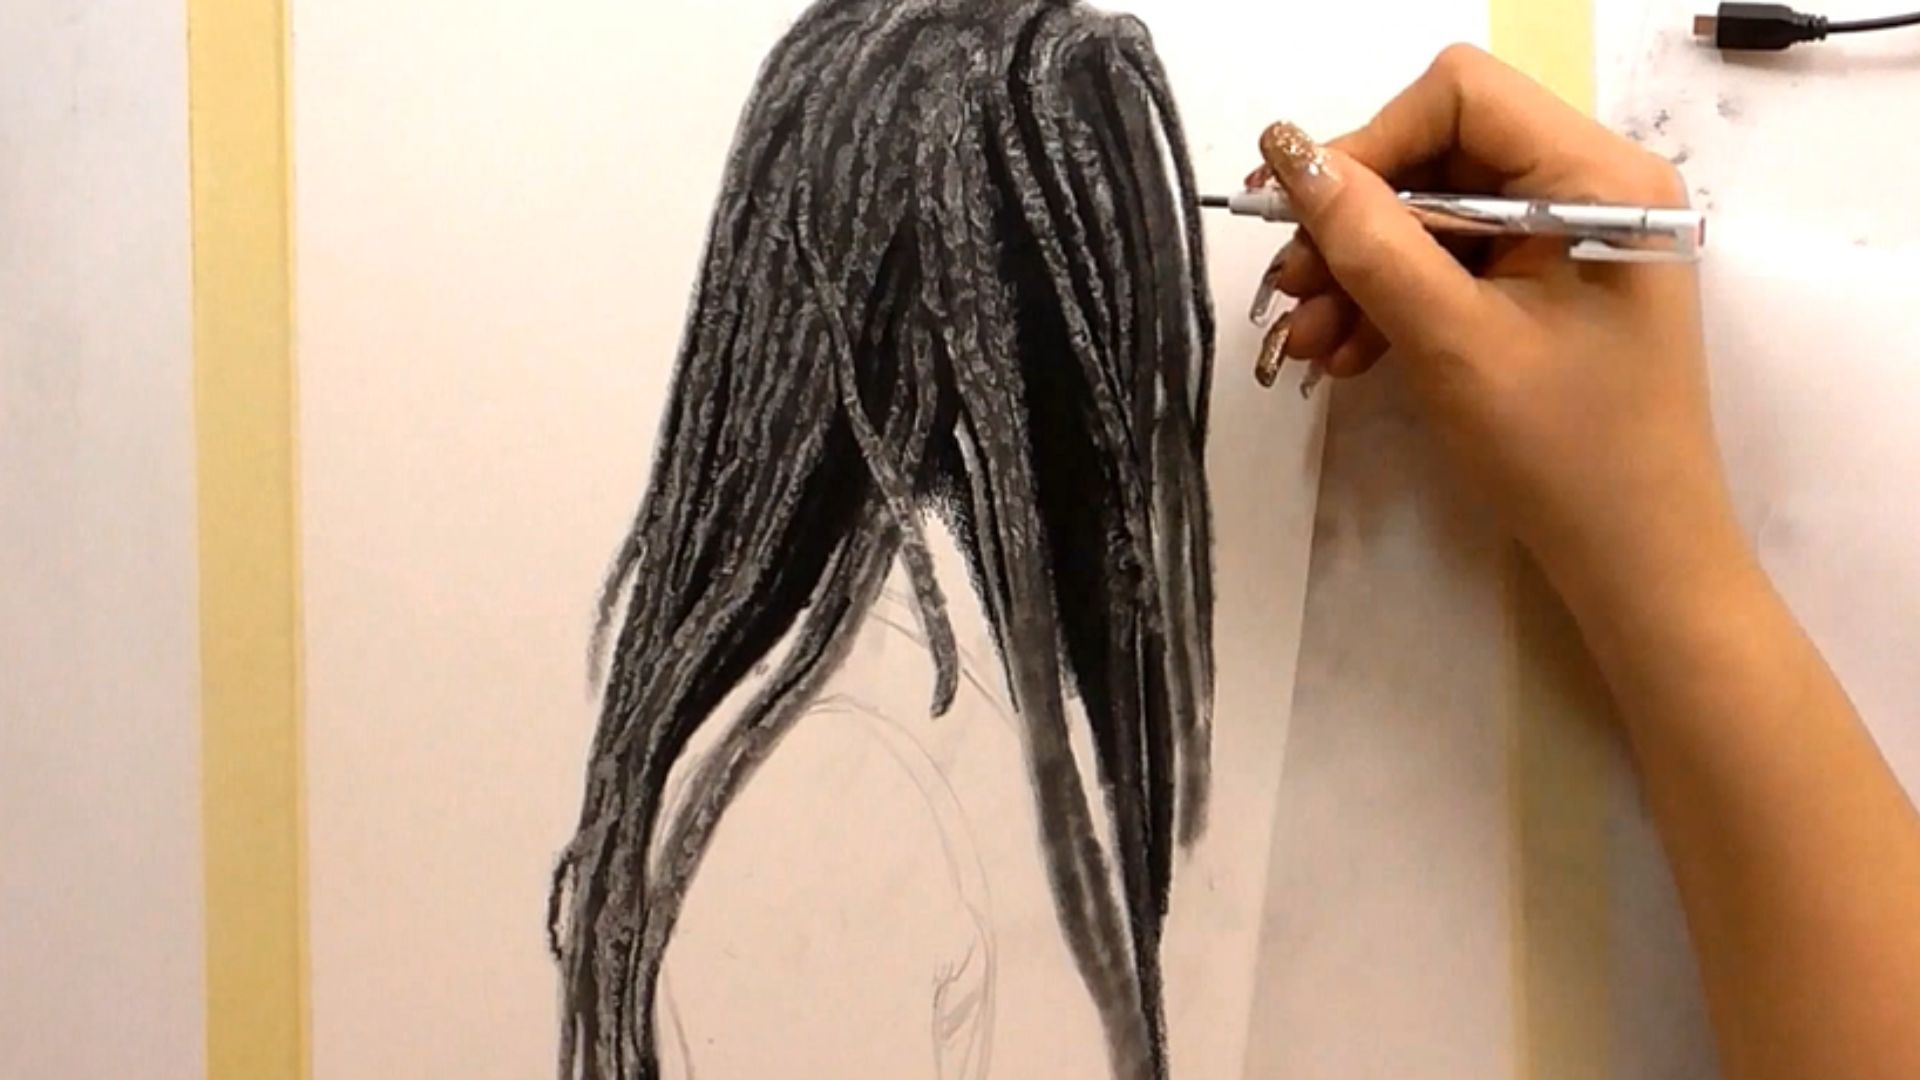
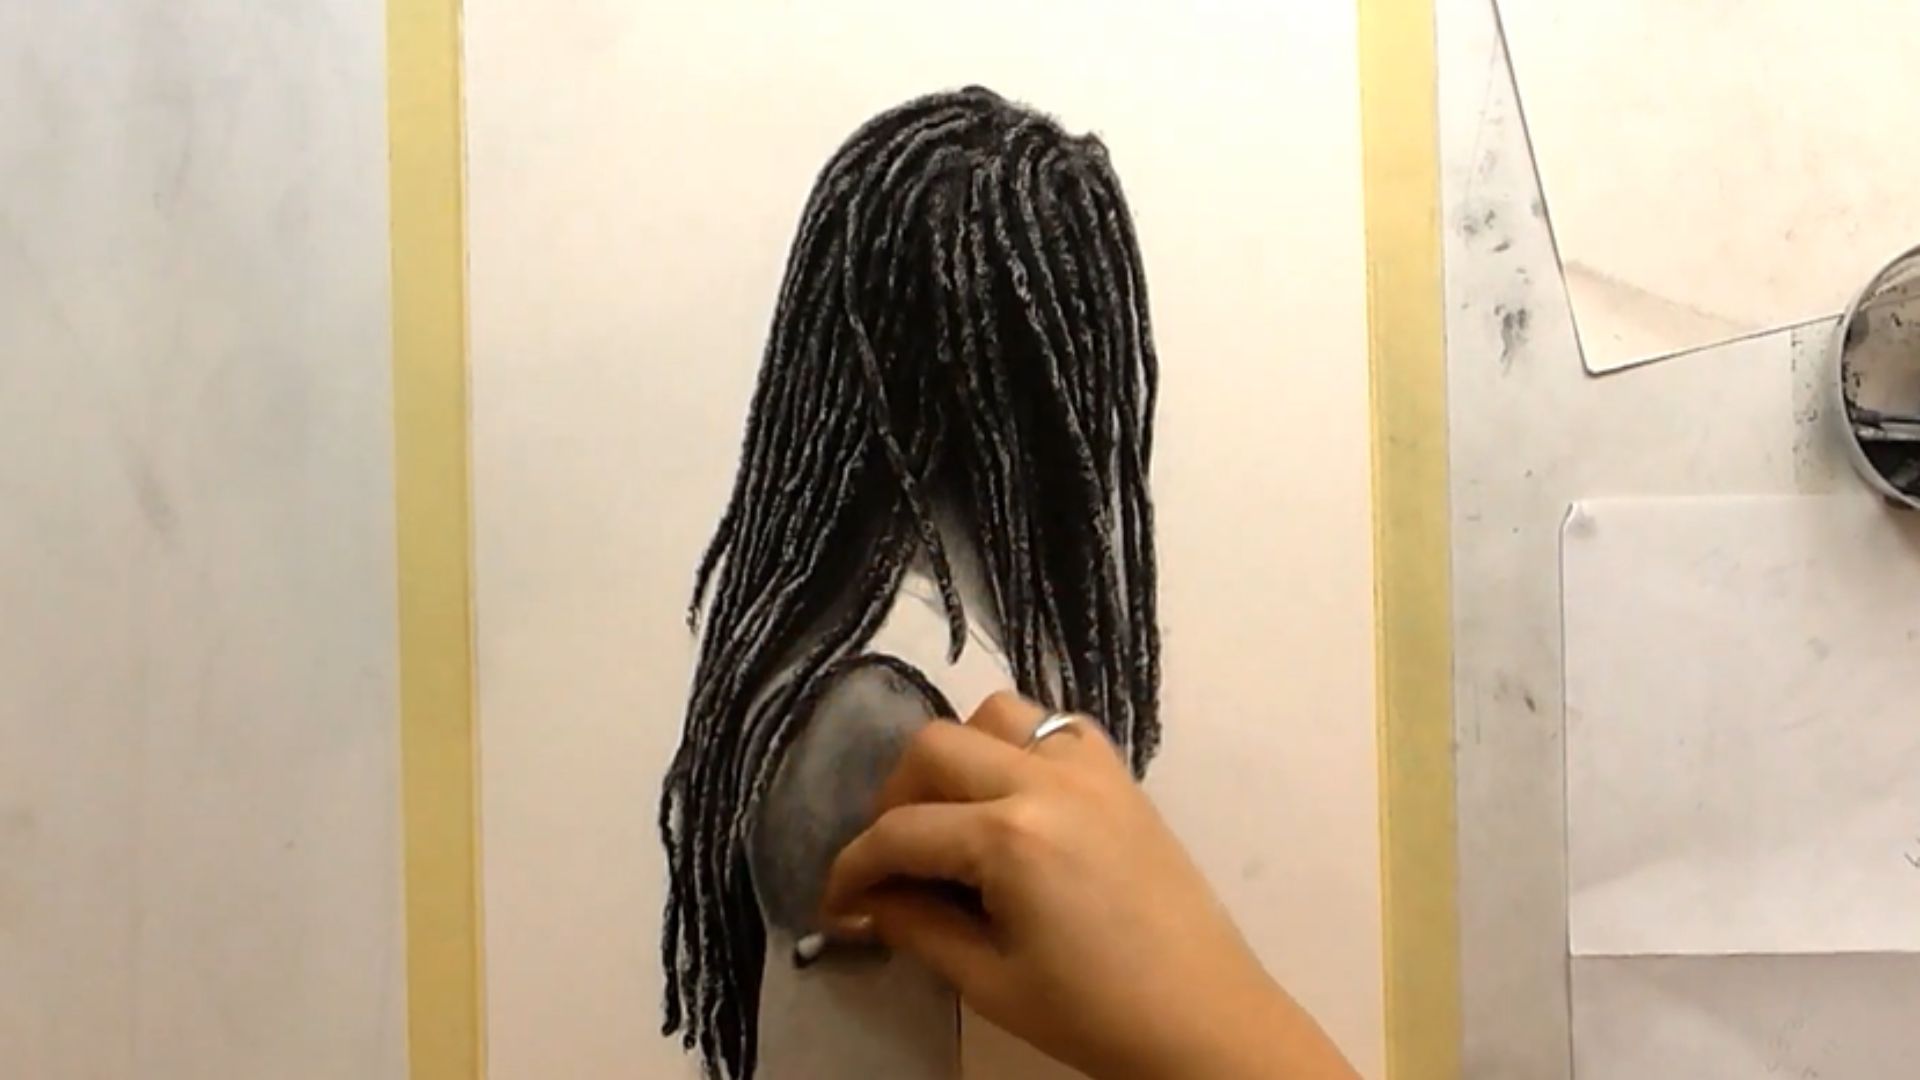
Step 8: Add Shadows and Depth
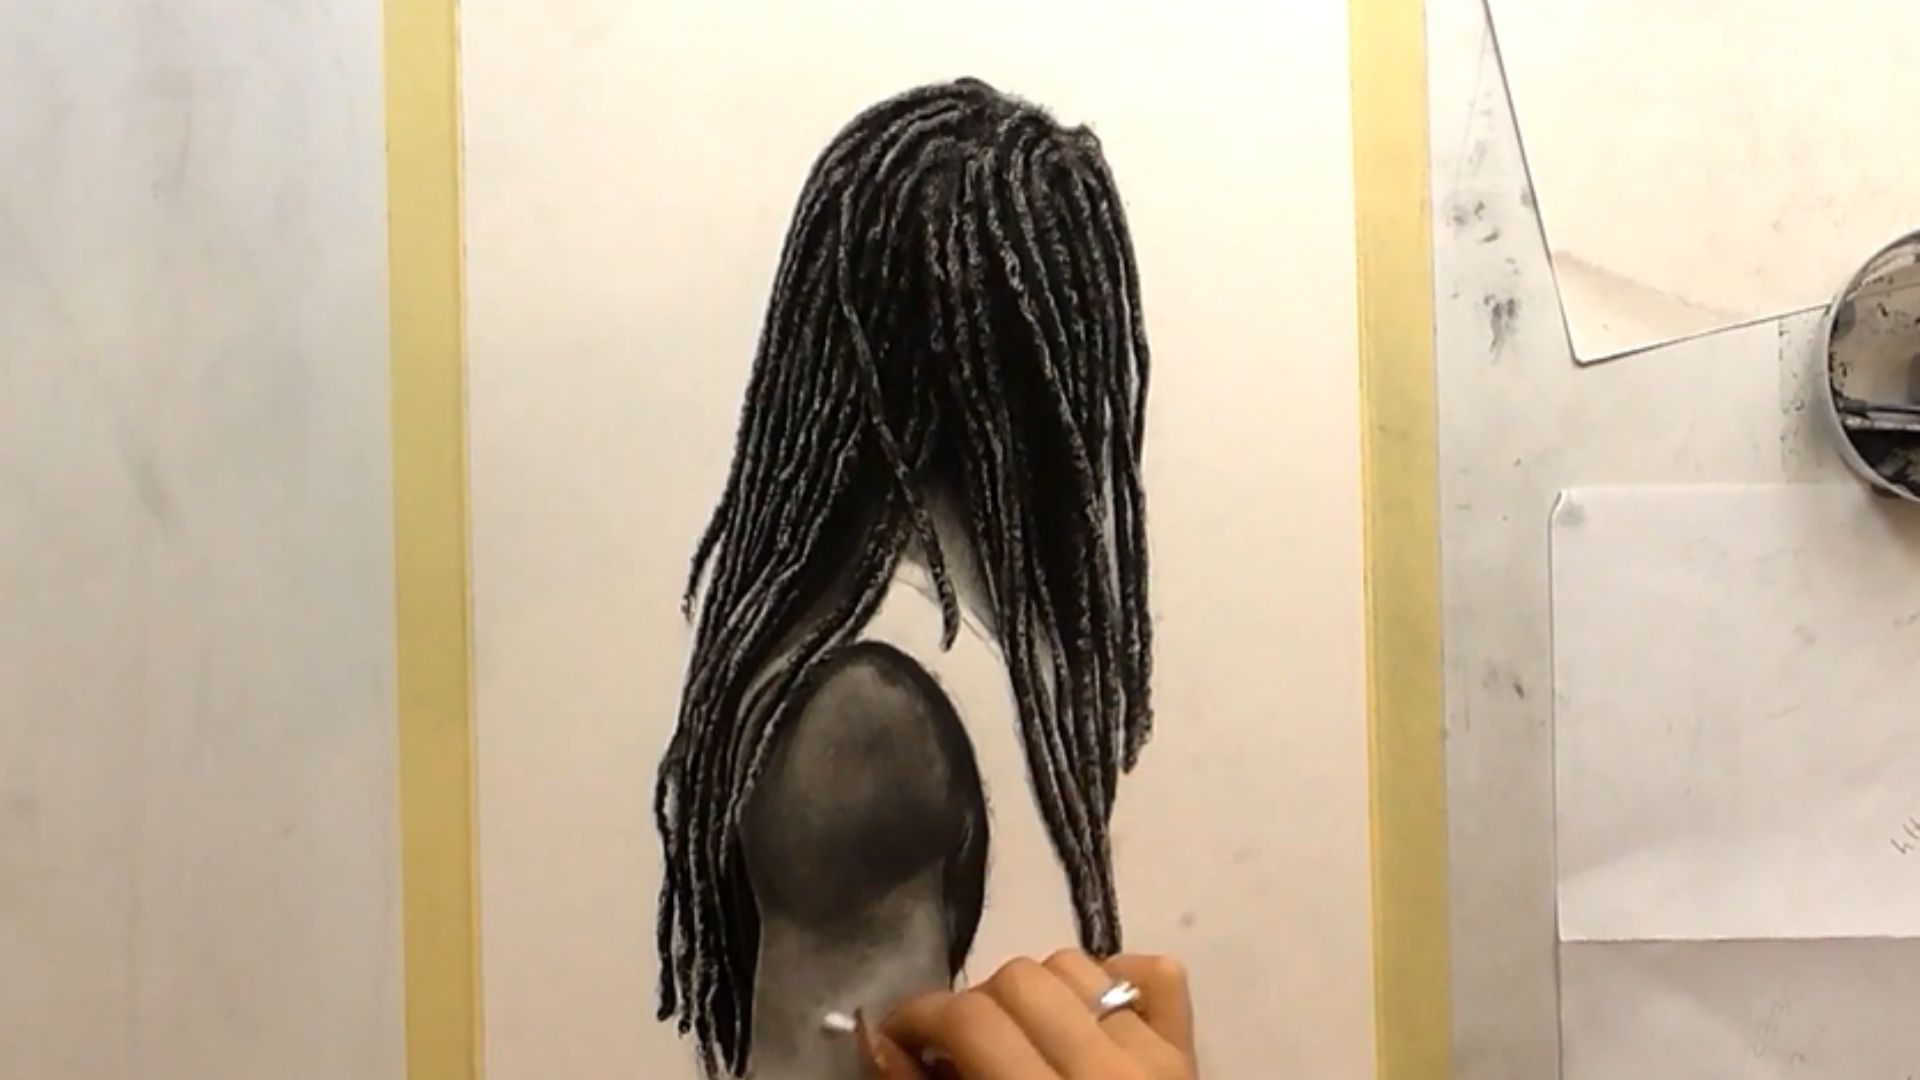
Pick one light source and stick with it. The side of the head away from the light gets the most shadow.
Shade between the dreads where they overlap. That's where the darkest tones go. It pushes some dreads back and brings others forward.
Build shadow gradually. Light hatching first, then deepen where needed. Don't jump straight to dark tones.
Step 9: Highlight Key Areas

Highlights go on the parts of each dread closest to the light source. A thin, lighter line or a lifted area on the top surface works well.
Keep highlights subtle. One or two well-placed ones per dread is enough. Too many and the drawing starts to look plastic.
If you're working in pencil, you can use an eraser to gently lift highlights. On digital, lower the opacity of your highlight brush.
Step 10: Add Flyaways and Imperfections

Real dreadlocks have loose hairs and frizz around them. Adding a few thin, stray lines around the edges of the hairstyle makes a huge difference.
Break the symmetry a little. Perfectly even dreads look artificial. Small imperfections make the drawing feel genuine.
A few flyaways near the hairline and around the tips go a long way. Don't overdo it, just enough to add life.
Step 11: Final Touches and Clean Up

Erase all your construction lines and guidelines from the earlier steps. The drawing should now stand on its own without them.
Check the overall contrast. If some areas look too flat, deepen the shadows a bit. If highlights are too harsh, soften them.
Step back and look at the full drawing. Small adjustments at this stage can make a big difference in the final result.
Common Mistakes to Avoid When Drawing Dreads
Knowing what not to do is just as useful as knowing what to do. These are the mistakes I see most often, and they're all easy to fix once you know to watch for them.
- Drawing stiff, straight lines instead of natural, flowing curves
- Ignoring volume and making the hair look flat
- Adding too much texture detail before the form is properly built
- Skipping shading and ending up with a drawing that looks one-dimensional
Every one of these comes down to rushing. Slow down at each step and you'll avoid most of these problems without even trying.
Best Video Tutorial Tips for Learning Faster
Watching someone else draw dreads in real time is one of the fastest ways to improve your own technique. But how you watch matters just as much as what you watch.
- Play tutorial videos at half speed so you can follow each stroke clearly
- Pause and sketch along rather than just watching from start to finish
- Focus on how the artist builds structure before adding detail
- Practice the same reference daily for a week and track your progress
The combination of watching and doing is what makes skills stick. One without the other only gets you halfway there.
Link:- https://youtu.be/V_6GvDnb4Ek?si=3_YBbwyq0sLqkekn
Conclusion
How to draw dreads is one of those skills that feels hard until it suddenly doesn't. And that moment comes faster than you'd expect. You've got the steps, you've got the tips.
Now the only thing left is to actually pick up a pencil and start. Don't wait until you feel ready. Just begin.
Drop your drawing in the comments when you're done because I want to see your progress. And if this guide was helpful, share it with a friend who's been putting off learning to draw.
Frequently Asked Questions
How Do You Draw Dreads for Beginners?
Start by sketching the overall hair mass as one shape, then break it into sections before adding individual dread forms. Build texture and shading last, after the structure is solid.
What Is the Easiest Way to Draw Dreads?
Group sections of hair together instead of trying to draw every single strand on its own. This keeps the drawing manageable and gives a much more natural result.
How Long Does It Take to Learn How to Draw Dreads?
With daily practice, most beginners see clear improvement within one to two weeks. Consistency matters far more than the amount of time spent in each session.
How Do You Make Dreads Look Realistic in Drawings?
Focus on uneven texture lines, layered shading, and natural flow rather than perfectly uniform shapes. Small imperfections and flyaways add the most realism.
Can I Learn How to Draw Dreads Through Video Tutorials?
Yes, video tutorials are great for seeing structure and technique in action. Sketching along in real time as you watch speeds up learning significantly.