

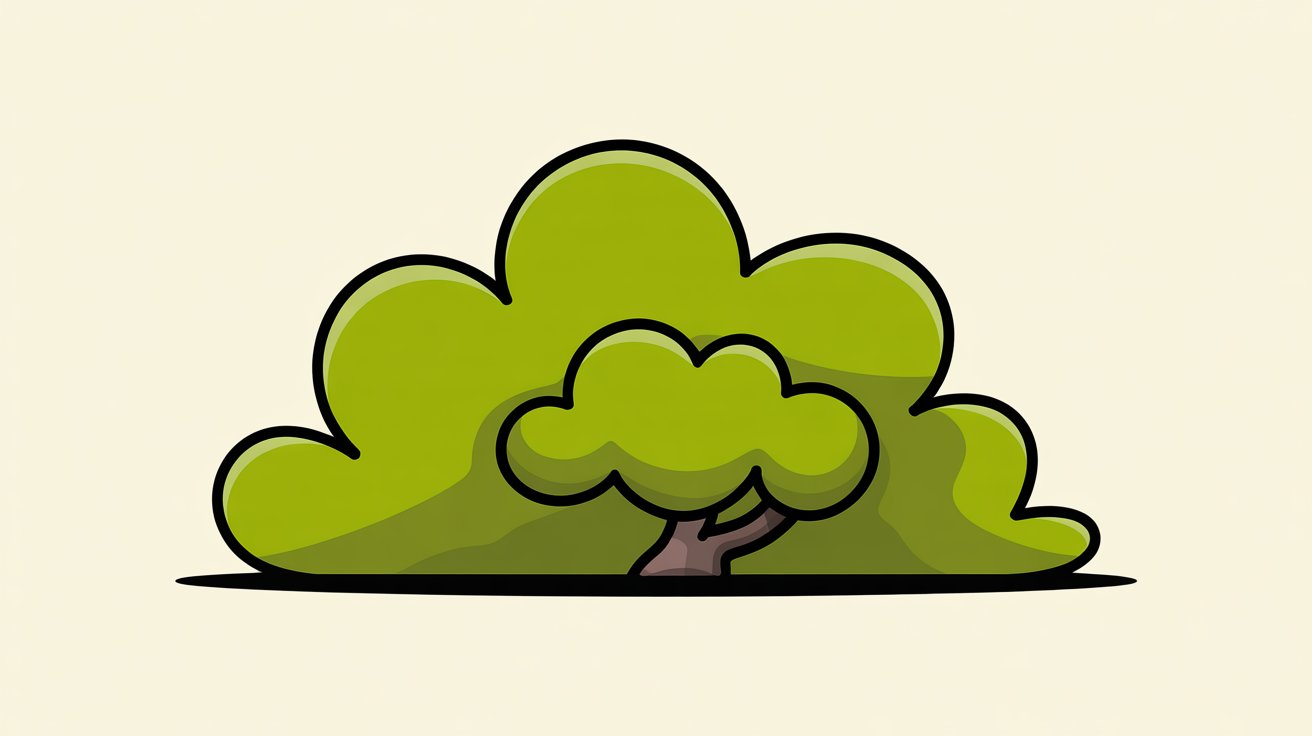
Learning to draw a bush is not as hard as it looks. I have worked with beginner artists for years, and the biggest problem I see is overthinking it. This article breaks everything down clearly so you can start right away.
You will find the right materials, four drawing examples, a step-by-step tutorial, tips for realistic results, and common mistakes to avoid.
You will not need fancy tools or years of training. This guide gives you everything you need to start drawing bushes with confidence today.
Understanding Bush Drawing Basics
A bush looks natural when it does not look too perfect. Real bushes are irregular, uneven, and random. Loose strokes always look better than stiff, careful ones.
Before you draw, observe three things: the overall shape, the volume, and the surface texture. Spend 30 seconds studying your reference first. Notice where things get light and dark.
Light and shadow are part of the structure, not finishing touches. Keep three zones in mind: bright areas facing the light, mid-tones in the middle, and dark areas deep inside the bush.
A simple trick is to squint your eyes when looking at a reference. It helps you see just the light and dark areas, making shading much easier to place.
Materials You Need for Bush Drawing
Before you pick up a pencil, having the right tools in hand makes a big difference. The right setup saves time and helps your drawing look better from the first stroke.
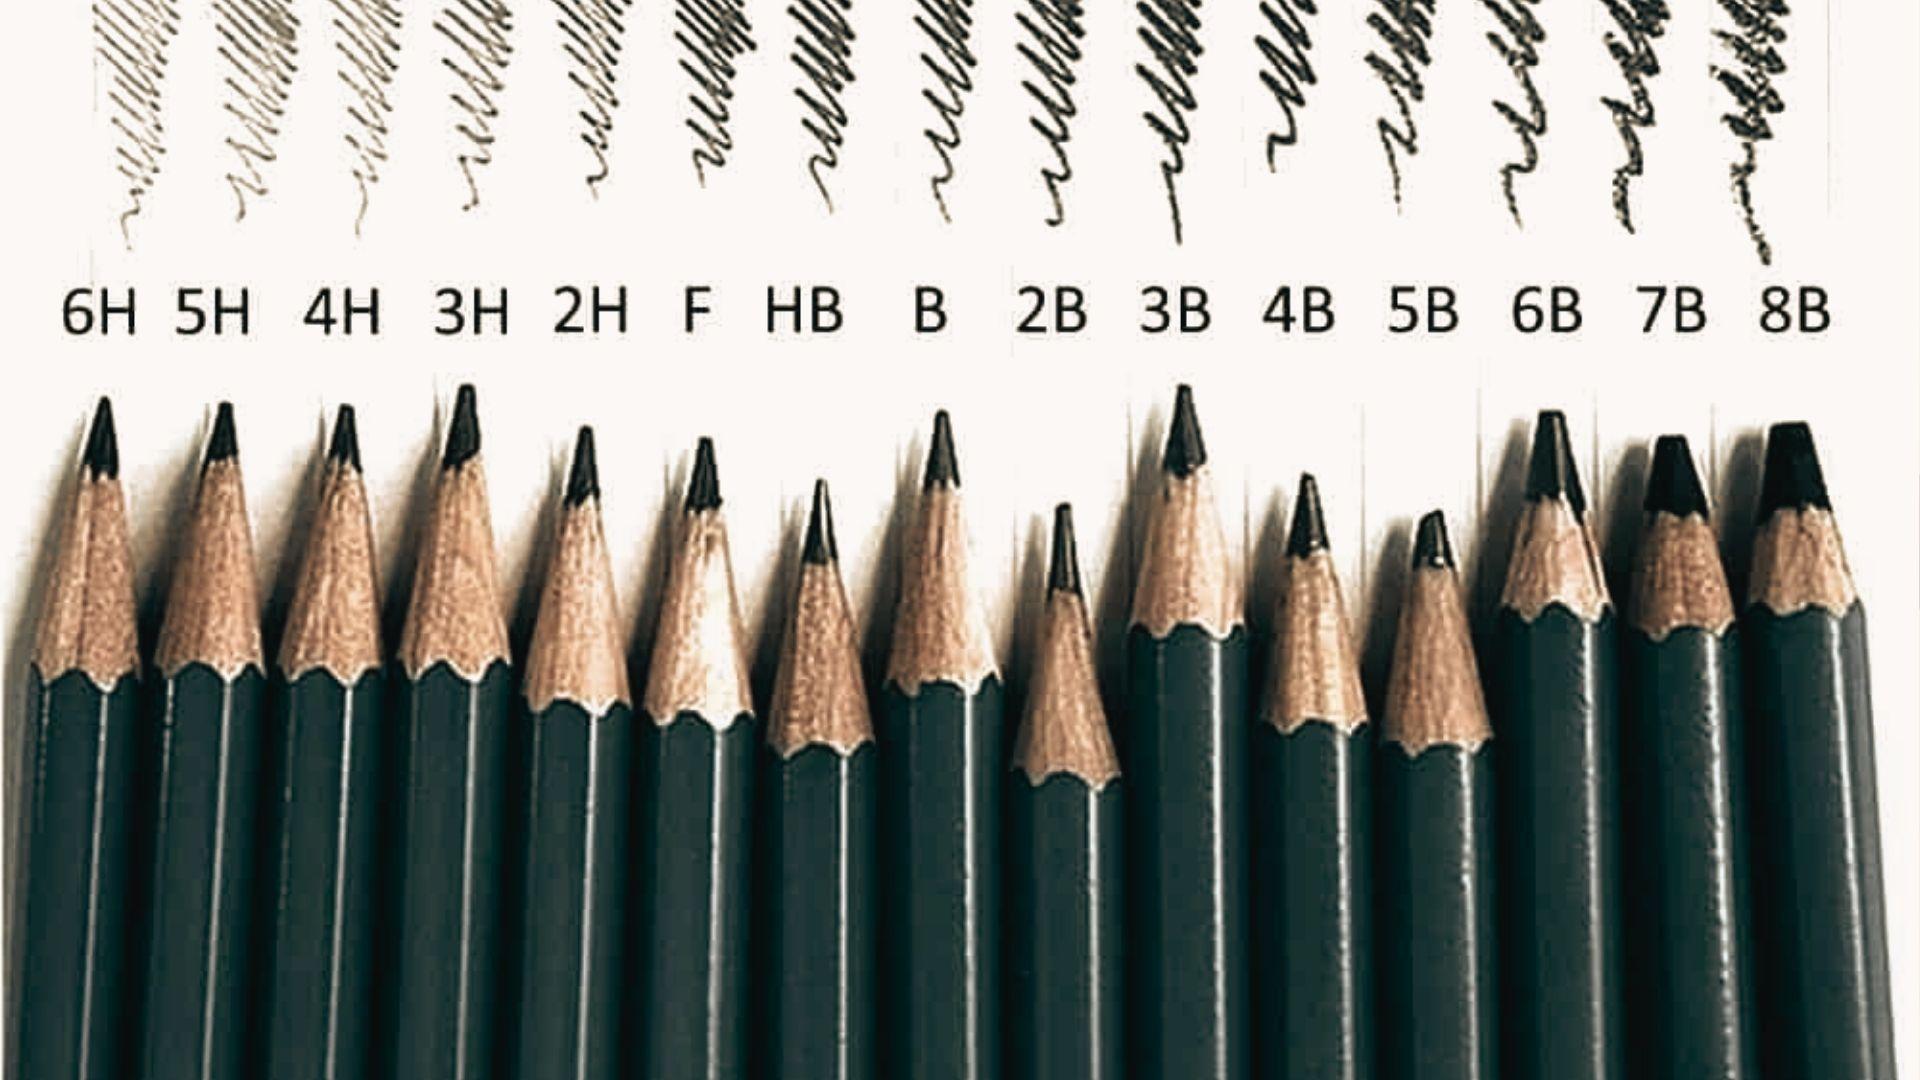
Choosing the Right Pencils (Hard vs Soft)
Pencils come in different grades. Hard pencils (like H or 2H) make light, thin lines. Soft pencils (like 2B, 4B, or 6B) make dark, bold marks.
For bush drawing, you will want both.
Use hard pencils for:
- Sketching light guidelines
- Drawing fine leaf shapes
- Outlining the basic form
Use soft pencils for:
- Adding shadow and depth
- Filling in dark areas
- Blending tones together
Starting with a 2H for structure and a 4B for shading is a solid choice for any beginner.
Paper and Basic Tools for Sketching
Not all paper works the same way. Smooth paper is good for detailed work. Textured paper is better if you want your shading to look rough and natural, which suits bush drawings very well.
Basic tools you should have:
- A sketchbook or drawing pad (A4 size works well)
- A kneaded eraser for soft corrections
- A vinyl eraser for clean, sharp fixes
- A blending stump to smooth out pencil strokes
- A sharpener to keep your pencil tip clean
You do not need anything expensive to start. A simple sketchbook and a few pencils will do the job.
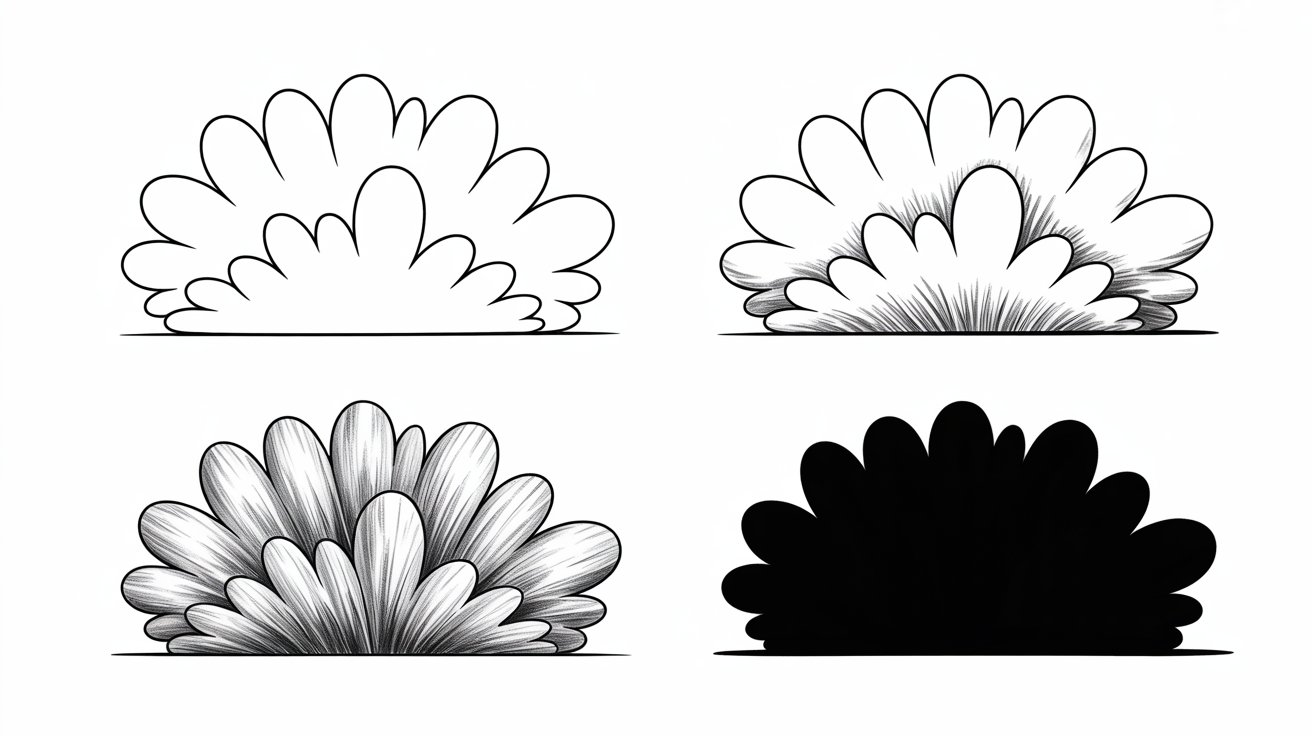
Bush Drawing Examples for Practice
Looking at different styles of bush drawings helps your brain understand shape, texture, and form. Here are four clear examples to study and practice.
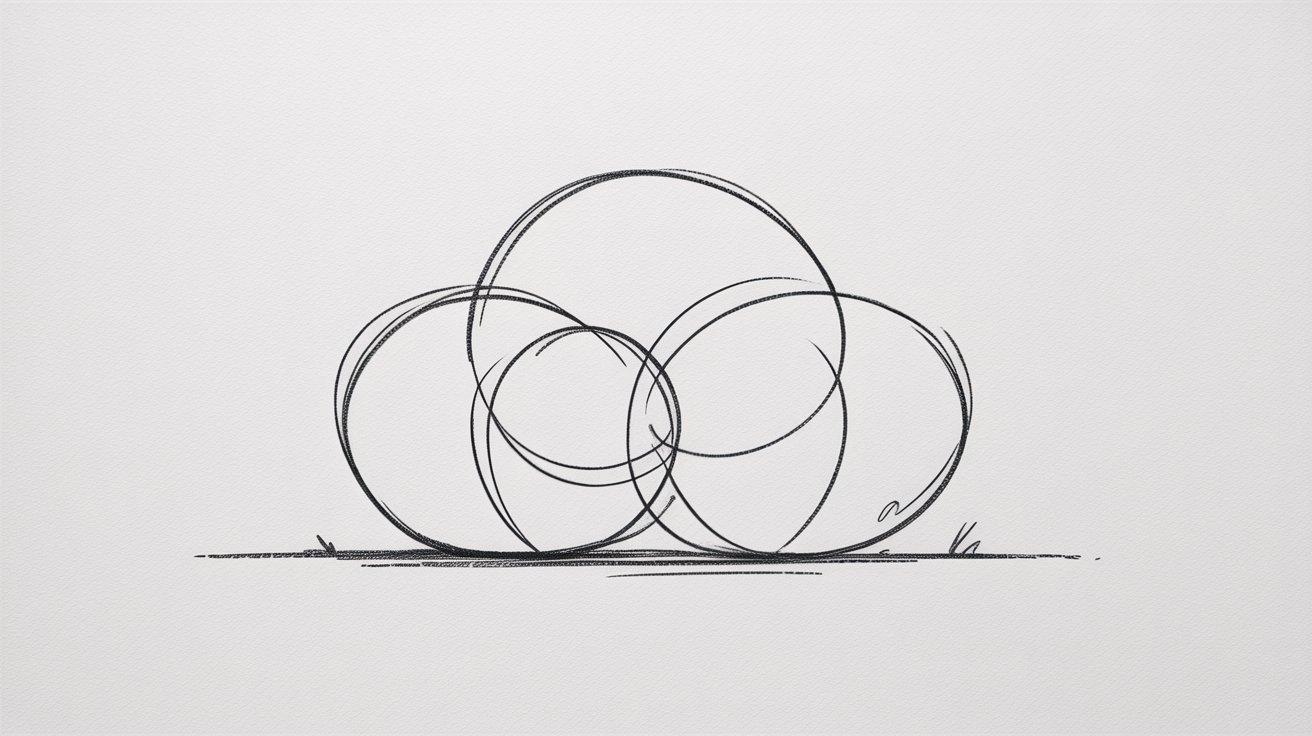
Simple Bush Outline Drawing

A simple bush outline is the best place to start. It uses basic shapes like circles and ovals grouped together to form a bush silhouette.
Draw a few overlapping round shapes along a curved base line. Do not make them too perfect. Real bushes are messy and irregular. Keep your lines loose.
Add a few small bumps along the edges to suggest leaves without drawing each one. This type of drawing is great for warming up or for young learners who are just getting started.
Cartoon-Style Bush Drawing
Cartoon bushes are fun, bold, and quick to draw. You have likely seen them in comics and animated shows. The key features include thick rounded shapes, a flat or slightly curved base, bold outlines with little or no shading, and sometimes a few simple leaf shapes on top.
To draw one, sketch a large round cloud shape, make the bottom flat, add a short thick trunk or stem, and outline it with a darker marker or thick pencil line.
This style is also used in graphic design and children's book illustrations, so it has real practical use.
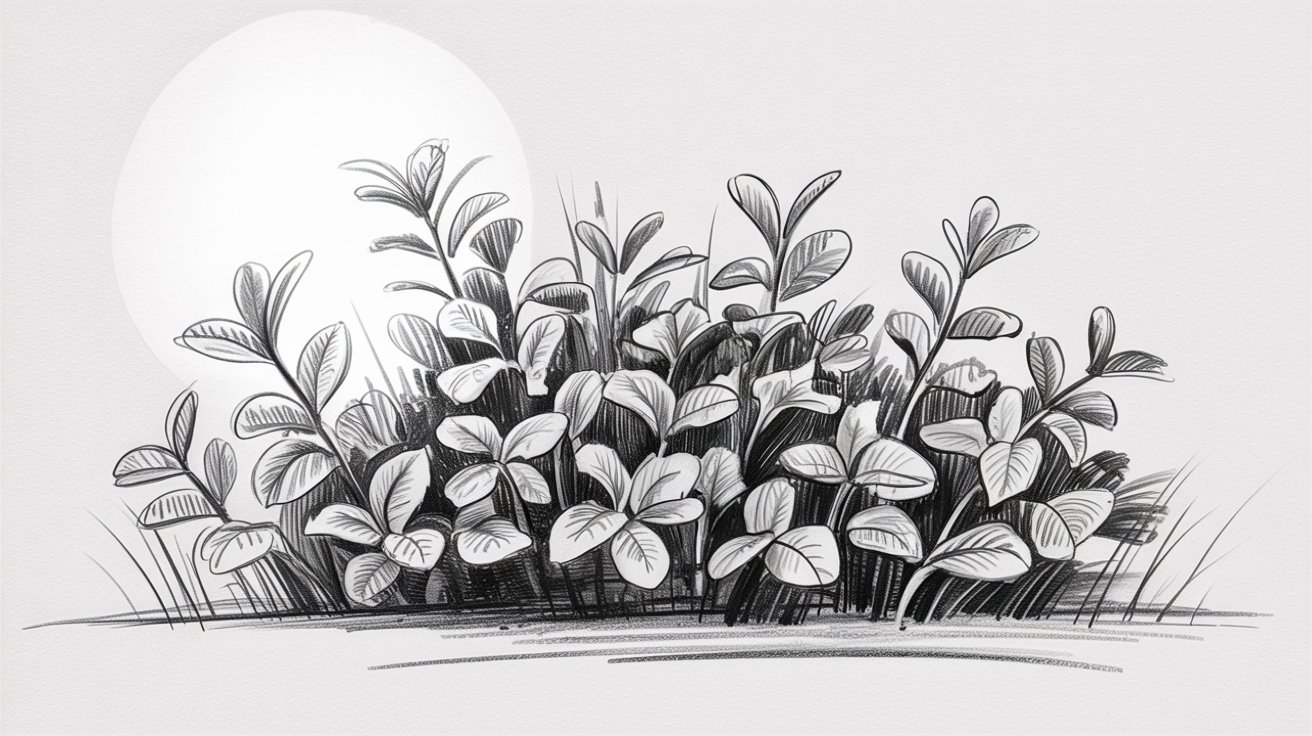
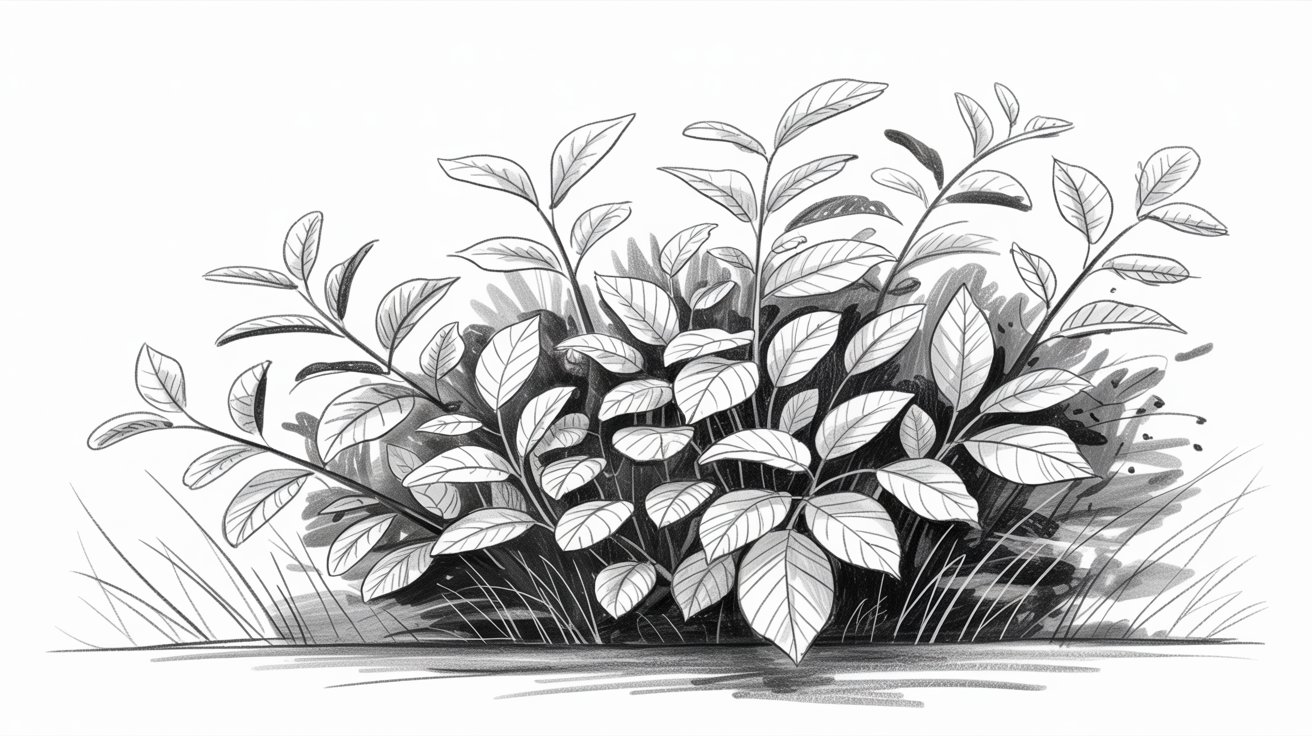
Realistic Bush Drawing with Shading
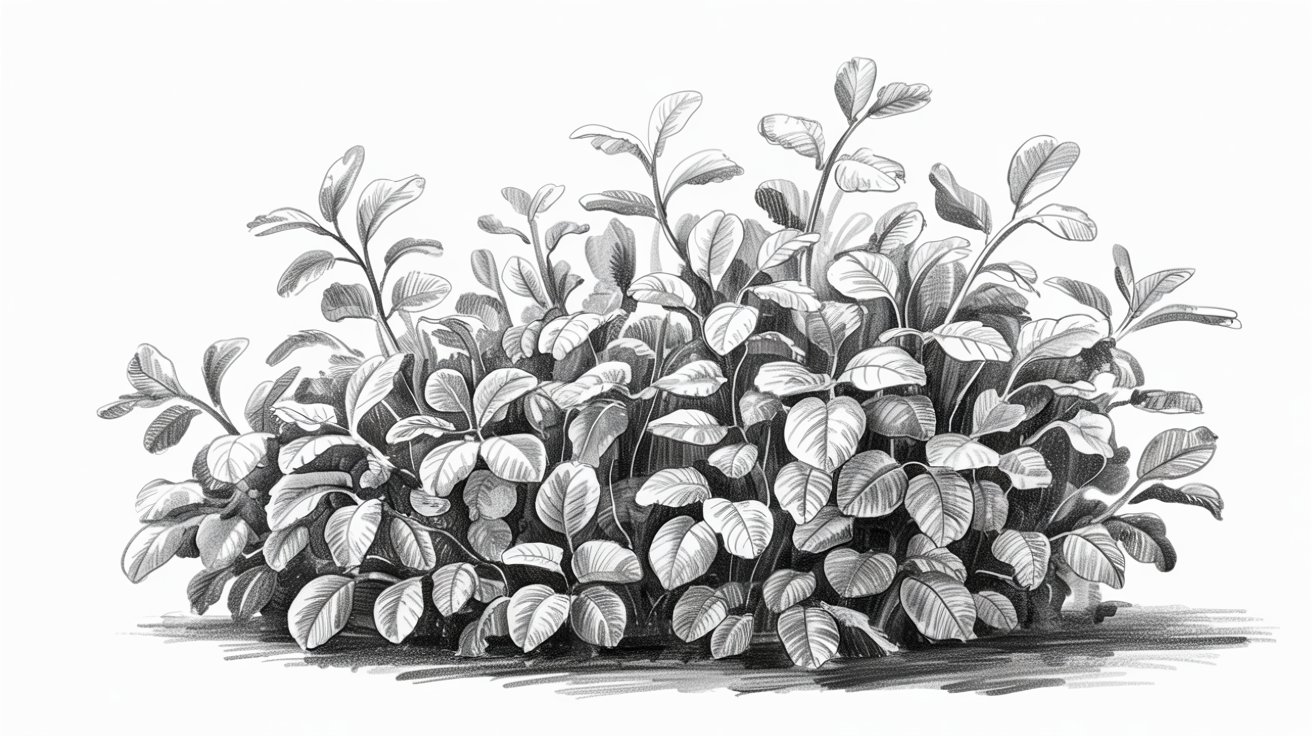
A realistic bush drawing takes more time, but the result looks impressive. The goal is to make your bush look three-dimensional. Do not draw every single leaf. Instead, draw clusters of leaves.
Decide where your light source is before you start shading. The top and outer edges of the bush catch more light while the inner and lower parts stay darker.
Use short, curved pencil strokes to build up texture. Work in layers. Start light and slowly build up the dark areas. This technique makes your bush look full and alive.
Silhouette Bush Drawing for Design

A silhouette is a solid dark shape with no internal detail. It is used a lot in design work, logos, and background art. Sketch the outer edge of your bush shape in a light pencil first.
Then fill the entire shape with dark pencil or ink. Keep the edges slightly uneven to suggest leaves and add no shading or internal lines.
Silhouettes work well when you want a clean, bold look. They are also a great exercise for understanding the overall form of a bush without getting lost in detail.
Step-by-Step Bush Drawing Tutorial
This tutorial walks you through drawing a realistic bush from scratch. Take it one step at a time and do not rush.
Step 1: Draw the Basic Shape and Guidelines
Start by drawing a light, loose oval or dome shape on your paper. This is the outer boundary of your bush.
Inside that dome, sketch two or three smaller overlapping circles. These guide the different sections of the bush, which helps make it look layered rather than flat.
Draw a short horizontal line at the base to show where the bush sits on the ground. Keep all these lines very light. You will erase most of them later.
Step 2: Outline the Leaves

Now begin drawing the outer edge of the bush with small, bumpy lines. Do not use one smooth curve. Instead, make short, jagged strokes that suggest clusters of leaves.
Work around the whole outer edge. Then add a few inner lines to separate the different sections of the bush you sketched in Step 1.
Do not draw every leaf. Think in groups. A cluster of five to ten leaves drawn as one bumpy shape looks more natural than fifty individually drawn leaves.
Step 3: Add Shading and Depth
Pick a light source. For this tutorial, imagine light coming from the top left.
The top left area of the bush stays light. Leave it mostly white or use very soft, light strokes there.
Move toward the right and lower sections and begin adding shading. Use soft pencil strokes in short curved lines. Build the darkness up slowly. Do not press hard right away.
The inner parts of the bush, where the sections overlap, should be the darkest. This is what creates depth and makes the bush look full.
Step 4: Refine Foreground and Background
The front part of the bush should have more detail and contrast. The back parts should look softer and less defined.
Use your blending stump to soften the background areas. Then go back to the front sections and sharpen the leaf shapes with a well-pointed pencil.
Add a few small individual leaves along the outer edges of the foreground section. These small details make the drawing feel real without overcomplicating it.
Step 5: Final Details and Dark Areas

Look at your drawing and find the darkest spots. These are usually deep inside the bush where light cannot reach.
Use your softest pencil (4B or 6B) to deepen these areas. Press firmly in the darkest spots. Blend lightly at the edges so they fade naturally into the lighter areas.
Add a few small lines or dots on the lighter sections to suggest leaf texture. Then erase any leftover guidelines from Step 1.
Step back, look at the whole drawing, and make small fixes where needed. You are done.
Tips to Make Your Bush Drawing Look Realistic
Small changes in technique can take your bush drawing from flat to lifelike.
- Decide your light source first. Before shading, pick where the light comes from and stick to it. The lit side stays pale and the opposite side goes dark.
- Use three value levels. Work with very light, medium, and very dark tones in every drawing. Having all three makes the bush look full and balanced.
- Layer from back to front. Keep background sections soft with less detail. Add more contrast and sharper edges as you move toward the foreground.
- Think in clusters, not single leaves. Draw groups of leaves as one bumpy shape instead of drawing each leaf one by one. It looks far more natural.
- Let shading do the work. Less leaf detail is better. Draw the shadow shapes between clusters and let the viewer's eye fill in the rest.
Common Mistakes to Avoid in Bush Drawing
Knowing what not to do helps just as much as knowing what to do. These three mistakes appear again and again in beginner drawings.
Drawing Leaves Too Uniformly
When every leaf is the same size, same shape, and same direction, the bush looks artificial. Real bushes are irregular and random.
To fix this, vary your leaf cluster sizes. Some groups should be bigger. Some should be tiny. Change the direction of your strokes from section to section.
A little randomness in your line work goes a long way.
Ignoring Shadows and Light Source
A bush drawn without shadows looks like a flat cutout. Shadows are not optional. They are what give the drawing form and volume.
If you skip shading, your bush will look like a green cloud. Always shade, even if it is just a light pass of soft pencil on the lower and inner areas.
Overcomplicating the Sketch
Some beginners try to draw every branch, every leaf, and every twig. This creates a messy drawing that is hard to read from a distance.
Keep your approach simple. Focus on the big shapes first. Add detail only in key areas. A clean, well-shaded drawing with a few details always looks better than a cluttered one.
Creative Uses of Bush Drawing References
Bush drawing is not just a practice exercise. It has real uses in art and design work that go far beyond a sketchbook page.
Landscape Sketching and Outdoor Scenes
Bushes are a regular part of landscape art. Learning to draw them well lets you build full outdoor scenes with gardens, forests, parks, and natural settings.
Once you are comfortable drawing one bush, you can:
- Draw rows of bushes along a path
- Add bushes in the foreground of a landscape
- Use them to frame a building or figure in a scene
Good bush drawing skills make your landscapes feel complete and grounded.
Graphic Design and Illustration Projects
Bushes appear in logos, maps, icons, greeting cards, and book illustrations. If you work in design or illustration, knowing how to draw a clean, readable bush shape is a practical skill.
Cartoon-style and silhouette bushes work especially well in:
- App icons and flat design projects
- Children's book illustrations
- Hand-drawn maps and infographics
- Decorative border designs
Practice Exercises for Artists
Bush drawing is also a great warm-up exercise. It trains your hand to draw irregular organic shapes, which is a skill that carries over into drawing trees, clouds, hair, and foliage.
Try these short practice drills:
- Draw ten different bush silhouettes in five minutes
- Shade the same bush outline three different ways
- Draw a bush from observation, using a photo or a real plant as reference
Regular practice like this builds confidence and improves your overall drawing ability faster than you might expect.
Conclusion
Drawing bushes gets easier the more you practice. I remember the first time I tried drawing one. It looked like a lumpy potato. But after practicing the shapes and shading a few times, things started to click.
Start with the basic outline, add some shading, and do not stress over perfection. The process is the point.
If this guide helped you, leave a comment below and share what worked for you. Feel free to pass it along to a friend who draws too.
Frequently Asked Questions
What is the easiest type of bush to draw for beginners?
A simple rounded outline using overlapping oval shapes is the best starting point. It does not require any shading or detail, making it easy for anyone to try on their first attempt.
Do I need special pencils for bush drawing?
No special pencils are required. A standard HB pencil for outlines and a 4B pencil for shading is all you need to create a solid bush drawing with depth and texture.
How do I make my bush drawing look more realistic?
Focus on shading rather than drawing every leaf. Use a clear light source, keep the top areas light, and make the inner sections darker. This contrast is what gives the drawing a natural, three-dimensional look.
How long does it take to learn bush drawing?
Most people can draw a decent-looking bush after a few focused practice sessions. Spending 15 to 20 minutes a day on basic shapes and shading is enough to see noticeable progress within a week.
Can bush drawing skills help with other types of art?
Yes. Practicing bush shapes improves your ability to draw other organic forms like trees, clouds, and hair. The skills you build, including shading, texture, and loose line work, apply across many areas of drawing and illustration.