


Star stitch embroidery is one of those stitches that looks complex but is surprisingly easy to learn.
It goes beyond a basic straight-stitch star by adding extra crossing threads that create a fuller, more detailed shape.
Both beginners and experienced embroiderers love it because it works on almost anything. You can use it to mend worn fabric, add decorative details, or mix it into other art forms.
Once you try it, you will want to add it everywhere.
What Is Star Stitch in Embroidery?

The star stitch is a classic hand embroidery technique. It adds texture and detail to fabric with simple crossed threads.
Basic Structure of the Star Stitch
The star stitch is built on a five-point structure. You place straight stitches that cross over each other at the center, creating a star shape.
Some embroiderers add an extra layer of stitches on top to make it look fuller and more defined.
Tension plays a big role here. Pull too tight and the stitch puckers. Keep it too loose and it looks flat. A consistent, medium tension gives you a clean, well-shaped star every time.
Tools & Materials Needed
Fabric Types:
- Cotton and linen hold the stitch well and are great for beginners.
- Denim gives the star stitch a bold, casual look.
- Knits stretch, so always use a stabilizer underneath to keep the shape.
Thread Choices:
- Cotton floss is easy to control and comes in many colors.
- Metallic thread adds a shiny finish, perfect for festive or decorative pieces.
- Variegated thread creates a natural color shift, making each star look unique.
When to Use Stabilizer:
- Use it on thin or stretchy fabrics to keep everything in place and get a cleaner result.
How to Do Star Stitch Embroidery (Quick Overview)
Learning star stitch is straightforward when you break it into steps. Follow this simple overview to get started and build confidence with every stitch.
Step 1 – Marking the Five Points

Start by drawing a small circle on your fabric as a guide. Mark five evenly spaced points around it.
This keeps your star balanced and symmetrical. Use a water-soluble pen so the marks wash out cleanly once you are done stitching.
Step 2 – Creating the First Star Layer

Bring your needle up at one marked point and skip to the point across from it. Connect each point using this skip-and-connect pattern.
Work around all five points to complete the first layer. This forms the base shape of your star stitch.
Step 3 – Weaving the Second Layer

Go back over the first layer in the same direction. Weave your thread slightly over and under the existing stitches to build fullness.
Keep your tension consistent throughout. This second layer gives the star its lifted, dimensional look that sets it apart from a basic straight stitch.
Want a full step-by-step walkthrough with photos? Check out our detailed star stitch tutorial for a closer look at every stage.
Creative Applications of Star Stitch Embroidery
Star stitch works across so many projects. From fixing old clothes to making wall art, here are some of the best ways to put it to use.
1. Decorative Mending (Visible Mending Technique)

Star stitch turns repairs into design features. Use it to cover holes in sweaters, reinforce worn denim knees, or fix children’s clothing in a fun way. Match the thread to blend in or pick a contrasting color to make the repair stand out.
2. Star Stitch on Denim & Jackets

Denim is perfect for star stitch. Create a celestial back panel, scatter small stars across pockets, or stitch constellation-inspired designs on jacket sleeves. It gives any denim piece a hand-crafted, personal feel.
3. Holiday & Seasonal Embroidery
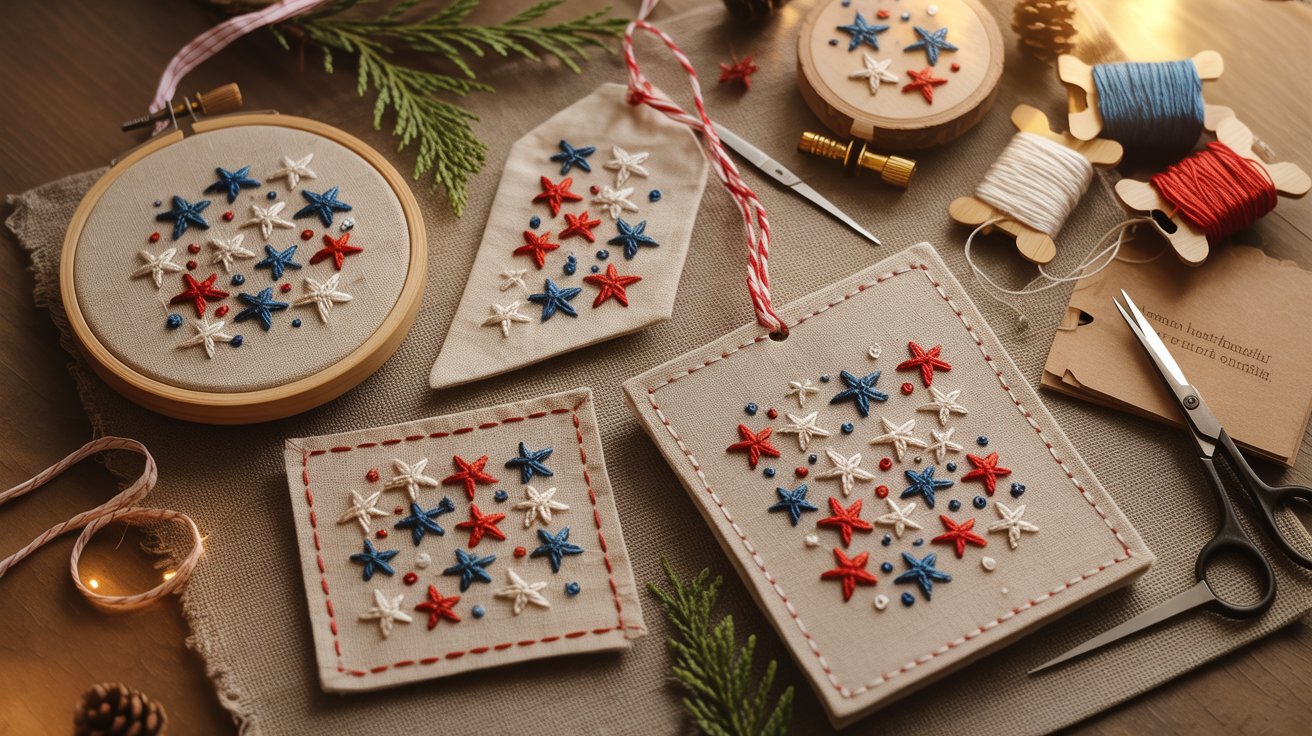
Star stitch fits right into holiday making. Add it to Christmas ornaments, handmade gift tags, or tree toppers. For patriotic themes, use red, white, and blue star clusters on tote bags or table linens.
4. Nursery & Kids’ Room Decor

Stitch a starry sky hoop for a nursery wall or personalize it with a child’s name. Metallic thread gives a soft glow effect that works beautifully under warm lighting. These also make great handmade gifts.
5. Travel & State-Themed Designs

Use small stars to mark cities or meaningful locations on an embroidered map. Combine star stitch with outline stitching to define borders and bring the map to life. It turns fabric into a personal keepsake.
Design Ideas Using Star Stitch Embroidery
Star stitch pairs well with other techniques and styles. Here are some design directions worth trying.
1. Galaxy & Celestial Hoops

Mix star stitch with French knots to mimic a real night sky. Add crescent moons and simple planet shapes around the stars.
Dark fabric like navy or black makes the thread colors pop and gives the whole piece a deep, starry feel.
2. Minimalist Modern Designs

Sometimes one large, well-placed star says more than a full pattern. Try a single statement star at the center of a hoop or on a plain tote bag.
Geometric layouts with evenly spaced stars and neutral thread colors keep things clean and modern without looking busy.
3. Layered & Textured Effects
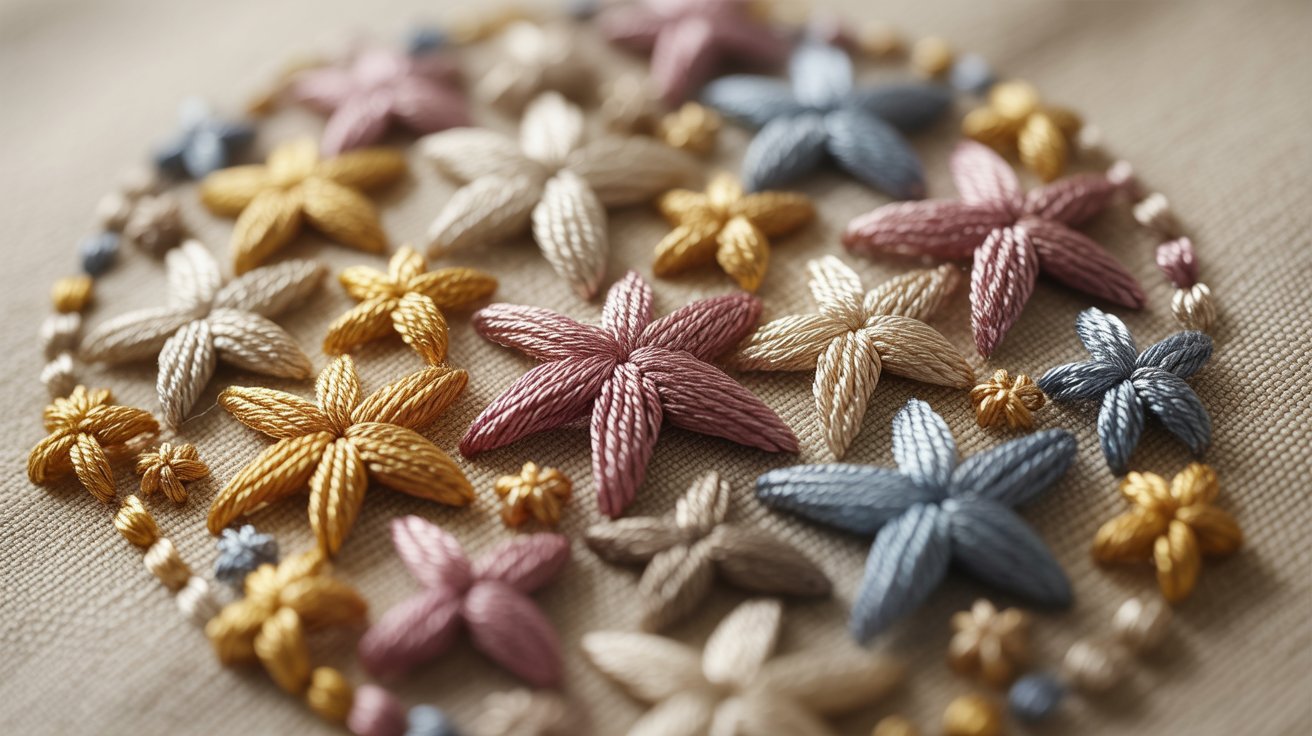
Combine star stitch with satin stitch to add filled shapes around your stars. Metallic or silk threads give each stitch a subtle shine that catches the light.
Mixing small and large stars in the same piece adds depth and makes the design feel more dynamic.
Choosing the Right Thread & Fabric for Star Stitch

Cotton floss is the most reliable choice for clean, bold stars. Pearl cotton adds thickness and definition. Metallic thread works well for decorative or festive pieces.
For fabric, lightweight materials like cotton and linen are the easiest to work with. Stretch fabrics need a stabilizer to stop the shape from distorting.
Thick fabrics like denim require a sharp needle. Always keep your hoop tension firm but not overly tight to avoid puckering.
Common Mistakes & How to Fix Them
- Uneven star points usually come from skipping the guide marks. Always pre-mark your five points before you start stitching.
- A loose or gapped center means your first layer needs more support. Add an extra weaving pass over the center to tighten it up.
- Fabric puckering happens when hoop tension is too tight. Loosen it slightly and make sure your thread tension stays consistent throughout.
- Thin or stretchy fabrics tend to distort under the stitch. Use interfacing or a stabilizer on the back before you begin.
- If your stars look flat, your second layer may be missing. Go back and weave an extra layer in the same direction to build shape.
Conclusion
Star stitch is one of those techniques that never gets old. It repairs worn fabric just as well as it decorates a fresh piece.
The more you work with it, the more possibilities you find. Try different sizes, play with bold or neutral colors, and place stars where you least expect them.
That is where the real fun begins. Pick up your needle and add star stitch to your next project. You will not regret it.
Frequently Asked Questions
What is star stitch embroidery used for?
Star stitch works great for decorative designs, visible mending, and adding texture to fabric. You can use it on clothing, hoops, home decor, and handmade gifts.
Is star stitch suitable for beginners?
Yes, star stitch is beginner friendly. Once you understand the five-point structure and practice consistent tension, it becomes easy to repeat across any project.
What thread works best for star stitch embroidery?
Cotton floss is the most popular choice for clean, defined stars. Pearl cotton and metallic thread are good options when you want more texture or shine.
Can I use star stitch on stretchy fabric?
You can, but always use a stabilizer on the back first. This stops the fabric from distorting and keeps your star shape clean and even.
How do I fix uneven star points in my embroidery?
Pre-mark your five points with a water-soluble pen before stitching. Taking time to space them evenly at the start saves a lot of correction later.
