


The first time I tried soft pastel art, I made a mess, and I loved every second of it.
If you’ve been curious about soft pastel art but don’t know where to start, you’re in the right place.
In this guide, I’ll walk you through everything, from what soft pastels are to the tools you need and a simple beginner tutorial you can try today.
I’ve worked with dozens of art mediums over the years, and soft pastels have a quality that most beginners completely overlook, keep reading to see what I mean.
What Are Soft Pastels?
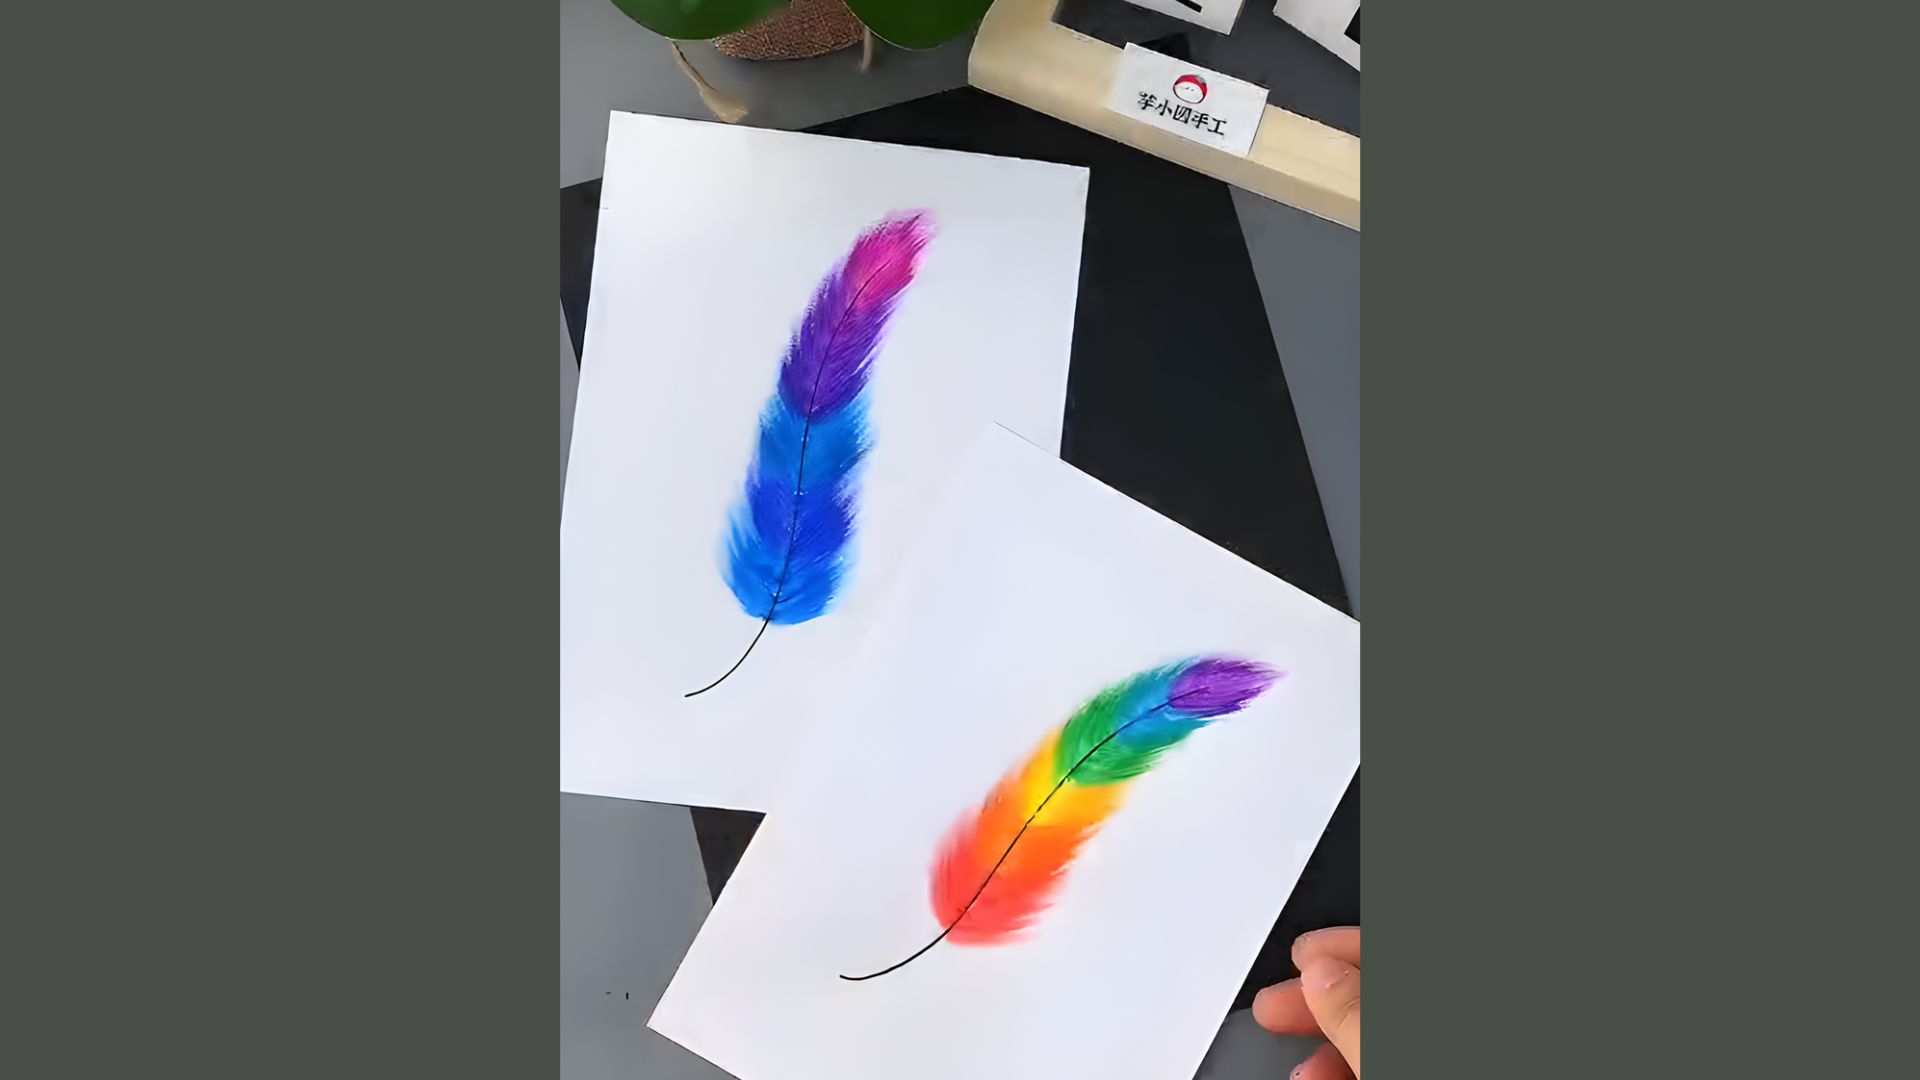
Soft pastels are drawing sticks made from powdered pigment and a small amount of binder.
They sit somewhere between drawing and painting, you get bold color with a powdery, blendable finish.
Unlike oil pastels, soft pastels go on smooth and light. They work well on textured paper, which grips the pigment and holds the color in place.
The result is soft, layered artwork that looks almost dreamy without much effort.
Materials and Tools Required for Soft Pastel Art
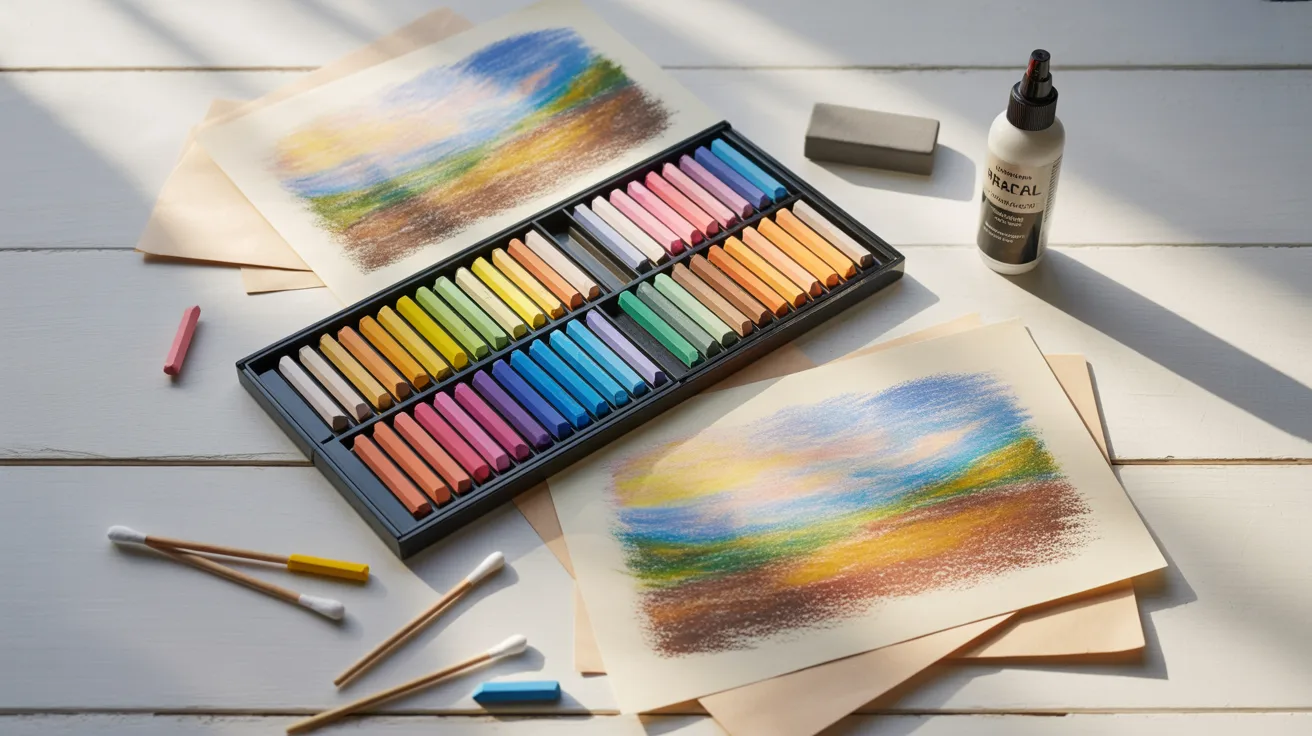
Here’s everything you need before you start your first soft pastel piece.
Soft pastel sticks: 24–36 color set for layering and blending.
Textured pastel paper: Holds pigment firmly and supports smooth blending.
Cotton buds: Blend edges in soft circular motions for clean transitions.
Kneaded eraser: Lightens centers and lifts color for highlights.
Fixative spray: Sets the finished artwork and reduces smudging.
Basic Soft Pastel Techniques
Learning a few key techniques early on will make your artwork look cleaner and more confident from the very first stroke.
Side Strokes
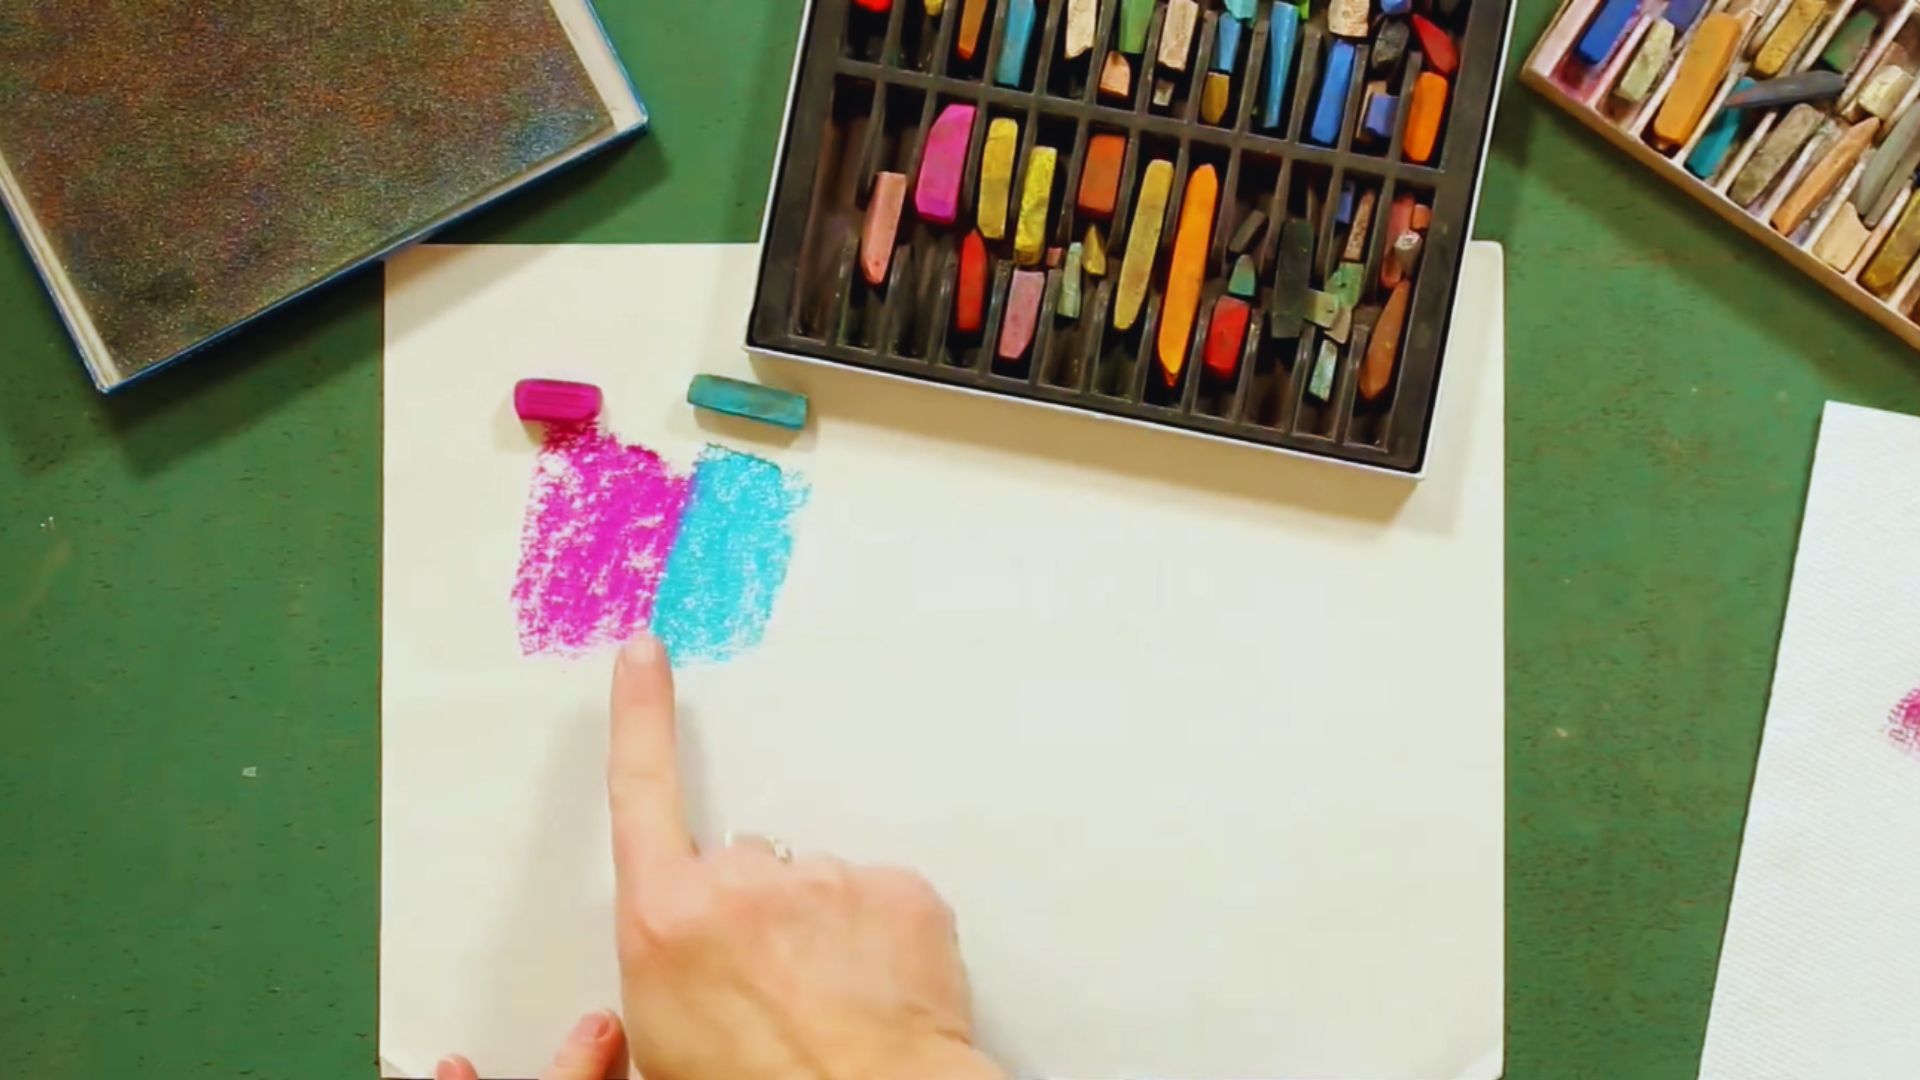
Hold the pastel on its side and drag it across the paper. This covers large areas fast and creates a soft, even layer of color.
It’s great for backgrounds.Once you get comfortable with this stroke, you’ll use it in almost every piece you create.
Blending Techniques
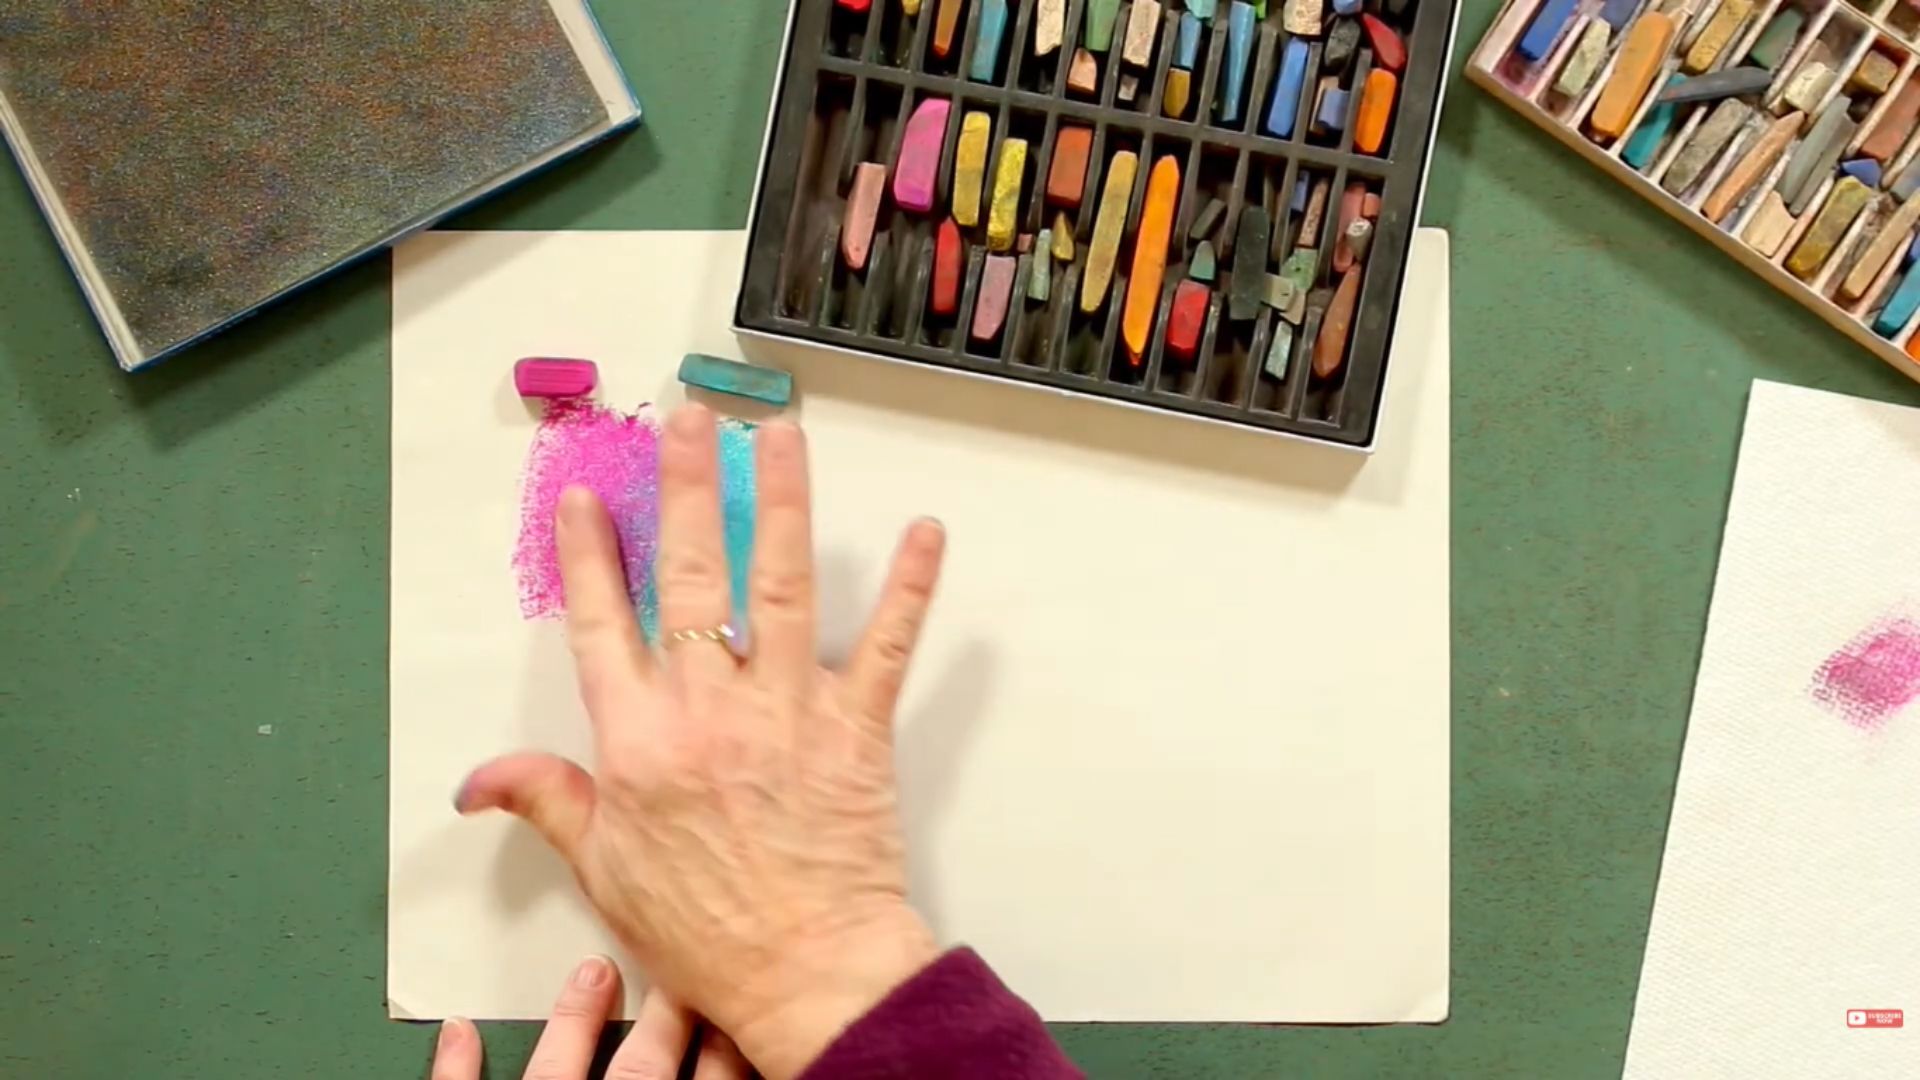
Use your finger, a cotton bud, or a blending stump to mix two colors together. Blend in small circular motions for smooth gradients.
Work gently, too much pressure can muddy the colors.The lighter your touch, the more control you’ll have over the final result.
Drawing Shapes and Lines
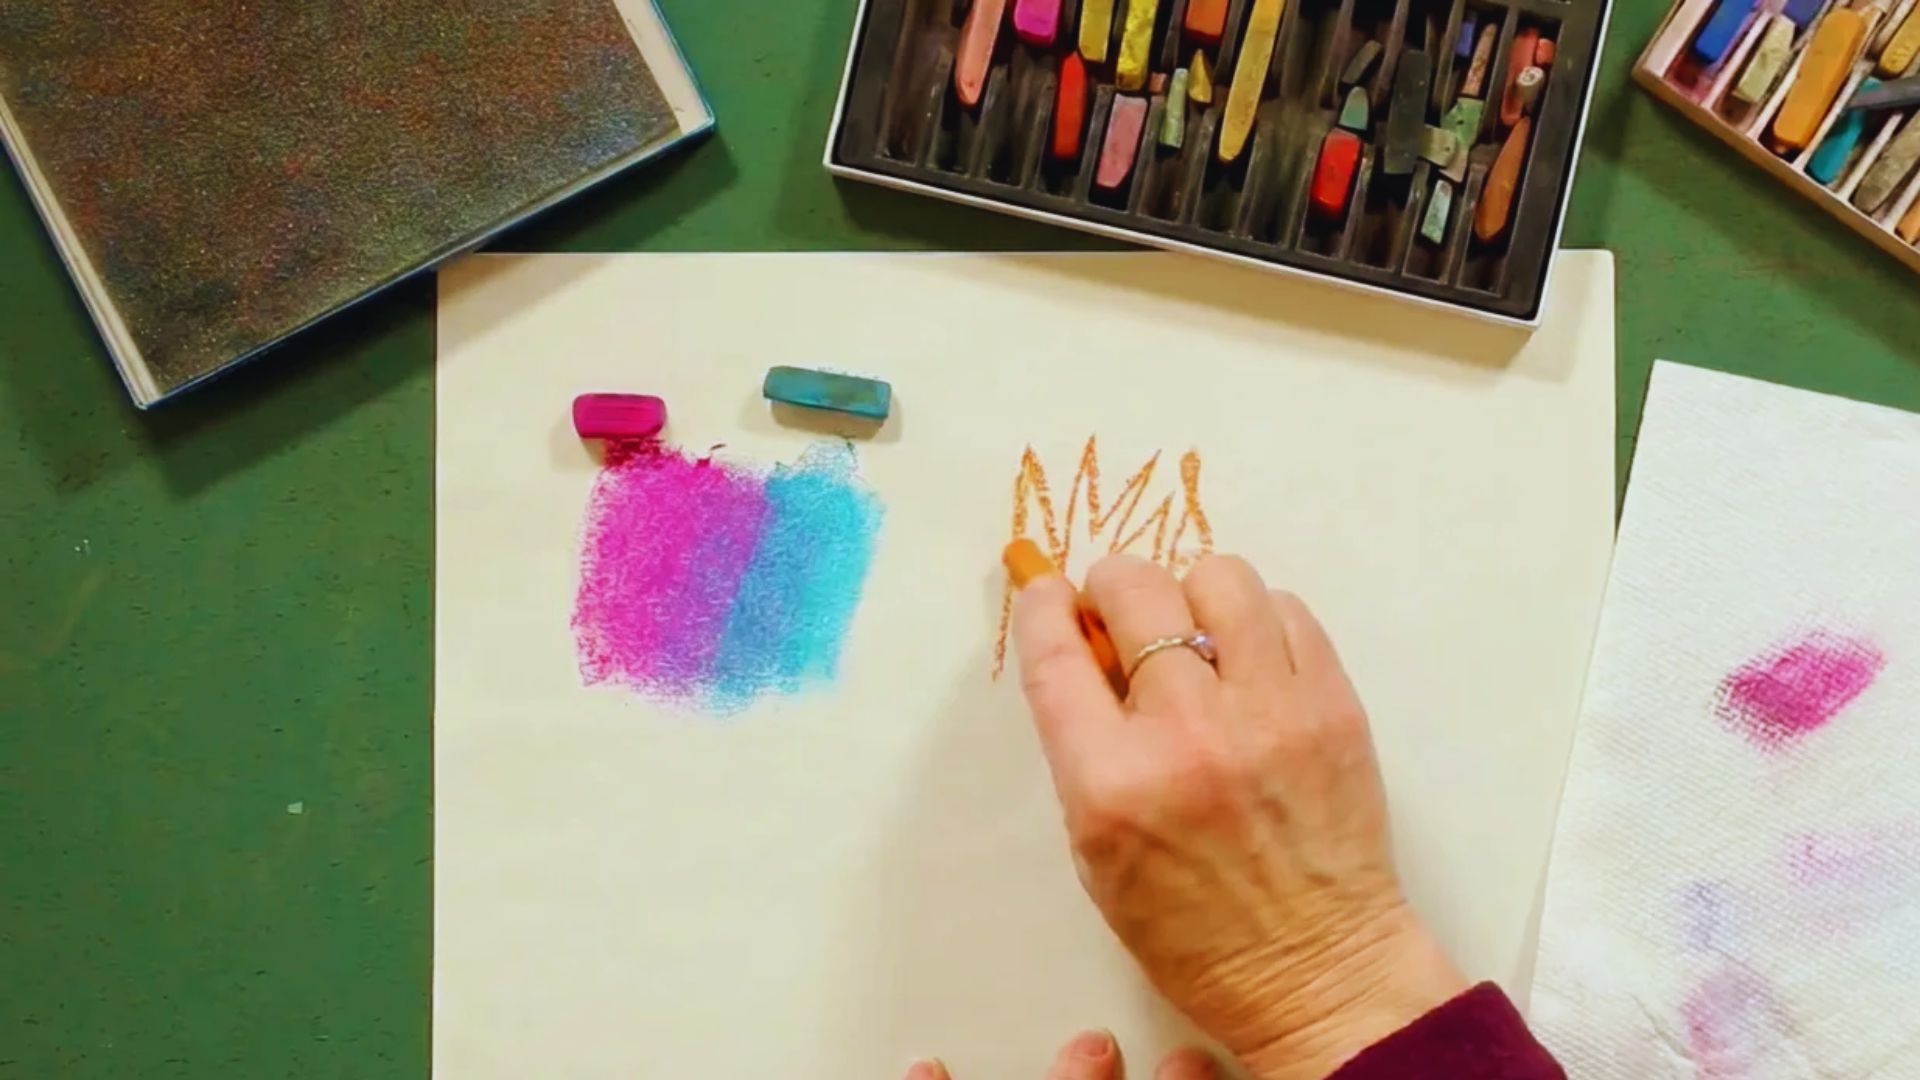
Hold the pastel at the tip for sharper lines and defined shapes. Press lightly for thin lines or add more pressure for bold, thick strokes.
This gives you control over details.Practicing this on scrap paper first will help you feel more confident on your main piece.
Dots and Short Strokes
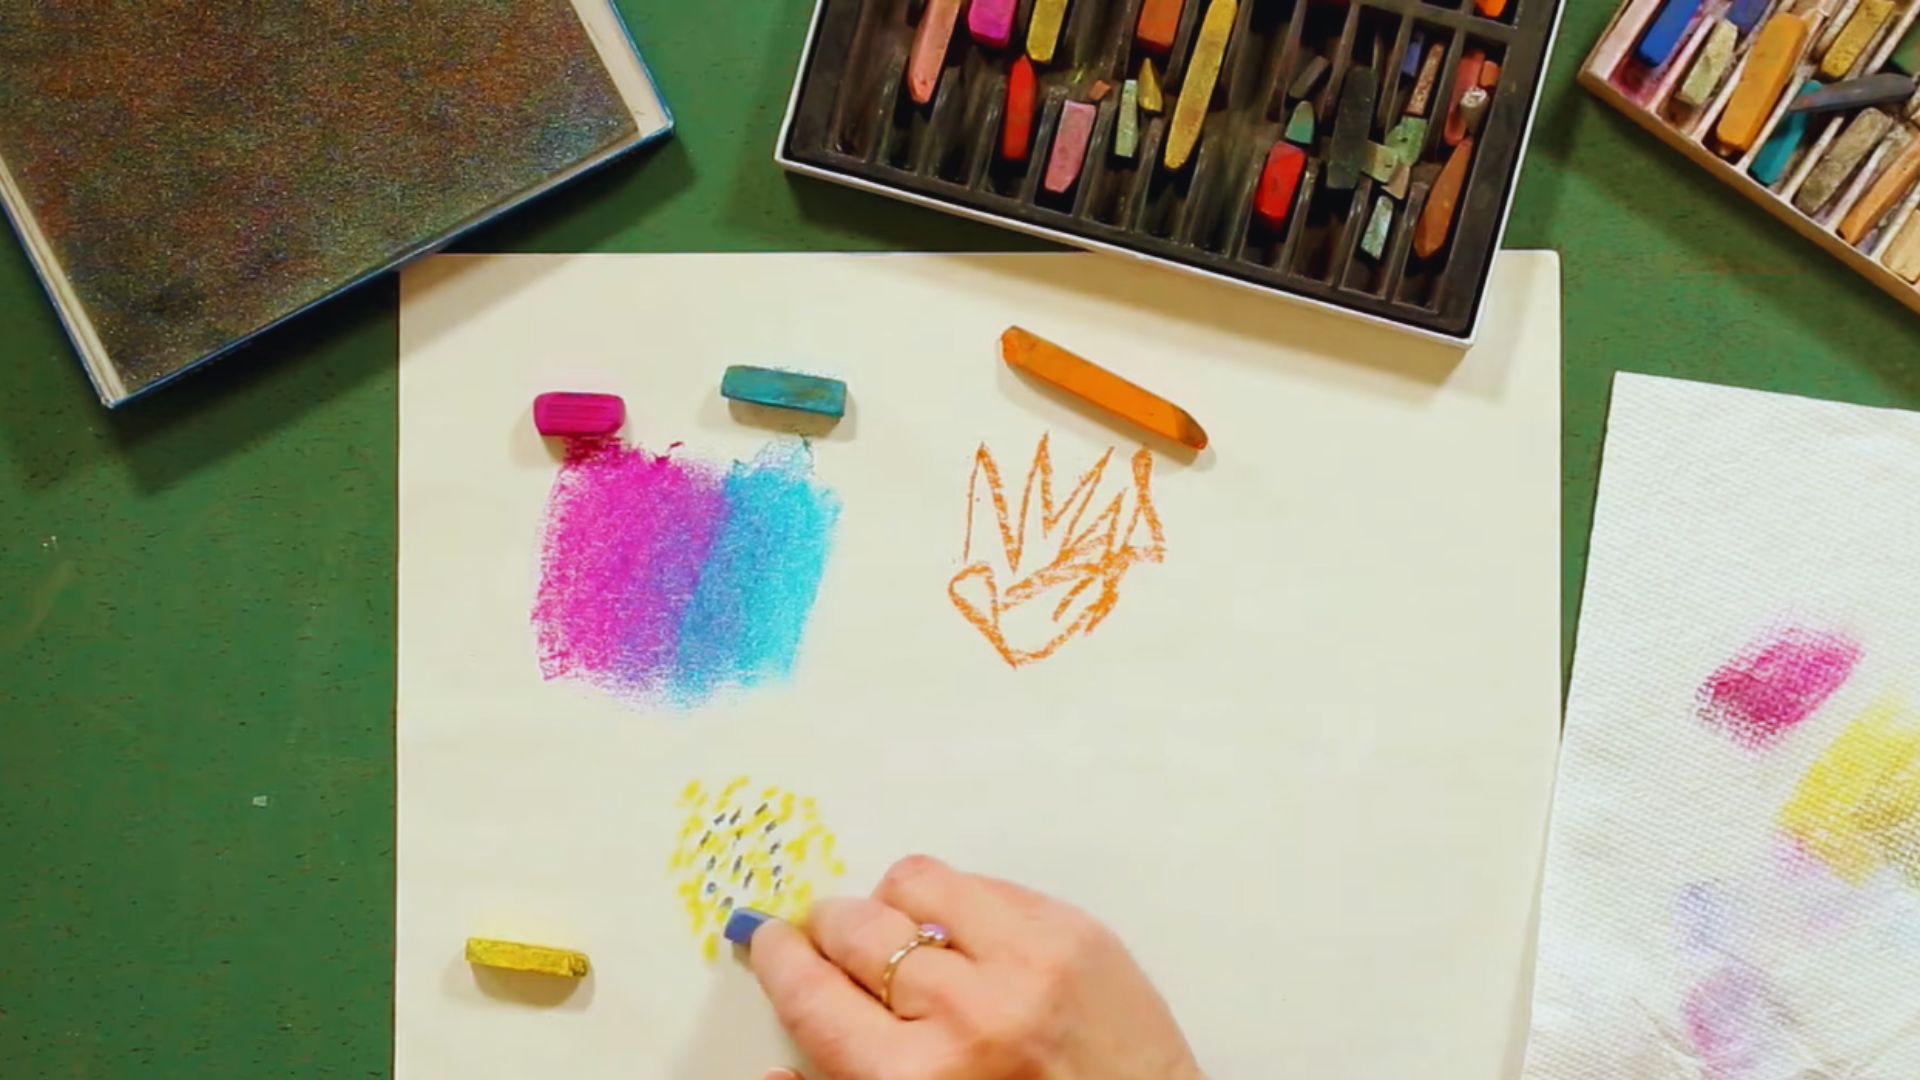
Tap the tip of the pastel onto the paper to make dots. Use short, quick strokes for texture. This technique works well for adding detail to flowers, foliage, or fur.
It’s one of those small moves that makes a big difference in how finished your artwork looks.
Rolling and Twisting the Pastel
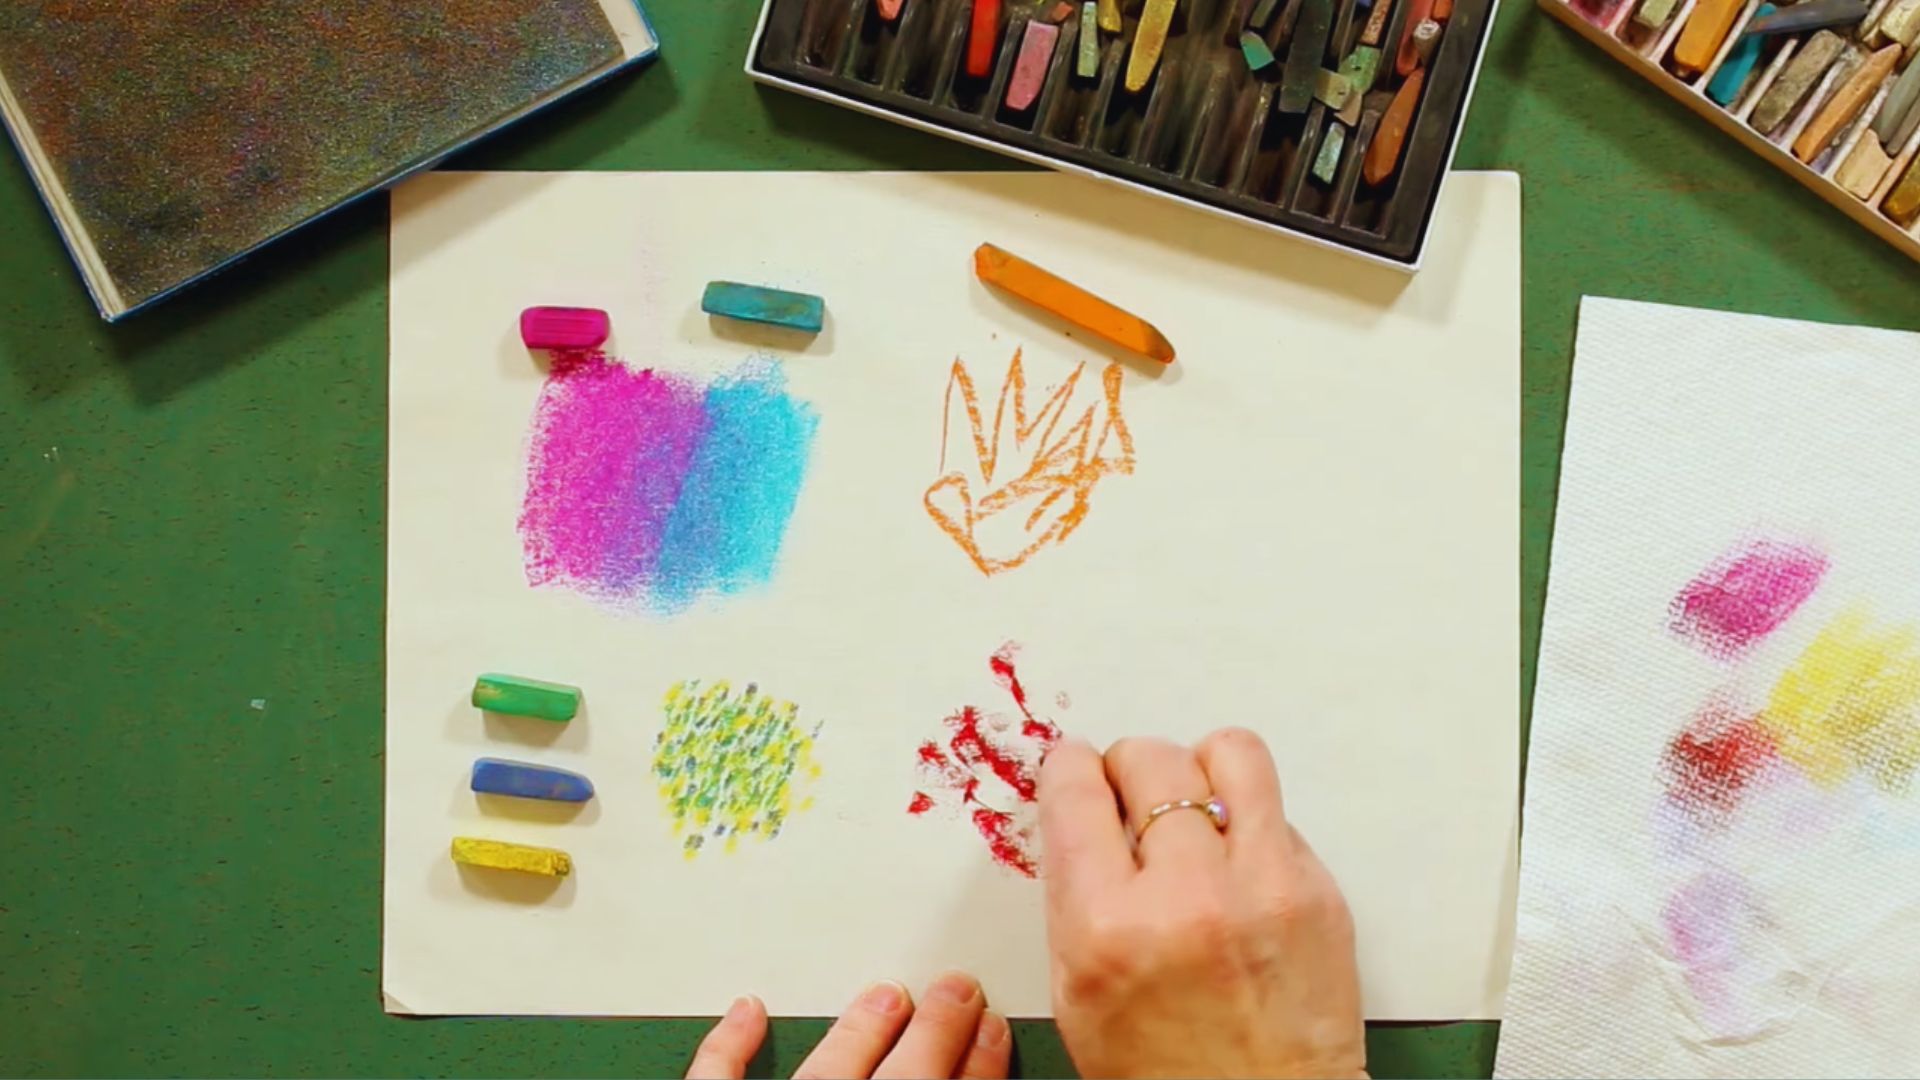
Slowly roll or twist the pastel as you draw to get varied line widths in a single stroke. This creates natural-looking lines with slight changes in thickness throughout.
It’s a simple trick that adds a lot of life and movement to your work.
Cross-Hatching
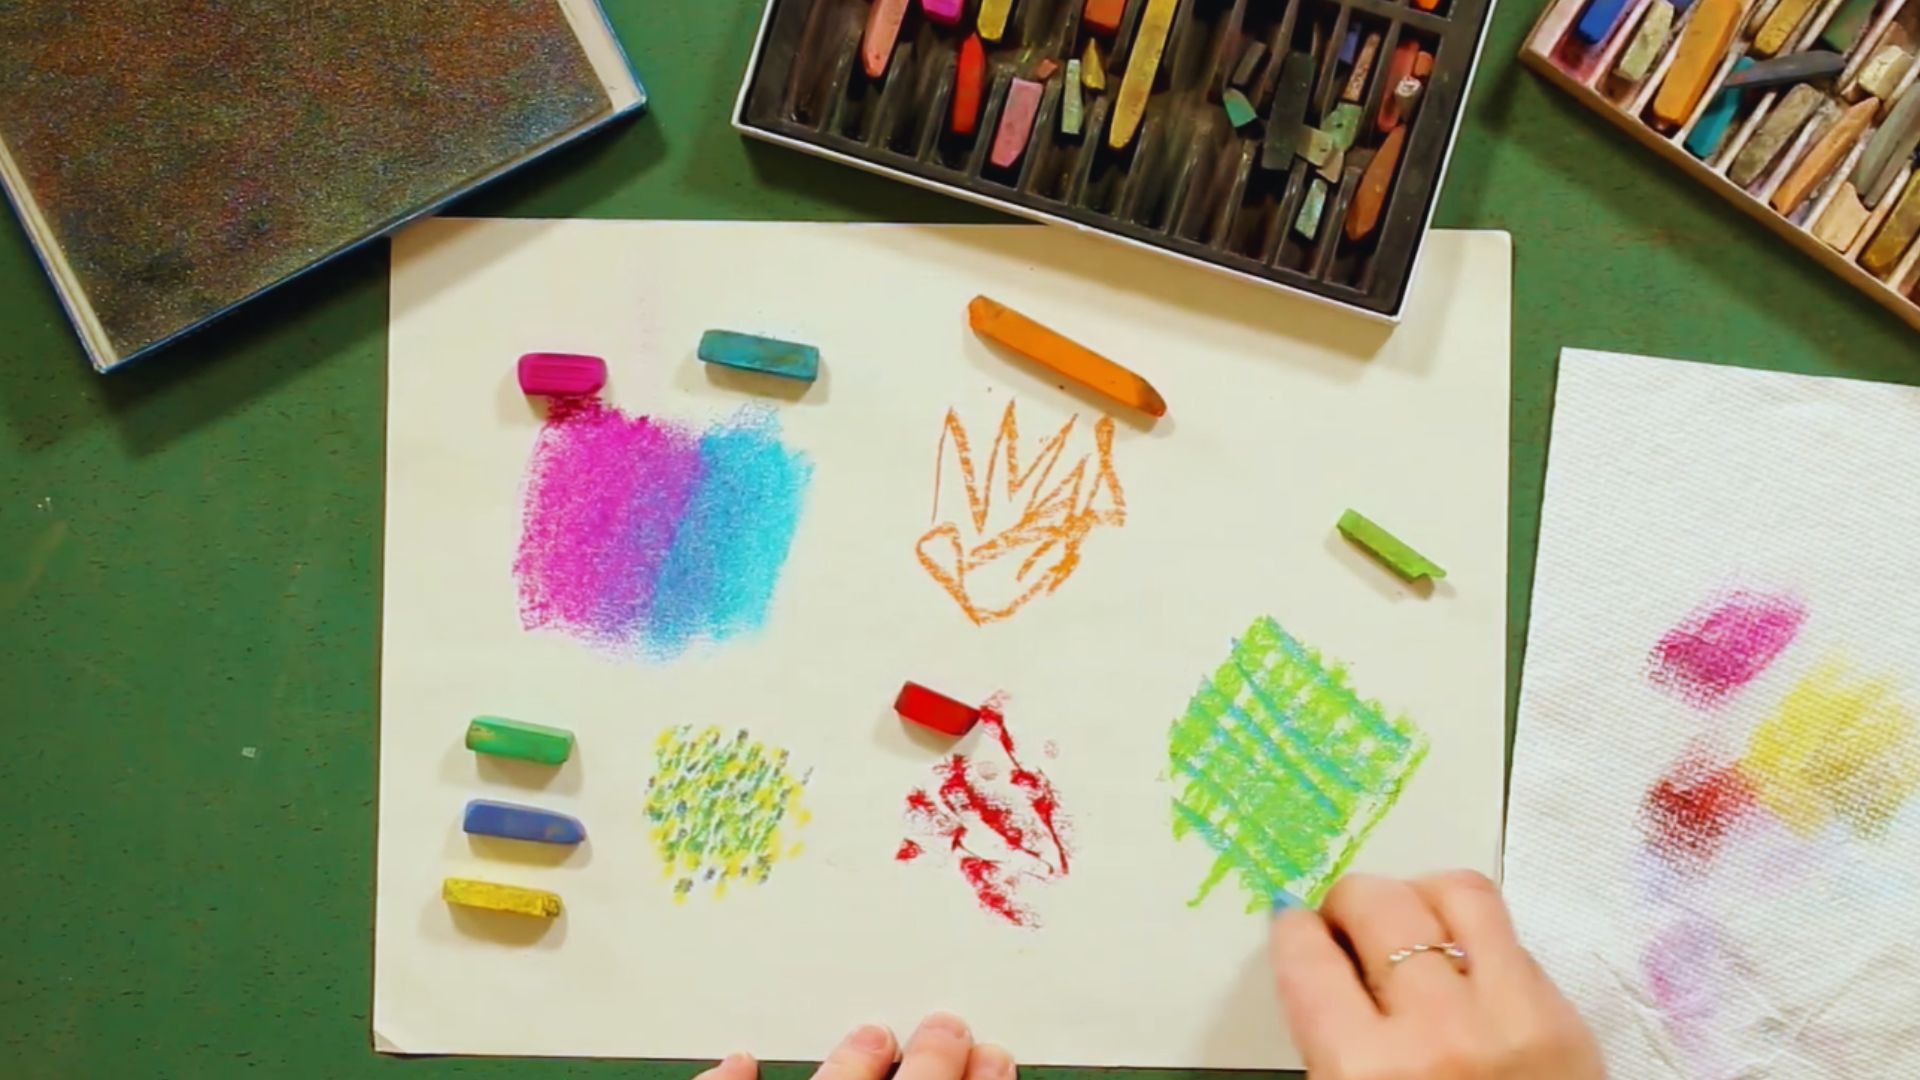
Draw overlapping lines in two or more directions to build up tone and texture. This works best when you want to shade an area without fully blending the colors together.
With a little practice, cross-hatching can give your artwork a rich, layered look that stands out.
How I Create Soft Pastel Art: A 5-Step Beginner Guide
These five steps will walk you through your first soft pastel piece from start to finish.
Step 1: Drawing the Base Guideline
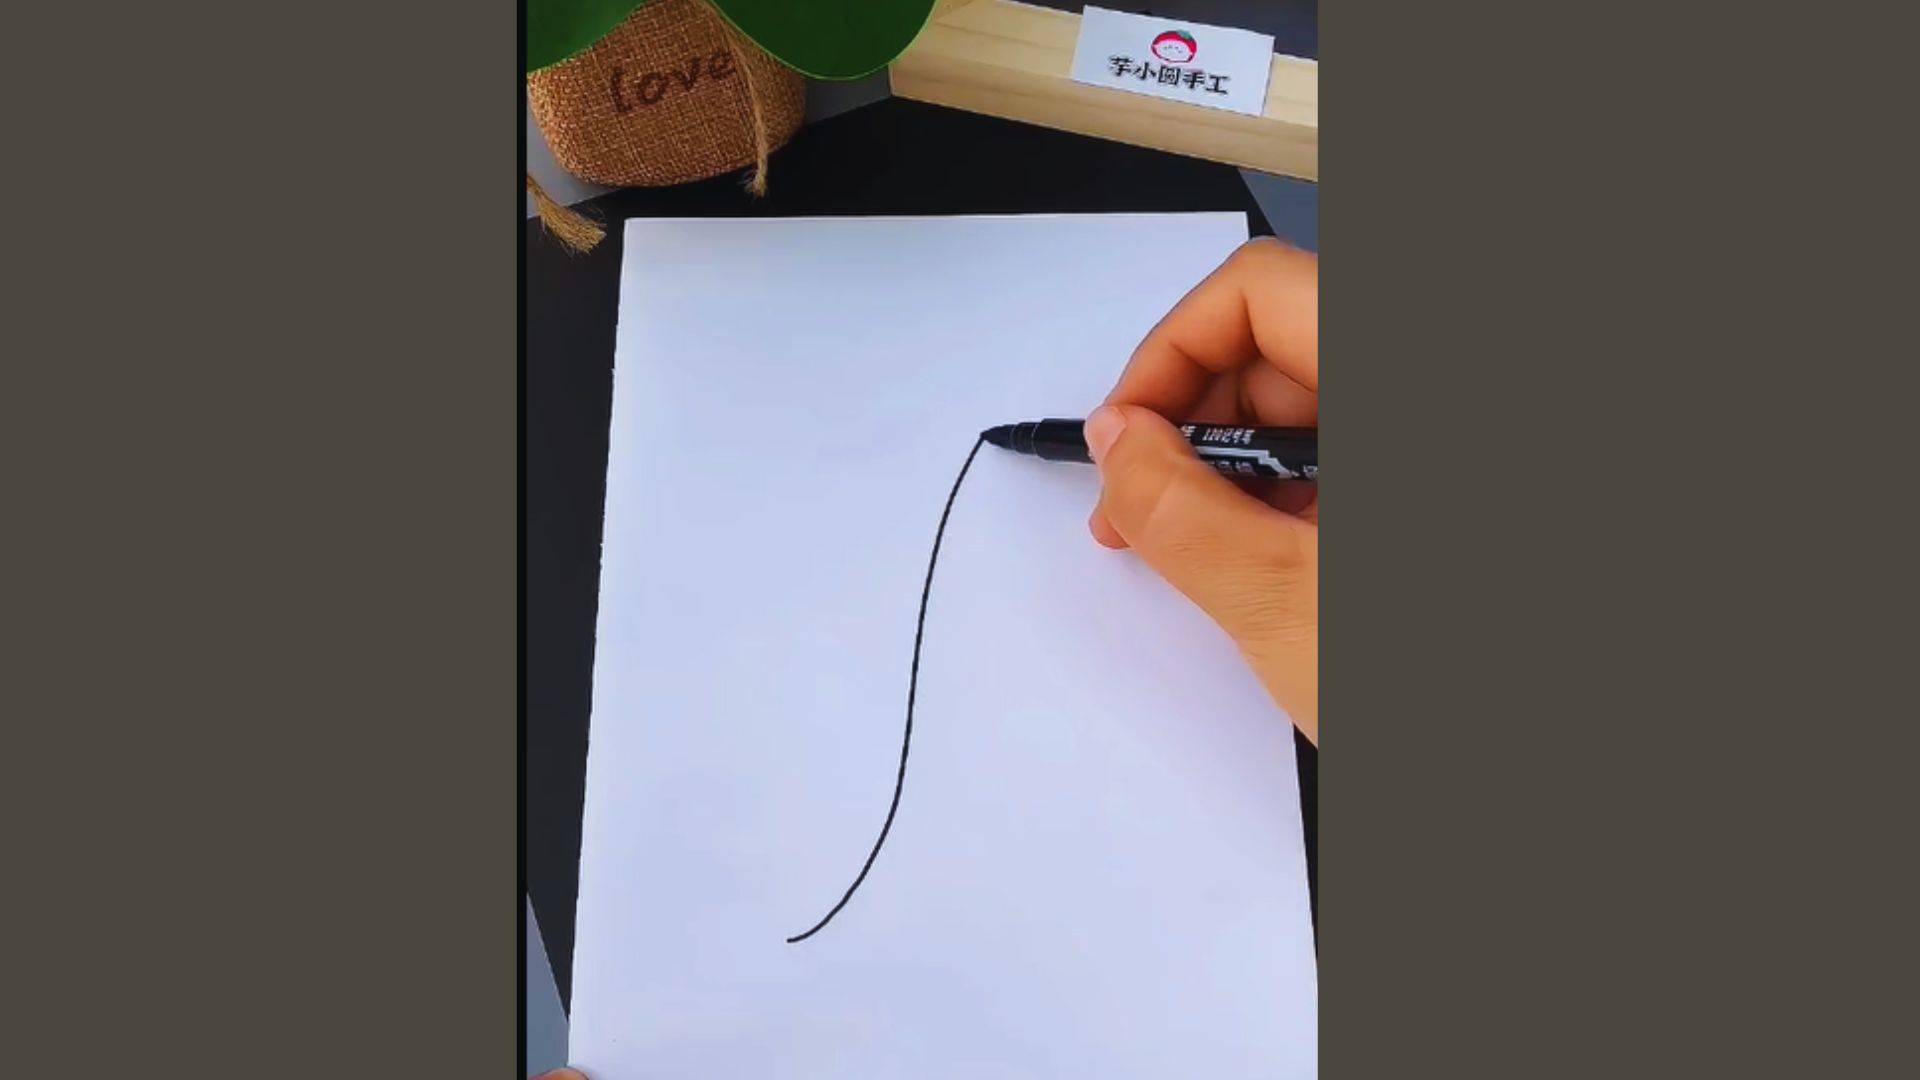
Start by drawing a smooth, slightly curved vertical line in the center of your paper. This acts as the main guideline for your composition.
It keeps everything balanced and gives you a clear path to follow as you add shapes along it.
Step 2: Creating the First Soft Pastel Circle
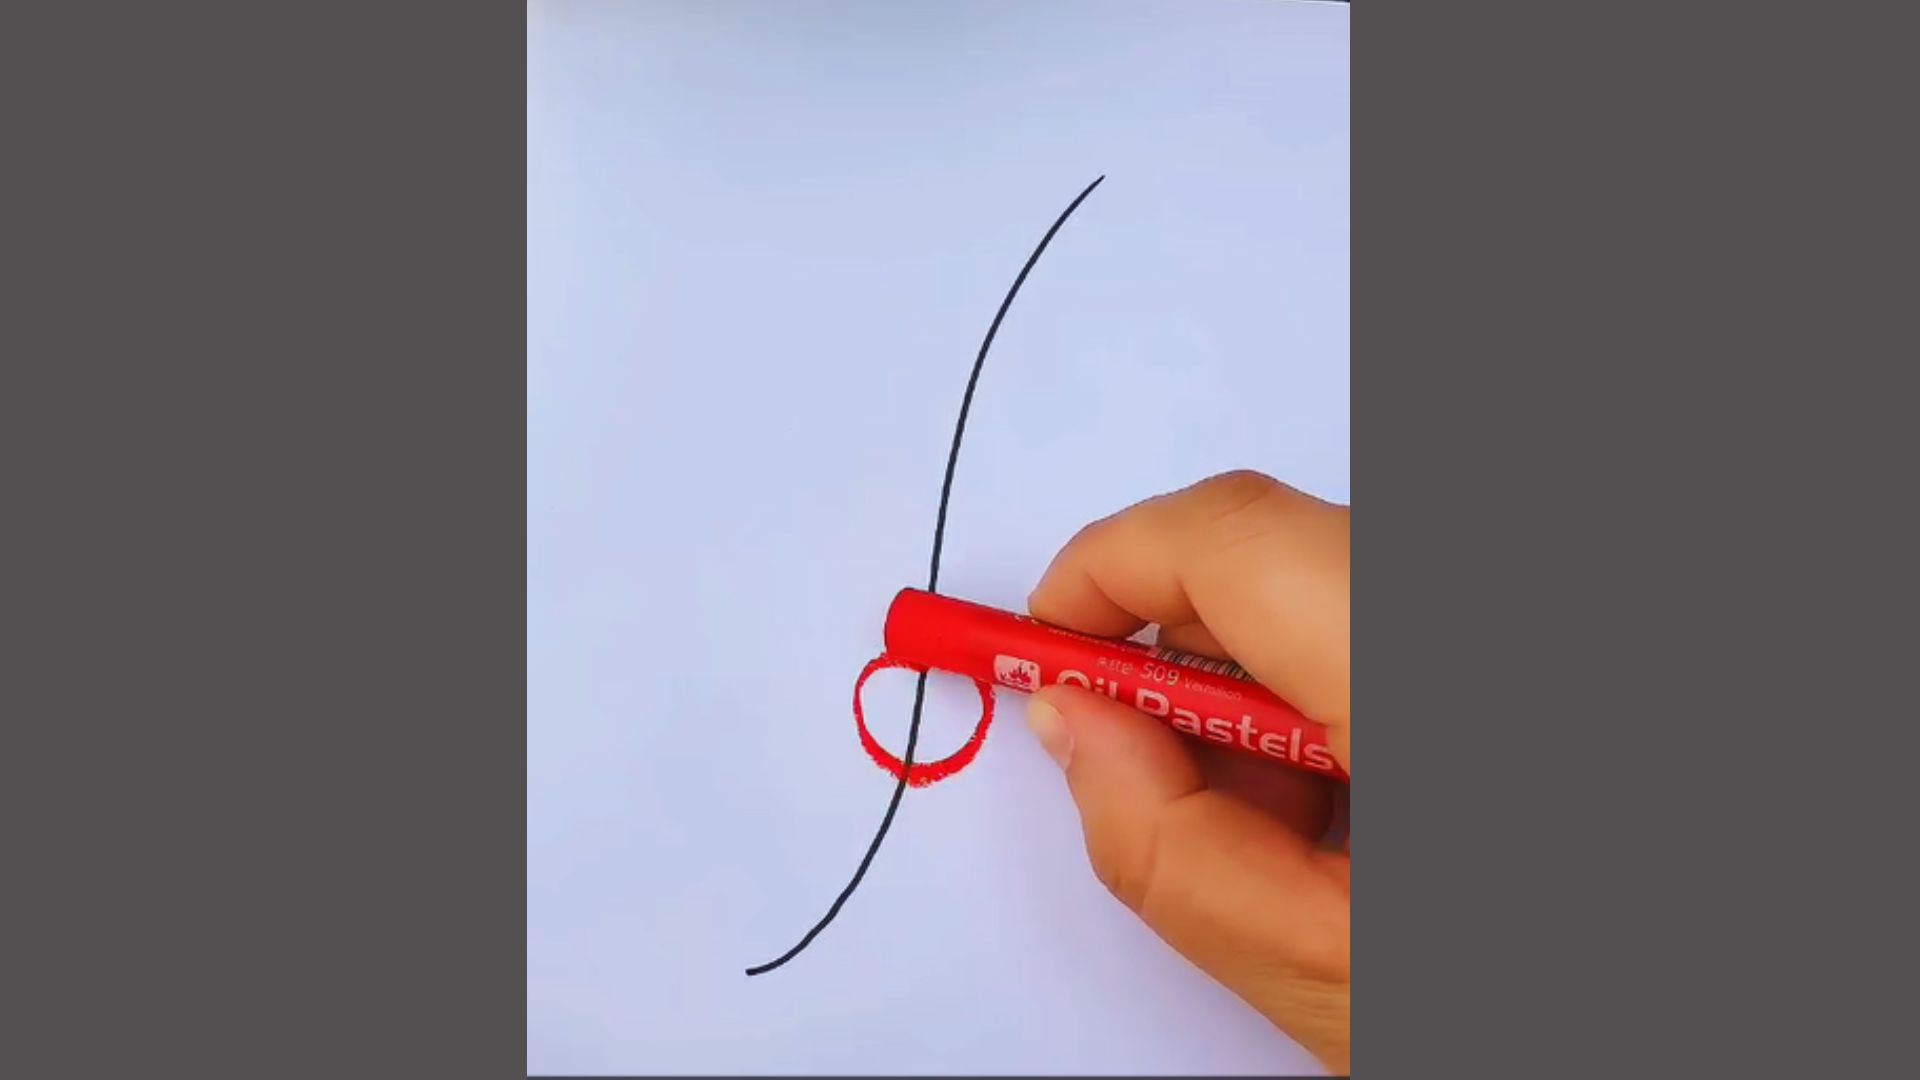
Pick up a red soft pastel and draw a small circle along the guideline. Keep your strokes light and slightly uneven, this gives the circle a natural, textured feel.
Leave the center a little lighter to create a soft highlight effect that adds depth.
Step 3: Adding Colorful Soft Pastel Circles
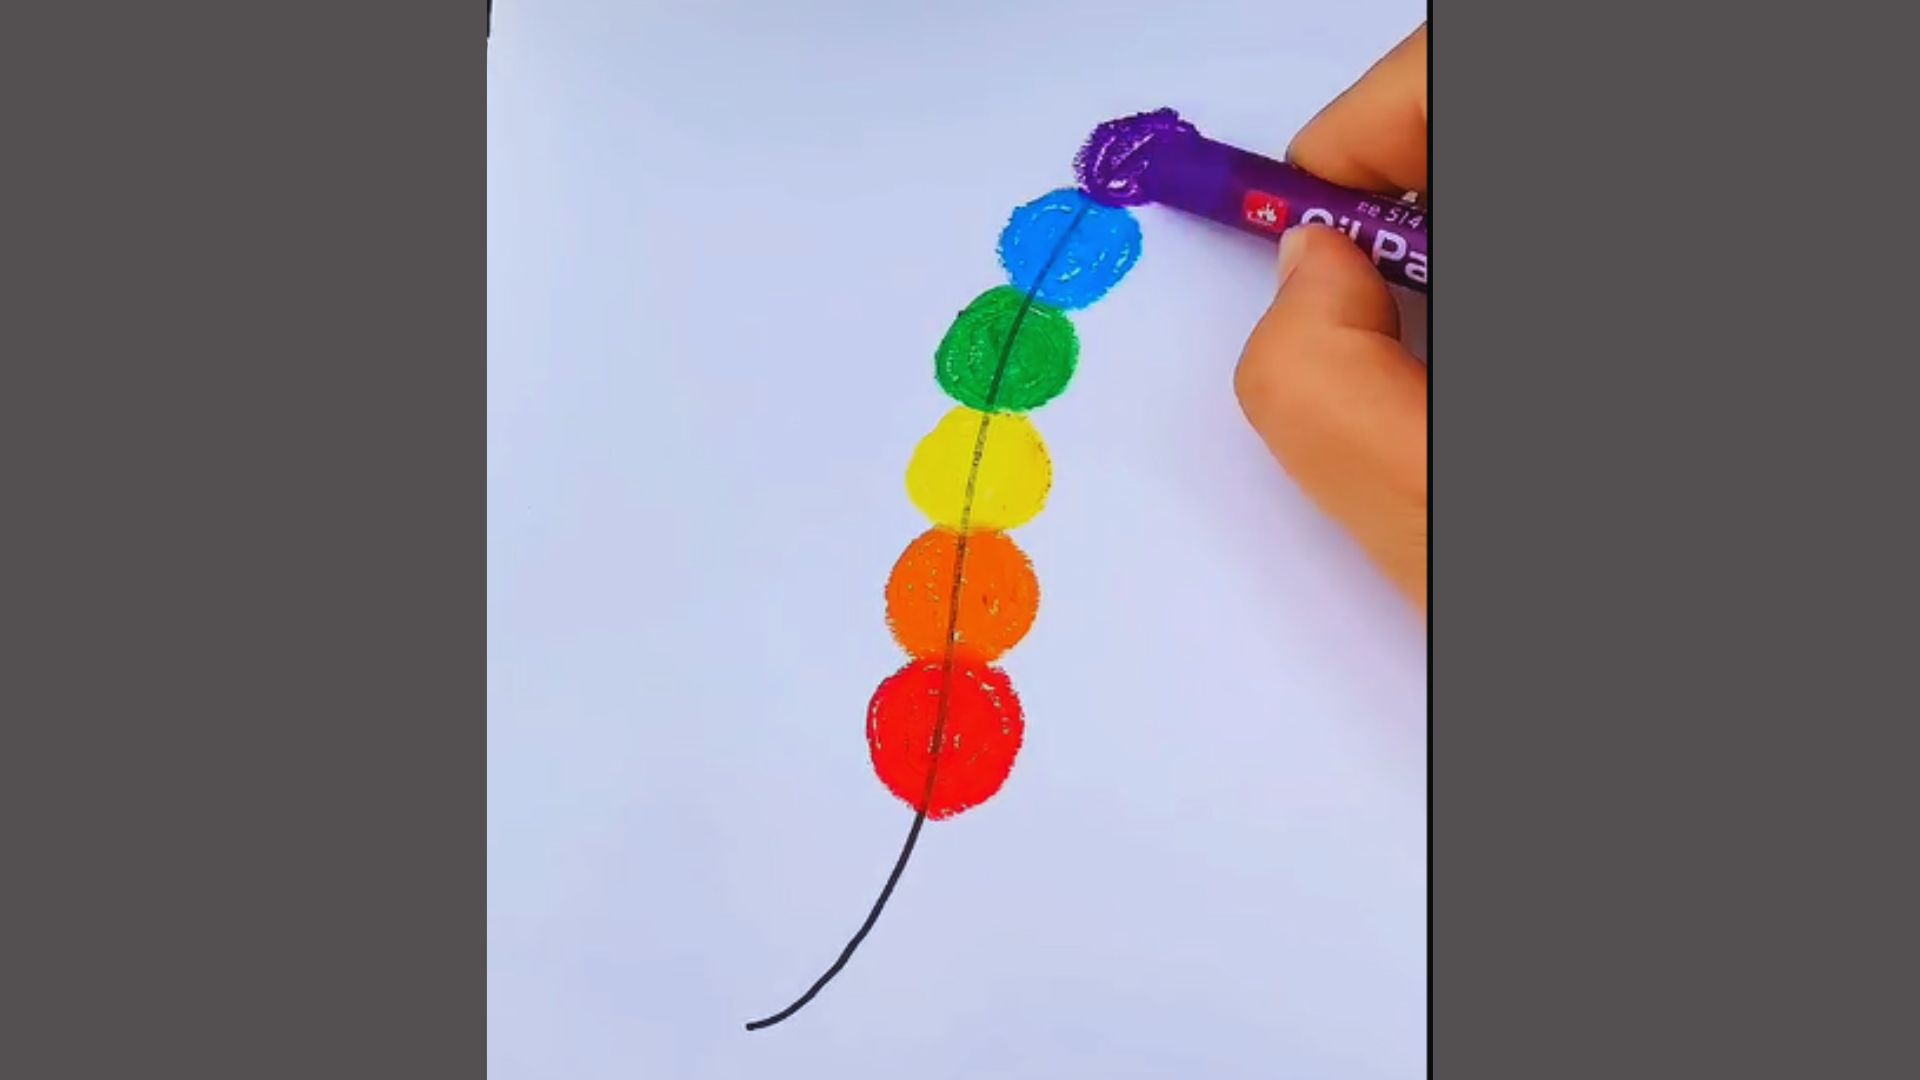
Now draw more circles along the guideline using different colors, orange, yellow, green, blue, purple. Keep each circle roughly the same size.
Let them slightly overlap the center line so the whole composition flows smoothly from top to bottom.
Step 4: Blending the Soft Pastel Colors
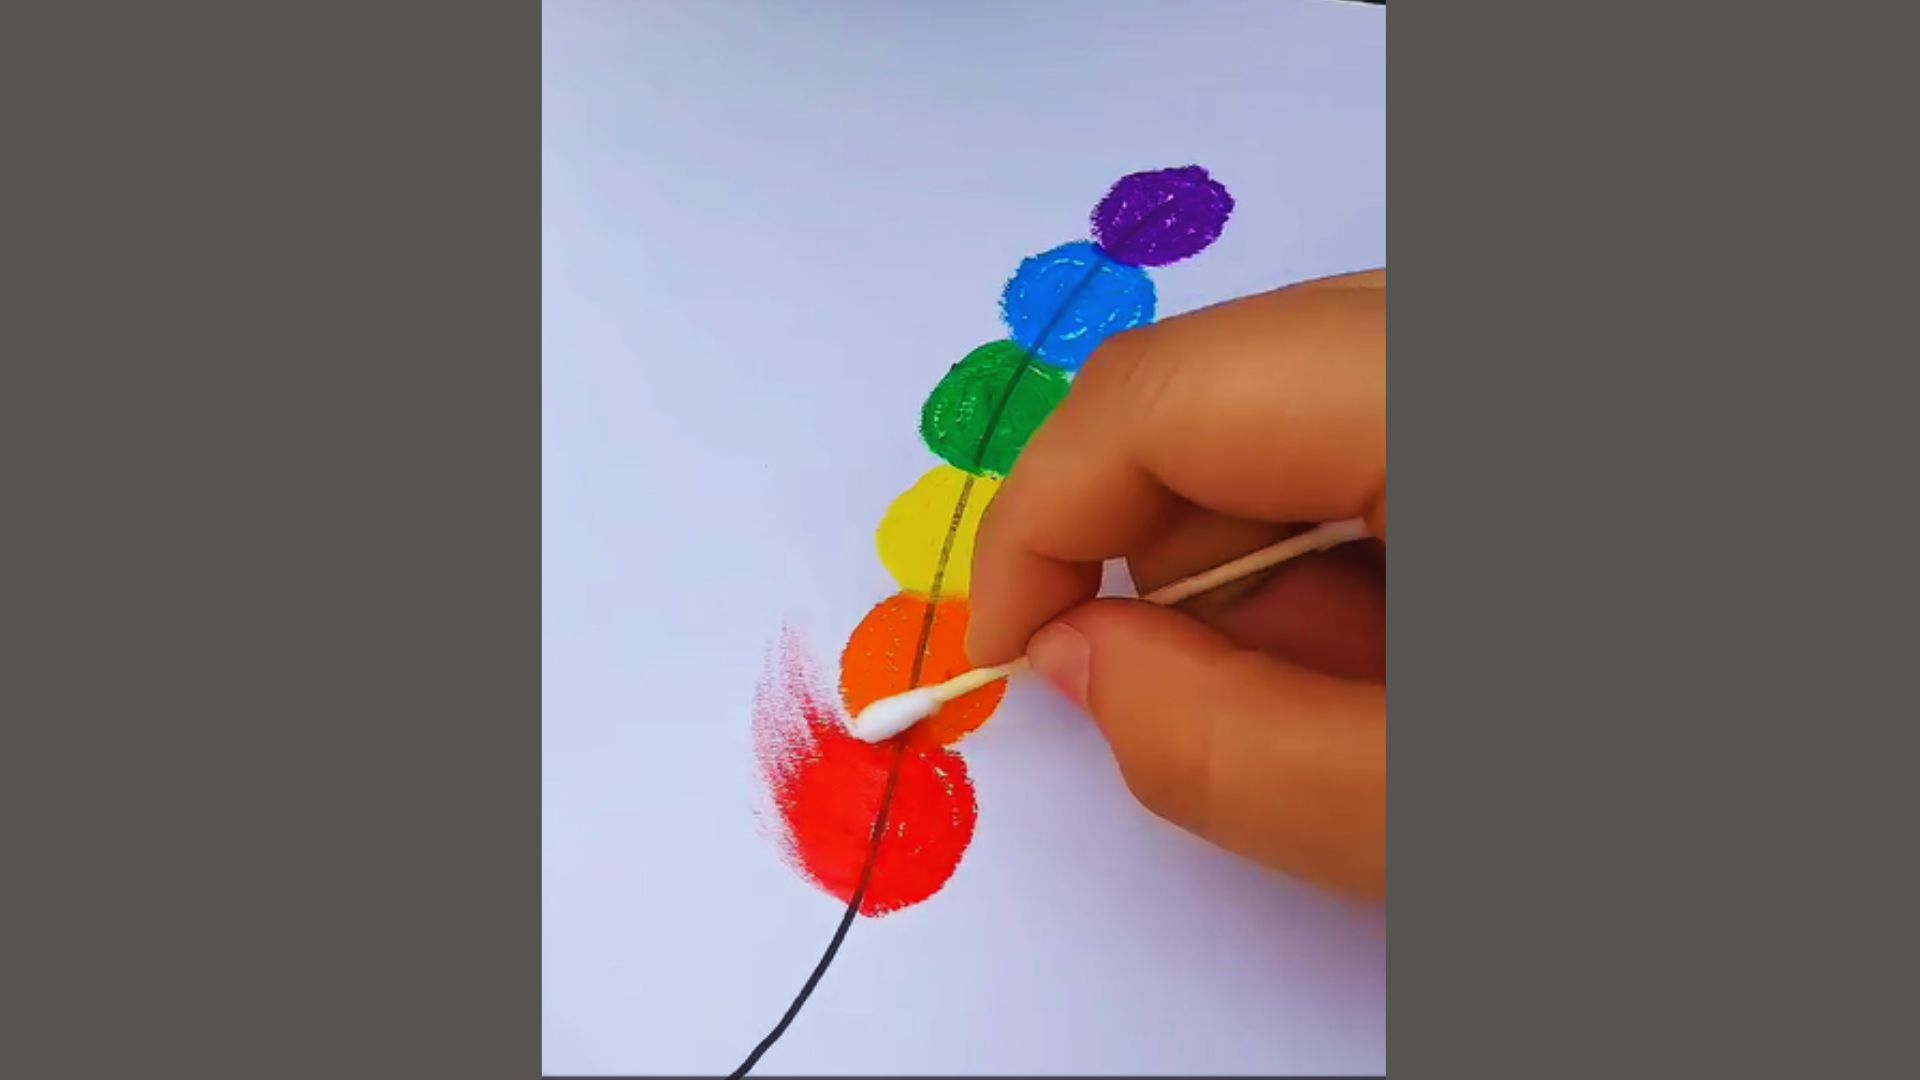
Take a clean cotton bud and gently blend the edges of each circle. Use soft circular motions to smooth out the texture.
Keep the center of each circle slightly brighter than the edges, this adds a subtle gradient that makes each shape look full and rounded.
Step 5: Adding Soft Texture & Final Highlights
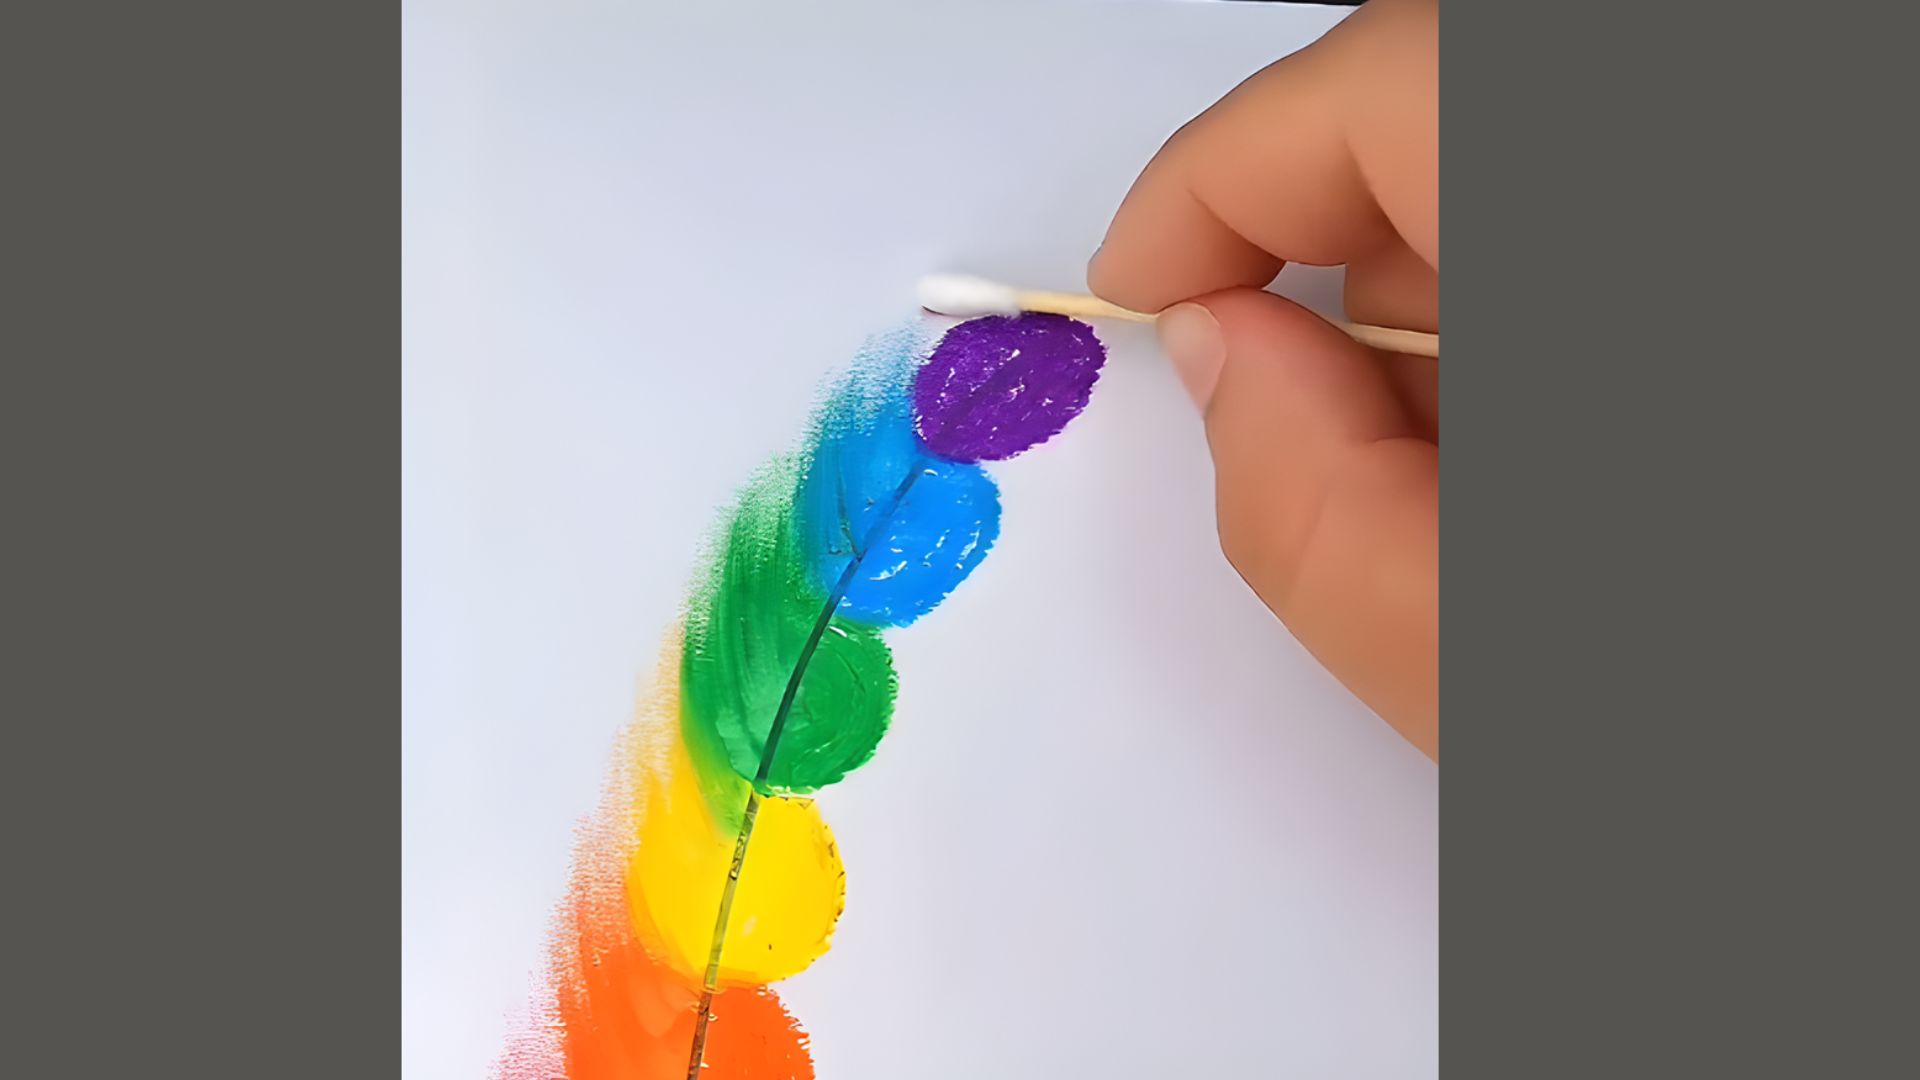
Use a clean cotton bud to lightly blend the top purple area. Move in soft upward strokes that follow the shape you’ve created.
Where two colors meet, gently smudge them together so the transition looks smooth. This final step brings the whole piece together and gives it a soft, airy finish.
Tips to Improve Your Soft Pastel Skills
A few simple habits will make a big difference in your work.
- Work light to dark. Start light and layer darker shades on top for better control.
- Use a reference image. A simple photo keeps your shapes and colors accurate.
- Clean your pastels often. Wipe them on a cloth or dip in rice between uses.
- Blend on scrap paper first. Always test before touching your main piece.
- Step back often. Distance helps you spot mistakes faster.
Consistent effort makes the biggest difference, even 10 minutes of practice a day adds up fast.
Conclusion
I’ll be honest, my first soft pastel drawing wasn’t great.
But it was fun, and that’s what kept me going. Soft pastel art is one of those things that gets better fast once you start. You don’t need to be an expert.
You just need paper, a few sticks of color, and a willingness to try. So go ahead, pick up that pastel and make your first mark. I’d love to hear how it goes.
Drop a comment below and share your experience, or tag us in your artwork!
Frequently Asked Questions
What kind of paper is best for soft pastels?
Pastel paper or sanded paper works best as it grips the pigment well.
Can I use soft pastels without a fixative?
Yes, but use a fixative spray to protect pieces you want to keep.
How do I keep soft pastel colors from mixing too much?
Use a clean cotton bud for each color and work one shade at a time.
Are soft pastels safe for kids?
Most are non-toxic, always check the label and wash hands after use.
How do I fix mistakes in soft pastel art?
Use a kneaded eraser to lift the color, or blend a new shade over it.
