


I’ve filled more sketchbooks than I can count. And for a long time, my drawings still felt flat.
The problem wasn’t effort. It was that I didn’t know the right techniques. Once I learned them, everything changed.
In this article, I’ll walk you through the tools you need, the techniques that actually work, and tips to put it all into practice. I’ve tested every single one myself.
If you want to draw better, you’re already in the right place.
Let’s get into it.
Why Learning Different Techniques Improves Drawing Skills

When I first started drawing, I stuck to one method. Just pressing the pencil down and hoping it looked right. It didn’t.
Once I started learning different techniques, everything clicked. Each one gave me a new way to show light, shadow, and texture.
I stopped guessing and started making real choices. That shift changed a lot.
Different techniques also train your hand and eye to work together. You build muscle memory. Your lines get more controlled.
The more techniques you know, the more tools you have. Simple as that.
Pencil Drawing Tools Required

Getting the right tools before you start saves a lot of frustration.
- Types of Drawing Pencils (H vs B): H pencils are hard and light. B pencils are soft and dark. Together they give you a full range of tones.
- Paper and Sketchbook Options: Paper texture changes how your marks look and feel. The surface you choose really does matter.
- Erasers and Blending Tools: A good eraser and blending stump give you more control over shading and soft edges.
The right tools won’t make you a better artist overnight, but they will make learning a lot easier.
List of 15+ Pencil Drawing Techniques
These 15+ techniques cover everything from basic shading to detailed texture work.
1. Hatching

Hatching is one of the first shading techniques most people learn. You draw parallel lines close together to create shadow and tone.
The closer the lines, the darker the area looks. I use this for quick shading all the time. It gives drawings a structured, graphic look.
You control the tone by adjusting how far apart the lines are. Pressure matters too. Start loose, then tighten as needed.
2. Cross-Hatching

Cross-hatching builds on basic hatching. You draw one set of parallel lines, then add another set going in a different direction.
Where the lines cross, the area looks darker. This is great for adding real depth to a drawing. I use it when I want to show a dark shadow without pressing too hard.
Layering more sets of lines makes the area even darker. It gives you a lot of control.
3. Vertical Hatching

Vertical hatching is exactly what it sounds like. You draw lines from top to bottom in a straight, controlled way. It works well for shading tall or upright objects.
I find it easier to keep my lines even when I go vertically. It also gives the drawing a clean, consistent feel.
It’s a great starting point for beginners who are building control over their pencil strokes.
4. Horizontal Hatching
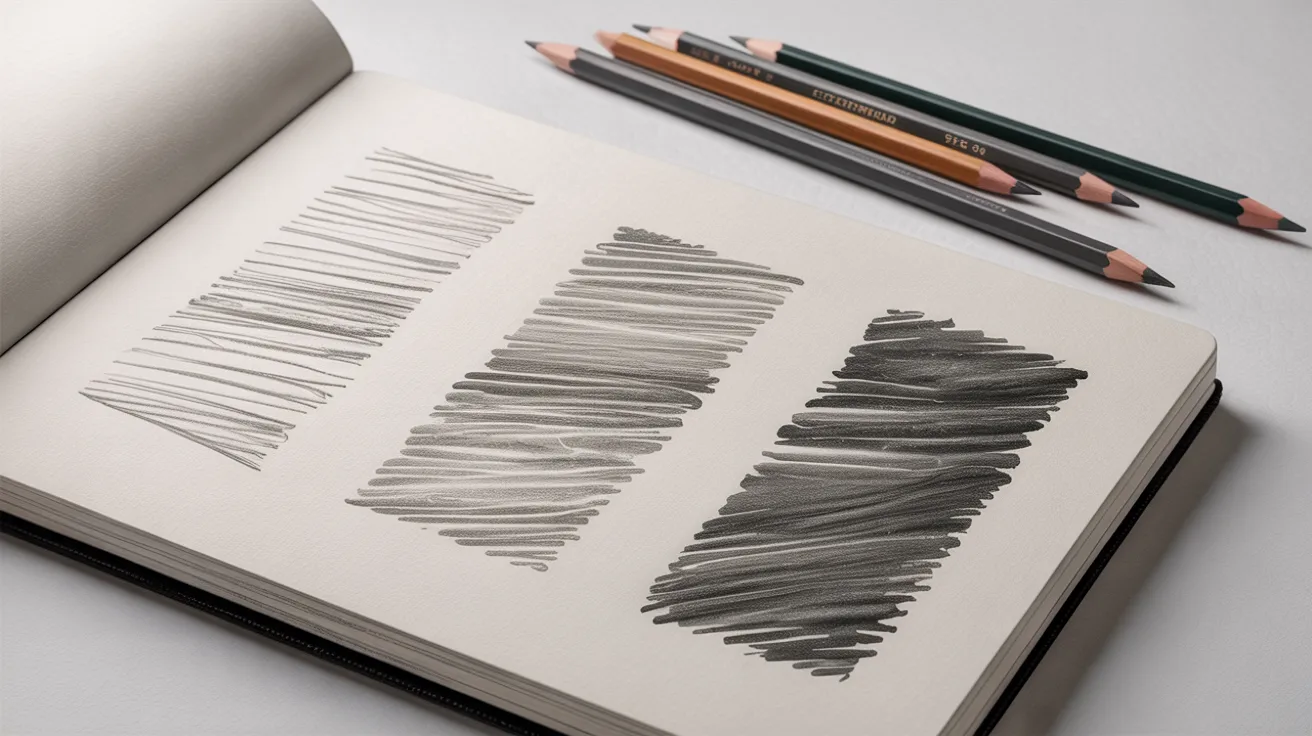
Horizontal hatching uses lines that go side to side. It’s good for shading flat or wide surfaces. I use it a lot for backgrounds and ground planes in my drawings.
The lines create a calm, smooth look across the page. Keeping them even and parallel takes some practice.
But once you get it, you can fill large tonal areas quickly and smoothly.
5. Inclined Hatching

Inclined hatching uses diagonal lines instead of straight vertical or horizontal ones. This adds direction to your shading and can make objects feel more dynamic.
I use it when I want the eye to travel across a surface. It’s a small shift from basic hatching, but the effect is noticeable.
You can lean the lines left or right depending on the mood you want to create in the drawing.
6. Radial Hatching

Radial hatching means your lines spread out from a central point, like rays from a light source. It creates a strong sense of depth and focus in a drawing.
I use it for things like flowers, eyes, or any form with a clear center point. The lines guide the viewer’s eye inward naturally.
It takes some practice to keep the spacing even, but the results look really striking.
7. Stippling

Stippling is all about dots. You place small dots across a surface to build up tone and texture. The closer the dots, the darker the area looks.
I use this technique when I want a really fine, detailed texture. It takes more time than most other methods.
But the level of control you get is worth it. It’s one of the most precise shading methods in pencil drawing.
8. Scribbling

Scribbling sounds messy, but it’s a real technique. You make loose, random lines in different directions to fill an area with tone.
It gives drawings a rough, hand-drawn feel. I use it for backgrounds or when I want a quick, expressive texture.
The key is to stay loose and not overthink it. Let the pencil move freely. The more relaxed your hand, the better the result looks.
9. Circling

Circling uses small circular motions to build up tone. You don’t lift the pencil. Just keep making soft, overlapping circles across the surface.
It creates smooth shading without harsh lines. I use this for skin tones or any area that needs a gradual, soft look.
The trick is keeping your circles small and consistent. Over time, this becomes one of your most natural, go-to shading habits.
10. Smooth Shading

Smooth shading is about applying even pressure across an area. You keep your pencil strokes close together and consistent.
The goal is a gradual tone with no visible lines. I use it for soft surfaces like fabric or skin. A softer B pencil works best here.
The lighter your touch, the smoother the result. It takes patience, but smooth shading makes drawings look really polished and finished.
11. Blending

Blending takes your shading and softens it. You use a finger, tissue, or blending stump to rub the graphite gently across the surface.
This removes the texture of individual strokes and creates a smooth, even tone. I blend after laying down a base layer of shading.
It’s one of the fastest ways to make a drawing look refined. Don’t over-blend though. You can lose important details quickly.
12. Feathering

Feathering uses very light, short strokes that taper off at the end. You press harder at the start and lift as you finish each stroke.
This creates edges that fade into the paper naturally. I use feathering to move from one tonal area into another.
It works really well for fur, hair, and soft shadow edges. It’s one of my go-to techniques for any area that needs a gentle, gradual fade.
13. Contour Lines

Contour lines follow the shape of the object you’re drawing. Instead of flat tones, the lines curve and follow the surface form.
This makes the object look three-dimensional. I use this when I want to show how something is shaped, not just what it looks like straight on.
It adds a strong sense of physical form. It’s one of the most useful drawing tools for showing depth and structure.
14. Loops

Loops are circular patterns drawn in a loose, connected way. Think of it like writing cursive in a small area over and over.
The result is a soft, layered texture. I use loops for grass, clouds, or any area that needs a fluffy, organic feel. It’s quick and relaxed.
Perfect when you want texture without going into too much fine detail. It also works well for loose, gestural backgrounds.
15. Dots and Dotted Lines

Dots and dotted lines add rhythm and texture to a drawing. You can place them in patterns or use them to outline shapes softly.
I use this technique to add subtle texture to surfaces like skin, stone, or wood. It’s different from stippling because the pattern and spacing matter more than sheer density.
Both dots and dashes can also be combined for a more layered, complex texture result.
16. Zigzag Lines

Zigzag lines give drawings a sharp, dynamic energy. You move the pencil back and forth in a tight or wide pattern.
Tight zigzags look rough and gritty. Wider ones look more open and airy. I use this for textures like tree bark, rock, or worn fabric.
It’s also a great way to add stylized shading without being too realistic. The angle and spacing both affect the final look.
17. Interwoven Textures

Interwoven textures mix lines that go in different directions without following a set pattern. It looks random, but you’re still in control.
The result is a rich, layered texture. I use this for complex surfaces like tangled hair or rough terrain. Changing direction often is the key.
Varying your pressure also helps add depth to the final look. It’s one of the more expressive techniques in this list.
18. Basketweave Pattern

The basketweave pattern is a structured technique where you draw short, parallel lines in one direction and then cross them at a right angle.
The result looks like a woven grid. I use it for decorative textures or to shade objects that have a fabric or woven look.
It takes patience to keep the structure clean. But when done well, it creates a really satisfying and distinct visual texture.
19. Rendering and Highlights

Rendering is the process of building up graphite layers to create a fully shaded, realistic image. Highlights come from removing graphite with an eraser in specific spots.
I use a kneaded eraser to lift small areas and create light. This contrast between dark and light is what makes drawings look three-dimensional and real.
Rendering takes the most time, but it’s where a drawing truly comes together.
When to Use Pencil Drawing Techniques
Knowing which technique to use and when is just as important as knowing how to do it.
Techniques for Shading

For shading, hatching, cross-hatching, and smooth shading are your best options. These give you control over how light or dark an area looks.
I use smooth shading for soft, gradual tones and hatching for more defined shadows.
Blending and feathering also work well here because they soften edges between tonal areas. Try combining two or three of these for richer, more layered shading results.
Techniques for Texture

For texture, stippling, scribbling, zigzag lines, and interwoven textures all deliver great results. Each one creates a different kind of surface feel.
I use stippling for fine, controlled texture and scribbling for rough, quick coverage. Loops work well for soft, organic textures like grass or clouds.
Matching the technique to the surface type is what makes the texture look convincing and intentional.
Techniques for Realism

For realism, you need a mix of techniques working together. I usually start with smooth shading to build base tones, then add hatching for shadow areas.
Contour lines help define shape. Rendering and highlights bring everything to life. The key is layering.
No single technique creates realism on its own. It takes patience, practice, and a willingness to keep building until the drawing looks right.
Practical Tips for Better Pencil Drawings
Small habits and smart choices can make a big difference in how your pencil drawings turn out.
- Use Different Pencil Pressures: Start light and build up slowly for smooth tonal ranges
- Combine Multiple Techniques: Layer hatching over shading for richer, more realistic results
- Practice Regularly: Set aside 10 minutes a day to work on one specific technique
- Experiment With Textures: Draw everyday objects like wood and fabric to build texture skills
- Use Reference Photos: Guide your work with real references to make drawings look more accurate
The more you practice these habits, the faster your pencil drawings will improve.
Conclusion
I remember picking up a pencil for the first time and feeling completely lost. Every drawing felt off.
Then I tried one technique, then another, and it all started making sense.
Now you have 19 pencil drawing techniques, the right tools, and real tips to improve fast.
Pick one technique from this list and try it today. Even 10 minutes makes a difference.
Found this helpful? Drop a comment below and tell me which technique you’re starting with. I’d love to know.
Frequently Asked Questions
What is the easiest pencil drawing technique for beginners?
Hatching is the easiest. Just draw straight parallel lines close together to build shading and tone.
What type of pencil is best for shading?
A 2B or 4B pencil. It’s soft, smooth, and lays down graphite easily.
Can I use regular paper for pencil drawing techniques?
Yes, but smooth drawing paper gives you better control over your strokes.
How long does it take to get good at pencil drawing?
With 10 to 15 minutes of daily practice, you’ll see real progress in a few weeks.
What is the difference between blending and feathering?
Blending smooths graphite with a tool. Feathering uses soft pencil strokes that fade at the edge.
