

I’ve always believed that drawing doesn’t have to be hard. And honestly, learning how to draw a mug is one of the best places to start.
In this guide, I’ll show you exactly what to do, step by step, with no guesswork and no frustration.
I’ve been drawing for years and have taught complete beginners how to go from a blank paper to finished art fast. These steps are clear, simple, and beginner-tested.
We’ll cover everything from gathering your materials to drawing the top rim, adding the body and handle, decorating with wavy lines, coloring your mug, and finishing with steam on top.
By the end, you’ll have a drawing you’re actually proud of. Let’s get started.
Easy Drawing Overview

Drawing a mug is one of the most beginner-friendly projects you can try. The shapes are basic, the steps are short, and you can finish it in under 10 minutes.
You start with a simple oval at the top. Then you build downward, adding the body, the handle, and the details. No complicated techniques. No fancy tools.
By the end, you’ll have a clean, colored mug drawing that actually looks good. It’s the kind of win that makes you want to keep going.
Materials You’ll Need

Get these ready before you begin.
- Drawing paper
- Pencil
- Eraser
- Black pen or marker
- Colored pencils
- Crayons
- Sketch pens
Step-by-Step Drawing Guide
Let’s understand the process quickly:
Step 1: Draw the Top Rim

This is where every good mug drawing begins.Draw a wide, flat oval near the top of your paper. This is the open mouth of the mug.
Keep your pencil light so you can fix it easily. The oval doesn’t need to be perfect. A slightly imperfect shape actually looks more natural and hand-drawn.
Take your time here. Getting this right makes every step after it much easier.
Step 2: Draw the Mug’s Body and Handle
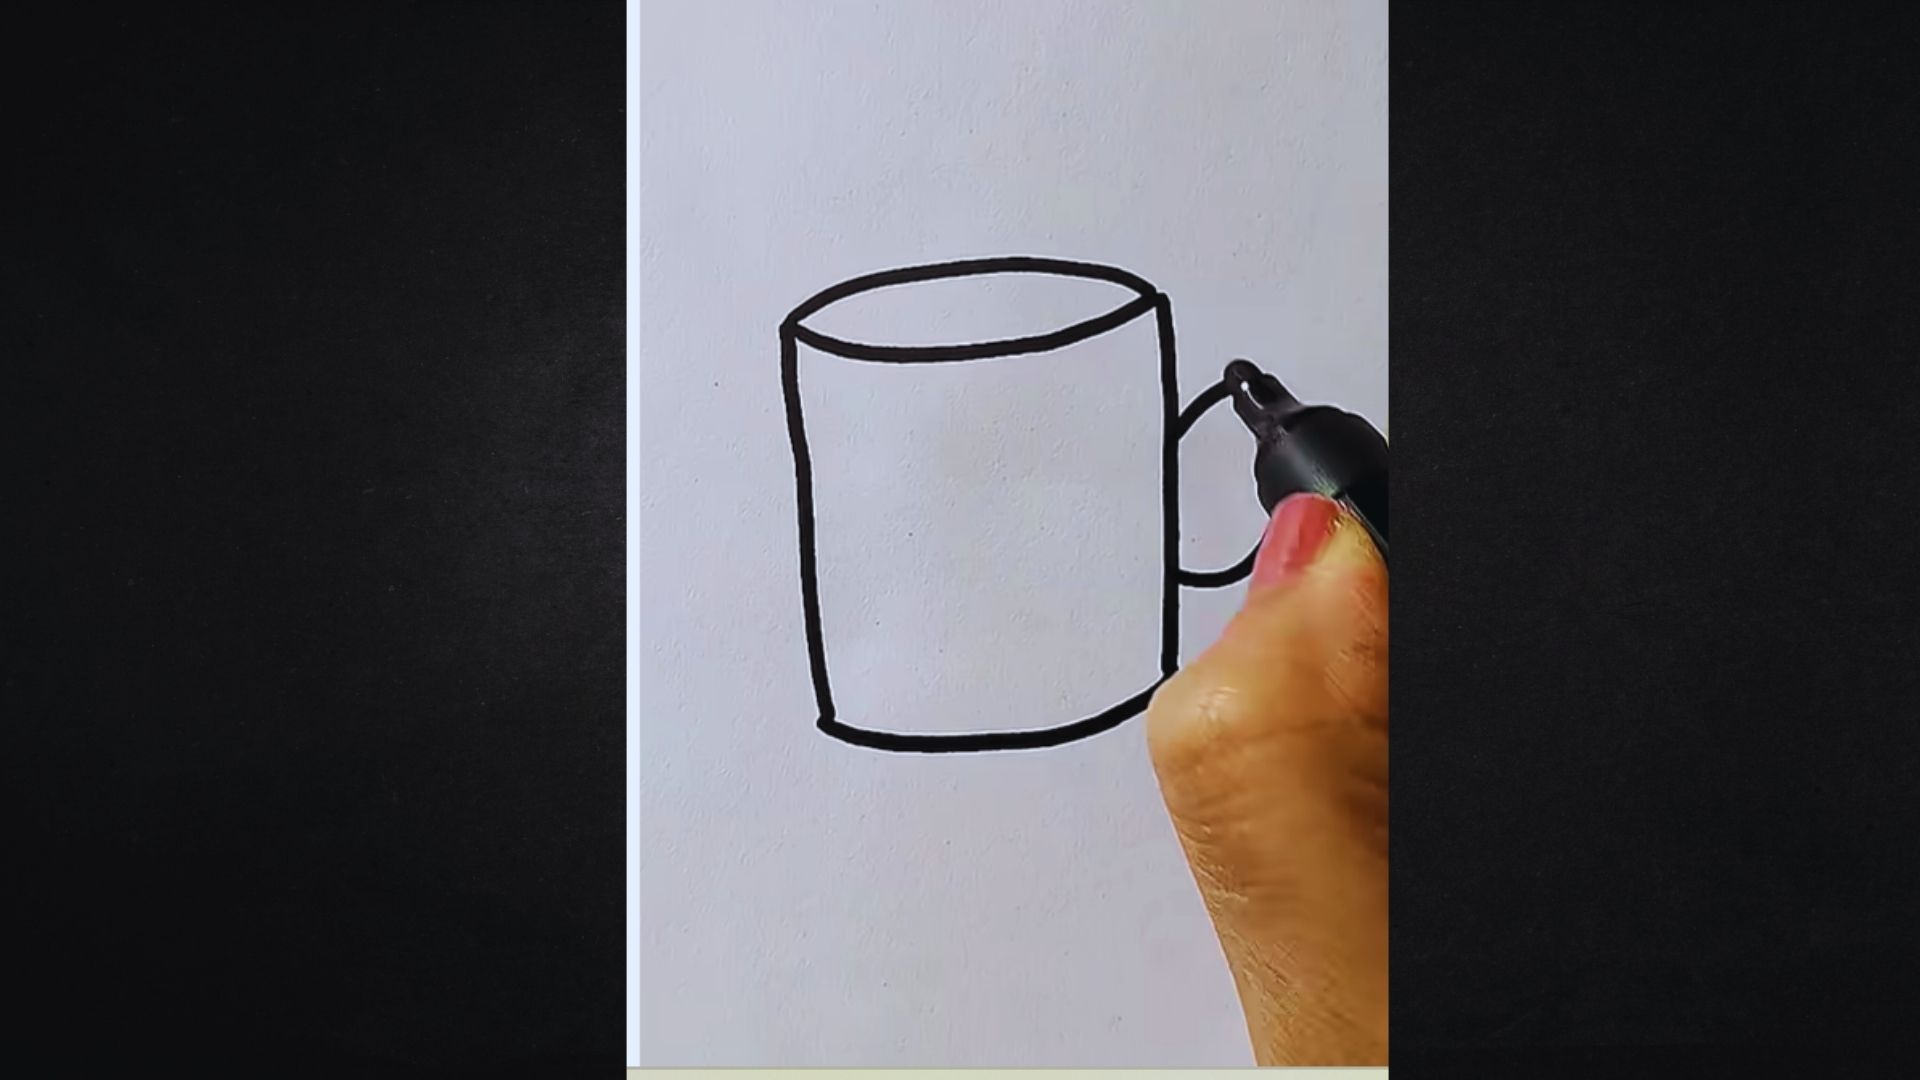
This step gives your mug its recognizable shape.From each end of the oval, draw two slightly curved lines going straight down.
Connect them at the bottom with a soft curved line. Then draw a D-shaped handle on the right side. Make it thick enough to look like you could actually hold it.
Press lightly so you can adjust the curves if needed.
Step 3: Add Decorative Wavy Lines

This is where your mug starts showing some character.Draw two or three wavy horizontal lines across the body of the mug. Space them out evenly.
Keep the curves soft and relaxed. These stripes act as a design detail. You can also add dots, small stars, or any simple pattern you like.
There’s no wrong choice here. Make it yours and have fun with it.
Step 4: Color Your Mug
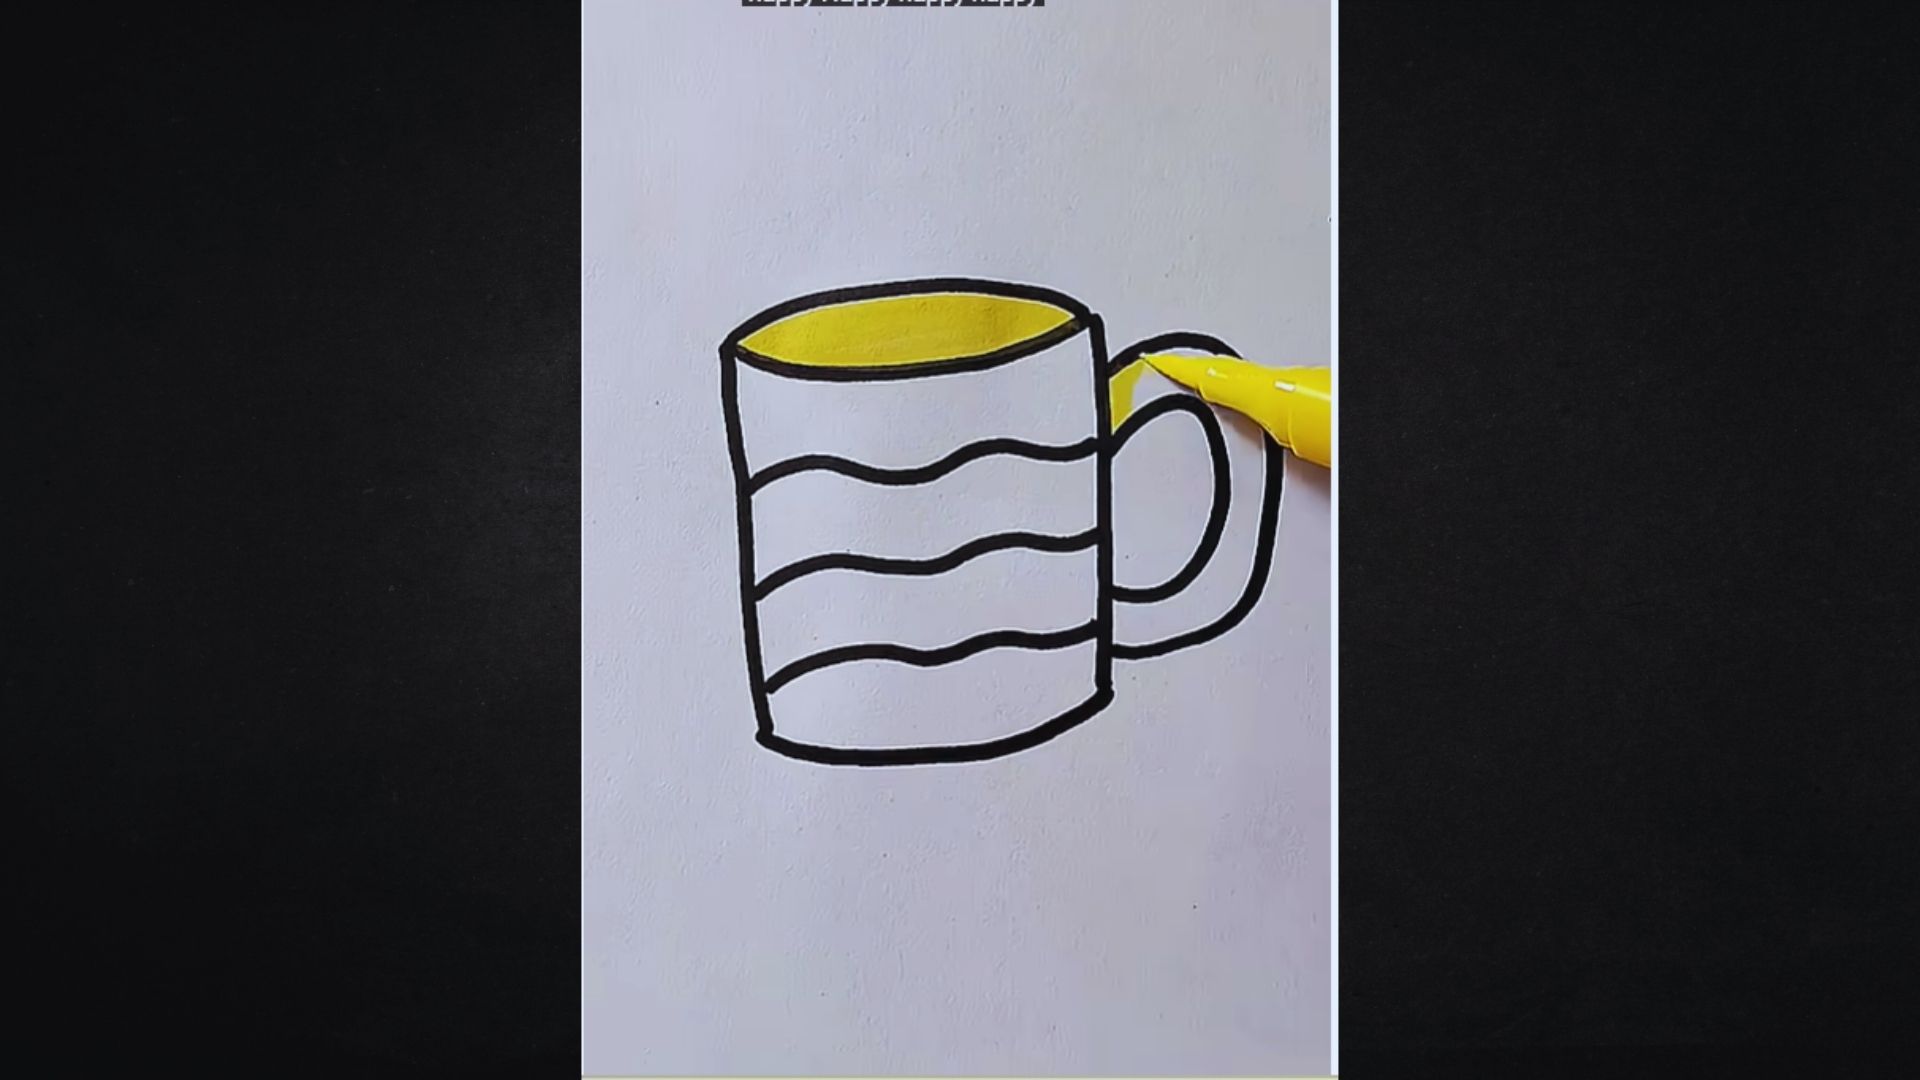
Now the drawing really comes to life.Pick a color you love for the main body. Leave the inside rim slightly lighter to hint at depth.
Use a second color for your wavy stripe details. Crayons give a smooth, even base while sketch pens give sharper detail.
Warm tones like red, orange, or yellow give the mug a cozy, inviting feel that looks great on paper.
Step 5: Add Steam Above the Mug

A little steam goes a long way.Draw two or three thin, wavy lines rising from the top opening of the mug.
Start each line thin at the bottom and let it curve upward loosely. These swirls suggest heat rising from a hot drink inside.
Keep them light and simple. Three gentle wiggles are honestly all you need to sell the whole effect.
Final Touches
Wrap it up with these five finishing details.
- Outline with a black pen: Trace over your pencil lines with a fine pen for a sharp, clean look.
- Erase pencil marks: Once the ink dries fully, gently erase all leftover pencil lines so the colors stand out.
- Add a shadow: Draw a small flat oval under the mug to make it look like it’s resting on a surface.
- Highlight the handle: Add a thin white or light-colored streak on the handle to show a bit of shine.
- Sign your work: Put your name or initials in the bottom corner. It’s your art. Own it.
Conclusion
I still remember the first mug I ever drew. The handle was lopsided, the oval was off-center, and the steam looked more like squiggly worms. But I was so proud of it.
That’s the thing about drawing. You don’t have to be perfect to enjoy it. You just have to start.
Now you know how to draw a mug from scratch. Try it today, make it your own, and don’t stress over the details.
Drop a comment below and let me know how it turned out. Share this with a friend who wants to start drawing too, and check out more easy guides on the blog!
Frequently Asked Questions
Can a total beginner learn how to draw a mug?
Yes, fully. This guide was made with complete beginners in mind. The shapes are basic and the steps are short. Just pick up a pencil, follow along one step at a time, and you’ll have a finished mug drawing before you know it.
What kind of paper works best for this drawing?
Any plain white paper works fine to start. You don’t need anything special. Printer paper works in a pinch, but sketch paper holds color much better and makes the whole process feel a lot smoother.
How do I make my mug drawing look more three-dimensional?
Add a small shadow beneath the mug and leave the inner rim slightly lighter than the outer body. These two simple tricks create a solid sense of depth without any advanced shading skills at all.
How long does it take to draw a mug from start to finish?
Most beginners finish the basic sketch in about 10 to 15 minutes. Add coloring and details and give yourself around 20 to 25 minutes. The more you practice, the faster it gets.
What colors should I use for my mug drawing?
There’s no rule here. Warm tones like red and orange feel cozy. Cool tones like blue and green look fresh. Pick whatever feels right. It’s your drawing, so have fun with it.