


Making a paper ring is easier than it looks. I have taught this craft to complete beginners, and most get it right on the first try.
This guide covers everything from materials and folding steps to tips for a clean finish and fun variations to try. You do not need glue, special tools, or any craft experience.
Just paper and a few minutes of your time.
By the end, you will know exactly how to make a paper ring that fits well and looks great.
Materials Needed to Make a Paper Ring
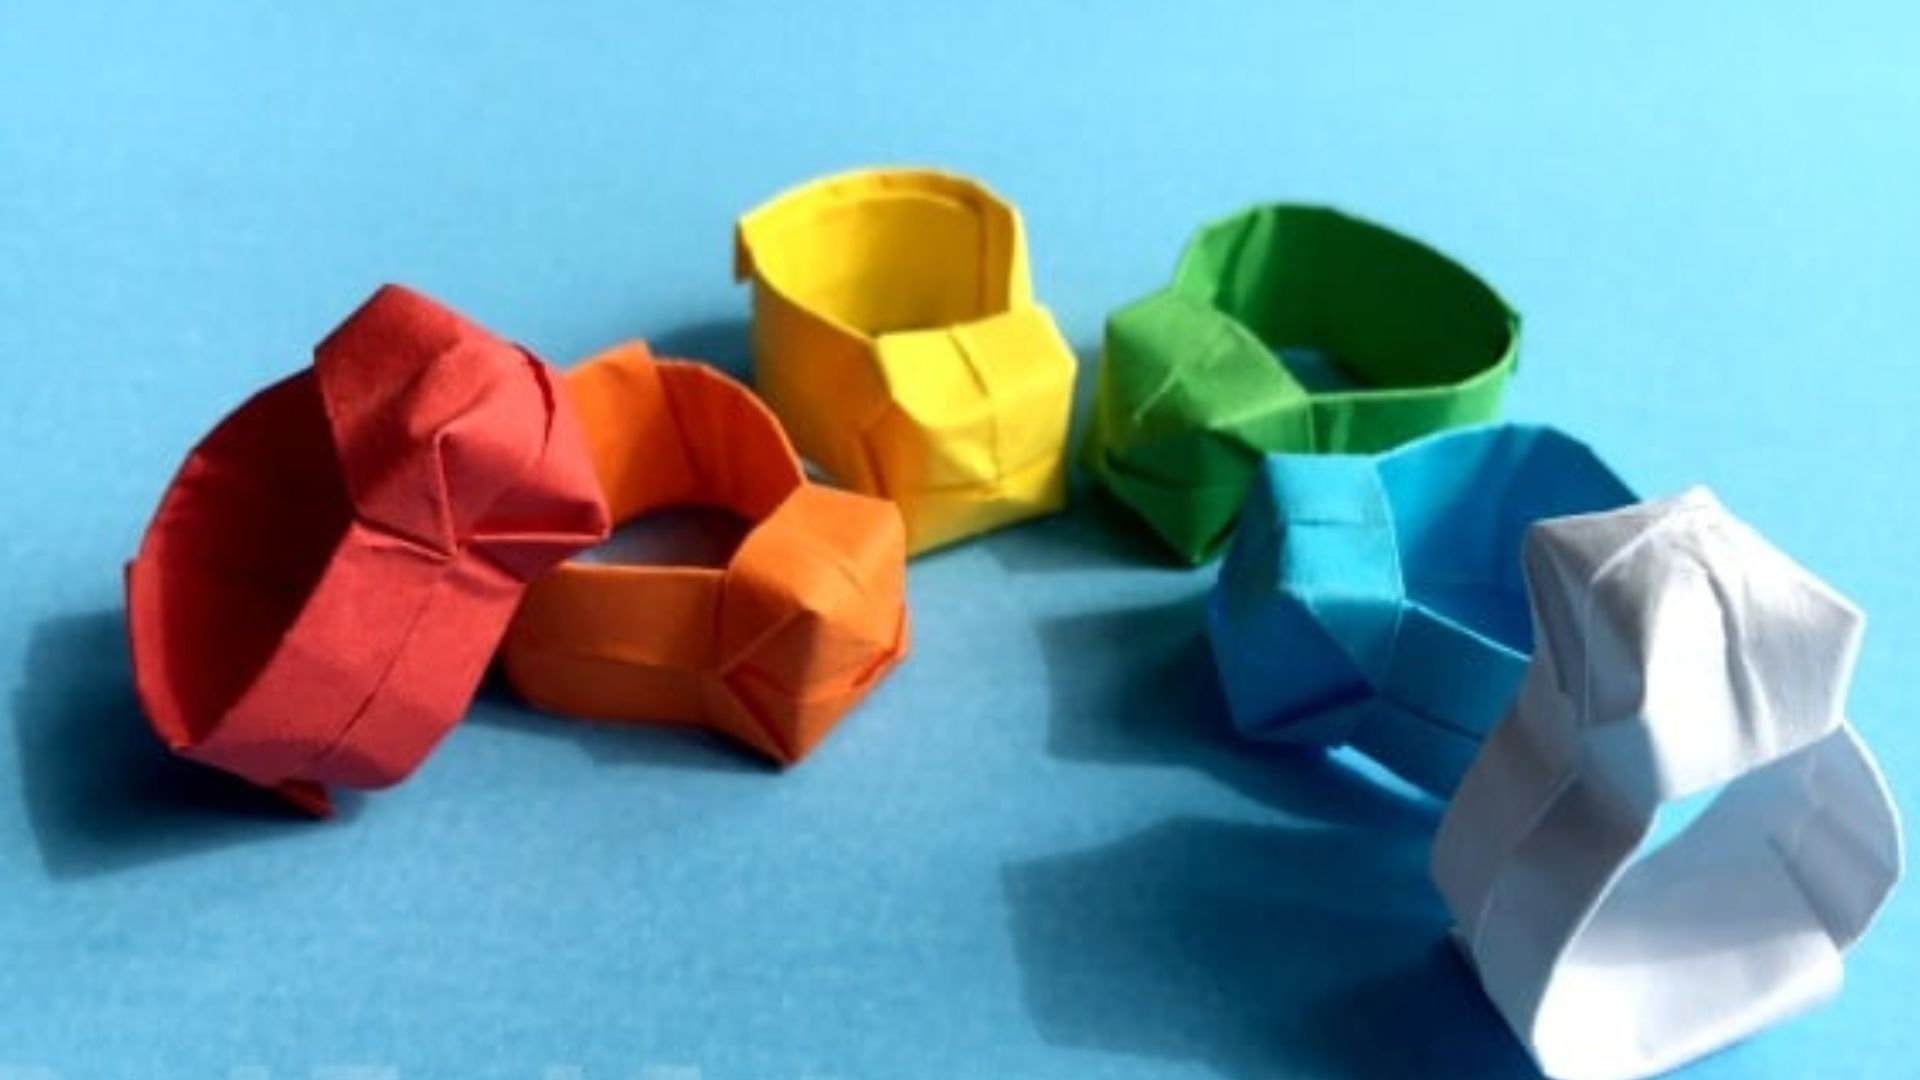
Getting the right materials ready before you start makes the whole process smoother and faster.
Paper is the most important part. Origami paper works great because it holds folds well and comes pre-cut. Craft paper also works fine if that is what you have at home.
A ruler and scissors are optional but helpful. They make trimming and measuring much easier. You do not need glue. The folding method holds everything in place on its own.
The right paper size matters for a good fit. A strip of 2.5 cm x 20 cm works well for most adult fingers. For a smaller ring, reduce the width. For a larger one, use a longer strip.
Before folding, wrap the strip loosely around your finger to check the size. Always leave a little extra length. You can trim it down, but you cannot add it back.
For kids, go with a narrower and shorter strip. Small adjustments make a big difference in the final fit.
How to Make a Paper Ring Step-by-Step
Follow these simple steps carefully and you will have a neat paper ring ready in minutes.
Step 1: Cut and Prepare the Paper Strip
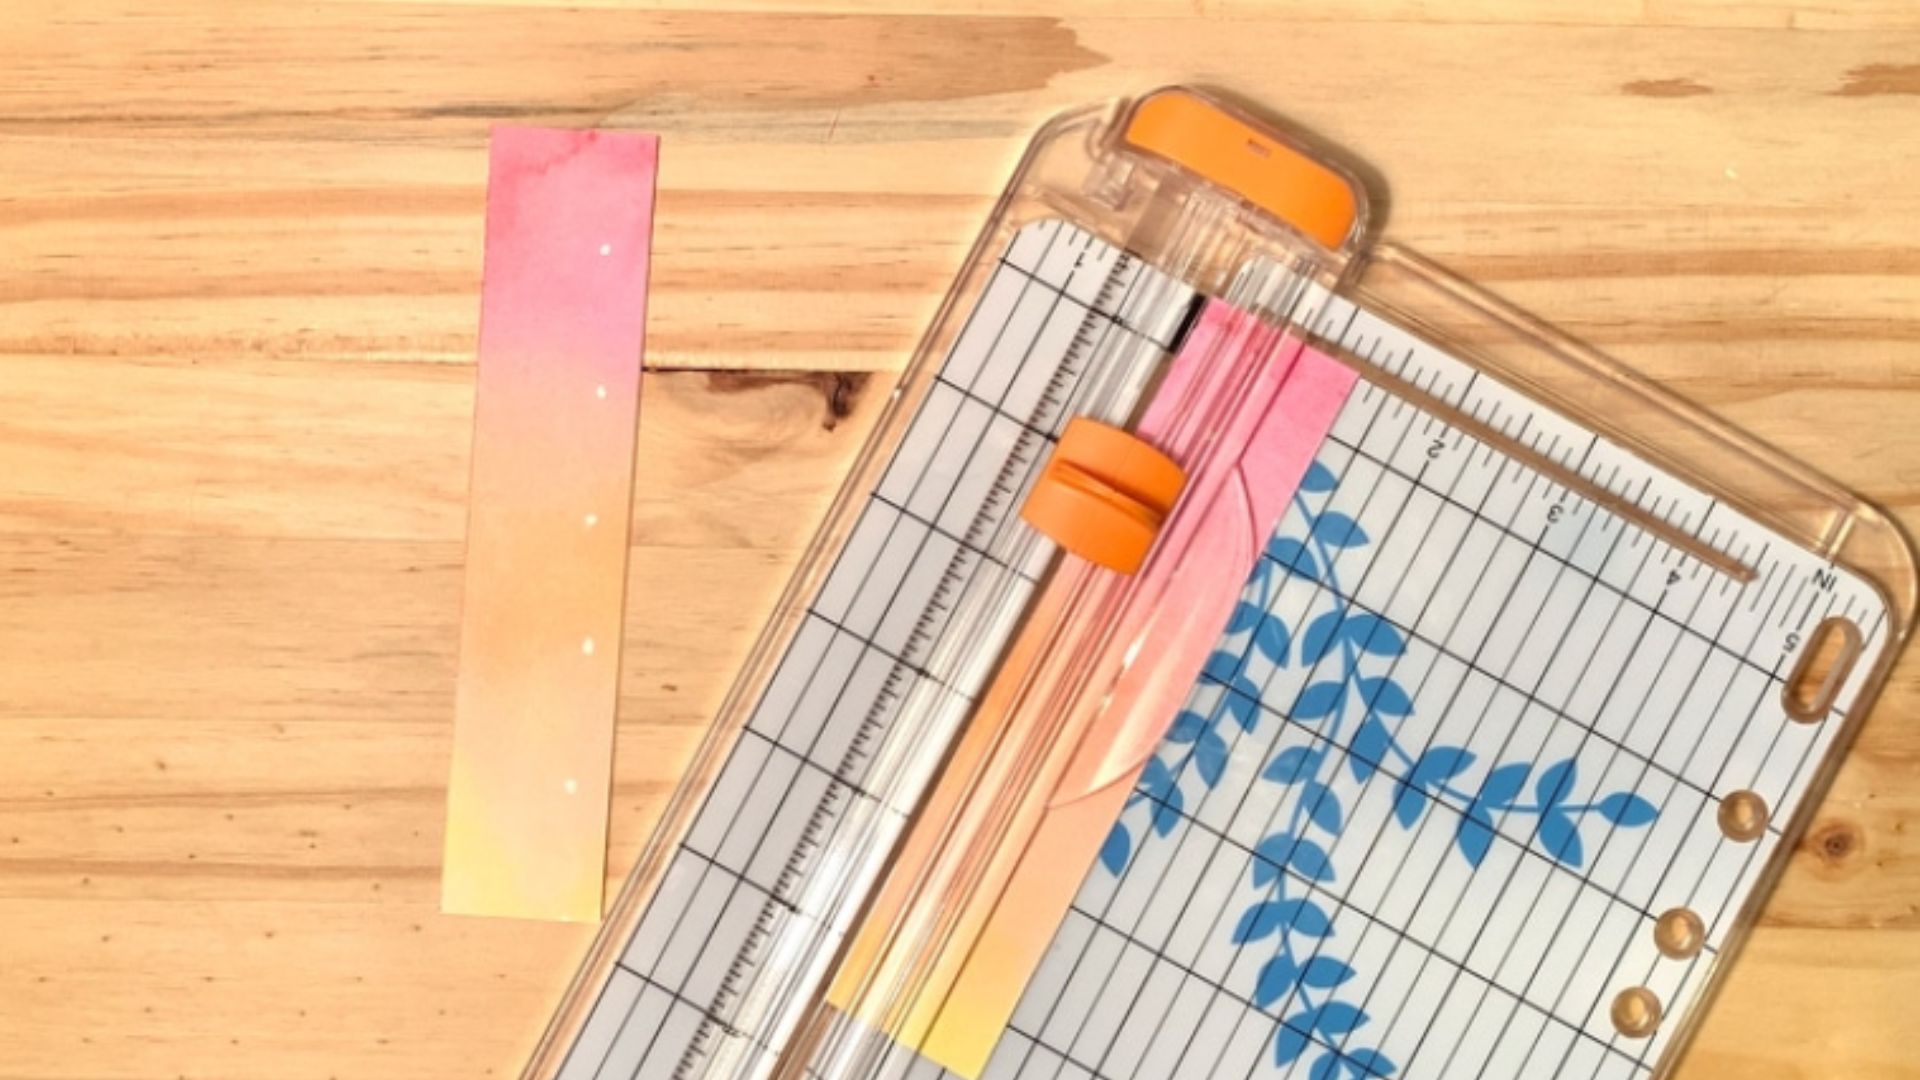
Start with a long, narrow strip of paper. Use a paper cutter or scissors to keep the edges straight and clean.
Make sure the strip is even in width from one end to the other. An uneven strip will make folding harder later. A colored or gradient strip works great if you want a nicer finish. Origami paper is a solid choice here because it is already smooth and easy to fold.
Step 2: Create the First Fold at One End
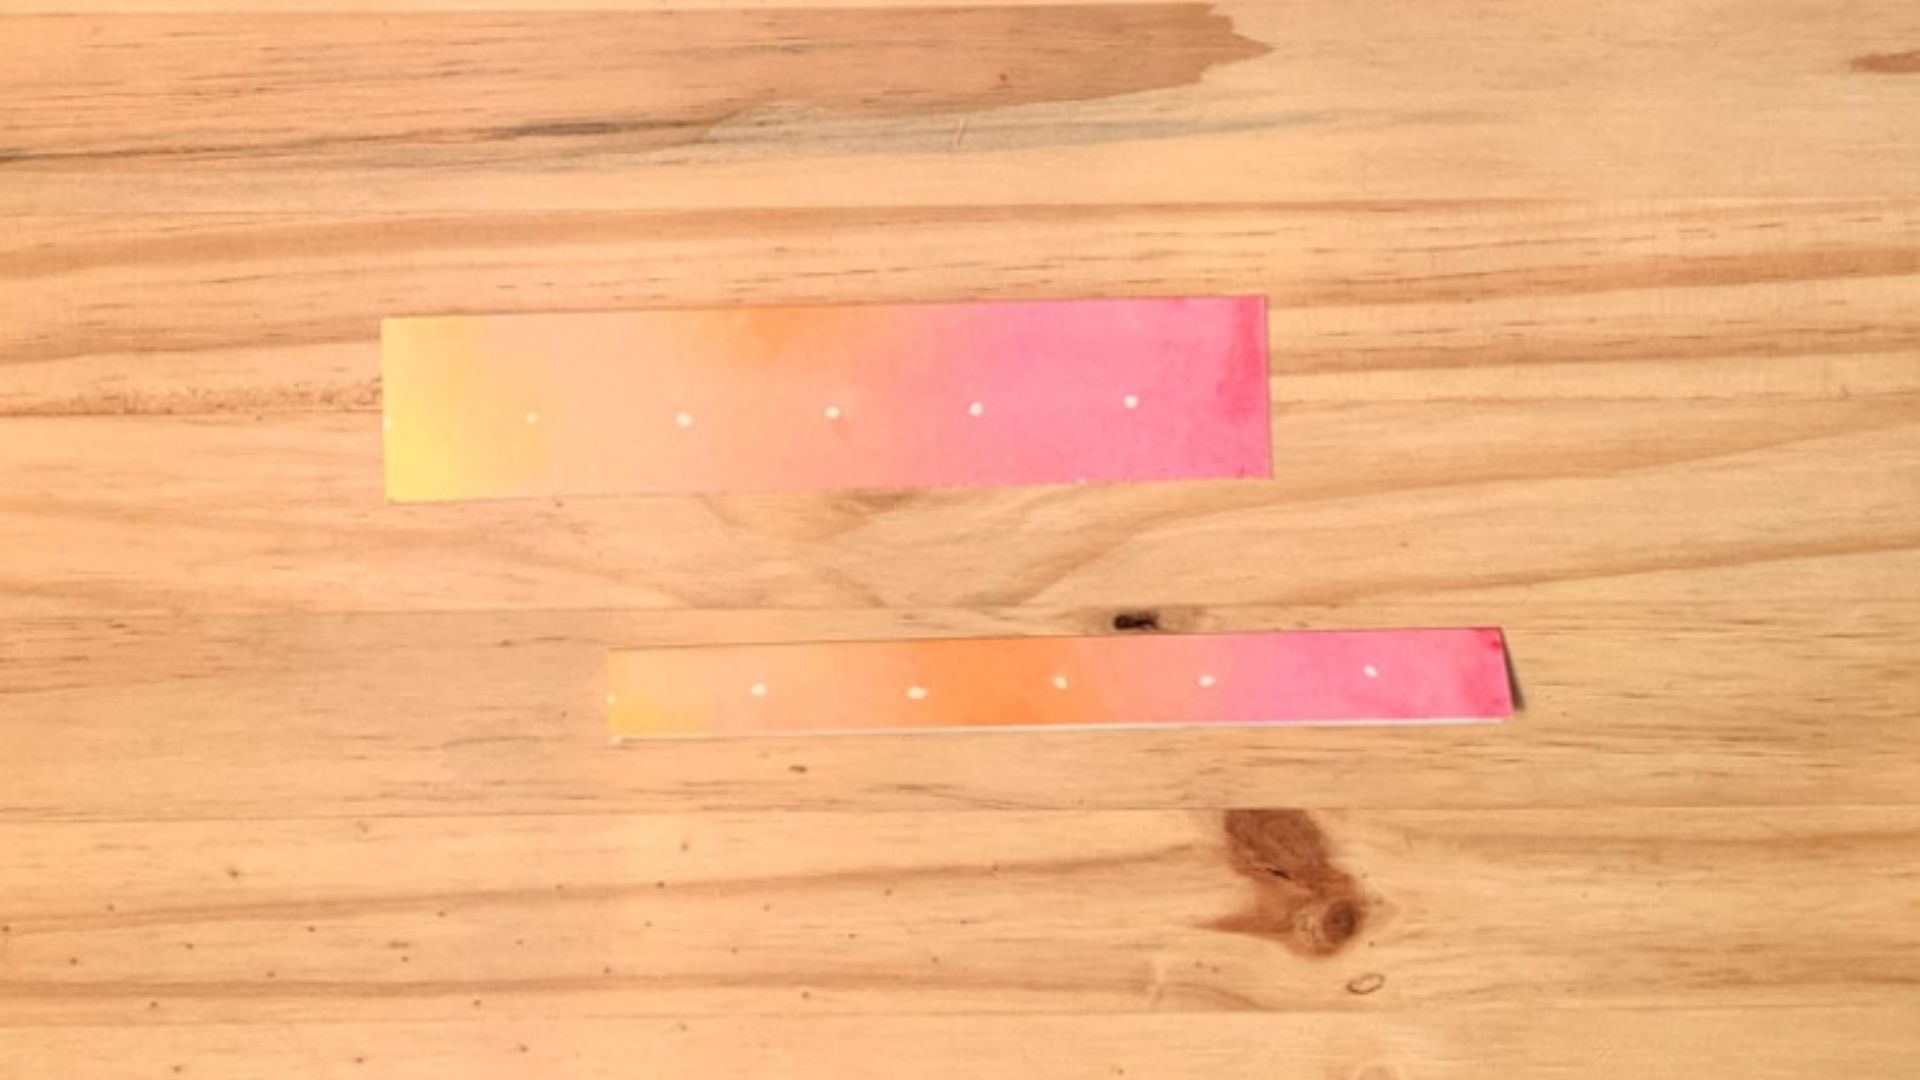
Take one short end of the strip and fold a small section upward. About 1 to 2 cm is enough. This small flap is important. It will act as a lock in the final steps to hold the ring together without glue.
Keep the fold sharp and straight. Press it down firmly with your fingernail so it stays flat.
Step 3: Fold Using the Guide Marks
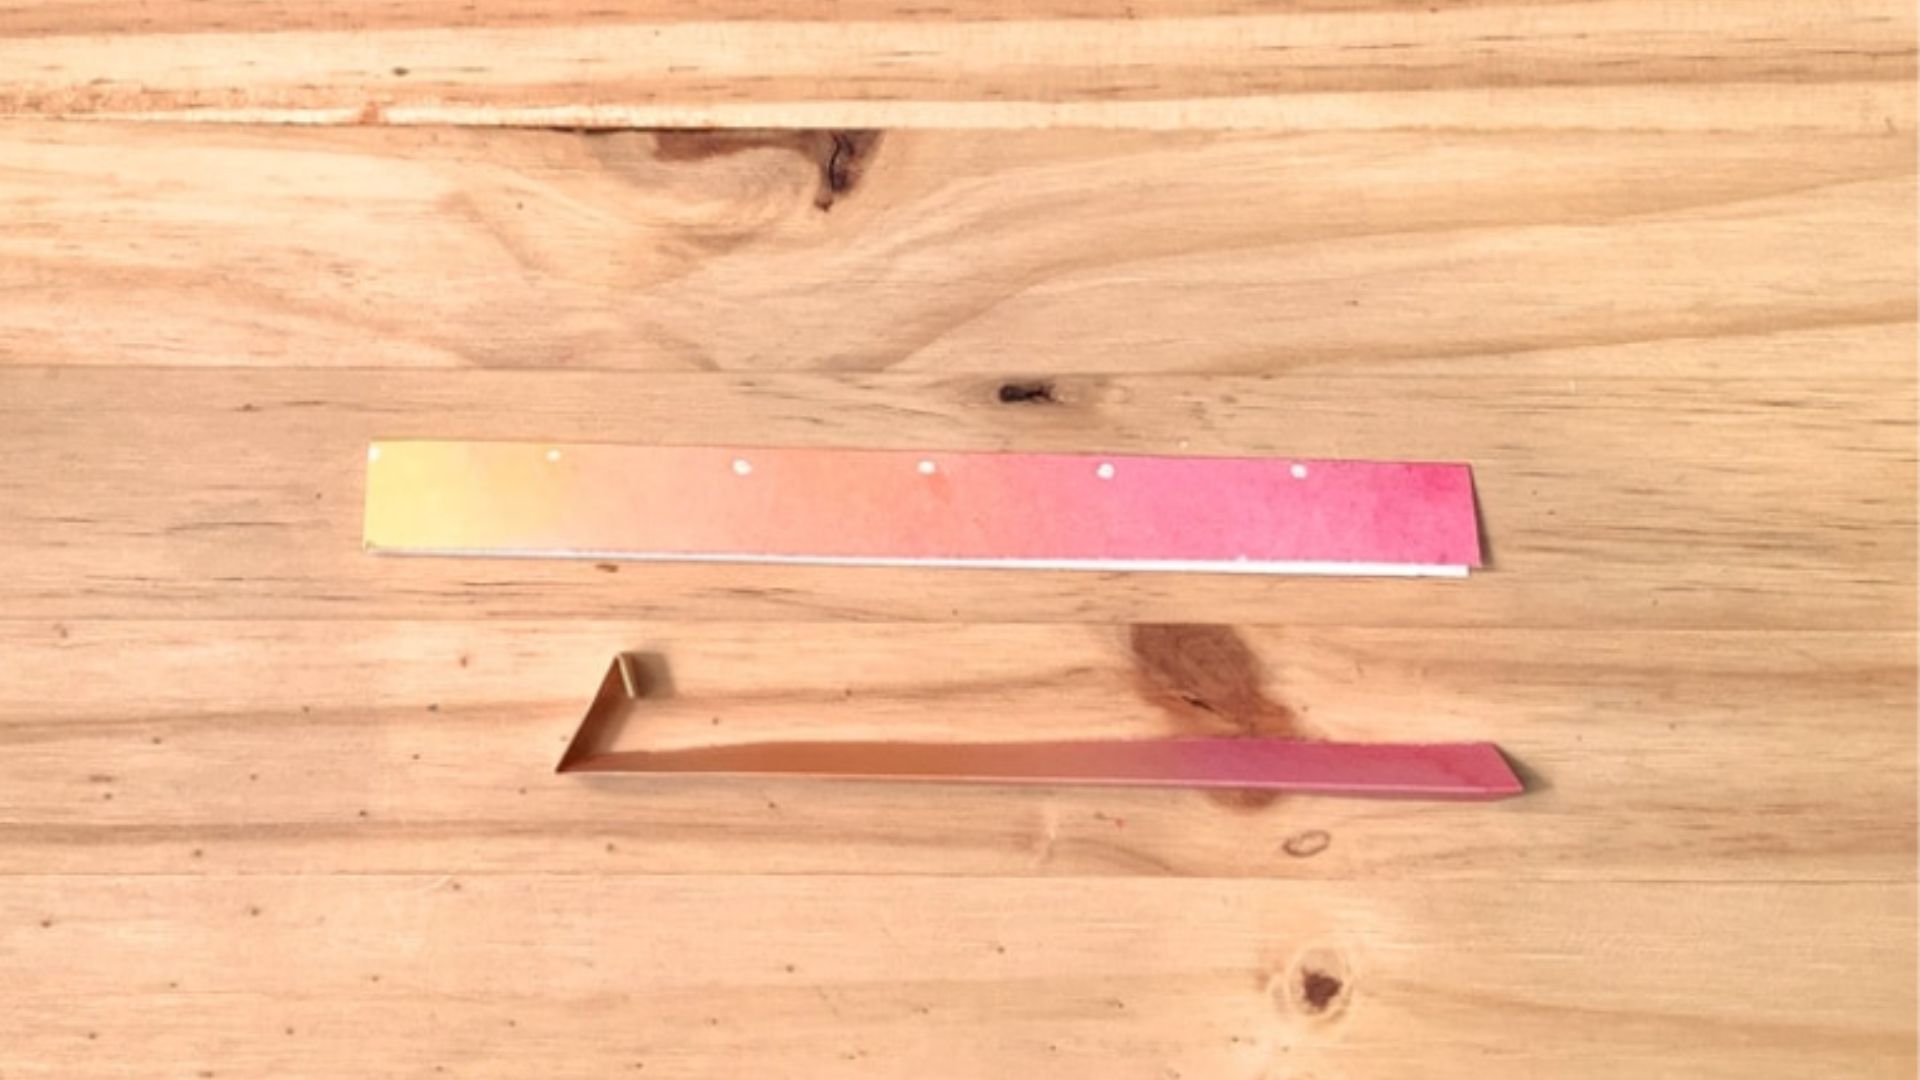
If your paper has dotted guide marks, follow them closely. If not, measure and mark the fold points yourself with a light pencil line.
Fold the strip at each marked point to create angled bends. You will notice the strip slowly forming a zig-zag shape. This is completely normal and exactly what should happen.
Press each fold firmly before moving to the next one. Rushing through this step leads to uneven bends that are hard to fix later.
Step 4: Form the Top Square
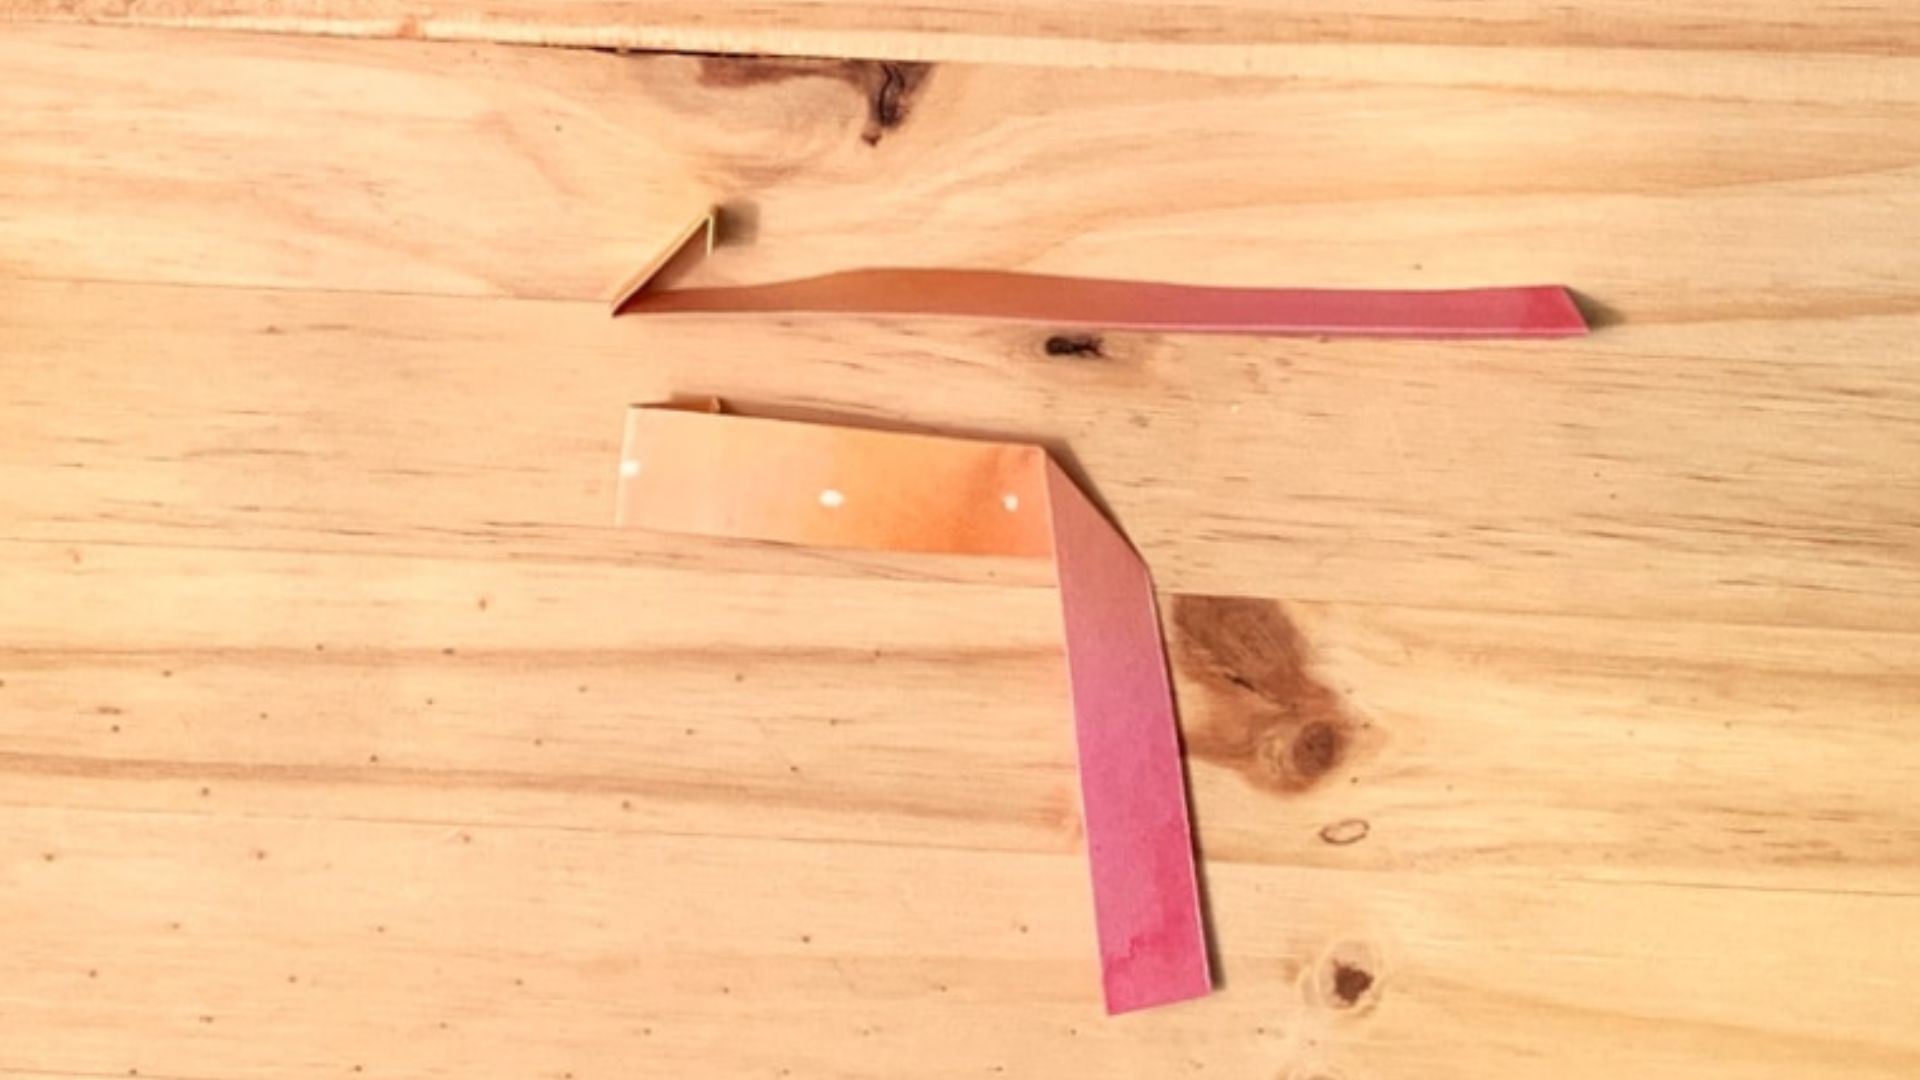
This step creates the decorative face of the ring. At the center section of the strip, fold the paper carefully into a small flat square shape.
Wrap the paper over itself so the square looks neat and sits flat. This is the part that will show on top of your finger, so take your time to get it even. Both sides of the square should line up cleanly.
If the square looks a little off, gently unfold and redo it. It gets easier with practice.
Step 5: Wrap Around to Form the Ring Band
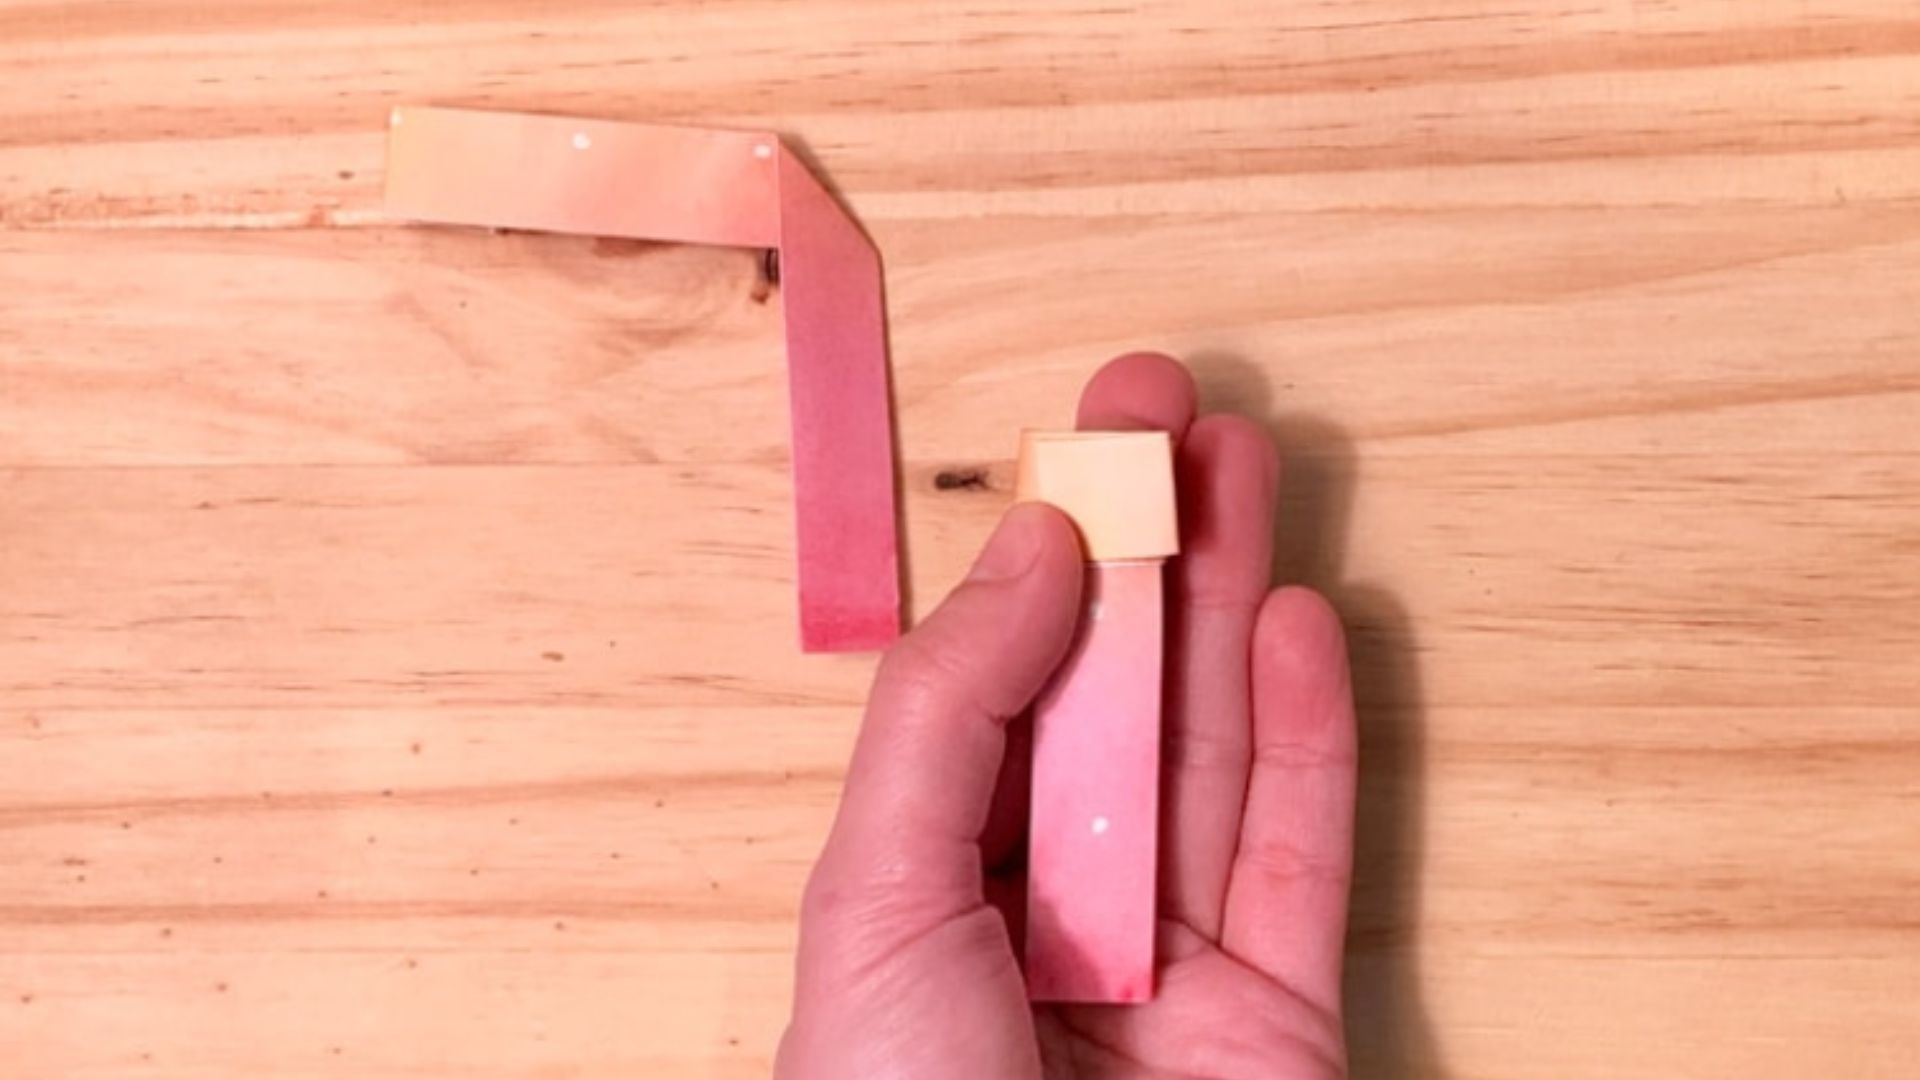
Take the longer end of the strip and start wrapping it into a loop. Curve it gently into a circular shape that fits around your finger.
Do not wrap it too tight. Leave just a little room so the ring feels comfortable. Bring the end of the strip underneath the square top section and hold it in place while you check the fit.
Try it on your finger before locking it. Adjusting the size is much easier at this stage than after it is locked.
Step 6: Lock the Ring in Place
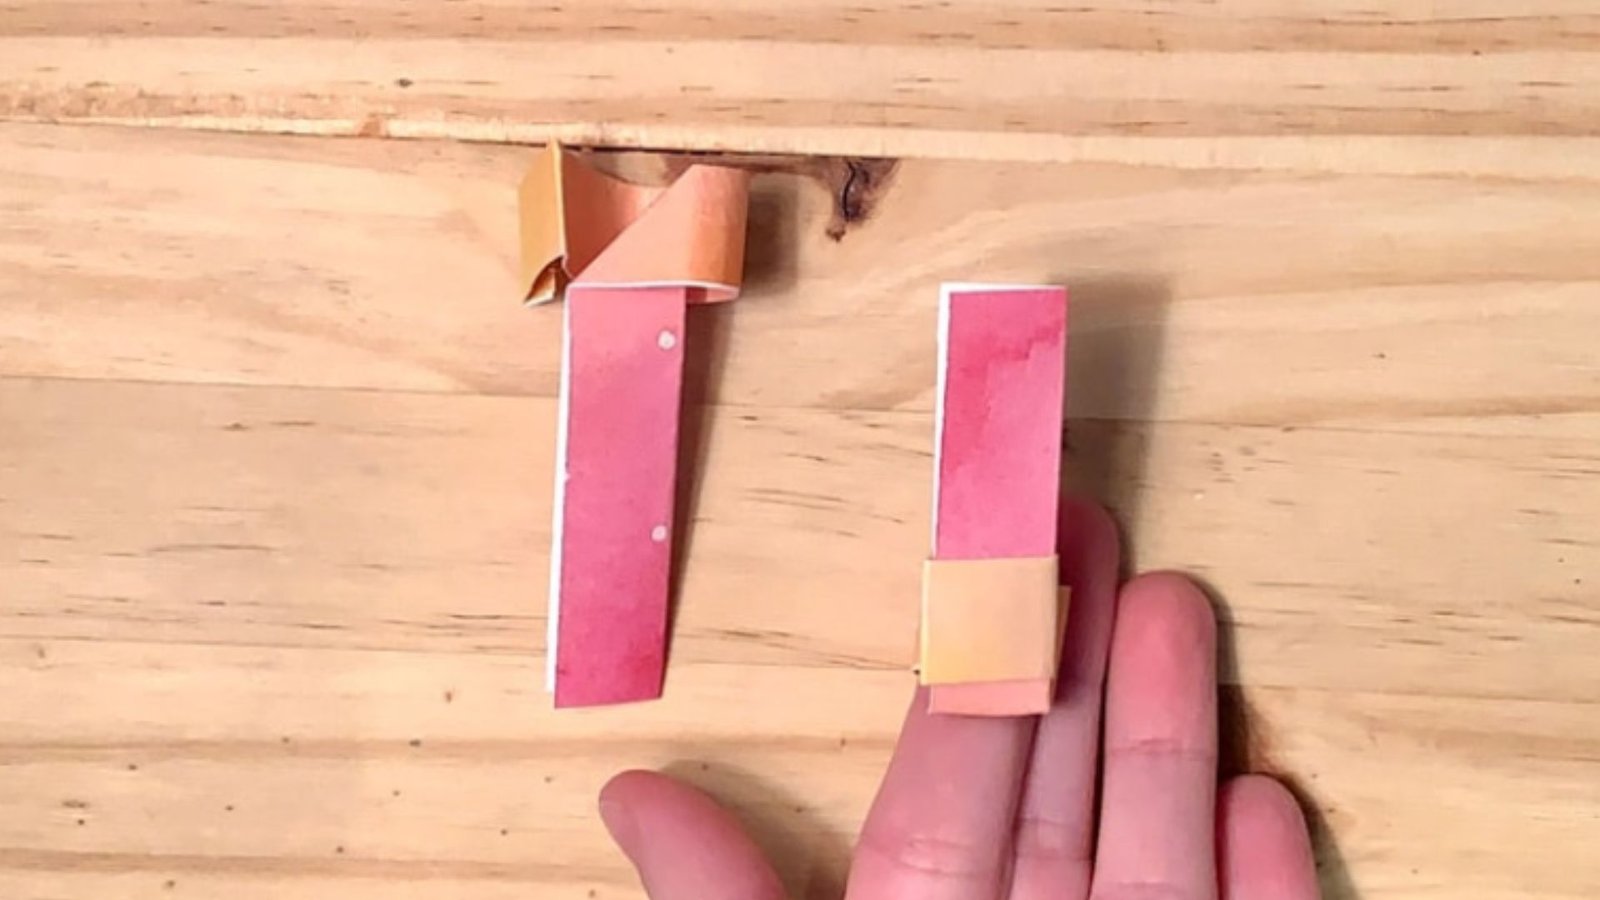
Use the small folded flap you made in Step 2 to secure the ring. Tuck the end of the strip into the folds underneath the square top. Slide it in firmly so everything holds together without any glue.
Press the whole ring down flat once it is locked. Run your fingernail along the edges to tighten any loose folds. The ring should now feel solid and hold its shape on its own.
Step 7: Final Shape and Adjustment
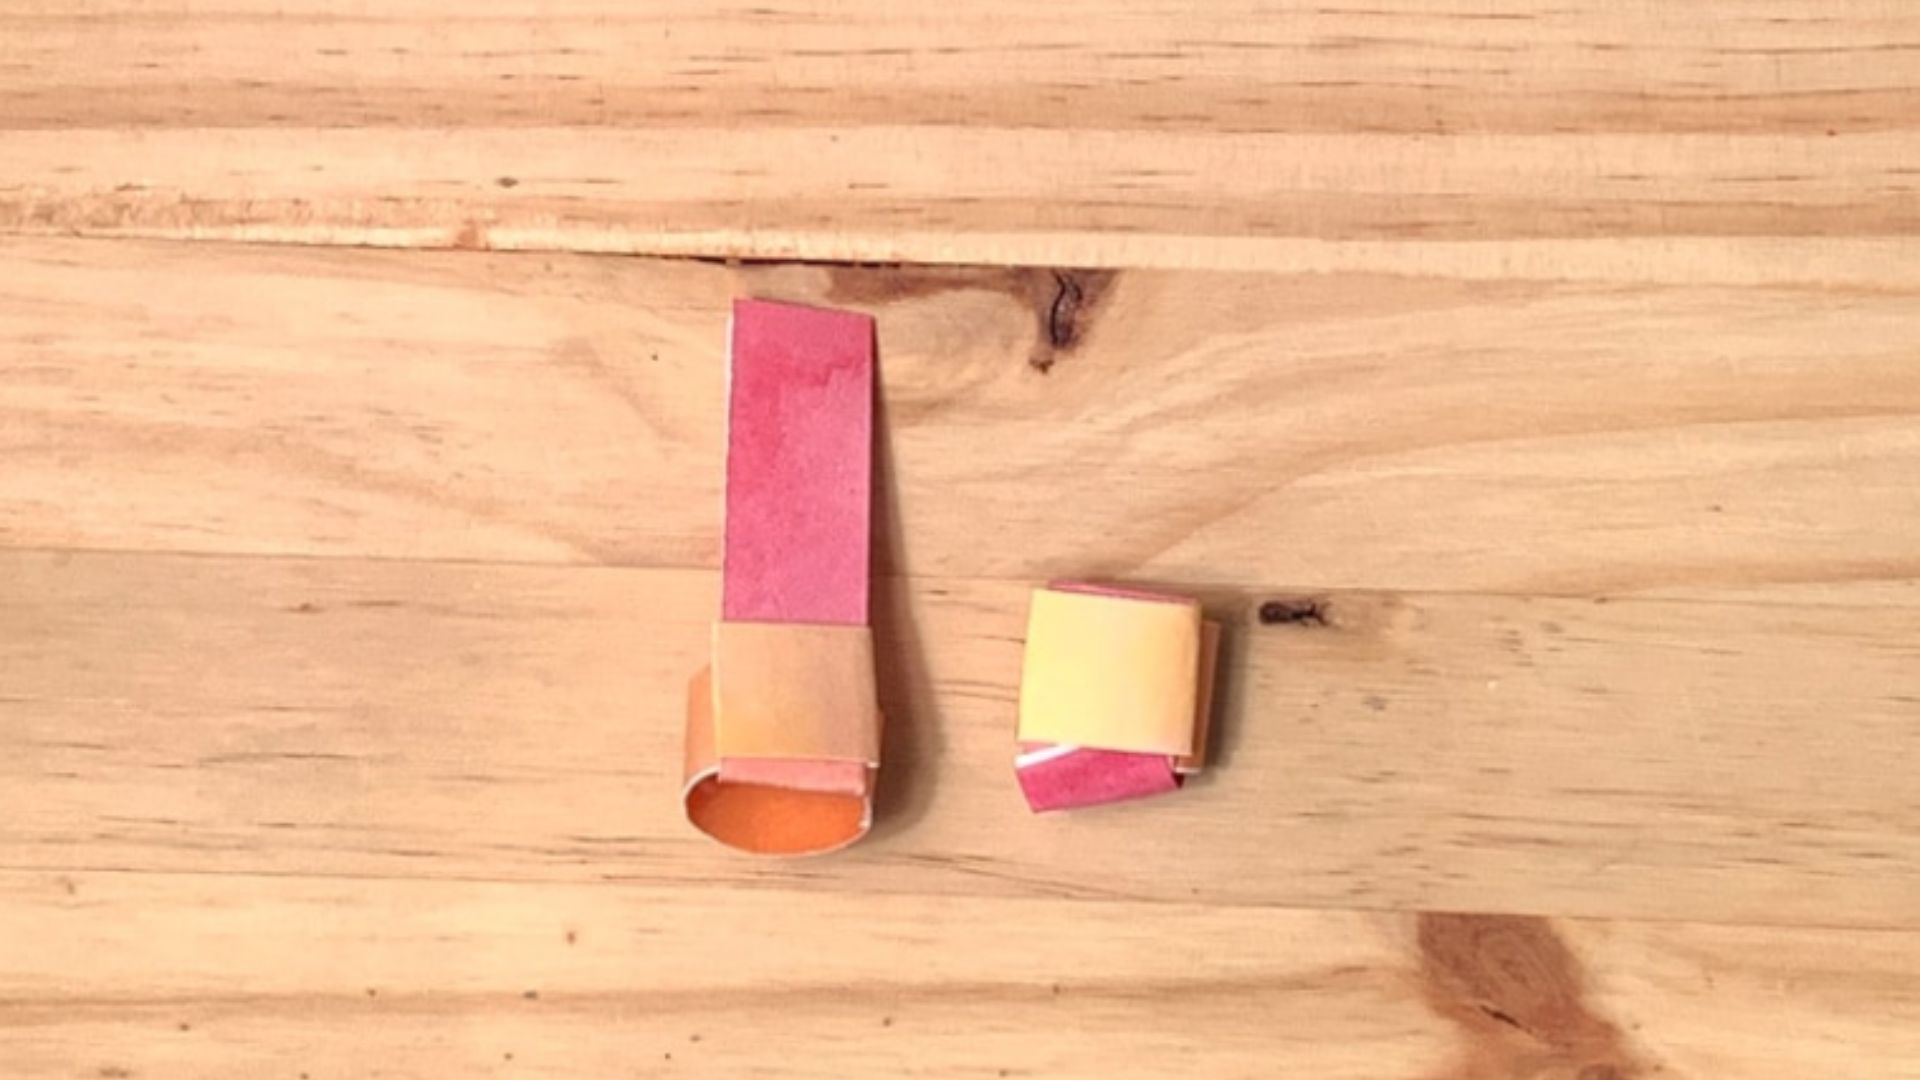
Gently round the band into a smooth circle by pressing it lightly between your fingers.
Slide it onto your finger and check the fit. If it feels too tight, pull the band open slightly from the bottom. If it feels too loose, push the folds a little closer together.
Make small adjustments only. Pulling too hard can tear the paper or loosen the lock. Work slowly and the ring will hold up well.
Tips to Make a Perfect Paper Ring
These practical tips help you avoid common problems and get cleaner results every time.
- Use your fingernail or a ruler edge to press each fold for a sharper crease.
- Always work on a flat, hard surface like a table or desk.
- Stick to origami paper if you are a beginner. It is thin, crisp, and easy to fold.
- Never skip the center crease. It keeps all your folds even and balanced.
- Check the fit around your finger before doing the final tuck to lock the ring.
Creative Ways to Decorate Your Paper Ring
Simple decoration ideas that make your paper ring stand out and feel more personal.
Use Markers and Doodles
Once your ring is finished, grab some markers and draw on it.
Fine-tip markers work best for small details. You can draw patterns, write a name, or add small symbols like stars or hearts. Keep the pressure light so you do not tear the paper.
Simple line patterns along the band look neat and clean. Even a few dots or stripes can make the ring look more finished.
Try Patterned or Colored Paper
The easiest way to make a ring look more interesting is to start with better paper.
Scrapbook paper, gift wrap, or printed origami paper all work well. Cut your strip from a section of the paper with a pattern you like. When folded, parts of the pattern will show through in interesting ways.
Metallic gold or silver paper creates a ring that looks almost like real jewelry.
Add Small Details and Designs
You can glue small things onto the top of your ring for extra detail.
Tiny stickers, sequins, or small paper shapes work well. Cut a small flower or star from a contrasting color of paper and glue it to the top of the ring. Let it dry fully before wearing.
A small dot of clear nail polish over the top can also seal the paper and give it a shiny finish.
Conclusion
I still remember making my first paper ring as a kid and feeling so happy when it actually held its shape. It is one of those small crafts that never gets old.
Now you have everything you need to get started. Try different paper colors, experiment with variations, and make a few for friends or family.
If this guide helped you, <u>leave a comment below and share how yours turned out.</u> I would love to see what you create with just a simple strip of paper.
Frequently asked questions
Can I Make a Paper Ring Without Glue?
Yes, you absolutely can. The folding and tucking method locks the paper ring in place without any glue needed. Just make sure the ends are tucked in firmly.
What Is the Best Paper for Paper Rings?
Origami paper is the best choice for beginners. It is thin, easy to fold, and holds creases well. Craft paper or scrapbook paper also works nicely.
How Do I Make the Ring Fit My Finger?
Wrap the paper strip around your finger before locking it to check the size. You can adjust the band slightly tighter or looser before doing the final tuck.
Is This Craft Suitable for Kids?
Yes, it is a great activity for kids aged 6 and above. Younger children may need help with the folding steps, but the overall process is simple and safe.
How Long Does It Take to Make a Paper Ring?
Once you know the steps, a basic paper ring takes about 5 to 10 minutes to complete. Your first try may take a little longer as you get comfortable with the folds.
