

Struggling to find the perfect tote bag pattern for your skill level? I’ve got you covered.
In this comprehensive guide, you’ll find 41 crochet tote bag patterns ranging from beginner-friendly rectangles to artistic designs.
You’ll learn:
- Which patterns work best for different uses (groceries, beach, everyday)
- How to choose the right yarn for durability
- Simple techniques to make your bags look professional
- Step-by-step instructions even absolute beginners can follow
Say goodbye to flimsy store-bought bags. By the end of this article, you’ll have all the knowledge you need to create beautiful, functional totes that last for years.
Classic and Everyday Totes
1. Simple Rectangle Tote Bag

This is where I started my crochet journey. Two rectangular panels joined together, that’s it! Perfect for absolute beginners. The straightforward shape means you can focus on mastering basic stitches without worrying about complex shaping.
Work this pattern in any stitch you’re comfortable with, single crochet, half double, or even treble. Try different border stitches around the edges to add a personal touch. I love making these as gifts because they work up so quickly!
Pro tip: Use a thicker yarn for your first tote to see results faster.
2. Solid Stitch Utility Bag

When you need a bag that won’t stretch or sag, this is your go-to pattern. The tight single crochet creates a dense fabric that stands up to daily use. I’ve had mine for three years, and it still looks brand new!
Adding a fabric lining takes this bag to the next level. Choose a fun contrasting print to peek out from the top edge. For extra durability, consider adding plastic canvas to the bottom to maintain the shape.
3. Back-to-School Book Tote

Students, this one’s for you! Designed specifically to carry heavy textbooks without stretching out of shape. The reinforced bottom means no more broken bags mid-semester.
The post-stitch pattern creates a thick, almost quilted texture that stands up to everyday abuse. Adding an internal pocket keeps smaller items from getting lost. Personalize it with school colors or iron-on patches for a custom look!
4. Everyday Neutral Tote

Sometimes simple is best. This clean-lined tote in natural cotton or linen yarn goes with everything. No wonder it’s one of my most-used patterns!
The beauty lies in its versatility, dress it up with leather handles or keep it casual with crocheted straps. These bags make excellent canvases for embroidered details or appliqué patches. I’ve made one in every neutral shade for different outfits.
5. Two-Tone Everyday Tote

Ready for something with a bit more personality? This tote uses basic color-blocking to create visual interest. You’ll be amazed how different it looks depending on which colors you choose.
Try complementary colors for bold contrast or different shades of the same hue for a subtle effect. This pattern teaches the invisible color change technique, a valuable skill for future projects. These bags also make great gifts for sports fans when made in team colors!
6. Office Chic T-shirt Yarn Tote
Got an important meeting? This sophisticated tote works up incredibly quickly using recycled t-shirt yarn. The result? A structured bag that looks store-bought but has that handmade heart.
The weight of t-shirt yarn gives this bag excellent drape and structure without need for a lining. Try making your own yarn from old shirts for a truly sustainable project. The chunky texture creates a modern, minimalist aesthetic perfect for professional settings.
Market & Grocery Bags
7. Chunky Yarn Grocery Tote

Need a new grocery bag by tomorrow? This chunky yarn pattern works up in just a few hours. The thick yarn creates a naturally sturdy structure, perfect for canned goods and heavier items.
Look for super bulky (category 6) yarn or even t-shirt yarn for maximum speed. These bags make excellent housewarming gifts paired with a few pantry staples inside. The simple stitch pattern makes it easy to add personalized touches like stripes or color changes.
8. Eco Cotton Mesh Market Bag

My personal favorite! This airy mesh design is lightweight but surprisingly strong. The tiny size when folded means I always keep one in my purse for unexpected shopping trips.
The diamond mesh pattern creates interesting visual texture while remaining practical. For beginners, start with a larger hook size to make the mesh easier to work. These bags stretch significantly when filled, so don’t worry if they look small when complete!
9. Expandable Produce Tote

The clever construction of this bag means it starts compact but stretches as you add more items. It’s like magic! Your fruit and vegetables will thank you for the breathing room.
The expansion comes from strategic increases in the pattern that create a naturally pleated effect. These bags are perfect for farmers market shopping where you might not know how much you’ll buy. Wash them after each use for food safety, cotton yarn makes this easy.
10. Farmers Market Carry-All

Saturday markets require serious carrying capacity. This oversized tote has reinforced handles and a breathable stitch pattern that keeps produce fresh longer.
The base works up in a tight stitch pattern for stability, while the sides use a more open pattern for airflow. Consider adding a drawstring top closure to prevent items from falling out. This design easily holds a week’s worth of vegetables for a small family!
11. Rustic Jute Shopping Bag

For a natural look with incredible durability, try jute yarn. The earthy texture adds character while standing up to years of use. Not to mention, it’s biodegradable!
Jute can be slightly rough on hands when crocheting, so consider working shorter sessions. The natural variations in color give each bag a unique personality. These totes develop a beautiful patina with age, much like fine leather.
Creative and Artistic Totes
12. Mosaic Crochet Tote

Don’t worry! Mosaic crochet looks complex but uses simple color changes to create eye-catching geometric patterns. Your friends won’t believe you made it yourself.
The technique involves working with one color per row and strategically dropping stitches down to previous rows. Chart reading is essential here, but once you get the hang of it, the possibilities are endless. Try high-contrast colors for your first attempt to better see the pattern emerge.
13. Mandala Circle Tote

Transform your bag into a wearable art piece with this circular mandala design. The methodical process of creating concentric patterns makes this project as relaxing as it is beautiful.
Working in the round eliminates side seams, creating a smooth, professional finish. Keep your tension consistent for best results—blocking will help even out any wobbles. Consider framing the mandala within a solid-colored background for dramatic effect.
14. Flower Power Granny Square Bag

Remember granny squares? They’re back and better than ever! Connect colorful floral squares for a retro-inspired tote that makes a statement.
Each square can be a different color combination, making this perfect for using up scrap yarn. Work a few squares at a time between other projects for a low-pressure approach. Adding black borders around each square makes the colors really pop against each other.
15. Abstract Patchwork Tote

No rules here! Create different shapes and join them for a truly unique boho bag. It’s the perfect project for using up scrap yarn from other projects.
The freestyle approach allows for maximum creativity—triangles, hexagons, circles, and squares can all work together. Use a consistent background color to unify different elements. This technique teaches valuable seaming skills that transfer to garment making.
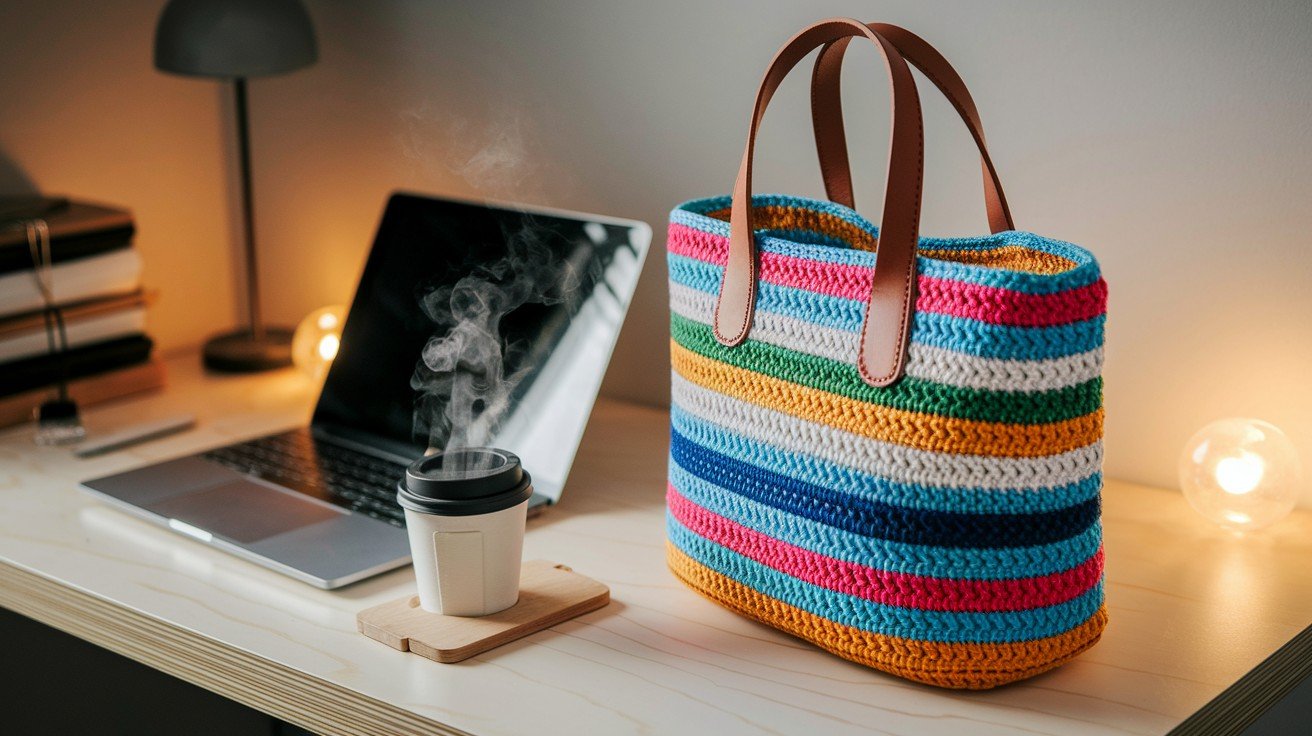
16. Color Blocked Chevron Bag
![]()
The zigzag pattern of chevrons creates movement and energy in this eye-catching design. Try contrasting colors for maximum impact!
Chevron stitch is surprisingly easy once you get into the rhythm of increases and decreases. This pattern teaches valuable shaping techniques that apply to many other projects. For a subtle version, try working in shades of the same color family.
17. Ombre Fade Crochet Tote

Three shades of the same color create a lovely gradient effect. I find this particularly striking in blues and purples, but any color family works beautifully.
The key is finding three yarns with the same fiber content for a consistent texture. Consider adding a fourth transition color for an even smoother gradient. This technique teaches valuable color theory principles applicable to all your crochet projects.
18. Painted Canvas Tote (Yarn Edition)

This technique uses varied stitches and thoughtful color placement to mimic brushstrokes. The result? A bag that looks hand-painted but is 100% crochet.
Study famous paintings for color inspiration—impressionist works translate especially well to this technique. The free-form nature makes this an excellent stress-relieving project. No two bags will ever be exactly alike, even if you try to replicate your own work!
Floral & Feminine Totes
19. Spring Bloom Lacy Tote

Light lace patterns create a feminine bag that’s perfect for spring events. The airy construction means it’s lightweight despite its pretty appearance.
Blocking is essential with lace work—use rust-proof pins and a foam mat for best results. Consider using a light-colored cotton yarn to show off the intricate stitch definition. Adding a satin lining transforms this into a perfect wedding or special occasion accessory.
20. Daisy Granny Tote Bag

Each granny square becomes a cheerful daisy in this sweet design. It’s impossible to carry this bag without smiling!
The flower centers can be worked in french knots or button centers for different effects. Make your squares larger or smaller depending on how many flowers you want to feature. These make perfect summer bags for children or cheerful gifts for gardening enthusiasts.
21. Rose Motif Tote

Take your crochet skills to the next level with dimensional roses applied to a solid base. The 3D effect creates a truly special accessory you’ll treasure.
Each rose takes about 30 minutes to create but adds hours of visual impact. Consider mixing different sizes of roses for a more natural, garden-inspired look. The solid base bag can be worked in a complementary or contrasting color to make your flowers stand out.
22. Sunflower Centerpiece Bag

Bold and beautiful sunflowers appear on each side of this statement tote. Yellow and brown yarns create realistic flowers that bring sunshine wherever you go.
The dimensional petals work up more easily than they appear—it’s all about simple increases and decreases. Consider adding green leaves around the flowers for a more complete look. This design turns heads at farmer’s markets and garden parties alike!
23. Petal Puff Tote

The texture is the star in this design. Puffy flower stitches create a soft, touchable surface that adds dimension and interest to a simple shape.
The puff stitch is easier than it looks—just multiple yarn overs gathered together. Try a gradient or rainbow effect by changing colors with each flower row. This stitch creates a thicker fabric that’s perfect for protecting items in your bag.
Beach & Summer Totes
24. Coastal Striped Tote

Nothing says “beach day” like blue and white stripes! This nautical-inspired tote is roomy enough for towels, sunscreen, and a good book.
Work the stripes horizontally for a traditional look or vertically for an elongated effect. Consider adding a waterproof lining to protect your belongings from sand and dampness. Red accents or anchor appliqués complete the maritime theme perfectly!
25. Shell Stitch Beach Bag

The shell stitch naturally mimics seashells, making it perfect for a beach tote. The stitch pattern creates a flexible fabric that conforms to whatever you’re carrying.
This intermediate stitch looks complex but follows a simple repeat pattern. Try variegated ocean-colored yarn for a subtle wave effect. The natural scalloped edge eliminates the need for a separate border—a time-saving bonus!
26. Mesh Beach Day Tote

Sand just falls right through this open-weave design. No more bringing half the beach home with you! The lightweight construction makes it ideal for hot days.
The mesh pattern allows wet items to dry more quickly—perfect for damp swimsuits or towels. Add a small zippered pocket inside for valuables that need extra protection. Consider working this in a cotton cord for extra durability against salt water.
27. Boho Fringe Beach Tote

Tassels and fringe add movement and playfulness to this free-spirited design. It’s begging to be taken on vacation!
Making tassels is surprisingly addictive once you get started—and they’re a great way to use up small yarn amounts. Try mixing textures by incorporating raffia or jute fringe for natural contrast. A drawstring closure keeps items secure when you’re on the move.
28. Sunset Ombre Tote

Capture the colors of a beach sunset with this gradient bag. Working from deep orange to soft pink creates a stunning visual that reminds you of perfect summer evenings.
The color transitions work best with at least four complementary yarns. Consider adding a pale yellow or gold accent for that perfect sunset “glow” moment. This bag becomes a treasured souvenir of summer memories long after vacation ends.
Compact, Foldable & Travel Totes
29. Fold-Flat Travel Tote

The clever construction of this bag allows it to fold completely flat for packing. Unfold it to use as a souvenir bag on your return journey!
The secret is in the strategic placement of decreased stitches that allow controlled collapse. When choosing yarn, prioritize drape over structure for better folding ability. These make thoughtful gifts for friends who travel frequently or have limited storage space.
30. Japanese Knot Tote

Inspired by furoshiki (Japanese fabric wrapping), this unique design uses wrapped handles for a distinctive look. It’s surprisingly comfortable to carry too!
The handles integrate directly into the bag body, eliminating weak attachment points. Practice the wrapping technique on a scarf before attempting the full bag pattern. This design teaches valuable principles of tension and drape that apply to many projects.
31. Mini Essentials Tote

Sometimes you just need the basics. This small, structured tote fits your phone, wallet, and keys—perfect for quick errands or evening outings.
The compact size makes this an excellent first project for children learning to crochet. Consider adding a small magnetic snap closure for extra security. Make several in different colors to match different outfits—they work up in just an evening or two!
32. Convertible Crossbody Tote

Why choose between a tote and a crossbody when you can have both? Strategic placement of D-rings and a detachable strap gives you two bags in one.
The reinforced sides maintain structure whether carried by handles or strap. Experiment with strap width for comfort—wider straps distribute weight better. Consider adding a zippered closure for security when worn crossbody style.
33. Backpack Tote Combo

Campus-friendly and versatile, this clever design transforms from tote to backpack with a simple strap adjustment. Your shoulders will thank you on heavy-load days!
The key is creating straps that function both ways without awkward dangling. Reinforced bottom corners prevent wear in high-stress areas. These make perfect gifts for students or busy parents who need hands-free options.
Totes Featuring Special Techniques
34. Tunisian Crochet Tote

New to Tunisian crochet? A tote bag is the perfect first project! The unique hybrid technique creates a fabric that looks knitted but uses a crochet hook.
You’ll need a special Tunisian hook with a long cable to fit all the stitches. The resulting fabric is thicker and less stretchy than regular crochet—perfect for structured bags. This technique creates a wonderful surface for cross-stitch decoration after completion.
35. Basketweave Stitch Tote

The textured pattern of basketweave stitch adds both beauty and structure to this tote. It’s particularly eye-catching in a solid color where the texture really shows.
The basketweave creates a naturally thicker fabric that stands up well without lining. This stitch pattern teaches valuable principles of front and back post stitches. Try it in a cotton-linen blend for excellent stitch definition with natural drape.
36. C2C Tote (Corner-to-Corner)

Crocheting diagonally opens up amazing possibilities for colorwork. This technique allows you to create pictures, words, or geometric designs with relative ease.
C2C works from a graph pattern, making it accessible even to beginner color-workers. The diagonal construction eliminates the need for seaming along the sides. This technique creates a slightly thicker fabric that maintains its shape beautifully.
37. Filet Crochet Tote

Create pictures or words with this technique that alternates solid and open spaces. It’s like pixel art with yarn! Try your initials or a simple image.
Working from a chart makes this technique very beginner-friendly. The open mesh creates an interesting semi-transparent effect when lined with a contrasting fabric. These bags make especially meaningful personalized gifts.
38. Cable-Stitch Tote Bag

Yes, you can create cables with crochet! This cozy textured bag looks like a favorite sweater and feels just as comforting to make.
Front post stitches create the raised cable effect without the complexity of knitted cables. Wool or wool-blend yarns show off the cable definition best. Consider adding wooden buttons or leather accents for a rustic, handmade finish.
Fun, Themed & Giftable Totes
39. Holiday Market Tote

Festive colors make this market bag perfect for holiday shopping. I make one each Christmas and fill it with small gifts—a present and wrapping in one!
Red and green yarn create the classic Christmas look, but try blue and white for Hanukkah or black, red, and green for Kwanzaa. Add jingle bells to the handles for extra festive charm. These bags become treasured decorations that families pull out year after year.
40. Heart Motif Valentine Tote

Show some love with this heart-patterned tote. It makes a thoughtful Valentine’s gift, especially filled with other handmade treats.
The hearts can be worked as appliqués or directly into the pattern using color changes. Consider adding initials or a special date for an anniversary gift. This pattern teaches valuable shaping techniques that create perfect heart curves.
41. Soap Saver Mini Tote

Not all totes need to be big! This tiny version acts as an exfoliating pouch for bar soap. It’s a practical zero-waste bathroom solution and makes a great gift.
The textured stitch provides gentle exfoliation while extending the life of expensive soaps. Make several at once as they work up in under an hour each. These pair beautifully with handmade soaps for thoughtful, eco-friendly gifts.
How to Crochet a Basic Tote Bag (Beginner Guide)
New to crochet? Let me walk you through the steps for a basic tote:
- Choose your yarn and hook. Medium weight cotton works well for beginners. Look for something that doesn’t split easily as you work. A size H/5mm hook gives good stitch definition without being too tight.
- Make your foundation chain. For a standard tote, chain about 30-40 stitches. This will create a bag approximately 12-15 inches wide. If you’re new to crochet, chain loosely to make the next row easier.
- Create two identical panels. Work in rows until each panel measures about 12-14 inches tall. Single crochet creates the sturdiest fabric, but half double crochet works up faster. Count your stitches at the end of each row to ensure even edges.
- Join the panels. Place them together and single crochet around three sides, leaving the top open. Work with the right sides facing out to create a cleaner finish. Use stitch markers at corners to keep track of your position.
- Add handles. Either crochet them separately and attach, or work them directly into the top edge. For beginners, I recommend adding handles made from sturdy ribbon or purchased webbing—just sew them on securely.
- Finish with any decorative touches you’d like to add. Simple borders, buttons, or even fabric patches can personalize your creation. Don’t be afraid to experiment!
That’s it! Your first tote is complete. Take a picture to document your achievement before putting it to use!
Pro Tips for the Perfect Crochet Tote
After making dozens of totes, I’ve learned a few tricks:
- Line your bags with fabric for extra structure and to prevent stretching. Iron-on interfacing on the fabric adds even more stability for heavier items. Choose a fun contrasting color that peeks out at the top edge.
- Reinforce handles with extra rounds of stitching or fabric backing. Grosgrain ribbon sewn to the inside of handles prevents stretching over time. For maximum durability, consider using paracord inside crocheted handle covers.
- Block your finished bag to improve its shape and drape. Wet blocking works best for natural fibers, while steam works well for acrylics. Proper blocking can transform a homemade-looking bag into a professional piece.
- Use starch spray on cotton bags for a crisp, professional finish. This works especially well for market bags that might otherwise look floppy when empty. Reapply after washing to maintain the structure.
- Consider adding a closure like a button, zipper, or magnetic snap. Even simple bags benefit from a secure closure, especially for city use or travel. Magnetic snaps are surprisingly easy to install, even for beginners. 💡 Pro Tips for the Perfect Crochet Tote
After making dozens of totes, I’ve learned a few tricks:
- Line your bags with fabric for extra structure and to prevent stretching. Iron-on interfacing on the fabric adds even more stability for heavier items. Choose a fun contrasting color that peeks out at the top edge.
- Reinforce handles with extra rounds of stitching or fabric backing. Grosgrain ribbon sewn to the inside of handles prevents stretching over time. For maximum durability, consider using paracord inside crocheted handle covers.
- Block your finished bag to improve its shape and drape. Wet blocking works best for natural fibers, while steam works well for acrylics. Proper blocking can transform a homemade-looking bag into a professional piece.
- Use starch spray on cotton bags for a crisp, professional finish. This works especially well for market bags that might otherwise look floppy when empty. Reapply after washing to maintain the structure.
- Consider adding a closure like a button, zipper, or magnetic snap. Even simple bags benefit from a secure closure, especially for city use or travel. Magnetic snaps are surprisingly easy to install, even for beginners.
Final Thoughts
Your perfect crochet tote bag awaits among these 41 patterns. From simple rectangles to detailed artistic designs, there’s truly something for everyone.
Remember that your handmade bag represents more than just an accessory. It’s a statement against disposable culture. It’s a way to carry your personality with you. It’s a conversation starter.
I’ve watched complete beginners grow into confident crocheters through tote bag projects. They’re the ideal learning canvas—forgiving, useful, and satisfying.
So pick up your hook and start today. Your first (or fiftieth) crochet tote bag doesn’t need to be perfect. It just needs to be yours. The joy is in the making, one stitch at a time.
Frequently Asked Questions
How do I prevent my market bag from stretching out of shape?
Use a non-stretchy cotton yarn and a smaller hook than recommended. For extra stability, add a round of single crochet at the top and bottom edges.
What’s the secret to perfectly even handles?
Count your stitches religiously! Mark the beginning and end of handle placement with stitch markers, and use a ruler to ensure both handles are identical in length.
Can I wash my handmade crochet tote bags?
Absolutely! Most cotton bags can be machine washed on gentle cycle. Lay flat to dry rather than hanging to prevent stretching. Always check your yarn label for specific care instructions.
How do I add a flat, sturdy bottom to my tote?
Crochet a separate oval or rectangle in tight stitches, then sew it to the bottom of your bag. For extra support, cut cardboard to size and cover with fabric before inserting.
Which pattern would sell best at craft fairs?
Market bags in cotton yarn and beach totes in bright colors are consistent sellers. Keep prices reasonable and display filled bags to show their practical use and proper shape.