

Learning to draw a cube is one of the first steps in understanding 3D art. This article walks you through everything, from the basics to shading, with clear and simple steps that actually work.
I have helped many beginners get past this exact struggle, so I know what trips people up.
You will cover what a cube is, tools you need, a step-by-step drawing guide, shading tips, and common mistakes to avoid.
By the end, you will have a solid cube on paper and the confidence to keep going.
Understanding the Basics of a Cube

A cube has six equal square sides. Every angle is 90 degrees and all edges are the same length. Think of a dice or a wooden block.
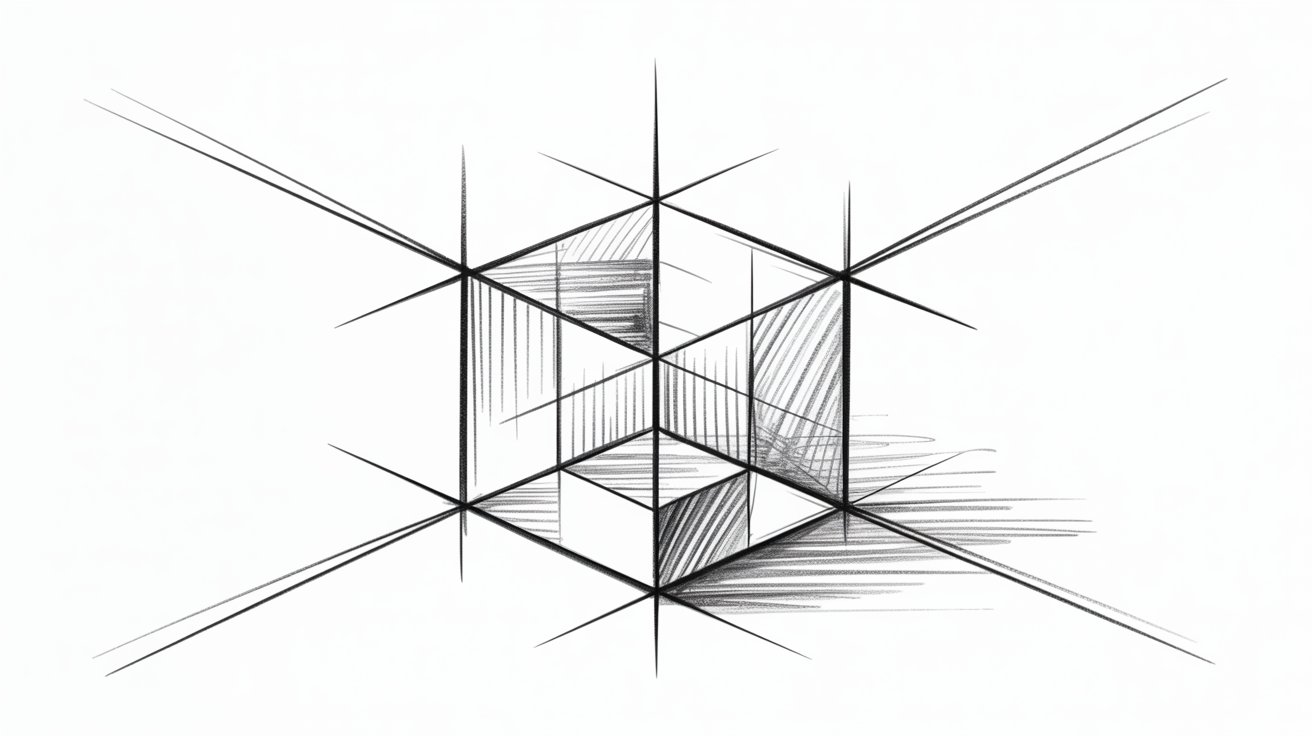
On paper, you make it look 3D by drawing it from a slight angle. This is called perspective.
Two things create the 3D effect:the direction of your lines and how you shade the faces.
Most lines in a cube run parallel to each other. If they are not parallel, the cube looks twisted. Keep all sides equal in size, and use a ruler if needed.
What You Need Before You Start

You do not need a lot to draw a cube. A few basic tools will do the job well.
Basic Drawing Tools
You do not need expensive supplies.
Here is what works:
- Pencil (HB or 2B works well)
- Eraser (a clean one, not worn out)
- Ruler (for straight lines)
- Plain paper (any white paper works)
A darker pencil like 4B or 6B is helpful for shading later. But start with what you have.
Quick Tips for Better Results
A few simple habits will make your cube look much better from the start:
- Draw lightly at first. Light lines are easy to erase and fix.
- Use a ruler for straight lines. Freehand lines can go off easily.
- Work slowly. Rushing leads to uneven shapes.
- Check your lines often. Hold your paper up and look at it from a distance.
These small habits make a big difference.
How to Draw a Cube Step-by-Step for Beginners
Follow these steps one at a time. Do not skip ahead. Each step builds on the last.
Step 1: Draw Three Parallel Lines

Start by drawing three vertical lines. Make them the same length and space them evenly.
These three lines will form the three visible front edges of your cube.
Keep them straight and parallel. Use a ruler if needed. This is your starting frame.
Step 2: Connect the Bottom Lines

Now connect the bottom of the left line to the bottom of the middle line. Then connect the bottom of the middle line to the bottom of the right line.
These two short lines should go slightly diagonal, not straight across. They give the cube its 3D angle.
These are the bottom edges of your cube faces. Get this right and the rest comes together.
Step 3: Add Two More Parallel Lines
From the top of the left line, draw a diagonal line going up and to the right. From the top of the right line, draw a diagonal line going up and to the left.
These lines should be the same length and angle. They form the top edges of the two side faces.
Think of them as matching wings on each side.
Step 4: Draw the Top (Pointy Hat Shape)
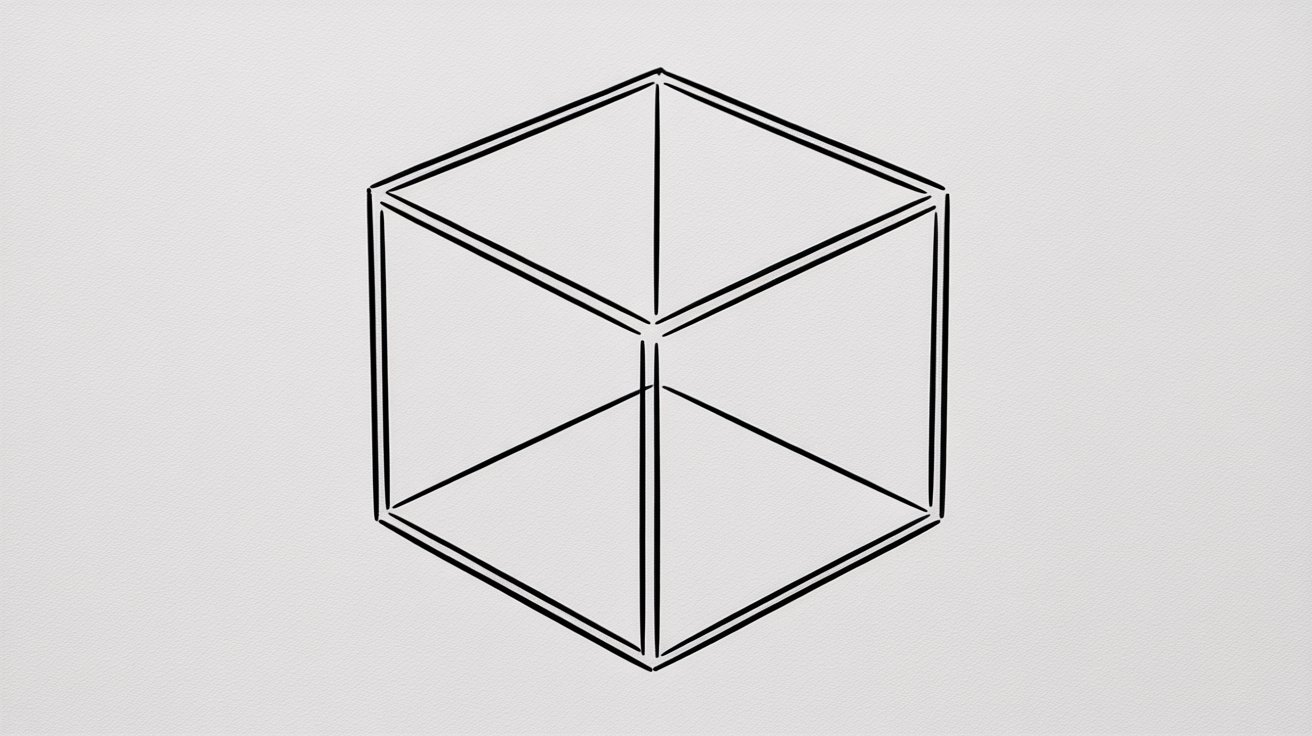
Now connect the ends of those two diagonal lines at the top. This creates the top face of the cube.
It will look like a flat diamond or a slightly squashed square. That is correct. This is the top of the cube seen from a slight angle.
Your cube shape is now complete. You should see all three visible faces clearly.
Step 5: Clean Up Lines and Add Details
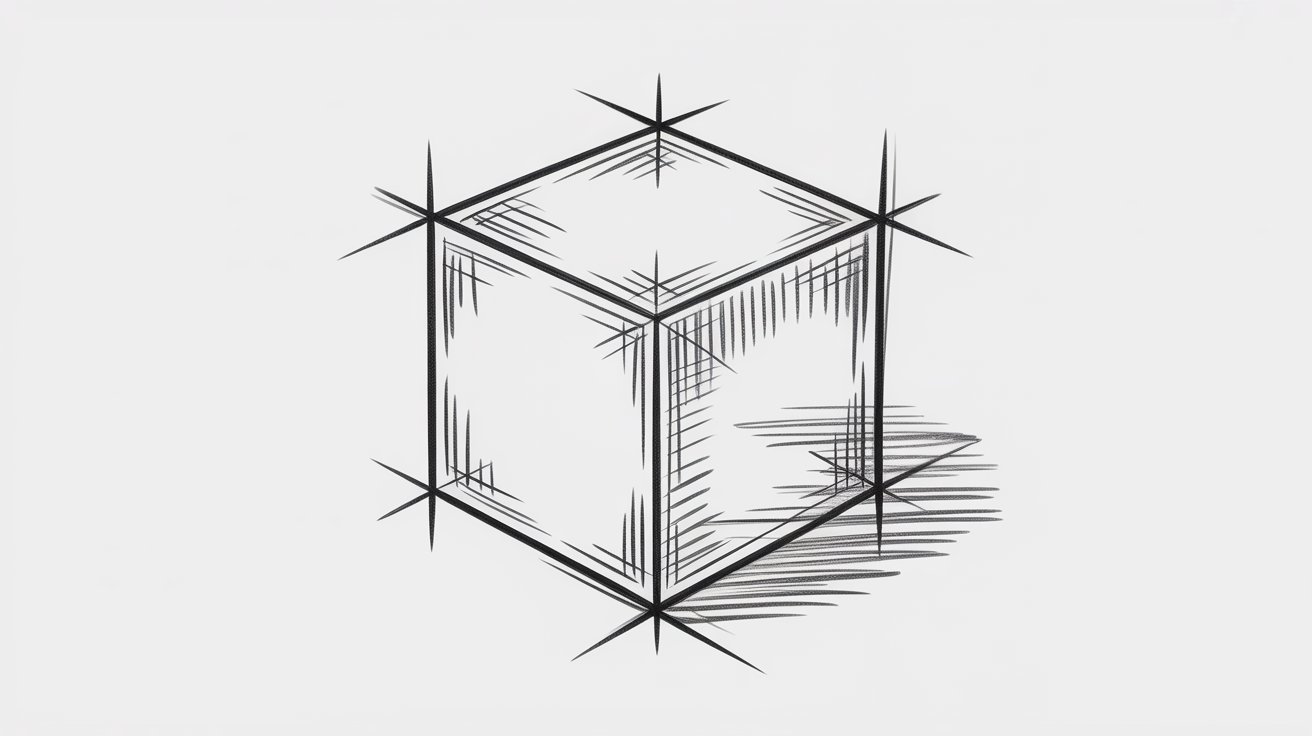
Go over your lines with a steady hand. Erase any extra marks or guide lines. Make your final edges clean and clear.
If any lines look off, fix them now before shading. A clean outline makes shading much easier.
At this point, your cube should look solid and balanced.
How to Shade a Cube for a 3D Look
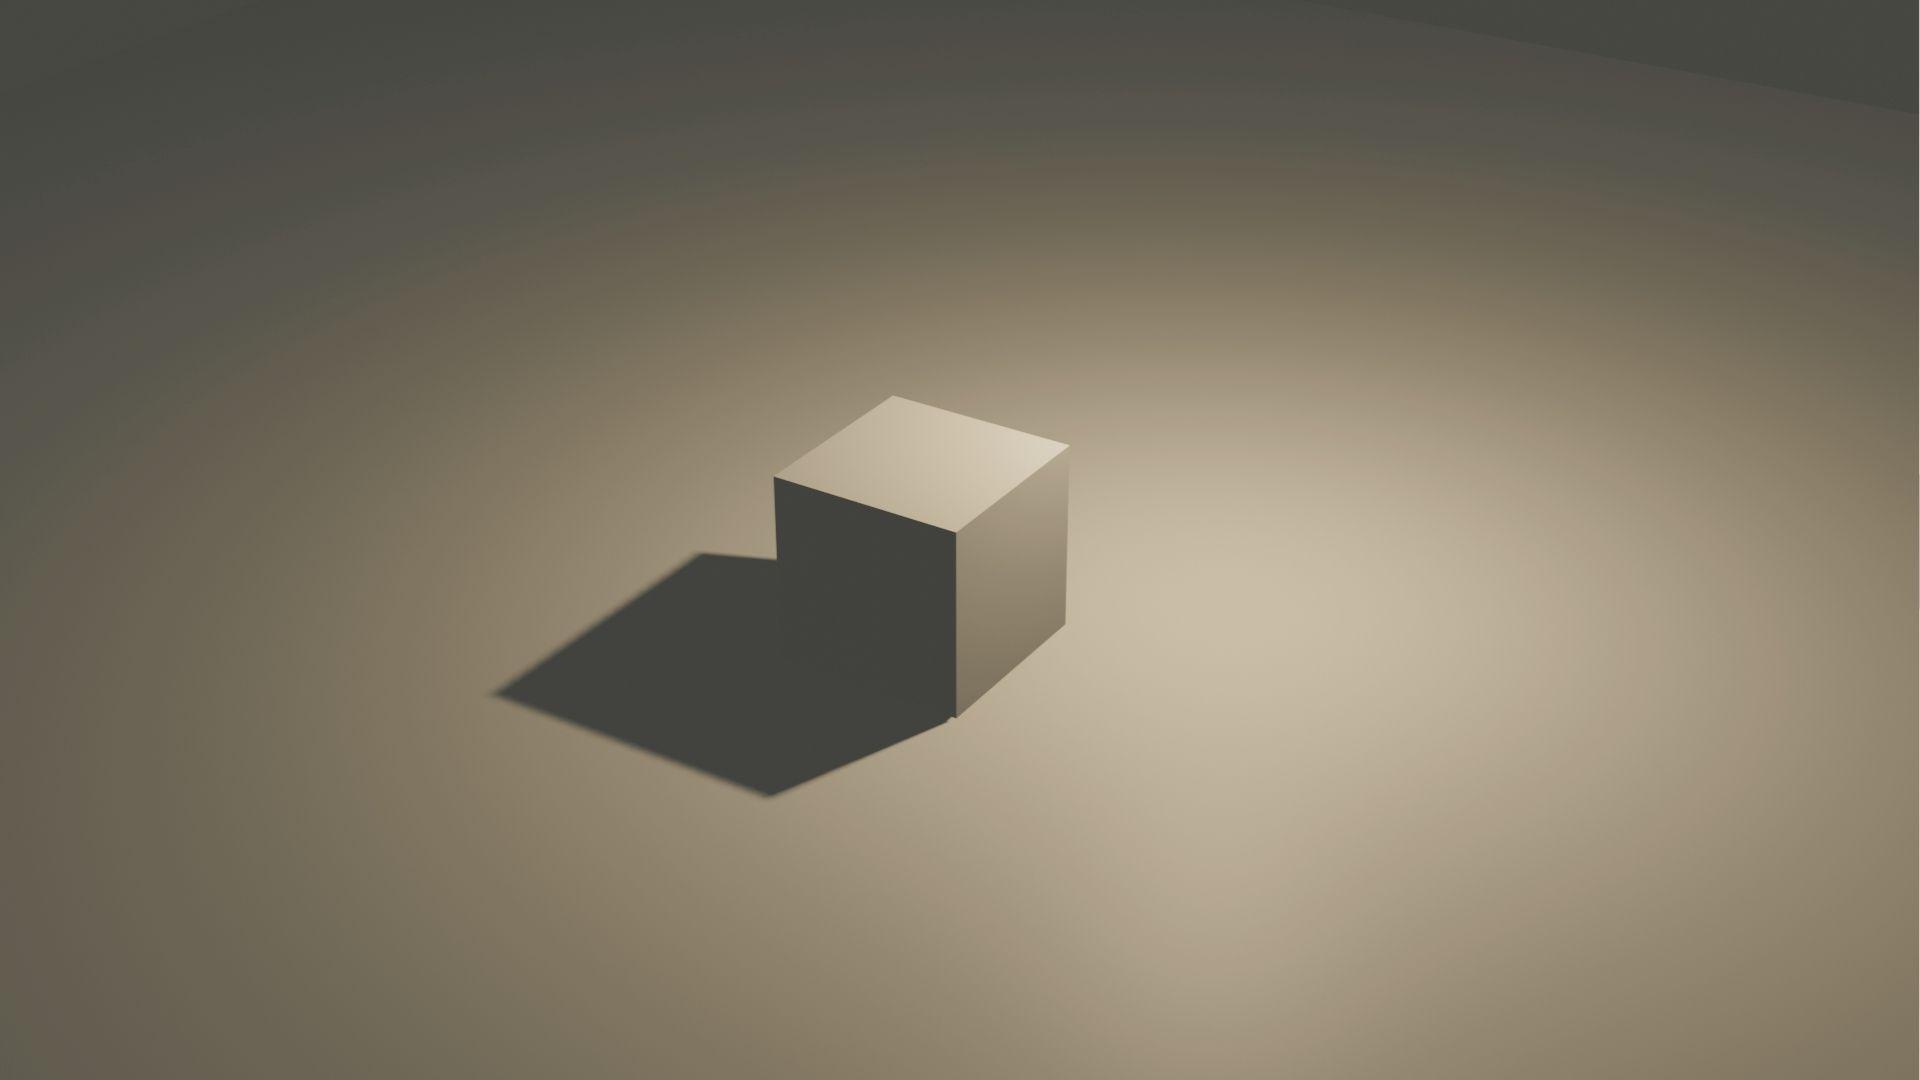
Shading is what turns a flat outline into something that looks real. It is easier than it sounds.
Choose a Light Source
Before you shade, decide where the light is coming from. This is called your light source.
Pick one side. Say the light comes from the upper left. That means the left face gets the most light, the front face gets medium light, and the right face stays darkest.
Stick with your chosen light source throughout. Changing it mid-drawing confuses the eye.
Add Shadows to Create Depth
Now shade each face based on how much light it gets:
- Lightest face: leave it mostly blank or shade very lightly
- Middle face: shade with medium pressure
- Darkest face: shade with firm pressure or darker pencil marks
Use the side of your pencil tip for soft shading. Move in one direction for a clean look.
You can also add a cast shadow on the ground beneath the cube. This makes it look like it is sitting on a surface.
Highlight Edges for Realism
The edges where two faces meet can catch light or sit in shadow depending on the angle.
Sharpen the edge between the light face and the dark face. This contrast makes the cube pop.
You can also lightly erase along the top edges of the lightest face to add a subtle shine. This small detail makes a big visual difference.
Common Mistakes to Avoid When Drawing a Cube
Knowing what goes wrong early saves you a lot of frustration later.
Uneven or Non-Parallel Lines
This is the most common problem. If your lines are not parallel, the cube looks bent or broken.
Fix: Use a ruler. Check your lines by holding the paper at arm's length. If something looks off, it probably is.
Incorrect Proportions
If one face is much bigger or smaller than the others, the cube will look distorted.
Fix: Measure your lines before drawing. All edges of a cube are the same length. Keep them consistent from the start.
Forgetting Light and Shadow
A cube with no shading looks flat and lifeless. Many beginners stop at the outline and wonder why it does not look 3D.
Fix: Always shade. Even basic shading adds depth. Pick a light source and follow through with it. This one step changes everything.
Tips to Improve Your Cube Drawing Skills
Small habits practiced daily will make your cube drawings look better each time.
- Once you can draw a cube straight on, try different angles like from above, below, or the side. Each view teaches you something new about edges and proportions.
- Always start with light, soft strokes. Heavy lines are hard to fix, but light lines are easy to adjust and clean up.
- Firm up your lines only after you are happy with the overall shape. A clean outline always looks more confident.
- Try different shading styles like hatching, cross-hatching, blending, or stippling. Each one gives a different look and feel to your drawing.
- Stick to one shading style per drawing when you are learning. This helps you understand how each method works before mixing them.
Conclusion
Drawing a cube might seem small, but it is actually a big step. Once you get this right, you can draw boxes, buildings, furniture, and all kinds of 3D objects.
I remember the first time my cube actually looked solid. It felt like something clicked. That feeling is waiting for you too.
Try drawing one cube today. Then try another. Share your cube in the comments or pass this post to a friend who wants to start drawing. You have got this.
Frequently Asked Questions
How long does it take to learn to draw a cube?
Most beginners get a decent-looking cube within one or two practice sessions. With shading, it may take a few more tries to get it right.
Do I need drawing experience to follow these steps?
No experience is needed. These steps are written for complete beginners and go from the very first line to the finished shaded cube.
Can I draw a cube without a ruler?
Yes, but a ruler helps a lot when starting out. Freehand cubes can look uneven until your hand gets used to drawing straight lines.
What pencil is best for drawing a cube?
An HB pencil works well for the outline. A 2B or 4B pencil is better for shading because it gives darker, smoother marks.
Why does my cube look flat even after drawing it?
It likely needs shading. A cube without shadow and light will always look flat. Go back and shade the three faces with different tones to add depth.